January 22, 2025

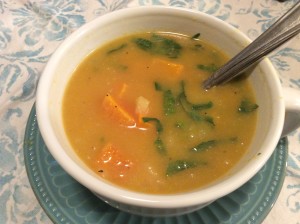
Harvest Veggie Soup

Well, we are certainly into full-blown Fall around here!  (How about where you live?)  The brightly colored foliage is fading fast…and the leaves are falling almost faster!  Piles of leaves are on the curbs, our sweaters are unpacked, almost everyone is wearing socks (except me…i still am scooting around in my Birkenstocks! But not for long!)   And we are enjoying soup a few times each week.  One pot of soup that we have enjoyed a few times already is this  Harvest Veggie Soup, full of veggies and grated apples…very yummy.   It is a slightly sweet soup, very satisfying and filling.  I choose to make it vegan/vegetarian but it could easily be made with chicken broth, too.  This would make a great addition to your own menu when you have vegans, vegetarians, and meat-eaters ? sharing a meal together.

Here on our Monday installment of At Home w/ GCH, we have been featuring recipes which included Fall in-season fruits and veggies.  This week, our recipe features a few: apples, cauliflower, and (surprise!) butternut squash.  This week’s recipe fits into our healthy but-oh-so-yummy! category since it is really yummy (did I mention that before?), extremely low in fat, and full of delicious, nutritious vegetables.  Enjoy!

2013-10-15 21.49.39

Harvest Veggie Soup

ingredients:
2 butternut squash
1 large head of cauliflower
2 tablespoons coconut or olive oil
sea salt, freshly ground pepper
1 sweet onion, diced small
1 additional teaspoon olive oil
2-3 tablespoons chopped garlic
2 quarts of vegetable stock
2-3 peeled apples, grated
1 can coconut milk (shake well!)

optional toppings:
cooked, crumbled bacon
sour cream or plain Greek yogurt
shredded sharp cheese
chopped avocado
sprinkle of cinnamon (try it!)

directions:

  • preheat oven to 425; line 2 large baking sheets with parchment paper
  • peel the butternut squash; scoop out the seeds and strings and cut up into 2″ chunks.  set aside in a very large bowl
  • cut up the cauliflower into smallish-size florets; add to bowl
  • pour in oil and season veggies with s&p.  stir together well, pour out onto a baking sheet and roast for 20-25 minutes
  • meanwhile, in a large stockpot, saute onion along with 1 teaspoon olive oil over medium high heat for 5 minutes or so; reduce heat to low and add in chopped garlic, stirring constantly for 1 minute
  • pour in the stock; add additional s&p to taste and allow to simmer gently
  • when the veggies in the oven are done roasting, remove from oven and immediately pour into the stockpot; stir well to combine.  allow to simmer for 20 minutes or so, adjusting heat if necessary
  • when done, scoop out about 1/2 of the veggies and use an immersion blender to puree what is left in the stockpot.  (This could also be mashed, or pureed, very carefully,  in a standard blender in batches.)  taste (be careful…it’s hot!) for additional seasoning, and add back in the reserved veggies
  • add the grated apple and pour in the coconut milk; stir well.  done!
  • optional toppings can be added to each individual bowl of soup

♥  ♥  ♥  ♥  ♥

God loves you!    (Don’t ever forget that!)

♥  coleen

Apple-Butternut Soup

Oh!  ‘Tis the season…apple season, that is!  Here in NY State, our farmers grow a huge portion of the country’s apple crop…and it is a GOOD one this year!  We are going apple picking next week but I didn’t want to wait to start with the recipes.  This one, Apple-Butternut Soup, included a few tart green Granny Smith apples. The tartness of the apple along with the sweetness of the squash melded together nicely.  This recipe is simple and easy, (and quick too!) and makes a smooth, thick soup which was very filling and satisfying.  If you would like to keep your soup vegetarian (or vegan), just use vegetable broth.  This soup fits perfectly into our healthy but oh-so-yummy POV, too.  Enjoy!

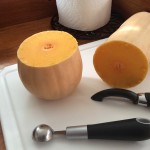
And please don’t let the task of cutting up the squash scare you off!  Be sure to use a sharp knife and just be careful.  I used a melon baller to scoop out the seeds and all the string-y business.  Here are a couple of pics of the process.

2015-09-26 16.43.57

2015-09-26 16.48.37


 Apple – Butternut Soup

2015-09-26 18.38.34

ingredients:

1 large butternut squash (3#), peeled and seeded, cut into 1-1+1/2″ cubes
2-3 tablespoons extra-virgin olive oil, divided
sea salt and freshly ground pepper (I use lemon-pepper blend)
1 sweet onion, chopped small
2 tablespoons finely minced fresh ginger
2 tablespoons chopped garlic (I use jarred)
2 or 3 apples, peeled and chopped
2 quarts chicken stock
1 cup cider (or additional broth)
1 cup water
big handful fresh greens (baby spinach, kale, arugula), sliced thinly

directions:

  • preheat oven to 425
  • line large baking sheet with parchment paper
  • in a large bowl, use just enough olive oil to lightly coat the squash and season well w/ s&p
  • pour seasoned squash onto the baking sheet; spread them out in a single layer…use two pans if necessary (I needed two)
  • roast until just beginning to brown, about 20-25 minutes; remove from oven and set aside

meanwhile…

  • in a 6 quart stockpot, heat 1 tablespoon olive oil and saute onion for 8-9 minutes over medium heat (or  ‘til softened and translucent)
  • reduce heat to low; add ginger and garlic and continue to cook for 1-2 minutes stirring constantly ’til fragrant
  • add chopped apples, cider, chicken stock and water; bring to a boil, reduce heat to a simmer
  • save out a cup or so of the roasted butternut; add the rest to the pot and simmer  for 15 minutes or  so
  • using an immersion blender**, puree soup ’til almost smooth
  • carefully taste and season, if necessary, with salt and pepper
  • place a handful of sliced greens and some of the reserved squash in bottom of bowl; fill with soup

**also can be pureed in a standard blender but be very careful and puree in batches

   ♥      ♥      ♥      ♥      ♥ 

God loves you!   ♥  (Don’t ever forget that!)

♥  coleen

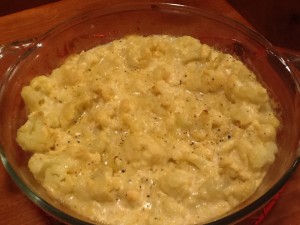
Cauliflower Mac and Cheese

Ok…I am really excited about this recipe…hope you like it, too!  Cauliflower Mac and Cheese!  Oh, yeah.  This has all kinds of tags associated with it: healthy but oh-so-yummy, paleo, low-carb, gluten free, low fat, vegetarian, comfort food (if you think of any additional, let me know, please!).
Here on our Monday installment of At Home w/ GCH, we have been featuring recipes which include Fall in-season fruits and veggies.  This week is our final blog on the subject. Our featured veggie is Cauliflower. Here are some nutritional facts about this ‘superfood.’
“We” love cauliflower here in our household.  I say, “we” because every time I tell my husband, Robert, that I have a new way to fix cauliflower, he never (may I repeat, never) responds enthusiastically.  But I am happy to report that every time (may I repeat, every time) he eats the dish I’ve prepared, his response is always (may I repeat, always) enthusiastic.  Ok—it’s taken me a while to figure this out but apparently the cauliflower dishes he grew up eating were just boiled, (overcooked), soggy, gray cauliflower-yucky!   I trust that if you have had experiences similar to Robert’s, you will try this Cauliflower Mac and Cheese and have a new yummy experience!  Enjoy!

Cauliflower Mac and Cheese2013-11-01 19.11.26

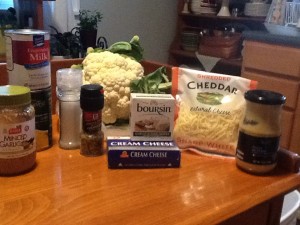
Ingredients:

1 large head cauliflower, cut into small florets
1 can evaporated milk
1/2 cup chicken or vegetable broth 2013-11-01 17.36.09
2 ounces cream cheese, cubed (or goat cheese, or Boursin)
2 teaspoons Dijon mustard
1 tablespoon chopped garlic
1/2 cup shredded sharp Cheddar cheese, plus 1/4 cup for topping the casserole
kosher salt, freshly ground black pepper
1/4 teaspoon nutmeg (freshly grated, if possible)

Directions:

  • Preheat the oven to 375.
  • Bring a large pot of water to a boil, seasoning the water with salt.
  • Lightly grease a 2 quart baking dish with butter or cooking spray.
  • When the water comes to a full boil, toss in the cut-up cauliflower; return to a boil and parboil ‘til crisp-tender, about 5 minutes.
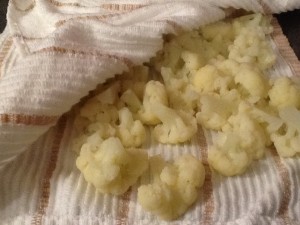
  • Drain well in colander, and then lay out on a clean dishtowel and pat dry. <The drier the cauliflower, the better the cheese sauce will cling to it.>

2013-11-01 18.33.57

  • Transfer the cauliflower to the baking dish and set aside.
  • Bring the evaporated milk and broth to a simmer in a small saucepan over medium low heat.
  • Whisk in the cream cheese, mustard, chopped garlic; continuously whisking ‘til smooth.
  • Add the 1/2 cup of shredded cheese, along with the seasonings and whisk just ‘til the cheese melts, about 2 minutes.
  • Pour the cheese sauce over the cauliflower, and stir gently to combine thoroughly.
  • Top with the remaining 1/4 cup cheese and bake for approximately 15 to 20 minutes. Turn up the oven temp to 425, and bake for 5 additional minutes; just ‘til it begins to brown.
  • Let cool 5 minutes before serving.

♥  ♥  ♥  ♥  ♥

God loves you!  ♥  (Don’t ever forget that!)

♥  coleen
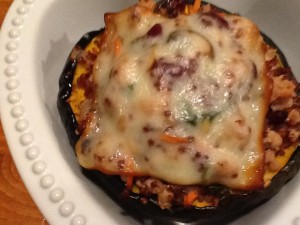
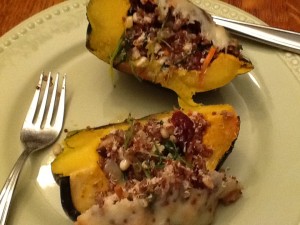
Stuffed Acorn Squash

Here on our Monday installment of At Home w/ GCH, we are continuing to focus on Fall in-season fruits and veggies.  This week, our recipe features Acorn Squash.  Ok, ok, I am sure you have noticed that I have a ‘thing’ for winter squash.  I love ‘em all…but my fav’s are Butternut, Spaghetti, Acorn, Delicata, and Sweet Dumpling.  Check out this link for lots more info on winter squashes and details on the incredible nutritional value they have.

This week’s recipe fits into our healthy but-oh-so-yummy! category since it is full of lucious veggies, uses low-fat ground chicken, and almost no added fat.  Also, this could easily become a vegetarian meal by leaving out the meat.  Also, you will have some leftover stuffing so you could enjoy it in a different “container” i.e., portabello caps, or zucchini; thus getting two meals for your effort!  Enjoy!2013-10-09 19.06.00

Stuffed Acorn Squash

Ingredients:
2 acorn squash, rinsed
1 tablespoon butter
salt and pepper
1 cup water
1 cup chicken or vegetable broth
1 cup quinoa (I used red quinoa)
1 medium-sized sweet onion, chopped
4-6 large Baby Bella mushrooms, cleaned and chopped
3 tablespoons chopped garlic
2 large handfuls baby arugula (or spinach) 2-3 ounces, roughly chopped
3-4 tablespoons pine nuts
1/2 cup dried cranberries
2# ground chicken
1 teaspoon thyme
1/2 teaspoon ground sage
1 teaspoon each, kosher salt and freshly ground pepper
4 slices (1 ounce each) of smoked gouda (or muenster, or swiss)

Directions:

  • Preheat oven to 400.
  • CAREFULLY cut each squash in half lengthwise; scoop out seeds and strings. Season the inside of each squash well with a bit of butter, and lots of freshly ground salt and pepper.  Place each half, cavity side up on a baking sheet and roast ‘til tender when pierced with a sharp knife, about 35-40 minutes. Remove from oven and set aside.
  • Reduce oven temperature to 350.
  • Cook quinoa according to package directions, using water and broth. When done, pour into a large bowl; set aside.  (NOTE: the squash and the quinoa can be prepared ahead of time.)
  • Meanwhile, in a large saute pan over medium-high heat, warm 2 tablespoons of olive oil; then add the onion and mushroom pieces.  Stirring often, saute ‘til just turning slighty brown and caramelized.
  • Add the chopped garlic and stir constantly for one minute.
  • Reduce heat and toss in the chopped arugula.  Stir frequently and cook just ‘til the greens are getting wilty; approximately 5 minutes or so.
  • Add this mixture to the cooked quinoa along with the pine nuts and dried cranberries, and stir ‘til all is well-combined.
  • Using the same pan, add 1-2 tablespoons olive oil and the ground chicken and seasonings.  Cook over medium high heat, ‘til the chicken is completely cooked through.  Break up the meat as it cooks.
  • When the chicken is done cooking, add it to the mixture in the large bowl and combine.
  • Fill each squash half equally with veggie-quinoa-chicken mixture and bake, uncovered, ‘til filling is slightly browned on top about 15 minutes.
  • Lay one slice of cheese on each squash half and bake just ‘til cheese begins to melt.2013-10-09 19.11.52

♥  ♥  ♥  ♥  ♥

God loves you!  ♥  (Don’t ever forget that!)

  coleen

At Home with GCH: Spring Salad Side Dishes

Here on our At Home with GCH blog, Mondays are always focused on healthy but oh-so-yummy! recipes.  This month we are spotlighting vegetarian dishes.  Each Monday will actually be a Meatless Monday!

So, I was talking with my dad about what to make for our family’s get-together on Easter Sunday.  Now, something you should know about us—every event is a food event. 😉  Is your family like that, too?  My contributions this year will be for dinnertime.  By request, I have been relegated the side dishes.  Two of them will be vegetarian salads: Broccoli-Craisin Salad and New Old-Fashioned Carrot Slaw.  Both fit into our healthy but-oh-so-yummy! category nicely!  Yes, there is a good amount of mayonnaise in the broccoli salad, but I think that you will find it balanced out by the rest of the healthy ingredients.  Plus this recipe provides 6-8 servings.  And in the carrot slaw, fat-free greek yogurt is substituted for the majority of the mayo that traditional ‘old-fashioned’ carrot slaw usually contains.  Enjoy!

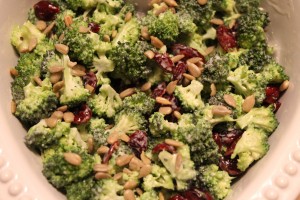
Broccoli-Craisin SaladIMG_0196

dressing:
3/4 cup good mayonnaise
3 tablespoons honey
3 tablespoons white balsamic vinegar (red wine vinegar also yummy)
freshly ground pepper, to taste

salad:
3 heads broccoli crowns, cut up into small florets – no stems
1/2 cup finely chopped red onion
1/2 cup sunflower kernels/seeds
1 cup craisins (dried cranberries)

Combine dressing ingredients in a small bowl.  Mix together ‘til emulsified;  set aside.

In a salad bowl, toss all salad ingredients ‘til well distributed. Pour dressing over and stir ‘til everything is nicely coated.  Put completed salad into a storage container or bag and refrigerate for a minimum of 2 hours to meld the flavors together (overnight is optimum).

Notes:
The smaller you chop the florets, the nicer this salad will be.  Takes a little time…but so worth it!  I use less mayo than most recipes call for; feel free to add more if you desire. ALSO, for your meat-loving family members, you can add 2-3 slices of crumbled, crispy, cooked bacon; makes for a nice addition!

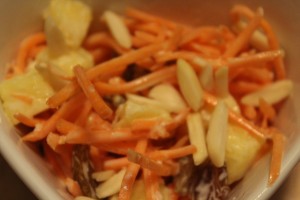
New Old-Fashioned Carrot SlawIMG_0200

dressing:
1 container lemon greek yogurt
2 teaspoons freshly squeezed lemon juice
2 tablespoons mayonnaise
freshly ground black pepper, to taste

salad:
2 cups julienned carrots *
1/2 cup fresh pineapple, cut in 1/2″ cubes
1/4 cup sliced or slivered almonds
1/4 cup golden raisins

Combine dressing ingredients together in a small bowl; set aside.

Mix all the salad ingredients together in a large bowl, and then pour on the dressing; mix together well.  Place in a storage container or bag; refrigerate for at least 2 hours or overnight so that the flavors can blend together.

Notes:
I buy bagged ‘matchstick’ carrots; usually available with the baby carrots in the produce section of your grocery store.

————————————————-

God loves you! (Don’t ever forget that!)

coleen

_________________________________

If you would like to send a personal message to Coleen concerning this series, you may email her at: Coleen@girlfriendscoffeehour.com, or leave a comment below.

At Home with GCH – Meatless Mondays – HashBrown Crusted Quiche

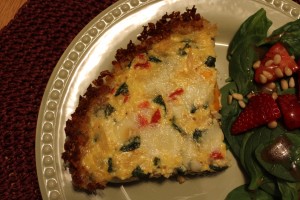
Here on our At Home with GCH blog, Mondays are always focused on healthy but oh-so-yummy! recipes.  This month we are going to spotlight vegetarian dishes.  Each Monday will actually be a Meatless Monday!  This week we are making quiche!  Oh, yum!  But in light of our healthy but oh-so-yummy inclination, we are substituting a shredded potato crust for a pastry crust.  So delicious…so easy…so nice and crispy!  I took a peek at a few similar recipes, and calorie counts on ingredients like those below will add up to approximately 250-300 for each wedge of this quiche.  This along with a simple salad (we had spinach-strawberry salad with ours) makes for a filling yet light supper.  You certainly can exchange different veggies and cheeses for the spinach-tomato-fresh mozzarella combination in this recipe.  During the spring and summer, we often have quiche once each week on our menu.  It is quick and nutritious; and, if I prepare different varieties from time to time, no one gets bored!  I would love to hear about your quiche if you make a different variety!  Enjoy! 

IMG_0184

Caprese Quiche with Hash Brown Crust (makes 4 generous servings)

Crust:
3 cups frozen hash browns, thawed
2 tablespoons butter, melted
1/4 cup grated Parmesan cheese
1/2 teaspoon kosher salt
1/2 teaspoon freshly ground black pepper
Preheat oven to 425. Thaw hash brown potatoes, and blot between paper towels to remove excess moisture.  Combine in mixing bowl with melted butter, Parmesan cheese, and seasonings.  Lightly grease 9″ glass pie plate.  Pour potatoes mixture into pie plate and press down onto bottom and up sides of pie plate…go all the way up to the rim.  Bake for 15-20 minutes until lightly browned; do not let burn!  When done, remove from oven.  Place on a cooling rack and allow to cool slightly.  Reduce oven temp to 350.

Filling:
1 medium sweet onion, diced
2 teaspoons olive oil
good-sized handful (12-14 grape tomatoes), chopped
1/2-3/4 cup fresh spinach leaves, sliced 1/4″ slices
1 heaping tablespoon chopped garlic (I use jarred)
Heat olive oil in medium-sized saute pan over medium heat.  Add diced onions and cook for 6-7 minutes until softened but just slightly browned.  While onions are cooking, chop tomatoes (drain away any excess juice).  To slice spinach, stack a number of leaves, and then just carefully slice down through them into 1/4″ slices; repeat until all spinach is sliced.  When onions are ready, add tomatoes, spinach, and garlic.  Saute for 1-2 minutes, stirring constantly, until spinach has wilted.  Remove from stovetop and allow to cool.IMG_0189

Egg Custard:

4 large eggs, lightly beaten
3/4 cup 2% milk
1/2 cup ricotta
dash of Kosher salt
1/2-1 teaspoon freshly ground black pepper
1/4 cup breadcrumbs
1 cup fresh mozzarella balls, rough chopped
To the eggs, add the milk, ricotta, seasonings, and breadcrumbs; whisk together until smooth.

To assemble:
Once baked crust has cooled slightly, layer in filling ingredients and then pour the custard on top.  Add chopped cheese and swirl with fork to evenly distribute ingredients.  Carefully place in middle of 350 oven, and bake until eggs are set and cheese is slightly browned, approximately 30 minutes or so.  Let stand for 10 minutes to set up and finish cooking.  Cut into four wedges.

————————————————-

God loves you! ♥  (Don’t ever forget that!)

coleen

_________________________________

If you would like to send a personal message to Coleen concerning this series, you may email her at: Coleen@girlfriendscoffeehour.com, or leave a comment below.

At Home with GCH: Meatless Mondays – Broccoli & Garlic White Pizza

Here on our At Home with GCH blog, Mondays are always focused on healthy but oh-so-yummy! recipes.  This month we are spotlighting vegetarian dishes.  Each Monday will actually be a Meatless Monday!

One of my favorite veggies is BROCCOLI!  What is your favorite way of preparing broccoli?  Mine is simply steaming it!  A pinch of salt and a grind or two of pepper…yummy!  I have been known to forsake utensils and use my fingers to eat it, too. IMG_0178

This week’s recipe is for Broccoli-Garlic White Pizza…ever had it?  Oh, I do l-o-v-e  a yummy, tomato-y, cheesy traditional pizza—but—equally love pizza of this genre!  This recipe fits our healthy but oh so yummy! category because 1) it has lots of healthy, no fat, few caloried, full of nutrition broccoli, 2) there is a tiny bit of olive oil on it, and 3) the calories contributed by the cheeses total approximately 850 for the whole pie!  Now divide that by the 3-4 servings this pizza offers, and you’ve got healthy…check!  Yummy…check!

Also you will see that I don’t make my own dough…I stop by my favorite pizza shop and purchase 1 pound of their dough!  (I already know how good it is!)  And it only costs me…$1.  Here’s my only suggestion for baking your pizza: use a pizza stone.  They are relatively inexpensive ($8-15 range, I would say) and can be bought in just about any big box store or kitchen goods store.  Mine came from Pampered Chef.  If not using a pizza stone, you will need a round pizza pan, or a large enough baking sheet to handle the size of your crust.

OK!  Here we go!  Pizza Pizza!

Broccoli -Garlic White Pizza (serves 3-4)IMG_0174

1 (1#) package of pizza dough
2-3 tablespoons of flour to handle the dough
2-3 tablespoons of cornmeal
2 heads (no stems) of broccoli, chopped into florets (about 3 cups)
3+ tablespoons chopped garlic (I use the jarred variety)
15 ounce container of part-skim Ricotta cheese, let come to room temp
1+1/2 cup shredded cheese (Mozzarella, Provolone, Monterey jack—or a mixture)
3 tablespoons freshly grated Parmesan
1 tablespoon olive oil
salt, freshly ground pepper, to taste
Crushed red pepper flakes (optional)

Choose the pizza dough of your preference.  If making from scratch…you better get going! If  purchased from your local pizza shop, you are set to go!

If using a pizza stone, get it into the oven so that it can heat up!

Preheat the oven to 500.

Heat 2-3 cups water in a medium saucepan to boiling.  While the water is coming to a boil, fill a medium-sized mixing bowl with very cold water and a few ice cubes; set aside.  When the water in the saucepan comes to a boil, add the broccoli florets.  Cook for just 3-4 minutes, no longer; watch carefully. When the broccoli is ready, it will still be bright green and still crisp. It is better for it to be undercooked than overcooked. Remove from the heat and drain. Then immediately place the cooked broccoli into the ice water to stop the cooking process; then drain again. Blot the broccoli with a couple of paper towels. You don’t want to add wet broccoli onto your pizza crust!  Extra moisture = soggy crust!

When you are ready to shape the dough, put a couple of tablespoons of flour onto a large cutting board (or your scrupulously clean countertop). Coat the dough ball with flour all around. Flatten the ball into a disc. Then with your fingertips, work your way around the edges, stretching it all out as you go. You can also put your fist in the middle of the growing circle and raise it off of the board, letting the sides stretch down. Then work your fingers around the edge of the circle one more time.  I find it easier (safer) to keep my dough flat and just keep working it.*

When your crust is ready, sprinkle a little cornmeal onto a large cookie sheet.  You will use this to transfer the pizza onto the VERY HOT pizza stone.  Carefully slide the formed pizza crust onto the cookie sheet.

Spread the olive oil all over the pizza crust, even onto the rim.  Use just the 1 tablespoon; remember, extra moisture = soggy crust!

Add the ricotta onto the crust and using the back of a spoon, spread the ricotta evenly over the pizza. Then sprinkle the garlic all around.  Arrange the broccoli pieces over the surface evenly. Sprinkle with the Mozzarella and Parmesan. Season with salt and pepper.

Bake 10-15 minutes. Watch carefully. If the cheese starts to brown too quickly (before the crust has had a chance to brown), reduce the heat to 475 or so. When the cheese and the crust are just starting to brown, remove from the oven and let cool for 2 minutes. Then slice and serve immediately.

Another veggie topping we like on a white pizza is Caramelized Onions and Mushrooms.

Easy-peasy!IMG_0177

2 tablespoons olive oil
½ good sized onion, sliced thinly
6-7 medium to large Baby Bella mushrooms, cleaned and sliced

Place a medium-sized saute pan on medium heat; add olive oil. Add onions and mushrooms to pan, and cook until they are lightly caramelized, approximately 6-8 minutes.  Remove from heat; allow to cool slightly.

Then proceed with the above recipe adding the onion/mushroom mixture in place of the broccoli.  That’s all!

*There are lots of videos that you can watch to give you tons of tips and tricks how-to make a perfect pizza crust…check ‘em out!

————————————————-

God loves you!  ♥  (Don’t ever forget that!)

♥  coleen
_________________________________

If you would like to send a personal message to Coleen concerning this series,
you may email her at: Coleen@girlfriendscoffeehour.com, or leave a comment below.

At Home with GCH: Veggie Stuffed Peppers

Here on our At Home with GCH blog, Mondays are always focused on healthy but oh-so-yummy! recipes.  This month we are going to spotlight vegetarian dishes.  Each Monday will actually be a Meatless Monday!  Now that we are <finally!> out of the winter months and moving towards S-P-R-I-N-G, we will have many more seasonal veggies available to us.  I’m thinking asparagus, baby salad greens, oh and my onion-of-choice, the Vidalia, has it’s best offerings in the spring! IMG_0164

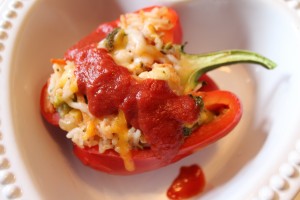
This week we are making Veggie Stuffed Peppers!  This dish allows you to use the veggies that you already have in your refrigerator and the ones that you know your family will enjoy (and eat!).  We have these rice-stuffed peppers regularly in our meal rotation because they are so adaptable, and the variety keeps them from being boring.

Consider using red and yellow and orange (or even purple, if you can find them) bell peppers rather than plain green ones as their taste is much milder than traditional green peppers.  If you are having the stuffed peppers as your main dish, plan on 2 halves per hungry adult; but if serving as a side dish, then half of a pepper will probably suffice.  The proportions in this recipe are for four whole peppers.

Veggie Stuffed Peppers (makes eight halves)

cooked rice  (see recipe below)

olive oil
5 big red, yellow, or orange bell peppers
1 green bell pepper
2 medium Vidalia onions, diced small
5-6 good-sized Baby Bella mushrooms, diced small
3 tablespoons chopped garlic (I use jarred)
2 cups (your choice) chopped veggies*
½ of a 10 ounce box frozen chopped spinach–or kale! (defrost)
Kosher salt, freshly ground black pepper
2 teaspoons herbs (thyme, basil, tarragon)
1 cup (or more) shredded cheese, plus 1/4 cup to finish
4 cups cooked rice (see below)
1 cup vegetable broth (or water)
1 cup seasoned tomato puree or sauce

Get the rice cooking…wash your veggies…preheat oven to 425.  Lightly coat a large baking sheet with a small amount of olive oil.  Take (4) of the brightly colored peppers and cut in half, down through the stem.  Important to keep the stem on so that the peppers hold their shape during cooking.  Remove seeds and any whitish parts of the insides.  Place the halved peppers, cut side down, on the baking sheet and roast for 15 minutes…just ‘til they start to get a teeny bit browned.  Remove from oven to cool.  Reduce oven temperature to 350.

Cut the other two peppers (one brightly colored, one green) in half, remove seeds, and chop into ½” dice.  Heat 2 tablespoons olive oil in a large saute pan over medium heat, then add onions and chopped peppers. Saute for 5 minutes; then add mushrooms, along with any veggies that need a little precooking (i.e., carrots, zucchini).  Cook for an additional 5 minutes or so.  Stir in other veggies of your choice along with the cooled rice; mix together well.  Season with salt, pepper, and herbs. Stir in shredded cheese.

Using your hands, scoop up rice/veggie/cheese mixture and stuff firmly into precooked pepper halves, mounding up slightly.  Distribute all mix among the pepper halves.  Place filled peppers into a 13X9 baking pan, filled side UP.  Pour broth inside the bottom of the baking pan.  Lastly, pour the tomato sauce over the tops of the filled peppers.  Cover tightly with aluminum foil.  Bake for 20-25 minutes.  Remove foil and sprinkle with just a bit more shredded cheese.  Place back in oven for 5 minutes ‘til cheese is melted.  DONE!  Serve immediately.

*zucchini, carrots, cauliflower and/or broccoli florets, butternut squash, corn, baby peas, grape tomatoes, etc.IMG_0165

Cooked Rice
1 teaspoon butter or olive oil
1+1/2 cups rice (lots of choices out there!)
3 cups water or broth
salt, pepper

Easy-peasy!   In a medium saucepan, heat the butter or olive oil.  Add the rice and stir for one minute making sure all of the rice is coated.  Add 1 teaspoon each salt and pepper along with the water or broth.  Raise heat and stir well.  Bring to a quick boil, and immediately reduce heat to very low; cover pan.  Cook until water is completely incorporated into the rice.  Remove from heat, give a quick stir to fluff; set aside to cool.


God loves you!  ♥  (Don’t ever forget that!)

  coleen

_________________________________

If you would like to send a personal message to Coleen concerning this series, you may email her at: Coleen@girlfriendscoffeehour.com

At Home with GCH: Chinese Tofu Stir-Fry

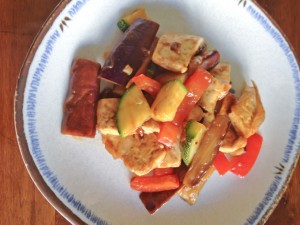
Tofu Stir Fry Plate


I call it “reverse-engineering” – when you eat something you really like at a restaurant, and then go home and figure out how to make it from scratch.  Have you ever done that?  It can be quite a challenge, especially if it’s a dish from a cuisine you are not all that familiar with.  But sometimes it’s good to challenge yourself, save some money, and make something healthy for your family that doesn’t need a trip to the strip mall!

Case in point:  There is a chain of Chinese take-out restaurants with locations all across the country.  I won’t name names, so let’s call it “Black-and-White Animal Express.”  They make a fantastic stir fry with tofu, Chinese eggplant, and onions.  I love it, and I figured I could recreate it at home.  I think I got pretty close!  The only ingredient that you may not have at home is Hoisin sauce, but I bet it’s in your grocery store’s “ethnic” aisle.  It’s sweet and a little spicy and is a great sauce with just about any vegetable and meat combo stir fry—chicken and broccoli, beef and snow peas, you name it.  If you can’t find it, you can try Plum sauce – it’s a little sweeter, and you may want to add a splash of hot sauce to it to offset the sweetness.  If you can’t find Chinese eggplants—they’re the long skinny kind—you can use a regular eggplant, or just substitute a different vegetable altogether.  I had planned on adding 8 ounces of mushrooms to this recipe; and then realized I’d used them the day before.  There’s always next time!

If you are looking for a Meatless Monday meal, or are craving Chinese take-out, why not give this a try at home?  Serve over rice and crack open a fortune cookie!

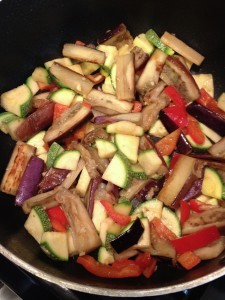
Tofu Stir Fry Pan

Before the sauce is added – I love the colors!

Chinese Tofu Stir-Fry

Ingredients:

  • 1 package firm or extra firm tofu
  • vegetable oil
  • 2 cloves garlic
  • 1 Chinese eggplant
  • 1 small onion
  • 1 red bell pepper
  • 1 zucchini
  • 1 tablespoon Hoisin sauce, or more to taste

Directions:

  1. Open the tofu, drain water, and place the tofu on a small plate.  Place another plate on top and gently squeeze out the water.  Leave the plate on top while you cut up the veggies.  Slice all the vegetables into bite-sized pieces: 2-inch strips for the eggplant, thin slices for the onion and pepper, and either strips or coins for the zucchini.  Mince the garlic.  When the vegetables are sliced, squeeze the tofu again, and then cut—first in half, then into squares, and then into smaller rectangles; they should end up around the same size as the eggplant.
  2. Heat 2 tablespoons of vegetable oil in a large non-stick pot.  Cook the tofu for five minutes until it’s golden, then flip and cook the other side.  When cooked and a little crispy on both sides, remove to a bowl.
  3. Add the rest of the vegetables to the pot, adding a little more oil if necessary to keep everything from sticking.  Sauté for five to eight minutes over medium heat, stirring occasionally.  When the onion is translucent, and the eggplant is soft and taking on a little color, add the tofu back to the pan.  Cook for another 2 or 3 minutes.
  4. Turn off the heat and stir in the sauce.  You want everything coated in sauce, but not smothered!

Explore, experiment, enjoy! — Dana


To view even more of Dana’s unique recipes, you can visit her at Frugal Girlmet!


If you would like to contact Dana in regards to this blog, please email her at Dana@girlfriendscoffeehour.com

GCH: What’s on Your Plate? Dubu Buchim (Pan-Fried Tofu, Korean-style)

Okay ladies, are you ready to step outside the box?  Time to put on your Big Girl shoes, be brave, and try something new!  This is a recipe called Dubu Buchim (pronounced “Dooboo Boocheem”), which means pan-fried tofu in Korean.  It’s easy, it’s tasty, and it’s a perfect way to get your first taste of homemade Korean food.

If you read my previous post about stocking an International pantry, you may have already purchased a tub of gochujang.  That’s the red pepper paste used frequently in Korean cooking.  It’s hot, fruity, spicy, and complex.  You’ll need it for the sauce.  A little goes a long way if you are new to spicy foods, so when you make the sauce, start with only a teaspoon of gochujang.  Taste it and see if it needs more heat – you may like it so much you’ll want to add a lot more!

One of my favorite things about Korean dining is that, unlike a typical American meal of meat, vegetable and starch, Korean meals  have many components.  Steamed rice is always served, as is some kind of kimchee.  Then there is the protein – either meat, tofu, or fish.  And my favorite part is the banchan.  Banchan means simply “little dishes”, and these are small portions of vegetables and other side dishes meant to be shared: some pickled vegetables, some steamed, some in different sauces, little salads, kim (seaweed), noodles – the possibilities are endless!  Also, a soup is usually served, something light and brothy.  So instead of eating large portions of three things, you get to eat small portions of a dozen different things!

When you make this at home, don’t worry about making twelve different banchan.  Make some steamed rice, open that jar of kimchee you were brave enough to buy (and now try!), and serve with a spinach salad or steamed broccoli.  You’ll be so proud of yourself for trying something new, and may even find a new favorite cuisine!

Dubu Buchim

Ingredients:

  • 1 block firm or extra-firm tofu
  • 2 teaspoons sesame oil
  • kosher or sea salt for sprinkling
  • 1 heaping teaspoon gochujang
  • 2 tablespoons sesame oil
  • 1 clove garlic, finely minced
  • 2 green onions, minced
  • 1 tablespoon toasted sesame seeds
  • 1 teaspoon soy sauce
  • 1 teaspoon sugar

Directions:

  1. Drain the tofu, then squeeze it in between two plates to get out even more water.  Press firmly, but don’t crush the tofu.  Cut the tofu in half lengthwise, and then slice each half into eight equal squares so you have sixteen total.  In a large pan, heat 2 teaspoons of sesame oil and cook the tofu until golden-brown and crusty, about 7 minutes.  Flip and cook the other side until golden, about 5 minutes more.  You’ll probably need to do it in two batches.  Remove from heat to a plate lined with paper towels and sprinkle the tofu with salt.  You can be generous with the salt, since the tofu is very mild-tasting.
  2. While the tofu is cooking, make the sauce.  Simply mix the gochujang, oil, garlic, onions, sesame seeds, soy sauce, and sugar together.  The gochujang is kind of stiff, so you are really going to use some muscle to stir this stuff together.  You can do this next to the stove, since the gochujang gets a little smoother when it’s warm.  Now taste it – it should be balanced – not too spicy, not too salty.  You can add more oil or sugar if it’s too spicy.  To serve, spoon the sauce over the tofu.

Explore, experiment, enjoy! — Dana

Find more recipes from Dana, Korean and otherwise, at Frugal Girlmet!