January 27, 2025

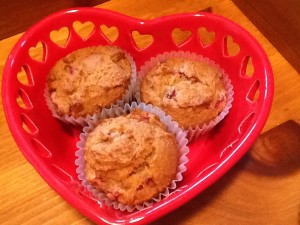
Strawberry Muffins (GF)

2014-04-03 11.47.32

So, I don’t know about your area, but we have had strawberries in abundance here in upstate NY…and they have been beautiful and fragrant and delicious!  My granddaughter, Kaylie Joy, just LOVES strawberries!  I had made a batch of these muffins and when she tasted one, she asked if we could bake some together…how could i say ‘no’?!  We actually doubled the ingredients and it worked very well. And we baked them up as a dozen standard size muffins and 3 dozen mini-muffins.  In either size, they baked beautifully!

kayliemuffins
This recipe (adapted from a similar one over at the Spunky Coconut – one of my very favorite gluten free, refined sugar free blogger/bakers) fits well into our healthy but-oh-so-yummy point of view:

  • uses honey or agave nectar and liquid stevia rather than refined white sugar
  • are gluten free with protein-rich almond flour and a bit of brown rice flour replacing wheat flour

Strawberry Muffins (make approximately 14)

2014-04-04 14.56.51

Ingredients:
2 cups almond flour
1/2 cup brown rice flour
1/2 teaspoon baking soda
1/2 teaspoon finely ground sea salt
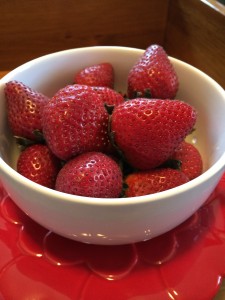
1 cup fresh strawberries
1/2 cup coconut oil, liquified
1/3 cup honey or agave nectar
6-8 drops vanilla liquid stevia
1/2 teaspoon vanilla extract
3 large eggs, at room temperature

Directions:

  • preheat oven to 350
  • line muffin cups with paper liners
  • wash and dry strawberries; chop finely (not mushed, but small)
  • sift together the dry ingredients; set aside
  • pour liquified coconut oil, sweeteners, and extract into bowl
  • using electric mixer, beat for one minute, then add eggs one at a time
  • slowly add dry ingredients, beating just ’til thoroughly combined
  • by hand, gently fold in strawberries
  • scoop into muffin cups, filling almost to brim
  • bake at 350 degrees for about 25 minutes
  • remove from muffin pan onto cooling rack; allow to completely cool


Tip: Coconut oil needs to liquify in order to be blended into a batter. Depending on the time of year (summer..no problem; winter…a problem) you might need to warm it up. You could either scoop out the required amount of coconut oil and place it in a glass measuring cup on your stovetop as the oven preheats. Or it can be microwaved for approximately 30+ seconds (depending on the quantity you need) and then stirred. Either way add it into your mixing bowl and combine with other liquid ingredients prior to adding room temperature eggs.

♥   ♥   ♥   ♥   ♥

God loves you!  ♥  (Don’t ever forget that!)

♥  coleen
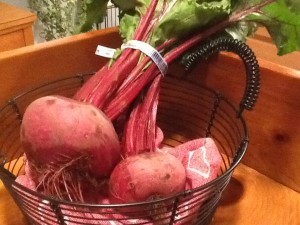
Roasted Beet Salad with Goat Cheese Medallions

2014-03-02 19.11.32

It is almost spring!!!  Yes, yes…I KNOW…it is still snowy (I have looked outside!).

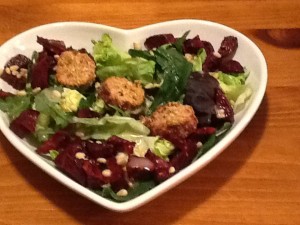
In the produce department, we are starting to see the return of the spring vegetables!  So here we go!  For the next few weeks, we will do a mini-series featuring spring vegetables…last week we featured an Asparagus Pasta Bake.   Today’s recipe is a salad with roasted beets, and baby lettuces such as arugula and kale.  YUMMMMMY!  Enjoy!

Roasted Beet Salad with Warm Goat Cheese Medallions

2014-03-03 00.58.19

Ingredients:
1/4 cup balsamic vinegar (I used honey balsamic)
1 tablespoon honey
1/3 cup extra-virgin olive oil, plus 2 tablespoons
Kosher salt and freshly ground black pepper
3-4 medium beets, peeled and cut into bite-size pieces
2 cups fresh arugula
2 cups baby kale
1 head romaine, chopped (or your favorite lettuce blend)
1/2 cup sliced almonds or pignoli
8 ounce log of goat cheese
1 egg
1 tablespoon water
1/2 cup almond meal/flour
1/2 cup sliced almonds, finely chopped (by hand or with a food processor)

Directions:
Goat Cheese Medallions:

  • Place the goat cheese log into the freezer ‘til firm (10-15 minutes).
  • Remove from freezer and carefully slice with thin, sharp knife into 8 rounds.
  • Preheat oven to 350.
  • Whisk together the egg and water.
  • Spread the almond flour on a paper plate, and the chopped almonds onto a separate plate.  Coat each goat cheese round with almond flour.
  • Dip each round in the egg wash and then roll in the chopped almonds to coat.
  • Place the coated goat cheese rounds on a parchment-lined baking sheet.
  • Bake for 10 minutes. Turn them over and broil on the top rack of the oven for 2-3 minutes, until the almonds turn golden brown. (Watch carefully!) Remove from oven and set aside.

Beets:

  • Line a baking sheet with foil. Raise oven temp to 450.
  • Whisk the balsamic vinegar and honey together in a small bowl to blend.
  • Slowly whisk in the oil. Season the vinaigrette with plenty of salt and LOTS of pepper.
  • Toss the beets in a small bowl with the 2 T of evoo and just a drizzle of the vinaigrette; thoroughly coat.
  • Place the beets on the foil-lined baking sheet and roast ‘til the beets are slightly caramelized, stirring once or twice, for about 30 minutes. Set aside to cool.

Salad:

  • Toss the lettuces along with a small amount of the vinaigrette in a large bowl ‘til lightly coated.
  • Season the salad, to taste, with additional salt and pepper. Place the dressed salad onto a large serving plate.
  • Arrange the beets around the salad.
  • Sprinkle with the nuts and top with the warm goat cheese medallions.
  • Serve with the extra vinaigrette on the side.

♥  ♥  ♥  ♥  ♥

God loves you!  ♥  (Don’t ever forget that!)

♥  coleen
Asparagus Pasta Bake

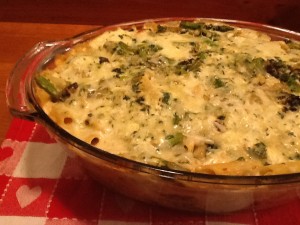
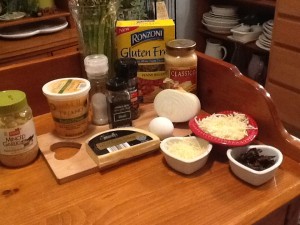
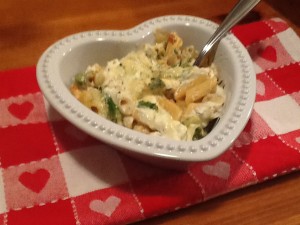
Have you noticed?  In the produce department, we are starting to see the return of the spring vegetables!  Hip-hip-hooray!  Oh, don’t get me wrong…I love winter veggies, too!  If you have followed the Monday installment of the At Home w/ GCH blog for any length of time, you KNOW we are big fans of butternut squash, brussels sprouts, and other winter veggies.  But, it’s almost spring!  So here we go! For the next few weeks, we will do a mini-series featuring spring vegetables… starting today with asparagus!  Oh, yum!  Today’s recipe features asparagus in a pasta bake.  This recipe could also be prepared using lasagna noodles, if you prefer.

A question and a tip for our gluten-free friends: Have you tried the new pasta that RONZONI has recently brought to the market?  It is fantastic!  Truly the best gluten-free pasta we have tried (and we have tried m-a-n-y different brands).  It is a multi-grain blend of white rice, brown rice, corn, and quinoa.  It cooks up well, holds sauce well, bakes well, even reheats fairly well!  Now it is still pasta so, of course, it has carbs!  But a serving, according to the facts label on the box, has 2g of fiber (8% DV) and 4g of protein even. I highly recommend this product.

2014-02-23 22.10.12

Asparagus Pasta Bake

Ingredients:

1 (12 ounce) box gluten free penne pasta2014-02-23 20.50.20
1 (15 ounce) jar alfredo sauce (I use ‘Classico’ brand; has no additives)
1 cup chicken or vegetable broth
2 tablespoons olive oil
1/2 cup sliced sun-dried tomatoes
1/2 cup fresh basil leaves, packed
1 cup baby spinach, packed
1/2 cup grated Parmesan cheese, plus additional 1/2 cup
1 medium onion, diced
1# asparagus, trimmed and cut into 1-inch pieces
2 tablespoons chopped garlic (I use jarred)
1 large egg
1 (15-ounce) container part skim ricotta cheese
1 tablespoon dried basil
1 teaspoon freshly ground black pepper
2 cups shredded part skim mozzarella cheese, divided

Directions:

  • Pasta:  Cook pasta following directions on box. Drain and set aside.
  • Preheat oven to 350.
  • Heat the Alfredo sauce and the chicken broth together. Set aside.
  • In a food processor combine the sun-dried tomatoes, basil, and baby spinach. Pulse until the mixture is combined.
  • In a medium-sized bowl, whisk the egg and then add in the ricotta, dried basil, 1 cup of shredded mozzarella, and freshly ground pepper.  Stir well; then add in the sun-dried tomato mixture.  Set aside.
  • In a large saute pan, heat 2 tablespoons olive oil over medium heat. Add the diced onion, and cook 4-5 minutes.
  • Add in the cut up asparagus and cook ‘til still crisp-tender, another 5 minutes or so.
  • And finally add in the chopped garlic and cook for 1 more minute, stirring constantly. Turn heat off.
  • In a 9 by 13-inch baking dish, ladle about 1/2 cup of the heated alfredo sauce onto the bottom; spread to cover. Place 1/3 of the cooked pasta, then 1/3 of the ricotta mixture, 1/3 of the cooked veggies, and a sprinkling of shredded mozzarella. Repeat this in order for 2 additional layers.
  • Cover tightly with aluminum foil and bake until the ingredients are just starting to bubble and the cheeses are melting, about 25 minutes.
  • Remove the foil and bump heat up to 425 and heat for 5 more minutes.
  • Remove from oven and let set for 10 minutes; then serve with additional sauce and shredded parmesan alongside.  Enjoy!

2014-02-23 22.13.10


♥  ♥  ♥  ♥  ♥

God loves you!  ♥  (Don’t ever forget that!)

♥  coleen
Valentines Day Cookies – By Request

Y’know, the way to a man’s heart is through his tummy!  😉 Or so the saying goes!  Actually I checked out a few survey’s and survey says: yes! One survey from Tango led off saying, “We were thrilled to discover that almost 80% of people felt preparing a meal for someone is a significant act of love!”

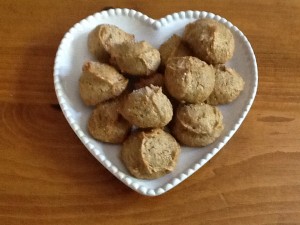
So as I was making a menu for the next week, I asked my husband what he would like for a special meal on Valentine’s Day… I was surprised as to his answer since I was sure he would say ‘lasagna!’  or ‘eggplant parmigiana!’ or perhaps some meat-y, manly steak dish!   No, he was much less concerned about the entrée  than about dessert.  His response?  Cookies!  I began offering suggestions but this is what he wants— Italian Almond Cookies.  This would be my significant act of love!  Happy   s Day, Robert!    

2013-05-17 17.41.18

Here on our At Home w/ GCH blog, Monday’s are always focused on healthy but oh-so-yummy! recipes.   Today’s recipe makes a delicious, slightly decadent sweet which still fits into this category!  This recipe has no oil or butter, uses gluten-free almond flour which is high in protein, and can be made very successfully using alternative, unrefined sugars.

Ingredients:
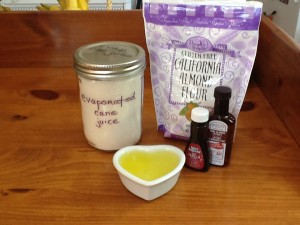
2+1/2 cups almond flourIMG_1563
1+1/4 cups superfine sugar
3 room temperature egg whites
1/2 teaspoon vanilla extract
1 teaspoon almond extract
extra sugar for dusting

Directions:

  • Preheat oven to 300.  Line 2 baking sheets with parchment paper.
  • Blend together the almond flour and sugar for 30 seconds in a food processor.  Add both extracts, and pulse 5 or 6 times to blend.  Add the egg whites ONE at a time, and continue to process the mixture ‘til the dough is nice and smooth.
  • Using a small cookie scoop, place teaspoons of the dough onto the lined cookie sheets, approximately 1″ apart.  (These cookies do not spread.)  Sprinkle the tops of the cookies with the extra sugar.
  • Bake for 20-24 minutes for chewy cookies; 24-30 minutes for a slightly crispy cookie.  Remove to a cooling rack.  Easily stored in your favorite cookie jar!

♥  ♥  ♥  ♥  ♥

God loves you!  ♥  (Don’t ever forget that!)

♥  coleen
Gluten free, Grain free Zucchini Muffins

Here on our At Home with GCH blog, Monday’s are always focused on healthy but oh-so-yummy! recipes.  This recipe fits perfectly into the category being it is low in fat (uses greek yogurt and a small amount of coconut oil or butter), is gluten-free, grain-free, and more than one cup of vegetables.

Have you ever used crystallized ginger?  I just love this product and try to always have some stored in the freezer.  (Hint: if you keep it frozen, it is super easy to grate up to put into your recipe.)  It is a great ingredient to add to many spicy dishes.  We especially enjoy it in Thai food!  Try adding a bit to any baked goodies that have cinnamon, or nutmeg, in them.  I buy mine in the grocery store; look for it either in the Asian food aisle, or the baking goods aisle.

Oh…just  a suggestion:  perhaps you might want to make a double batch!  Enjoy!

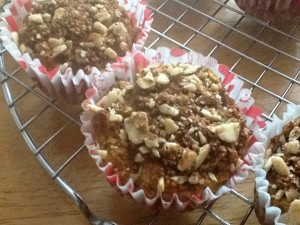
IMG_1556

Zucchini Muffins

makes one dozen regular-sized muffins

Ingredients:

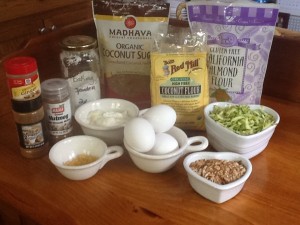
topping ingredients:IMG_1553
1/4 cup chopped almonds
1 tablespoon sugar (I use coconut sugar)
1 teaspoon cinnamon
2 tablespoons almond flour
2 tablespoons very cold butter, cut into little cubes

muffin ingredients:
1/2 cup sugar (I use coconut sugar)
3 eggs
3/4 cup greek yogurt
1/4 cup softened coconut oil
1+1/2 cup shredded zucchini, squeezed dry in a dish towel
1 teaspoon cinnamon
1/8 teaspoon powdered ginger
1 cube frozen crystallized ginger*, grated fine
1/4 teaspoon nutmeg
1+1/2 cup almond flour
1/2 cup coconut flour
1 teaspoon baking powder

  • Heat oven to 325
  • Place muffin cups in muffin tin
  • Make topping ingredients first: mix all dry components of topping together; then drop in the butter cubes and quickly use your fingertips to incorporate the butter; set aside
  • In a medium-sized bowl, whisk together first 4 muffin ingredients until sugar is dissolved
  • Add zucchini (and crystallized ginger, if using) to the wet ingredients; stir well
  • In a separate large bowl, mix together the flours, spices, and baking soda
  • Add wet ingredients to the dry, mixing until incorporated
  • Divide batter into muffin cups evenly
  • Sprinkle on almond topping
  • Bake for 30- 35 minutes
  • After removing from oven, let cool for just a minute  and then remove to a cooling rack

Shepherds Pie with Cauliflower Mash

Oh, so yummy!  My husband loves Shepherd’s Pie—and so I indulge him!   We’ve had Shepherd’s Pie with beef filling, chicken filling, turkey filling, vegetable filling.  We’ve had it topped with traditional mashed potatoes, with mashed sweet potatoes, with mashed turnips, and like this—our favorite way—with mashed cauliflower!  I always have my eye out for new variations!  This recipe fits into our healthy but oh-so-yummy category in a couple of ways:

  • it is low-carb (with the absence of potatoes)
  • it  is made with natural ingredients that you can pronounce (as the gravy is made from scratch), and not a can of cream of something or other
  • it is low in fat/high in protein (using boneless chicken breast as the protein and just 1/3 cup of shredded cheese and 1/3 cup Parmesan)

This recipe could easily be doubled and baked in an 11 x 13 baking dish.  Enjoy!

Shepherds Pie with Mashed Cauliflower Topping 

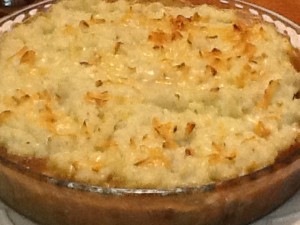
shepherdspie

Filling Ingredients:

1 sweet onion, chopped in pieces about 1/2 inch dice
4-6 ounces baby bella mushrooms, wiped clean and sliced chunky
2-3 tablespoons chopped garlic in oil (from a jar)
4+ teaspoons olive oil
1# boneless chicken breast, pounded flat, cut into 1″ cubes

1 tablespoon butter, or coconut oil
2 tablespoons brown rice flour (or all-purpose flour)
1/4 cup white wine (or broth)
1+1/4 cups chicken broth

1 bag frozen mixed vegetables (your choice), defrosted

Topping Ingredients:

1 medium-sized head of cauliflower, cored and chopped into small pieces
1/4 cup milk
1/3 cup finely grated parmesan cheese
salt and freshly ground black pepper to taste

1/3 cup shredded cheese (sharp cheddar, smoked gouda) *use a flavorful cheese

Instructions:

  • Preheat oven to 375.
  • Bring a medium-sized pot of salted water to a boil. Add cauliflower and simmer ‘til  soft enough to mash easily (10-12 minutes).
  • Drain cauliflower very well; place back into pot and  “mash” the cauliflower along with the milk and Parmesan.
  • Season very well with salt and pepper to taste.
  • While the cauliflower cooks, heat 2 teaspoons of olive oil in a large frying pan and saute the cut-up chicken.  Cook ’til just getting brown but don’t overcook.
  • Reduce heat to low, and add the chopped garlic for the last minute (don’t let the garlic burn).  Remove pan from stove; set aside cooked chicken.
  • Wipe pan with paper towels to remove bits.
  • Then add 2 additional teaspoons olive oil; and saute chopped onions for 3 minutes.  Add chopped mushrooms and saute for 4-5 minutes more to caramelize.
  • Reduce heat to low; add 1 tablespoon butter, and sprinkle flour over the mushroom-onion mixture, stirring with a whisk or wooden spoon.
  • ‘Cook’ this mixture for 3 minutes (to reduce the flour-y taste) occasionally scraping the pan.
  • Then gradually whisk in the wine ’til the mixture is smooth.
  • Slowly whisk in the  broth and your gravy will come together.  Gently simmer for 5 minutes.
  • Add back the cooked chicken and the defrosted veggies and heat together for 1-2 minutes.
  • Spread the chicken-vegetable-gravy mixture in the bottom of a 8 cup casserole dish.
  • Top with the cauliflower mixture, and spread across the pan almost to the edges.
  • Bake for 20 minutes, and then top with the shredded cheese.
  • Continuing baking another 10 minutes or so ’til bubbly.  (If top is not lightly browned, can be carefully placed under broiler for 2-3 minutes.)  Enjoy!

   ♥      ♥      ♥      ♥      ♥ 

God loves you!     (Don’t ever forget that!)

♥  coleen
Cookie Week – GF Chocolate Chip Cookies

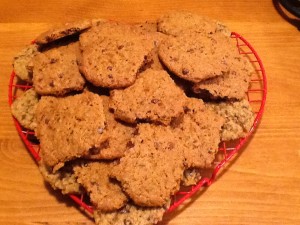
2013-12-15 23.12.46

Cookies.  A lovely tradition of giving during the Christmas holidays.  There are cookies to make for exchanges.  There are cookies to make to fill tins and baskets that are given to friends and loved ones.  There are cookies to make for the cookie monsters in your own home! (I have one of those…do you, too?)

Our own Dana, Wendy, Amy (and me!) who blog here for At Home w/ GCH are each sharing a favorite cookie recipe!  Dana started us off last Friday with her Monkey Bites (Paleo Banana Chocolate Chip cookies).  They looked so moist and yummy!  And today I am sharing Gluten Free Chocolate Chip cookies. *See below for adaptation for a dairy-free version.*  Can’t wait to see Wendy and Amy’s delicious contributions later in the week, too!

AND…we will be having a ‘virtual’ cookie exchange over among our Girlfriends Coffee Hour – Fellowship group.  Come join us Tuesday through Friday as our sisters post a picture of their own homemade cookies…and possibly share their recipe, too!

My recipe for Gluten-Free Chocolate Chip Cookies starts off with putting together a basic mix.  I would strongly suggest doubling the ingredients so that you can make a batch AND have the basics mix set to go to quickly throw together another batch!  Or perhaps you could take the second batch and put into a large Mason jar and gift someone with it!  Just sayin’!!!

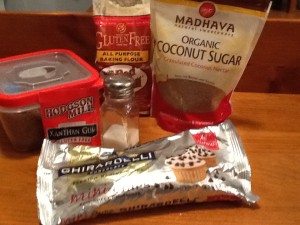
Gluten Free Chocolate Chip Cookie Mix2013-12-15 21.10.34

(makes approximately 4 cups; enough for 4 dozen cookies)

Ingredients:
2+1/4 cups good quality all-purpose gluten-free flour blend
1 teaspoon baking soda
1 teaspoon xanthan gum
1/2 teaspoon salt
3/4 cup dark brown sugar
3/4 cup coconut sugar
12 ounce bag semi-sweet chocolate chips

Directions:

Place all ingredients (NOT the chocolate chips) into a large bowl and whisk together well.  If using immediately, pour in the chocolate chips.  If not, pour the mix into a storage jar and add the chocolate chips right on top.  Seal well.

Gluten Free Chocolate Chip Cookies

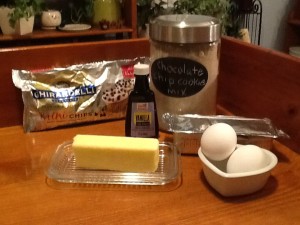
Ingredients:2013-12-15 21.25.04
1 batch of above GF Chocolate Chip Cookie Mix
8 tablespoons butter (unsalted), room temperature
2 extra-large eggs, room temperature
1+1/2 teaspoons vanilla extract (NOT imitation, please!)

Directions:

  • Preheat oven to 325.  Line two (2) large baking sheets with parchment paper; set aside.
  • Beat together the room temperature butter and eggs to thoroughly incorporate; stir in the vanilla.
  • Pour 4 cups (or one batch) of the cookie mix into a very large bowl.  Stir in the liquid ingredients and thoroughly blend.
  • Drop balls of dough (approximately 1+1/4″) onto the prepared baking sheets.  Place the baking sheets (one at a time) into the freezer for 5 minutes to firm up.
  • After the chill time, put cookies (one sheet at a time) into the oven.  Bake for 12-14 minutes (depending on the size of your cookie balls) or ‘til the bottoms are beginning to brown.
  • Remove from the oven.  (I carefully remove the cookies ON the parchment paper from the cookie sheet directly onto a cooling rack—works beautifully!)
  • Store in an airtight tin or jar.  Enjoy!

*To make these cookies dairy-free, simply substitute 1 stick of butter-flavor shortening for the 8 tablespoons of butter; and purchase chocolate chips with no milk or milk products.  I use the Ghiradelli or the Enjoy Life brands.

 ♥  ♥  ♥  ♥  ♥

God loves you ♥  (Don’t ever forget that!)

Merry Christmas from mr. hayden and i!

♥  coleen

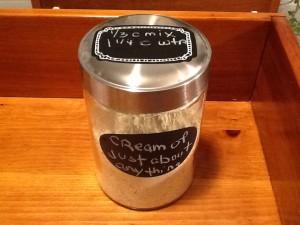
Cream of ‘Just About Anything’ Soup and Sauce Mix

2013-12-08 20.35.59So, if you are like me, you are in the thick-of-it-all…the sewing/knitting/painting of gifts; the baking of cookies (and more cookies); the caroling and school concerts; the shopping (online AND out in the stores); and the wrapping of all these treasures you have shopped for and made with love!  But supper is still expected (I KNOW, right?) on our tables each evening by our loved ones.  Most of us really don’t want to be going through the drive-thru and bringing home ‘less than the best’ to feed our families.  However, time escapes us some days and we have not prepared for suppertime!

2013-12-08 21.36.25


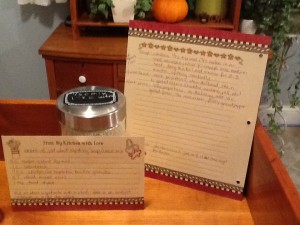
One great solution to this dilemma is to put together a yummy CrockPot meal early in the day.  At this time of year, my CrockPot remains out on the counter…handy and ready to be filled with yummy goodness.  However, I find that many recipes designed for the CrockPot call for a can of condensed soup of one variety or another.  And that creates a problem in our household: 1) canned condensed soup contains wheat (we eat gluten free, remember), and 2) there is just too much sodium (and a few other not-so-good-for-you ingredients) in a can of condensed soup.  Below is a recipe for a mix you can put together and keep in your pantry (OR gift to someone else in a cute little jar with a label giving directions).  Here, too, is a link to a great resource for quite a few ways to use thisCream of Just About Anything’ soup and sauce mix.  Enjoy!

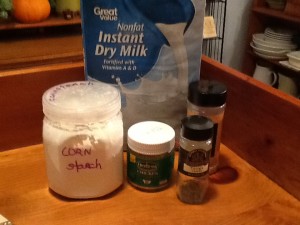
Ingredients: 2013-12-08 20.23.15
3 cups nonfat instant dry milk
1 cup cornstarch
1/3 cup chicken bouillon granules
2 tablespoons dried minced onion
1 teaspoon dried thyme

Directions:

  • Mix all the above ingredients in a large bowl with a whisk.
  • Store in an airtight container in a cool dry place.

On our menu for this week are two recipes using the CrockPot and a portion of this healthy but oh-so-yummy ‘cream of just about anything’ soup.  One will be Chicken and Mushrooms in Wine Sauce and the other will be Beef Stroganoff.  How about you?  Are you already planning on utilizing your CrockPot to save you time but still feed your loved ones a yummy, healthy, satisfying meal?  Please share with us about what’s on your menu this week in the comments below!

 ♥  ♥  ♥  ♥  ♥

God loves you ♥  (Don’t ever forget that!)

♥  coleen
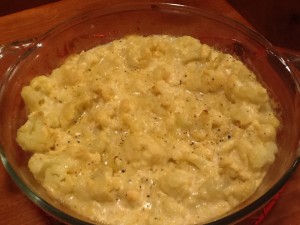
Cauliflower Mac and Cheese

Ok…I am really excited about this recipe…hope you like it, too!  Cauliflower Mac and Cheese!  Oh, yeah.  This has all kinds of tags associated with it: healthy but oh-so-yummy, paleo, low-carb, gluten free, low fat, vegetarian, comfort food (if you think of any additional, let me know, please!).
Here on our Monday installment of At Home w/ GCH, we have been featuring recipes which include Fall in-season fruits and veggies.  This week is our final blog on the subject. Our featured veggie is Cauliflower. Here are some nutritional facts about this ‘superfood.’
“We” love cauliflower here in our household.  I say, “we” because every time I tell my husband, Robert, that I have a new way to fix cauliflower, he never (may I repeat, never) responds enthusiastically.  But I am happy to report that every time (may I repeat, every time) he eats the dish I’ve prepared, his response is always (may I repeat, always) enthusiastic.  Ok—it’s taken me a while to figure this out but apparently the cauliflower dishes he grew up eating were just boiled, (overcooked), soggy, gray cauliflower-yucky!   I trust that if you have had experiences similar to Robert’s, you will try this Cauliflower Mac and Cheese and have a new yummy experience!  Enjoy!

Cauliflower Mac and Cheese2013-11-01 19.11.26

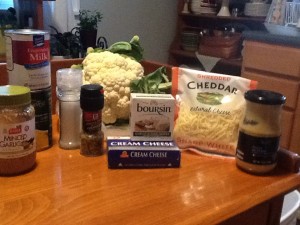
Ingredients:

1 large head cauliflower, cut into small florets
1 can evaporated milk
1/2 cup chicken or vegetable broth 2013-11-01 17.36.09
2 ounces cream cheese, cubed (or goat cheese, or Boursin)
2 teaspoons Dijon mustard
1 tablespoon chopped garlic
1/2 cup shredded sharp Cheddar cheese, plus 1/4 cup for topping the casserole
kosher salt, freshly ground black pepper
1/4 teaspoon nutmeg (freshly grated, if possible)

Directions:

  • Preheat the oven to 375.
  • Bring a large pot of water to a boil, seasoning the water with salt.
  • Lightly grease a 2 quart baking dish with butter or cooking spray.
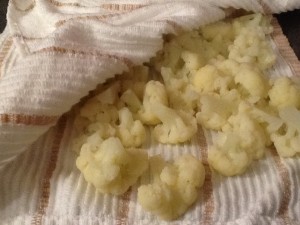
  • When the water comes to a full boil, toss in the cut-up cauliflower; return to a boil and parboil ‘til crisp-tender, about 5 minutes.
  • Drain well in colander, and then lay out on a clean dishtowel and pat dry. <The drier the cauliflower, the better the cheese sauce will cling to it.>

2013-11-01 18.33.57

  • Transfer the cauliflower to the baking dish and set aside.
  • Bring the evaporated milk and broth to a simmer in a small saucepan over medium low heat.
  • Whisk in the cream cheese, mustard, chopped garlic; continuously whisking ‘til smooth.
  • Add the 1/2 cup of shredded cheese, along with the seasonings and whisk just ‘til the cheese melts, about 2 minutes.
  • Pour the cheese sauce over the cauliflower, and stir gently to combine thoroughly.
  • Top with the remaining 1/4 cup cheese and bake for approximately 15 to 20 minutes. Turn up the oven temp to 425, and bake for 5 additional minutes; just ‘til it begins to brown.
  • Let cool 5 minutes before serving.

♥  ♥  ♥  ♥  ♥

God loves you!  ♥  (Don’t ever forget that!)

♥  coleen
Pumpkin Spice Coffee Creamer


Cheers!

Cheers!

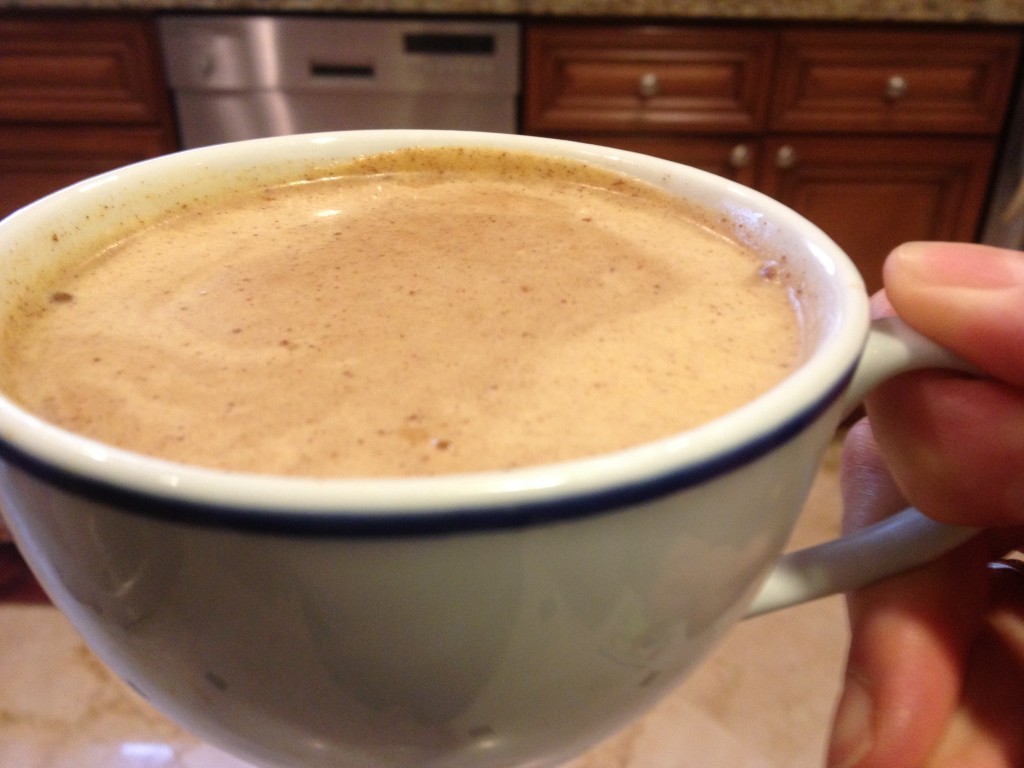
Since the website is called Girlfriend’s Coffee Hour, I think we should have a post actually about coffee!  One of the hardest things I’ve ever done for my health was changing how I took my morning coffee.  I was a teaspoon of white sugar plus half and half kind of girl.  I was also a big fan of Coffeemate creamer – you know, Irish Cream, French Vanilla, Hazelnut – the good stuff. Unfortunately, white sugar first thing in the morning creates a huge insulin spike, setting you up for inflammation, sugar cravings, energy crashes – the list goes on.  And I dare you to pick up a bottle of flavored coffee creamer at the store and tell me what half of those ingredients are. Chemical city!  So I decided to surf the web and find something to jazz up my coffee (because a splash of almond milk just isn’t making magic in my cup.)  After some experimentation, I present to you:  Pumpkin Spice Coffee Creamer!

This recipe is dairy-free, gluten-free, and processed sugar-free.  I used maple syrup for a little sweetness, but you can use honey or stevia if you prefer.  This recipe calls for an egg.  Try to find organic, best-quality eggs – hopefully you can find a farmer’s market that carries local eggs, because that really lowers any salmonella risk.  If it freaks you out, you can skip the egg, but it really does add body and substance to the creamer.  I keep this in a mason jar in my fridge.  I go through it in about a week and that seems to work well.  It may get solid, and that’s fine – just scoop out a ball of creamer with a tablespoon and it will melt immediately in your coffee.  If you want to make a fall treat for the kids, heat up some milk in a pan on the stove, stir in a quarter cup of the Pumpkin Spice Coffee Creamer, and garnish with whipped cream and a little extra cinnamon!

Pumpkin Spice Coffee Creamer

(makes about 16 ounces)

Ingredients:

  • 1 can (13.5 ounces) full-fat coconut milk
  • 1/4 cup pumpkin puree
  • 1 egg
  • 1 teaspoon pumpkin pie spice (or 3/4 teaspoon ground cinnamon and 1/4 teaspoon ground nutmeg)
  • 1 teaspoon vanilla extract (or try half vanilla and half almond extract!)
  • 2 tablespoons maple syrup
  • 1 tablespoon coconut oil (optional, but I like it!)

Directions:

  1. Add all ingredients to the blender and mix for 30 seconds.  That’s it!  Pour into a jar with a lid and store in the fridge for up to one week.

Enjoy!

Dana