March 28, 2024

Pumpkin Pie with GF Nut Crust—and Spiced Whipped Cream

2014-11-23 21.57.44
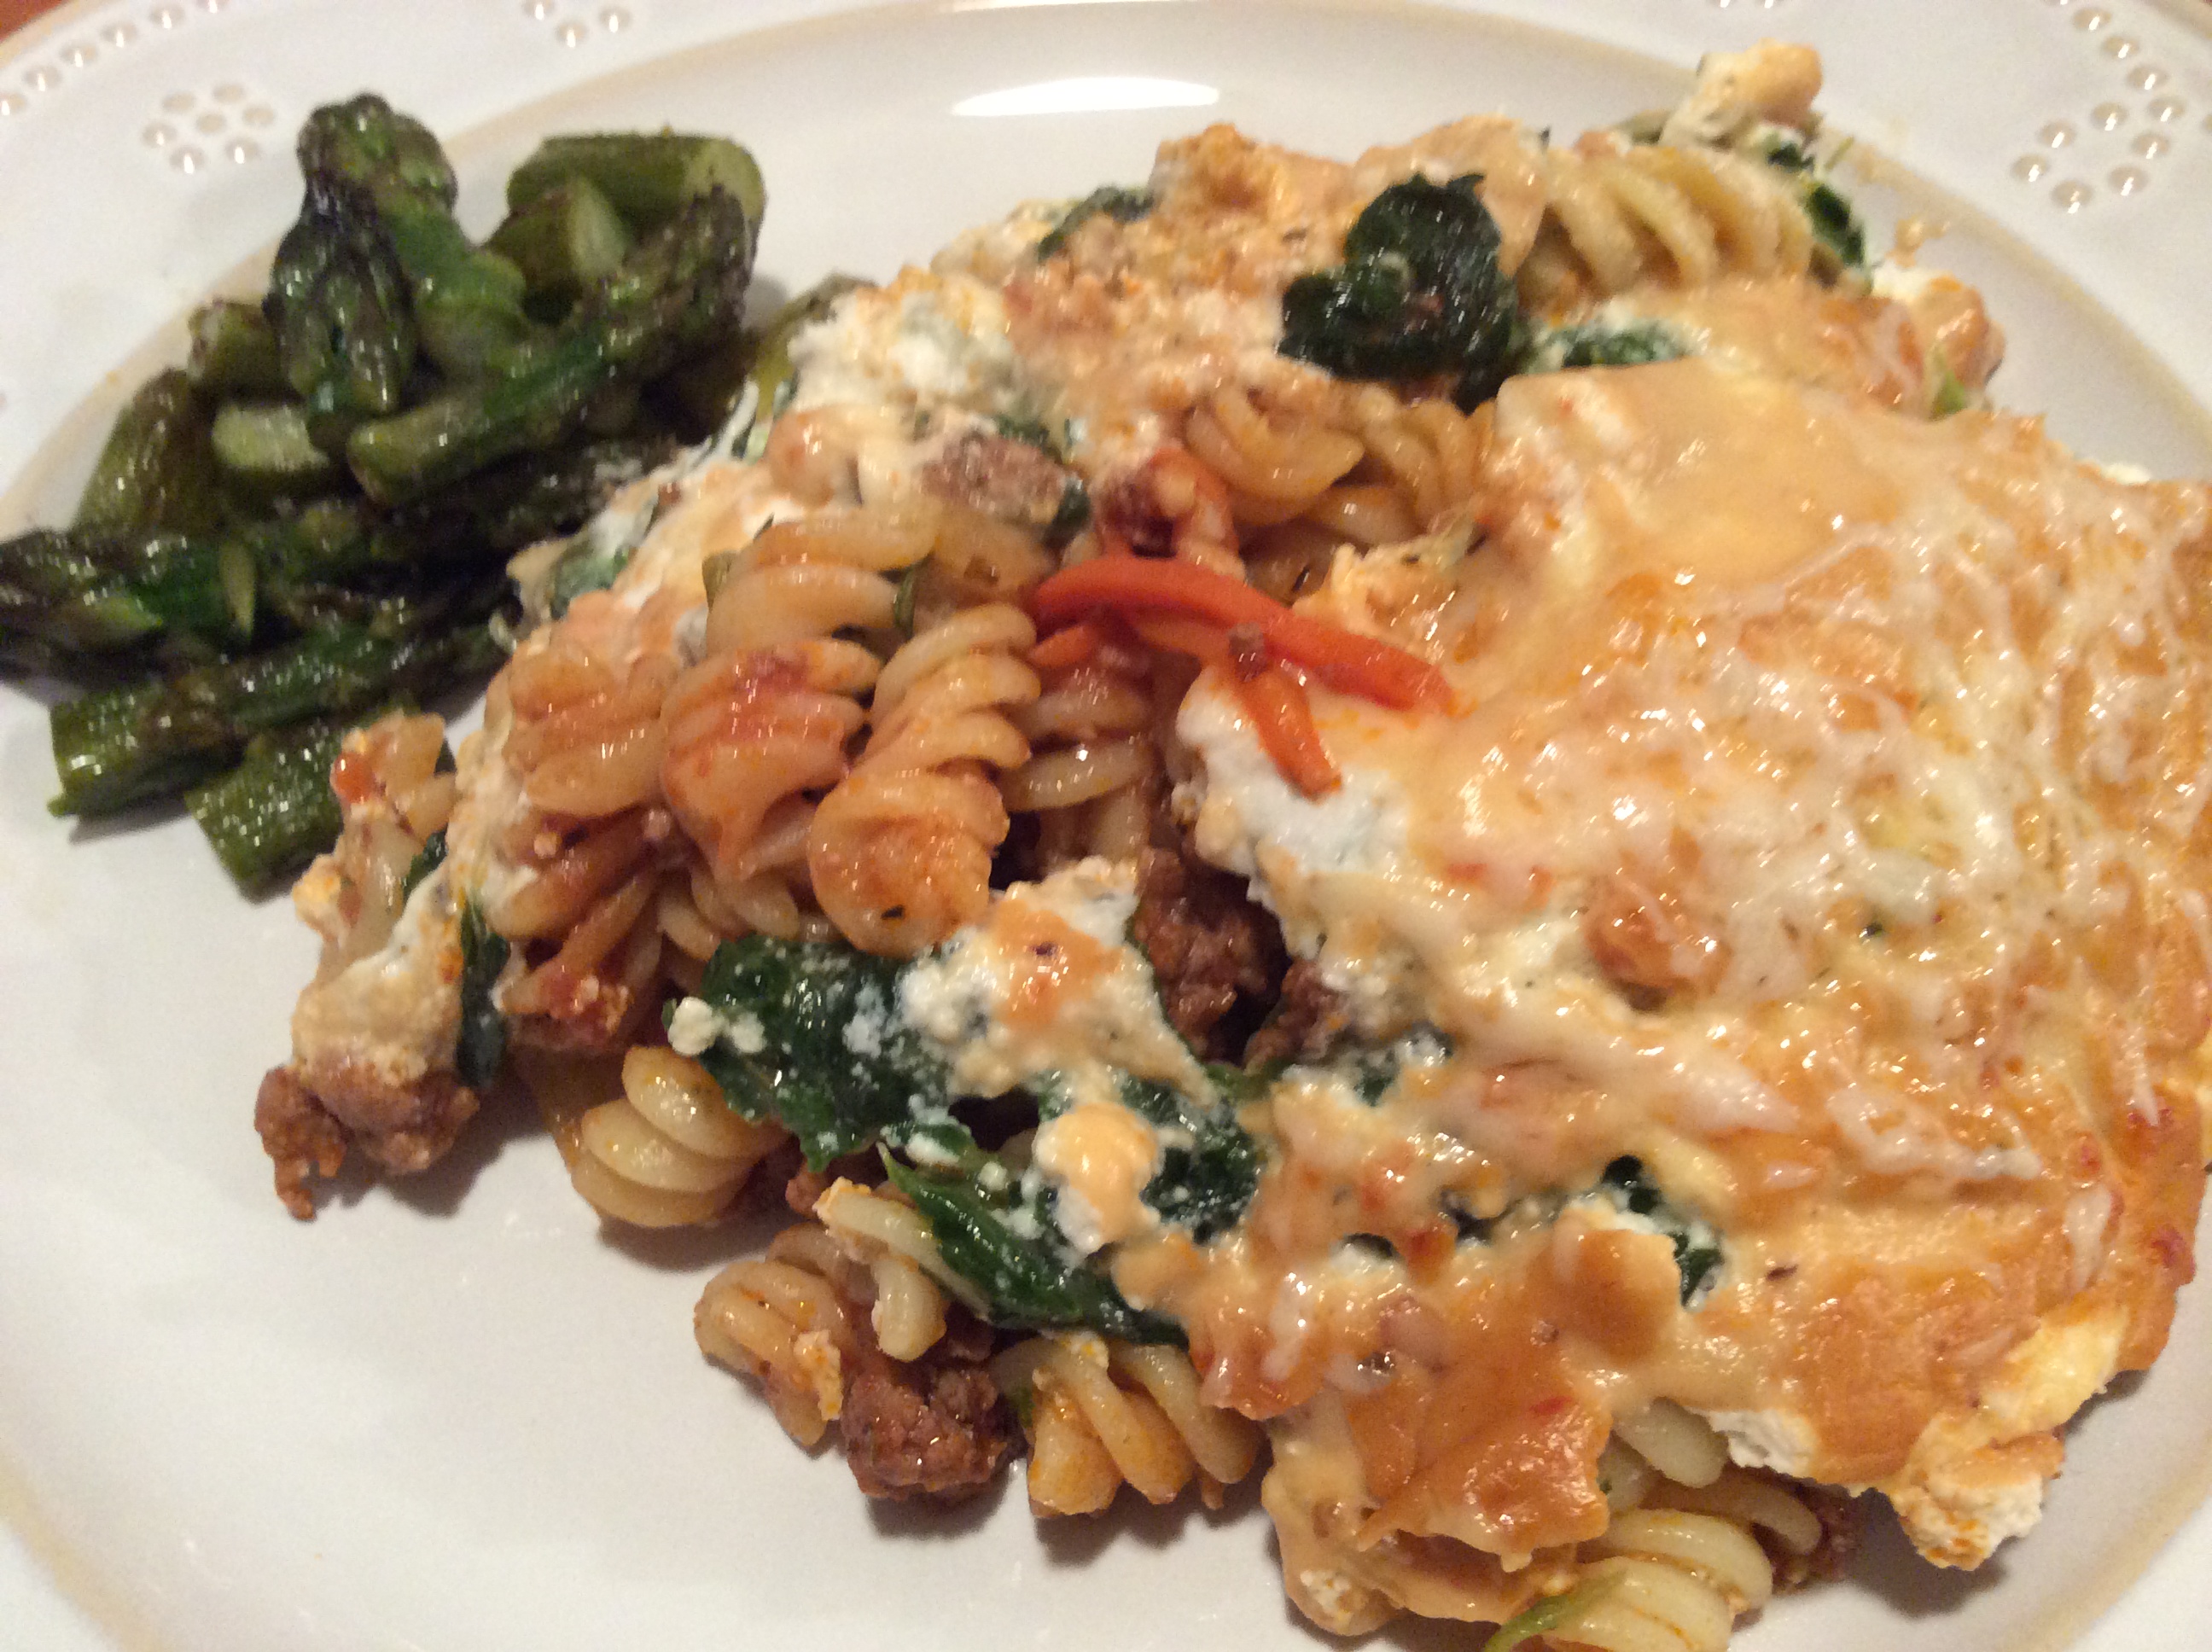
I think that the Thanksgiving meal is one where the most traditional fare is prepared, served, and enjoyed.  Whether they are the ubiquitous offerings…turkey (goes with saying, right?), gravy, cranberry sauce; or favorites that are traditional for your own family…there are just some dishes we expect to prepare and share.  One of these is Pumpkin Pie!

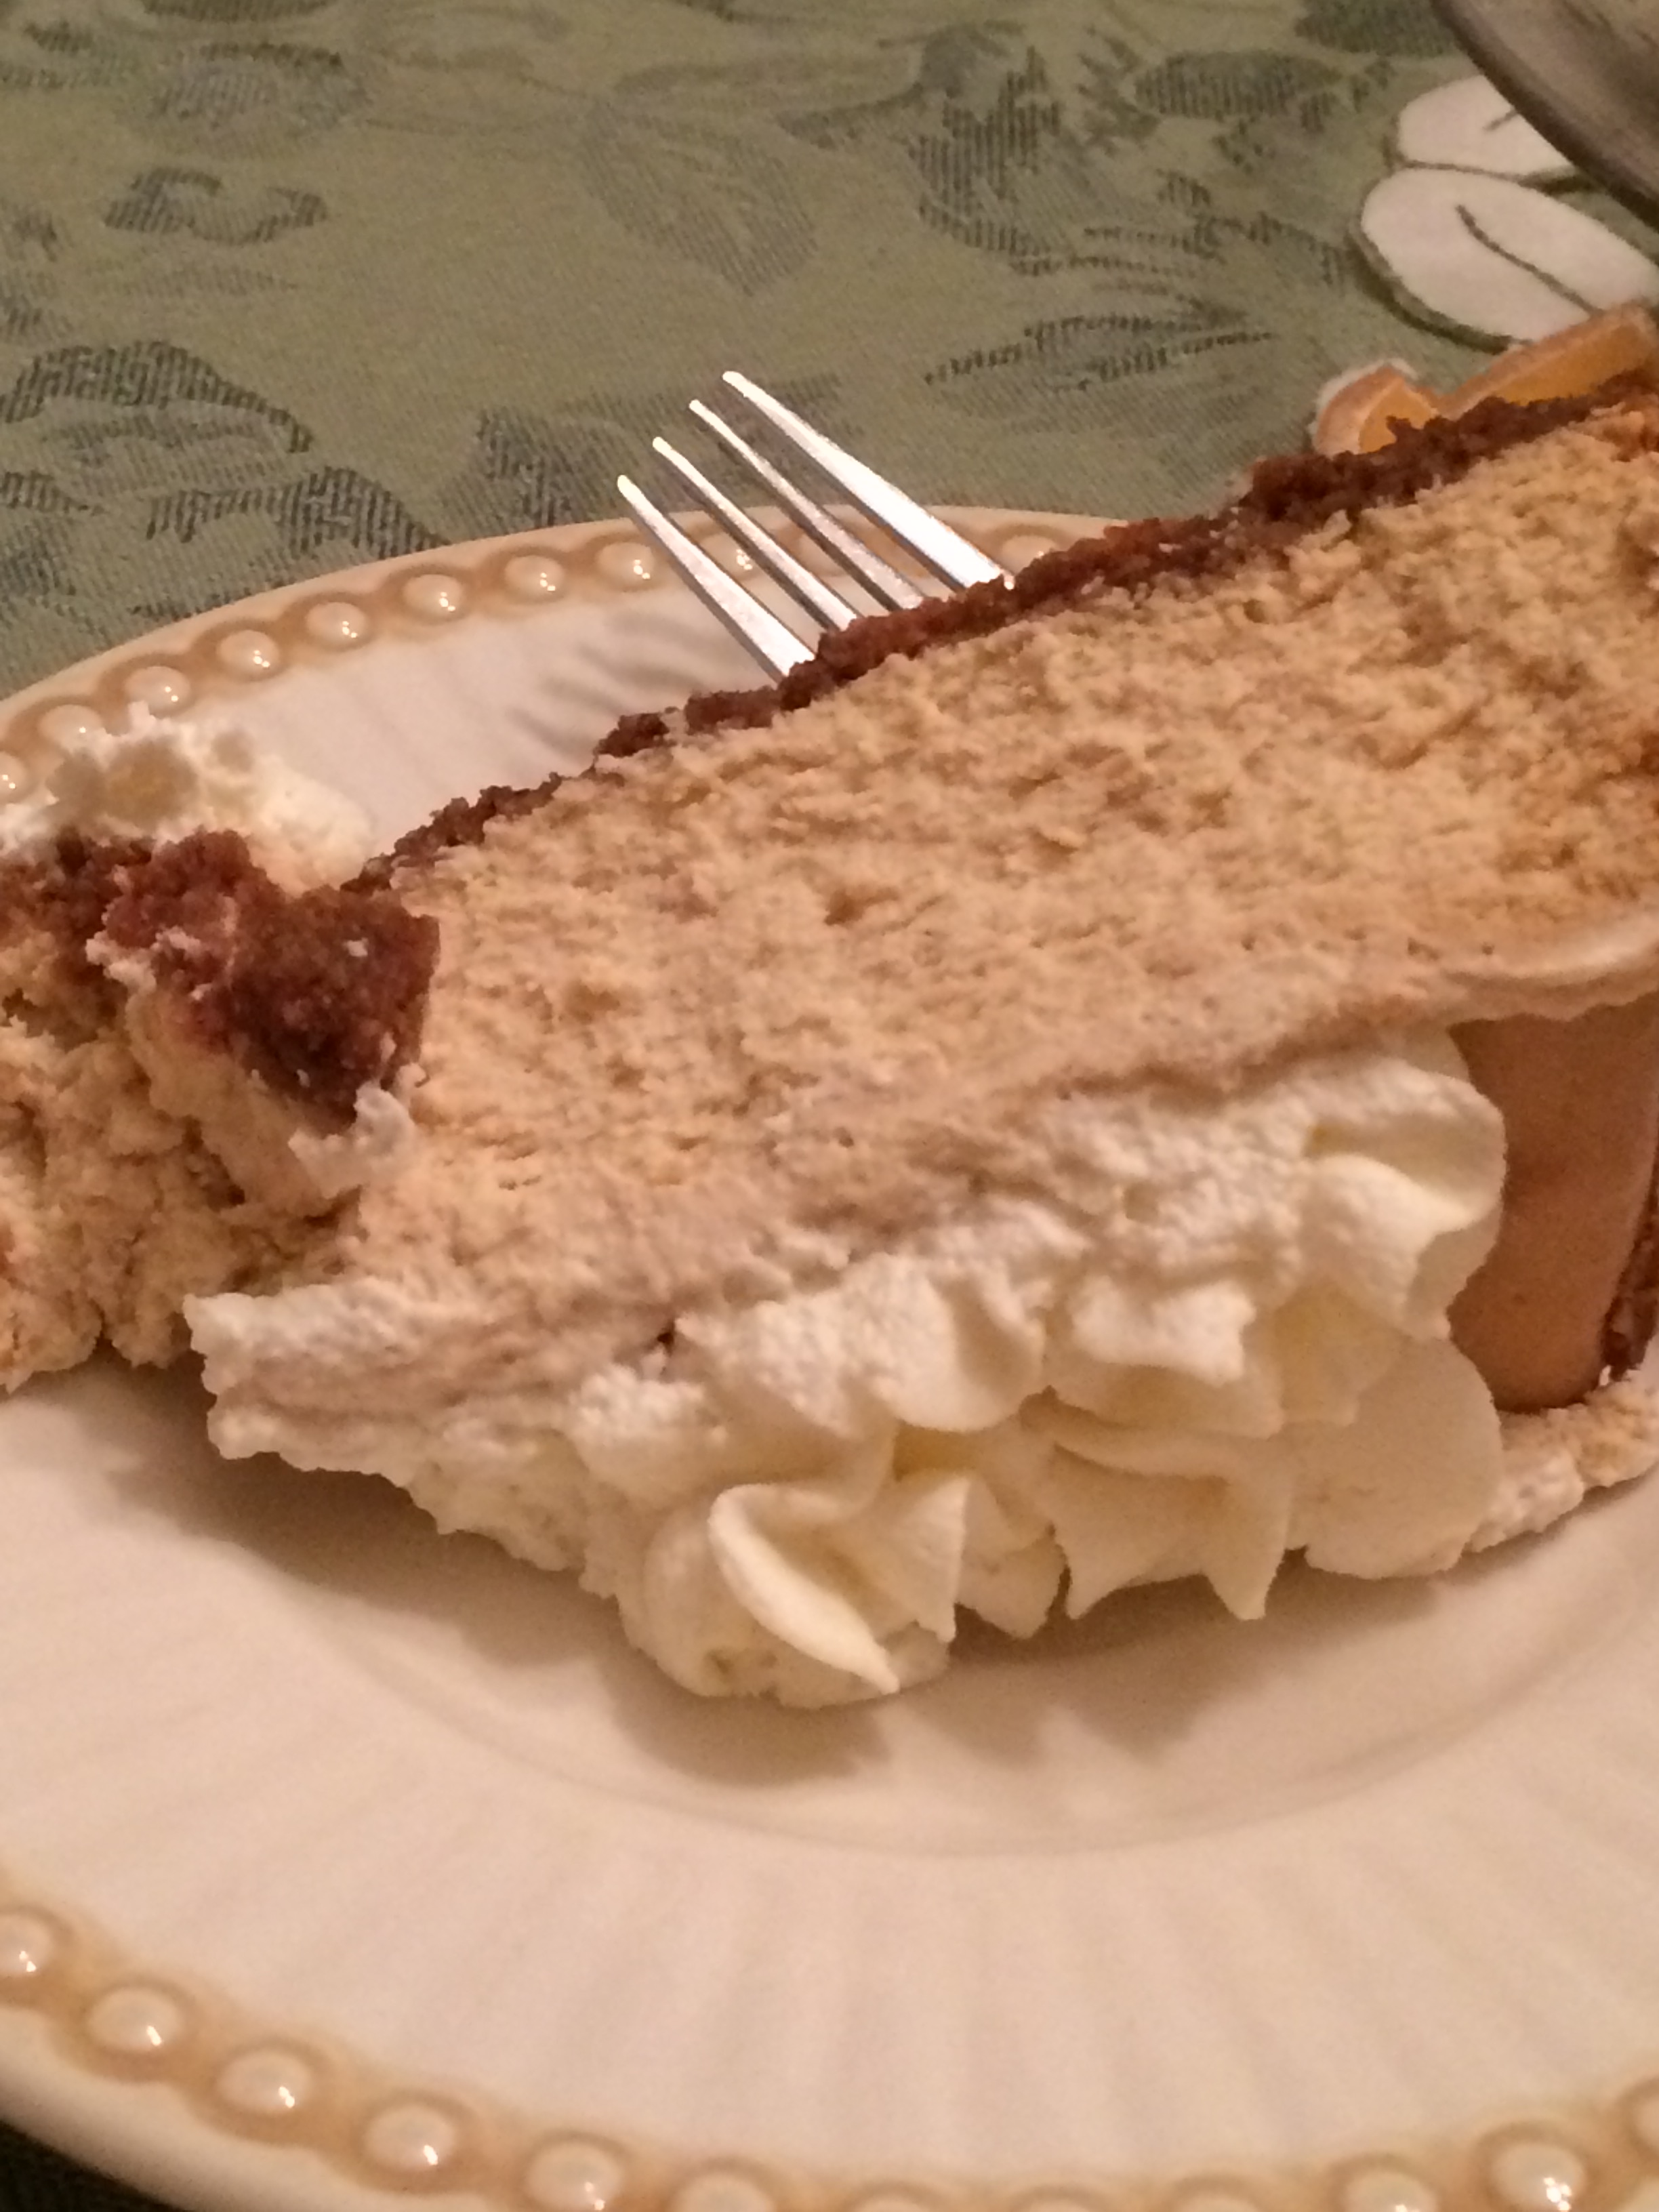
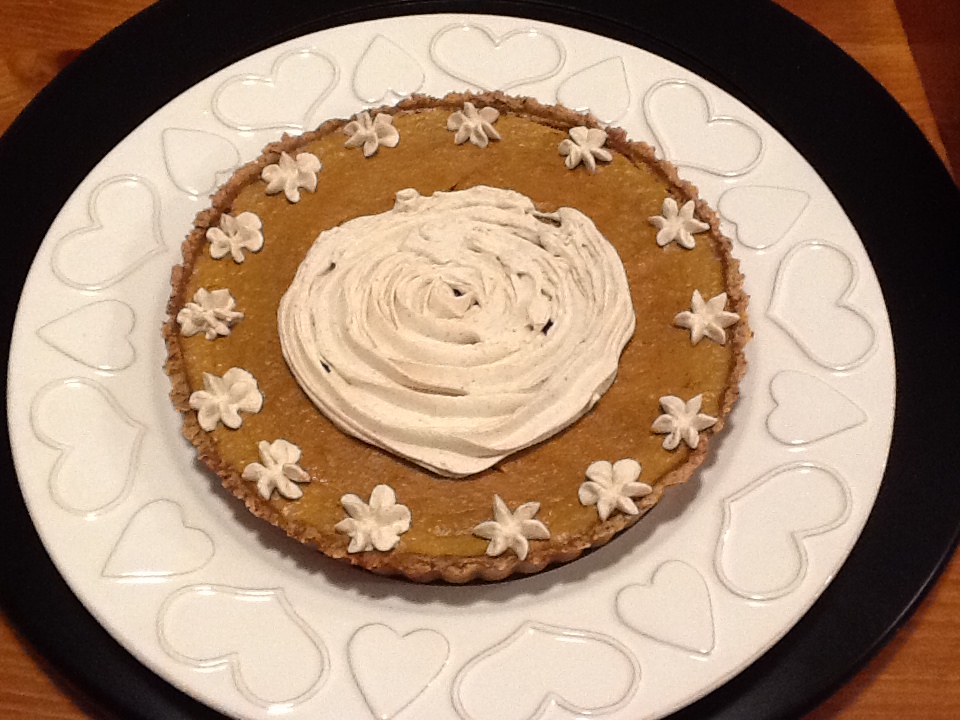
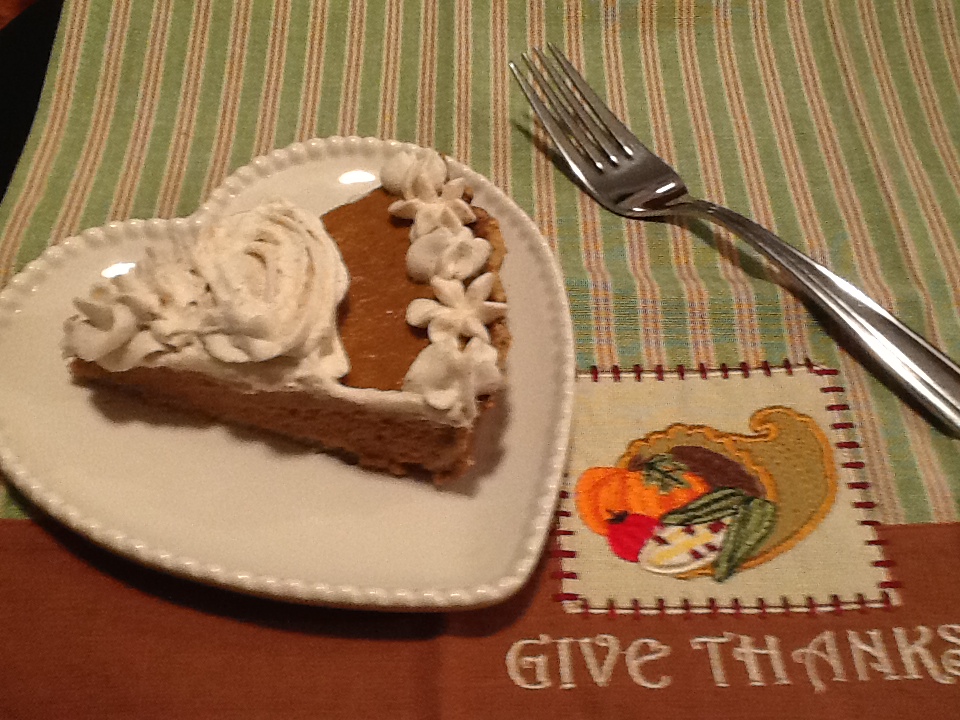
Ok, asking for a show of hands, please…how many of you are baking pumpkin pie(s) to serve to your loved ones at your Thanksgiving dinner?  Me, too!  Actually, have already made this one.  The recipe included below features a Gluten-Free crust (made with almond and hazelnut flours) filled with a very traditional Pumpkin Custard and served with Spiced Whipped Cream to top it all off.  If you are looking for something traditional but with an updated twist, this might just fit the bill!

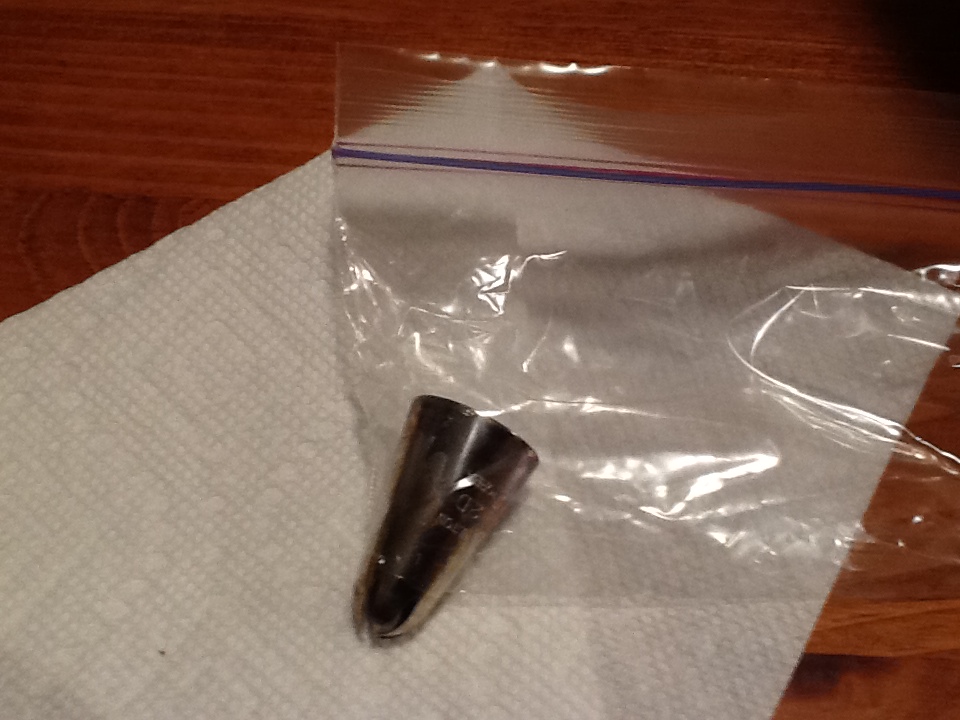
Here’s a tip (oh, punny!) for decoratively adding the whipped cream topping:  place a large-sized cake decorating tip (I used a #2D) into a small zip-top disposable bag…snip off JUST a bit from one corner.  Push the tip firmly into the snipped corner and add a good amount of the Spiced Whipped Cream into the bag; zip closed being SURE the baggie is sealed.

2014-11-23 19.59.46


Carefully manipulate the whipped cream down towards the corner holding the tip…making sure the tip remains lodged in the opening.  Gently squeeze allowing the whipped cream to come out through the tip.  Decorate to your heart’s content!  Make designs…write ‘Thank You, God, for all Your blessings!’ on the pie top.  Have fun!


Pumpkin Pie in a GF Nut Crust
with Spiced Whipped Cream

2014-11-23 22.07.23

Nut Crust
ingredients:
1+1/2 cups almond flour
1/2 cup hazelnut flour
1/4 teaspoon salt
1/8 teaspoon almond extract
1 egg
1+1/2 tablespoons ice cold butter

directions:

  • cut butter into small cubes; place in fridge ‘til ready to use
  • preheat oven to 350
  • place ingredients in food processor (in order listed)
  • immediately pulse ingredients ‘til they come together into a ball
  • dump gathered ingredients into a 9″ tart pan
  • press out from the center evenly spreading across the bottom of pan and up the sides
  • bake for 15 minutes ‘til just beginning to lightly brown around the edges (don’t be alarmed if center puffs up; just lightly tap pan onto counter…crust will settle)
  • allow to cool completely before adding pumpkin custard filling

Pumpkin Custard
ingredients:
1+3/4 cups pumpkin puree (15 oz. can)
1/2 cup almond milk
1/2 cup half and half
2 large eggs, room temperature
1 teaspoon almond extract
1 teaspoon ground cinnamon
1/2 teaspoon ground nutmeg (freshly ground if possible)
1/2 teaspoon ground allspice
1/4 teaspoon salt
1/4 teaspoon liquid stevia (I used vanilla stevia)*

directions:

  • Increase oven temp to 375
  • in a large bowl, whisk eggs and salt
  • add in liquids and pumpkin puree, continuing to whisk
  • add spices and sweetener whisking ‘til spices are fully blended in
  • pour into the cooled nut crust (it will fill the pan)
  • place filled pan on a baking sheet’
  • bake at 350 for 50-60 minutes
  • custard is done when center is set and slightly puffed
  • allow to cool before slicing
  • store any leftovers in the ‘fridge

Spiced Whipped Cream
ingredients:
1/2 cup heavy or whipping cream
2 teaspoons 10X powdered sugar
1/4 teaspoon vanilla extract
1/8 teaspoon EACH ground cinnamon, nutmeg, allspice, ginger

directions:

  • in mixer bowl, at medium-high speed, beat cream ‘til peaks start to form
  • add sugar and spices into a fine sieve or sifter and dust over whipped cream
  • start mixer up again, pour in extract
  • continue to whip just ‘til stiff peaks form
  • (follow directions above if piping using decorative tip) otherwise, serve with Spiced Whipped Cream

 ♥   ♥   ♥   ♥   ♥

God loves you!  ♥  (Don’t ever forget that!)

♥  coleen

Baked Ziti…Greek Style

This recipe came about because I needed to use up some ground lamb. In our efforts to eat more healthy, quality foods, we have been trying to use better quality meats…especially ground meat.  But sometimes these items come along with a price tag that is steep!  (Y’know?)  Last week, I came across some organic, grass-fed ground lamb at a really good price…oh, happy me!  But even happier hubby—he just loves lamb!  And, maybe because it was cold and rainy, I thought it would be good basis for a real comfort food meal!  Thus…Baked Ziti, Greek Style!

Now, this dish is a little decadent as it has a bechamel (or white) sauce and uses a couple of cups of ricotta. However, the other cheeses included only add up to four (4) ounces. Just be sure to use really flavorful cheese, and grating it yourself will give you a nice melting product. So this dish fit well into our ‘healthy but oh-so-yummy’ POV since it has lots of veggies (onions, mushrooms, carrots, tomatoes, spinach) and uses a meat that is of a really good quality.

Let me tell you, this recipe fills a huge casserole! I used a 4quart casserole which holds more than a 9X13 baking dish. And we got 8 generous servings (maybe 6 if you are feeding manly men!) out of it.  Enjoy!

2014-10-28 20.50.23

Baked Ziti…Greek Style

ingredients:
2 tablespoons extra-virgin olive oil
1 pound ground lamb
a couple sprigs rosemary (or 1+1/2 teaspoons dried chopped rosemary)
1 teaspoon dried marjoram (or oregano)
sea salt and freshly ground black pepper (I always use a lemon-pepper-salt combo)
1 large onion, finely chopped
6-8 ounces Baby Bella mushroom, chopped small
1 carrot, peeled and finely grated
3 (or more!) tablespoons chopped garlic (I use jarred)
1/2 cup tomato paste
2 cups chicken stock
1 cup dry red win

1 pound macaroni (I used GF rotini)
16 ounce bag of frozen chopped spinach, defrosted
bechamel sauce
2 tablespoons butter
2 rounded tablespoons all-purpose flour (I used GF all-purpose)
1 cup milk (I used coconut milk)
1 cup chicken broth
Freshly ground black pepper
Freshly grated nutmeg (just a bit!)

2 cups ricotta cheese
dried oregano
4 ounces freshly shredded cheese (I used smoked gouda and a really sharp white cheddar)
directions

for the meat sauce:

  • heat 1 tablespoon olive oil in a Dutch oven over medium-high heat
  • when hot, crumble the ground lamb into the pot, and saute ‘til lightly browned
  • strip the leaves from the rosemary stems (if using fresh herbs) and finely chop
  • season with rosemary, orgegano, s&p
  • once the meat has browned, remove from pan, draining away juices
  • add 1 tablespoon olive oil along with the onion and carrot; saute for 6-7 minutes
  • add the chopped garlic and cook, stirring constantly, for an additional minute or so
  • stir in tomato paste, and cook for another minute or ‘til fragrant
  • stir in broth and wine, bring up to a boil; reduce heat to low and gently simmer ‘til pasta is ready

pasta:

  • prepare pasta according to package directions but UNDERcook by 2 minutes (then it won’t be overcooked after baking)
  • add the defrosted spinach into the pasta water for the last couple of minutes
  • drain the pasta/spinach and add back to the pasta pot
  • toss the pasta with the meat sauce
  • pour the pasta into a large (4 quart) casserole

bechamel/white sauce:

  • melt the butter in a medium saucepan, adding the diced onion
  • cook ‘til the onion is soft and translucent, approximately 5 minutes
  • sprinkle the flour over the cooked onion and, using a whisk, stir constantly for 1 minute; adjust the heat to VERY low and continue to cook for 2-3 minutes to get the starchy taste out of the mixture. do not let the mixture brown
  • increase the heat back to medium and immediately start slowly pouring in 1/4 cup or so of milk while whisking briskly; (just keep whisking!)   as this is absorbed, continue to slowly and steadily add the balance of the milk followed by the broth whisking constantly as the liquid becomes absorbed…this will take about 3 minutes
  • adjust the heat lower again and let this mixture simmer gently for another 5 minutes, stirring occasionally.  season with salt, pepper, and nutmeg, to taste

2014-10-28 20.48.42

to finish:

  • combine the ricotta and dried oregano
  • spoon the ricotta evenly around the top of the casserole, spreading to cover the pasta/meat mixture
  • pour the bechamel sauce in an even layer over top the ricotta; top with shredded cheese
  • place casserole into a preheated 425 degree oven; bake for about 20 minutes or ‘til middle is hot and edges are bubbly

♥  ♥  ♥  ♥  ♥

God loves you!  ♥  (Don’t ever forget that!)

♥  coleen

Some of my Favorite Things…and Cheesecake

So it was suggested to me to post a recipe today that is one of my very own favorites…since it is my very own birthday!  Woo-hoo…59 ! So I began to think about some of my favorite things…here are  ♪♬♪ a few of my favorite things! ♪♬♪

anything lemon-y
cheese
thai food
butternut squash (prepared just about ANY way!)
a really good mixed greens and veggie salad

But none of these yummy, delicious things are truly enjoyable to me without being able to share them with others. My FAVORITE things include being able to share a meal and God’s blessings with family and friends around our big old oak table!


2013-10-20 17.41.15

As far as a recipe for one of my favorites…well, I wasn’t quite sure and then decided to post my daughter’s Cheesecake Recipe (with her permission, of couse!). This was our indulgence for my birthday cake this year! This recipe is gluten free and refined sugar free; and prepares a huge cheesecake…enough for many slices! Enjoy!


2014-10-19 19.42.00

Cheesecake ala Kassia

crust
ingredients:
1 cup gf graham cracker crumbs (or traditional)
1/2 cup ground pecans
3 tablespoons softened butter

directions:

  • preheat oven to 400
  • butter sides and bottom of springform pan
  • mix ingredients together
  • pour mixture into springform pan and press firmly onto bottom of pan and up sides approximately 1+1/2″
  • bake for 10 minutes; remove from oven
  • set aside to cool
  • lower oven temp to 325

filling
ingredients:
4 (8 ounce) packages cream cheese or neufchatel (or combination)
1/2 cup coconut sugar
1/2 cup agave nectar (or honey)
16 drops vanilla creme stevia
4 eggs, room temperature
1 cup plain 2% Greek yogurt
2 tablespoons cornstarch
3/4 cup half&half
1 tablespoon vanilla extract
1 tablespoon lemon juice

directions:

  • (set eggs out when starting to make the crust)
  • adjust racks in oven so that one is in the high middle position (not the top position) and one is in the highest low position (#2 and #4 of 5)
  • put a roasting pan on the lower rack and add approximately 1″ water
  • beat cream cheese ‘til light and fluffy
  • gradually beat in sugar ‘til fully incorporated
  • add agave (or honey) and liquid stevia
  • add eggs one at a time, beating after each addition ‘til egg is fully incorporated
  • add cornstarch and beat ‘til smooth
  • add lemon juice and vanilla; beat ‘til fully incorporated
  • add yogurt and half½ beat just ‘til combined
  • carefully pour the filling mixture into the cooled crust
  • place filled springform pan into 325 oven; bake for 70-75 minutes ‘til very center of baked cheesecake is just a tiny bit jiggly when pan is gently wiggled
  • leave cheesecake in oven! turn oven off and leave door slightly ajar for two hours
  • it is best to refrigerate cheesecake for 24-48 hours before serving

topping
can be topped with {your choice} homemade whipped cream, canned pie filling, a drizzle of chocolate sauce, fresh fruit, caramel sauce, etc.

(I would love to hear what your favorite cheesecake topping is!)

♥  ♥  ♥  ♥  ♥

God loves you!  ♥  (Don’t ever forget that!)

♥  coleen

Granola and Grilled Peaches

This recipe came about backwards…first I was looking for something to do with a few gorgeous, huge, fragrant peaches. Then I saw a picture of a grilled peach topped with homemade vanilla ice cream with a big scoop of granola over top. Oh, yeah!

2014-09-28 20.21.19

Grilled Peaches with Ice Cream and Granola

I don’t know if you remember but just a few weeks ago, Dana shared her recipe for “No-Ice-Cream-Machine-Needed” Ice Cream (here’s a link).  THAT would be a great option for the ice cream portion.   To put this yummy simple dessert together, slice a big peach around the middle (the ‘equator’), pull the pit out, and put on a hot grill for 3-4 minutes. (Other options: either place face down on a hot stovetop grill pan or simply broil for a few minutes.)  When the peach halves get a little caramelized, place one (or two!) into a bowl. Top with a couple of tablespoons of granola, a scoop (or two!) of vanilla ice cream, and some additional granola scattered on top.  Get your spoon ready…the ice cream will begin to melt quickly! Enjoy!

2014-09-28 20.25.33

Your granola will keep well in the pantry in a glass jar with a lid.  I put a small scoop right into or attached to the jar for easy access to a scoop on the fly for my husband. Oh, and he really likes this best when I add a bag of mini chocolate chips (I just mix it in when the granola is cool enough to place in the jar). Just sayin’.

Granola

ingredients:
5 cup rolled oats*
3 cups nuts and seeds (almonds, walnuts, pistachios, pumpkin seeds, sesame seeds, sunflower seeds, etc.)** – give a quick chop to whole nuts
2 teaspoons spice (cinnamon, or cardamon, or pumpkin pie spice, etc.)
1+1/2 teaspoons sea salt
3/4 cup liquid sweetener (maple syrup, honey, agave nectar)
1/3 cup oil (coconut or canola)
1 teaspoon extract (almond or vanilla)
1+1/2 cups mixed dried fruit (apricots, golden raisins, banana chips, pineapple, papaya, etc.)

directions:

  • preheat the oven to 325
  • place parchment paper in a baking or sheet pan (with sides); use enough parchment paper to slightly extend to use as ‘handles’
  • warm the liquid ingredients for 20-30 seconds in the microwave
  • mix dry ingredients, spice, and salt together in a large bowl; stir well
  • pour the warm liquid ingredients over top and stir it all up ‘til all the oats are well coated
  • place the mixture onto the parchment lined pan; with slightly wet hands, press down gently into an even layer. this will help to make some ‘chunks’
  • bake for 15 minutes or so; remove pan from oven and add the dried fruit. stir to incorporate the fruit and so that everything is cooking evenly. try to pull the mixture from the outside edges to the middle, and the middle ‘stuff’ out to the edges of the pan.
  • return to oven and bake for another 15 minutes or so
  • remove pan, add any roasted nuts you were holding out and stir gently again; place back in oven for 15 minutes…or so
  • at this point, your granola quite possibly is done. the goal is not wet, slightly crunchy, and just beginning to turn golden brown. (y’know, like granola!) if done, let cool before popping a handful in your mouth. if not, 10-15 additional minutes should do it
  • let thoroughly cool before placing in glass storage jar (optional: toss in a bag of mini chocolate chips)

Makes 9-10 cups

*    be sure to use ‘old-fashioned, rolled’ oats not ‘quick-cooking oats! the latter will break down as the granola bakes. 🙁
**  IF you are using any nuts/seeds that are already roasted (like the sunflower seeds I used), DO NOT add them ‘til the last 10-15 minutes. Since they are already ‘roasted’ they will burn if added for the entire baking time

  ♥   ♥   ♥  

God loves you!  ♥  (Don’t ever forget that!)

♥  coleen

Oven Baked Encrusted Tilapia

Last week, Crystal shared her heart and encouraged us to find ways to prepare A Simple Healthy Meal at Home for our families.  She posted a wonderful recipe for Oven-Baked Chicken in that blog.  (Click the link to see her recipe.)  And she inspired me with an idea for something similar—Oven Baked Encrusted Tilapia.

Now while we all might enjoy a fried piece of fish or chicken…it isn’t very good for us!  Browsing through a few recipes online, I found that baking the fish or chicken versus frying it on the stovetop (or in the deep fryer!) will save, on average, 9-11 grams of fat per serving.  So, the choice is pretty simple, I’m thinking!  And this fits in perfectly with our healthy but oh-so-yummy POV!  You also could substitute a different white fish…cod, orange roughy, or even flounder.  Just remember the thinner the fillet, the shorter the baking time!  The fillets I prepared were actually called ‘loins’ and were about 1+1/2 – 2 inches thick; they took the whole 30 minutes.

This recipe would work out just fine with traditional wheat flour but since we have made the choice to eat gluten-free, I prepared it with almond flour. (You also could use a lesser amount of coconut flour.)  Coating the fish with these non-grain flours also ups the protein, too!  Also both Crystal and I used cooking spray…I have been using this coconut oil spray for quite some time now. I love how well it works!

Oven Baked Encrusted Tilapia

2014-09-03 19.18.14

ingredients:
1# tilapia fillets
1/2 cup almond flour
1/4 cup cornmeal
1/4 cup finely shredded cheese (Parmesan, Asiago)
1 teaspoon lemon pepper
1/2 teaspoon garlic salt
1 egg
1 tablespoon water
1 tablespoon dijon mustard
coconut oil cooking spray

directions:

  • preheat oven to 375
  • line a baking sheet w/parchment (not waxed) paper
  • in a medium-sized bowl, beat egg and water together, then stir in the mustard
  • on a large plate, mix together flour, cornmeal and seasonings
  • run each fillet individually through the egg wash and then lightly coat w/seasoned coating mixture; give a little shake and place on parchment paper-lined baking sheet
  • give each fillet a 2-3 second spray with cooking spray
  • bake for 15-30 minutes total (depending on the thickness of the fillets), flipping over halfway through and giving another quick mist with the cooking spray
  • bake ‘til lightly browned and easily flakes with a fork
  • sprinkle with a pinch of sea salt and a couple of turns of freshly ground pepper
  • serve with a lemon wedge

2014-09-03 19.13.01

♥   ♥   ♥   ♥   ♥

God loves you!  ♥  (Don’t ever forget that!)

  coleen

Peach-Raspberry Crumble

If you can get your hands on some late-season peaches…you really should try this recipe (or your version of it)! And I strongly suggest serving it to your loved ones warm with a scoop of vanilla ice cream…doesn’t have to be a huge scoop even! This is one of those sweet treats that is warm and cold, crunchy and mushy, sweet and not-so-sweet. I, myself am not a huge dessert eater. But this? …just delicious! Perfect for the last weekend of August.

This dish fits well into our healthy but oh-so-yummy POV since there is little added sugar, has a good amount of whole grains and nuts, full of fresh fruits, AND…a little bowl is very satisfying! Now it does have a fair amount of butter in it (about 1 tablespoon per average portion)…but I haven’t figured out how to reduce it without changing the quality of the crumbly goodness. I prepared this recipe using gluten free flour and coconut sugar…but this would come out just as well using traditional all-purpose flour and white/brown sugar; it is up to you. Enjoy (I hope you can find some gorgeous peaches!)!

Peach – Raspberry Crumble

2014-08-31 21.59.43

ingredients:
1+1/2 pounds ripe (yet firm) peaches
12 ounce package red raspberries
1 tablespoon coconut sugar
2 tablespoons ginger jam (or peach, apricot)
1 tablespoon lemon juice (fresh, if possible)
1/4 teaspoon ground cinnamon
1/4 teaspoon nutmeg (freshly ground, if possible)

6 tablespoons cold UNsalted butter
3/4 cup gluten-free oats
3/4 cup gluten free all-purpose flour blend
1 teaspoon lemon zest, finely grated
1/4 teaspoon ground cinnamon
1/4 teaspoon sea salt
1/8 teaspoon xanthan gum (**only if using gluten-free flour)
3-4 tablespoons sliced almonds

directions:

  • cut the cold butter into a small dice; return to refrigerator ‘til ready to use
  • preheat oven to 375
  • butter a 1+1/2 quart ceramic or glass baking dish
  • pit and slice the peaches (for a softer texture, cut a bit smaller)
  • put fruit into a large bowl, and add next 5 ingredients; stir gently together; set aside to get the juices flowing
  • in a separate bowl, whisk together the rest of the ingredients EXCEPT for the butter, and almonds
  • then add the cold butter to the flour-y mixture; toss to coat the butter w/flour. then use your fingertips to ‘cut’ the butter and flour mixture together ‘til the mixture is crumbly and looks like coarse meal
  • stir in the almonds
  • now pour the fruit and juice into the prepared baking dish
  • scatter the oat-flour crumbly mixture over the top of the fruit
  • place the baking dish onto a sheet pan (just in case the juiciness bubble over the sides!)
  • place in oven and bake for 35-45 minutes ‘til juices begin to bubble around the edges and the crumbs are beginning to brown (should they start to brown too early, just lay a piece of aluminum foil over the top)
  • remove from oven, and let set for 5 minutes (just enough time to grab some bowls, spoons, AND the ice cream)

♥   ♥   ♥   ♥   ♥

God loves you!  ♥  (Don’t ever forget that!)

♥  coleen

Pesto Pasta with Grilled Chicken

Look what someone who loves me gave me today?  Oh happy me!

2014-08-07 17.34.47

My daughter, Kassia, lovingly gifted me with a jar of her healthy but-oh-so-yummy pesto (and luscious balsamic reduction)!  This is precious stuff…what to make, what to make?  Eventually, I just decided to keep it simple: I took a couple of tablespoons to marinate chicken tenderloins, which we then grilled; and then topped off sauteed zucchini and onions with another couple of tablespoons and combined it all together with some gluten-free penne pasta. So yummy!

2014-08-07 19.31.01

Kassia graciously is sharing her pesto recipe with us today…. This recipe is vegan and dairy-free (along with being intrinsically gluten free, soy free). Her secret ingredient? “Nutritional yeast.” Yup! Don’t knock it ‘til you try it! (Oh, speaking of trying it…dust your freshly popped popcorn with it!) Here’s a fun link loaded with lots of good info about nutritional yeast, or noosh, and some ideas where to purchase it. Enjoy!

Pesto

ingredients:
1/4 cup walnuts2014-08-10 17.47.41
1/2-1 tablespoon finely minced garlic (she uses jarred garlic, like her momma!)
2 cups fresh baby spinach
1 cup fresh basil (leaves only!)
1 tablespoon nutritional yeast flakes
1 tablespoon lemon juice
1/4 cup+/- extra virgin olive oil
sea salt, freshly ground black pepper (to taste)

directions:

  • in a food processor, process the walnuts and garlic until minced
  • add the spinach, basil, nutritional yeast and lemon juice; process by pulsing until spinach is finely ground
  • with food processor running, s-l-o-w-l-y pour the oil down the food chute ‘til all is well incorporated
  • season with salt and pepper, to taste
  • this will make approximately 3/4 cup (about 12 tablespoons) of pesto. I only used 5 tablespoons in the entire dish pictured above which made 4 generous servings!

♥   ♥   ♥   ♥   ♥

God loves you!  ♥  (Please don’t ever forget that!)

♥  coleen


Fruit Parfaits (to go!)

Here in our little village, we have a community park which fronts on the river which runs through the village.  Twice each week during the summer season, free concerts are held in the bandshell!  This week the Schenectady Pipe Band was scheduled to play!  Oh, I just love bagpipe&drums!!!  (How about you?)  So Robert asked if I would like to go…ummm, let me think…YES!

I thought that he would love it if I made some kind of sweet treat to bring along and enjoy out under the stars listening to stirring bagpipes!  Originally I was planning on making some cookies (his favs!) but we had an abundance of gorgeous berries this week. So then I got ready to make a berry crisp…all yummy warm berry sweetness with a healthy topping of cinnamon-y crunchiness!  But THEN I was talking with my daughter, kassia, about the trendiness of mason jars filled with salads, and suppers…and desserts! My mind was made up—Fruit and Cake Parfaits!

2014-07-31 18.51.46

These were super simple to put together.  I prepared all the components earlier in the day: an easy-peasy yellow sheet cake (gluten free, of course), a berry compote, and homemade whipped cream.  After supper, all that was needed was to layer it all up into mason jars, cap ‘em off, and put them into my picnic basket!  I hope you give these a try!  They would be a great dessert to bring along to a bbq, or picnic…or how about taking them to the drive-in?  Enjoy!

Fruit and Cake Parfaits…to go!

components:
mason (or Ball) canning jars2014-08-03 21.13.26
yellow cake or angel food cake
fresh fruit
whipped cream

note: quantities are at your discretion! For our parfaits, I used a ‘manly’ quart-size jar and a pint-size jar for me. I would suggest “wide mouth” jars, too (much easier to spoon out the yumminess!).

cake component:

  • I simply baked up a plain yellow cake (use a mix…go right ahead!)
  • when thoroughly cooled, cut up into small cubes

fruit component:2014-07-31 14.55.43

  • we had strawberries, blueberries, raspberries, blackberries, and cut up peaches
  • sprinkle sugar (I used coconut sugar) over the fruit and gently combine
  • proportions: 1 tablespoon sugar to 1 cup fruit (I used 3 cups of fruit)
  • set aside for a minimum of 30 minutes (or up to 2-3 hours) to allow the sugar to draw out the moisture from the fruit creating a syrup

whipped cream component:

  • please indulge and make your own whipped cream
  • I used a half-pint container of heavy cream, 1/2 teaspoon of almond extract, and 2 teaspoons of confectioners (10X) sugar

to assemble:
in this order—cake cubes, macerated fruit, whipped cream—fill up your jars; done!  oh…if taking along with you…don’t forget the spoons!!!  Enjoy!

♥   ♥   ♥   ♥   ♥

God loves you!  ♥  (Please don’t ever forget that!)

♥  coleen


Lime Shrimp Quesadillas

So…I’ve told you before about my husband’s new-found love for Tex-Mex foods. The other day he specifically asked me to make quesadillas. “Why, sure I will!”  😉 But I was a bit stymied how to ‘lighten them up’ from being cheese bombs in our tummies…AND fit them here into our healthy but oh-so-yummy POV.  But then I realized it was simple: ease up on the cheese, and add lots of veggies!  That was easy!

Oh, there’s just one not-so-easy step—the flipping!  Here’s what I did…but if you have a better method…bring it on!  (Please!)  When the bottom tortilla has browned off just a bit (3 minutes or so), slide it carefully out of the pan onto a dinner plate. Then, invert ANOTHER dinner plate on top, hold them together now, flip over, remove the top plate and slide the tortilla back into the pan with the browned side facing up now!  If I can do it, then I have no doubt that you, too, can do it!  Enjoy!

2014-07-20 19.09.42

Lime Shrimp Quesadillas

(makes 2 or 3 finished quesadillas; serves 2-3)

Shrimp
ingredients:
12 oz medium to large raw shrimp

lime marinade:2014-07-20 18.45.29
zest of 1/2 large lime
1/2 teaspoon dried oregano
1/2 teaspoon sea salt
1/2 teaspoon freshly ground pepper
2 tablespoons olive oil
juice of 1/2 large lime
2 teaspoons minced garlic (I use jarred)

directions:

  •  in a medium glass bowl, whisk together marinade ingredients
  • add peeled shrimp; set aside for 15 minutes
  • thread onto 2-3 wooden skewers
  • grill over indirect heat for 2-3 minutes per side; don’t overcook!
  • remove from skewers; set aside

Veggies
ingredients:
2 tablespoons vegetable oil
1 sweet onion, sliced into halfmoons
1 red bell pepper, sliced
1 yellow bell pepper, sliced
1 teaspoon salt
1 teaspoon ground cumin
1 teaspoon chili powder

directions:

  • saute veggies in olive oil over medium high heat for 7-8 minutes, allowing to brown just a bit
  • remove from heat; set aside

Assembly
12 oz +/- monterey jack cheese, shredded (or similar)
4-6 flour tortillas (I used gluten free)
1 tablespoon butter
directions:

  • in a large nonstick saute pan, melt 1/2 tablespoon butter over low heat; raise temp to medium-high when prepared to start cooking2014-07-20 18.51.06
  • place 1 tortilla shell in bottom of pan
  • layer 2-3 oz shredded cheese, some of the sauteed veggies and some of the shrimp (the amount you use will depend on whether you are making 2 or 3 completed quesadillas)
  • top with a second tortilla shell; pressing down so everything will begin to adhere together
  • allow bottom tortilla to slightly brown; then flip so other side can brown also
  • slide out onto a plate, cut into quarters
  • (if making more than 2 or 3, keep warm in oven)

serve with guacamole, sour cream, mango dipping sauce, salsa…or ? (I would love to hear your ideas, please!)

♥   ♥   ♥   ♥   ♥

God loves you!  ♥  (Please don’t ever forget that!)

♥  coleen


Chicken Enchiladas (Gluten-free)

Who loves Tex-Mex food?  Raise your hand!  Me, too!  And the crazy thing—my husband, Robert, has said for years now, ’Um, no thanks!’  Somehow he got it in his head that all Mexican, Tex-Mex, Cal-Mex food had to be spicy.  (And Robert does not enjoy SPICY!)  So, recently I have been preparing an occasional dish to try and introduce him to one of my most favorite cuisines…successfully, I might add!  Olé!

Recently, Aldi (Do you shop there?  You should!)  introduced a new line of gluten-free products…really quite good, very good quality!  One of the items is a ‘flour’ tortilla.  They are amazing…just like a really good wheat flour tortilla that I remember (soft, pliable, thin) from before we went gluten free.  So I went back and bought not one, not two, but three packages…oh the options!  These Chicken Enchiladas were my first choice!  I prepared them with a tomatillo salsa (oh, yum!) but certainly they can be made with traditional salsa equally well.   (And, please, make this recipe using traditional ingredients (NOT gluten-free) as well!  Enjoy!

2014-05-22 20.25.09

Chicken Enchiladas

ingredients:
1/2 red pepper, sliced thin
1 medium sweet onion, sliced into halfmoons
2 tablespoons olive oil
sea salt, freshly ground pepper
2 tablespoons (divided) chipotle chili powder
3 cups cooked chicken, shredded
2+ cups enchilada sauce  **gf recipe below
1 cup frozen corn (defrosted)
1 cup tomatillo salsa (or traditional salsa)
1 can (15 ounces) black beans, rinsed and drained
1 cup sour cream
1 cup shredded Mexican-blend cheese

directions:

  • preheat oven to 350
  • lightly oil the bottom of a large (9 x 13) baking pan, and pour in ½ cup of the enchilada sauce
  • saute the veggies with the olive oil for 7 or 8 minutes ‘til softened.  season with salt, pepper, and 1 tablespoon of the chipotle chili powder.  set aside
  • in a large mixing bowl, combine the shredded chicken, corn, black beans, sour cream, 1 tablespoon chili powder, ½ cup of the enchilada sauce, ½ cup of the salsa, ½ cup of the shredded cheese; mix well
  • pour 1 cup of the enchilada sauce into a shallow saute pan (or a bowl)
  • now, set up a little production line with the baking pan, the chicken mixture, the pan with enchilada sauce, and an empty plate…this gets messy; you’ll thank me for it!  😉
  • take 1 tortilla, run it through the enchilada sauce to coat; place it on the plate.  take 1 good handful (1/3-1/2 cup) of the chicken mixture and spread it down the center of the tortilla; roll the tortilla up; place in baking pan with seam-side down.  repeat ‘til all tortillas are filled. (*tip: you might want to trim the edges of the filled tortillas to fit nicely into the baking pan)
  • pour the sauteed veggies across the top of the filled tortillas
  • (if there is any enchilada sauce left, pour that over the top…don’t want to waste that!)
  • sprinkle the remaining shredded cheese over the top, too
  • bake for 15-20 minutes ‘til bubbly and cheese is melted
  • serve with sour cream, salsa, and guacamole

** here are two really good, homemade, gluten-free, chemical and additive-free recipes for enchilada sauce.  also, Nicole from GFOAS has a nice recipe for homemade ‘flour’ tortillas!

http://glutenfreeonashoestring.com/enchiladas-saucy-smokin/
http://glutenfreehomemaker.com/enchilada-sauce/


♥  ♥    ♥  ♥

God loves you!  ♥  (Don’t ever forget that!)

♥  coleen