November 5, 2024

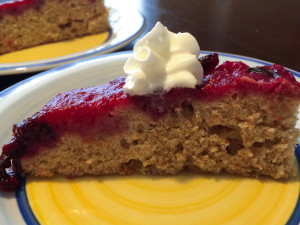
Plum and Basil Upside-Down Cake

Plum Basil Upside Down Cake

I  hadn’t really planned on baking a cake today.  But every Friday, I need to have a post up for you fine ladies, and sometimes…{sigh}.  The kids are acting crazy, work is busy, the husband has to work late—you know how it is.  So, you make all the family favorites for dinner because it’s easy and you don’t have to think about it.

This week, however, I was really stumped.  I looked in my fridge:  I had a LOT of plums to deal with that were edging toward soft.  I also have a basil plant in my front yard that I’m in love with!   I am plucking off leaves daily and trying to find new uses for it.  Well, I did a Google search for “plums and basil”…and guess what came up?  This Plum and Basil Upside-Down Cake!

It was easy to make and, while not instantaneous to whip up, I could still do it in steps—in between washing dishes, or folding some laundry.   You don’t need the basil in this recipe, but it adds a lovely complexity to the flavor and elevates it from being just another sweet cake.  If you don’t have plums, use nectarines or peaches – both taste great with basil.

Plum and Basil Upside-Down Cake

(click here for the original recipe)

Ingredients:

  • 1/4 cup plus 2 teaspoons butter, divided use
  • 1 pound large plums – any kind, or peaches or nectarines – pitted and quartered (about 6 plums)
  • 1 1/4 cups sugar, divided use
  • 1/2 cup packed fresh basil leaves, roughly chopped
  • 1 1/2 cups whole wheat flour (or use regular flour)
  • 1 1/2 teaspoons baking powder
  • 1/4 teaspoon salt
  • 2 eggs
  • 3/4 cup buttermilk (I used plain yogurt instead)

Directions:

  1. Melt 2 teaspoons butter in a large nonstick skillet over medium heat. Add plums, and cook for 3 minutes.  Add 1/2 cup sugar, basil, and a pinch of salt.  Cook for 10 minutes or until plums are tender, stirring frequently.  Remove plums from pan using a slotted spoon.  Bring cooking liquid to a boil.  Cook 5 minutes or until liquid is very thick, like jam.  Strain liquid through a sieve to remove basil.
  2. While the liquid reduces, arrange plums in the bottom of a 9-inch cake pan (I used square, but the author recommends round) coated with cooking spray.  Pour the liquid over the plums.  Let cool.  (I actually reserved about 3 tablespoons of the liquid for another use – read on!)
  3. Preheat oven to 350F*.  In a medium bowl, whisk together the flour, baking powder, and salt.  In a separate bowl, beat the remaining 1/4 cup butter and remaining 3/4 cup sugar with an electric mixer until fluffy.  Add one egg at a time, beating well. Add flour and buttermilk (or yogurt) alternately to sugar blend, beginning and ending with flour.  Pour batter over plums, spreading evenly.
  4. Bake for about 50 minutes, or until a wooden toothpick comes out clean.  Let cool for 10 minutes.  Run a knife around the edge of the cake.  Invert onto a plate.  Cool and serve plain, or with whipped cream, or even vanilla ice cream!

I saved a bit of the plum syrup.  My husband got a promotion today (Praise the Lord!), and I’m going to surprise him with a glass of sparkling wine with a teaspoon of the plum syrup stirred in for a champagne cocktail!  If you don’t like champagne, I bet this plum syrup would be delicious stirred into sparkling water or iced tea too.

Explore, experiment, enjoy! — Dana


To view even more of Dana’s unique recipe, you can visit her at Frugal Girlmet
At Home with GCH: Strawberry Shortcake (Gluten-Free)


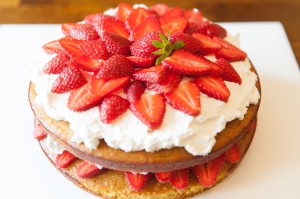
Strawberry Shortcake Whole

Strawberry Shortcake is one of those comfort food recipes that everyone’s Mom or Grandmom makes a version of.  When Spring arrives and berries finally come to the store, what better way to dress up a plain old cake than with sweet, juicy fruit?  I wanted to make a healthier version, so I adapted a recipe for a coconut flour cake, spruced up with orange zest, from Nourishing Days.  Add whipped cream and a basket of berries and you’re in business!


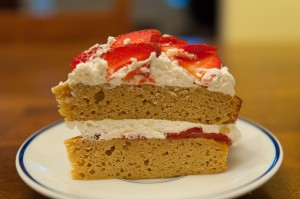
Strawberry Shortcake Cut
Strawberry Shortcake (Gluten-Free)

Ingredients:

  • 12 eggs
  • 1/2 cup coconut oil (or butter), softened
  • 1/2 cup coconut milk (or regular milk)
  • 1/4 cup honey (or more, if you like)
  • 2 teaspoons vanilla extract
  • 1 teaspoon grated orange zest
  • 2 tablespoon orange juice
  • 1 cup coconut flour
  • 1 teaspoon baking powder
  • 1 teaspoon salt
  • 1 cup strawberries, sliced thin
  • 1 pint heavy whipping cream
  • 1 teaspoon vanilla extract
  • optional – 1 or 2 teaspoons sugar (I didn’t use them, since my berries were really sweet.  If your strawberries aren’t as sweet as you’d like, add the sugar to the whipping cream)

Directions:

  1. Preheat the oven to 350*F.  Grease two 8-inch round cake pans, and then cut a circle of parchment paper for the bottom of each pan, and grease that too.  (You can do this without parchment paper, but you will need to be really liberal with the coconut oil / butter / cooking spray on the bottom of the pan.  The cake stuck the first time I made it, so the next time I used parchment paper, and it was perfect!)
  2. In a very large bowl, using a stand mixer or a hand mixer, beat the eggs until frothy.  Beat in the softened coconut oil and milk, blending well.  Mix in the honey, vanilla, orange zest and orange juice.  Beat until foamy again.
  3. In a small bowl, stir together the coconut flour, baking powder and salt.  Then, a little at a time, blend the flour mixture into the egg mixture.  Mix well, making sure there are no lumps.
  4. Divide the batter between the two prepared pans and bake for 35-40 minutes.  When a toothpick comes out dry, remove from the oven and cool for ten minutes.  Remove from pans, and finish cooling on a rack.
  5. While the cake is cooling, place the beaters of your hand mixer and a metal mixing bowl in the freezer for half an hour.  Slice the strawberries and put back in the fridge until ready to use.
  6. When the beaters and bowl are very cold, beat the whipping cream with the vanilla (and optional sugar) until stiff peaks form.  To decorate:  spread a very thin layer of whipped cream on the top of one cake.  Make concentric circles of strawberry slices (use half the strawberries, saving the other half for the top), then cover with a thick layer of whipped cream.  Place the other cake on top of this, cover with the rest of the whipped cream and the rest of the strawberries.  Refrigerate until ready to serve.

This is not a very sweet cake, since it relies on the berries for sweetness.  If your berries are not sweet enough for your taste, you can add more honey to the cake, and the optional sugar to the whipped cream.

Explore, experiment, enjoy! — Dana


To view even more of Dana’s unique recipe, you can visit her at Frugal Girlmet!


At Home With GCH: Cinnamon Bun Cake

I don’t know about you, but I love the smell of cinnamon ANYTHING wafting through my house! So when I found a recipe for a cinnamon roll cake, I knew I had to take it and make it my own!  I hope you enjoy this recipe for Cinnamon Bun Cake as much as my family and I did!


Cinnamon Bun Cake

Cake:

3 cups flour

1/4 teaspoon salt

1 cup sugar

4 teaspoon baking powder

1.5 cups milk

2 eggs

2 teaspoon vanilla

.5 cup butter (1 stick), melted

Topping:

1 cup (2 sticks) butter, softened

1 cup brown sugar

3 tablespoons flour

1 tablespoons cinnamon

Glaze:

2 cups powdered sugar

5 tablespoons milk

1 teaspoon vanilla


Directions:

Preheat oven to 350 degrees. Spray a 9×13 baking pan with cooking spray, or grease and flour it. Set aside.

For Cake: In your mixer, add the flour, salt, sugar, baking powder, milk, eggs, and vanilla. When it is combined completely, slowly stir in the melted butter. Pour into the prepared pan.

For Topping: In a large bowl mix the butter, brown sugar, flour and cinnamon together until well combined and creamy. Drop spoonfuls over the batter and use a knife to marble/swirl through the cake.

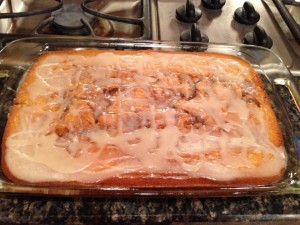
566435_10151714303108858_2139789690_n

Bake at 350 for 35-40 minutes or when a toothpick inserted near the center comes out clean.


FOR GLAZE: In a small bowl, mix the powdered sugar, milk and vanilla together with a whisk. Drizzle evenly over the cake. The glaze can be drizzled when the cake is warm or cooled.  I prefer it when it is cool, but it will work either way.  Serve warm or at room temperature.

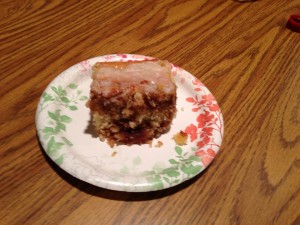
711082_10151714303003858_857873375_n

Enjoy!!

804680_10151714438033858_1929815908_n