November 24, 2024

Crockpot Curry Chicken and Curry Chicken Stew

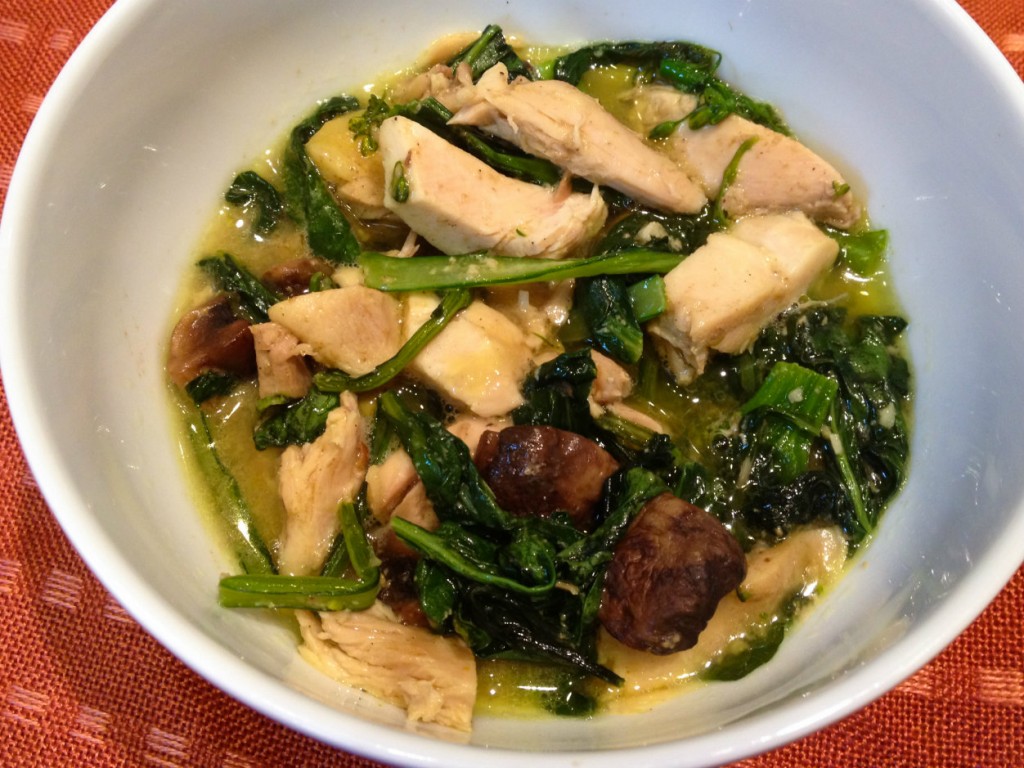
Curry Chicken Stew resize

Two for the price of one!  That’s what you get when you start this recipe in the crockpot.  It’s not very glamorous, but oh boy! does it smell and taste divine!  A simple list of ingredients  and a crockpot are all you need to make two delicious meals: Crockpot Curry Chicken and Curry Chicken Stew!

First you need a can of coconut milk or coconut cream.  It needs to be a can, because the coconut milk “beverage” they put in cartons is all watery, and you need the high fat content of the canned stuff.  Trader Joe’s has both canned coconut milk and coconut cream, or you can try an Asian market or online.  Next thing you need is curry.  You can use curry paste; I just used curry powder and it was lovely.  You’ll need an 8-ounce package of mushrooms, any kind – I used regular button mushrooms, but shiitakes or creminis would be nice too, and give it a stronger flavor.  And last is this beauty:

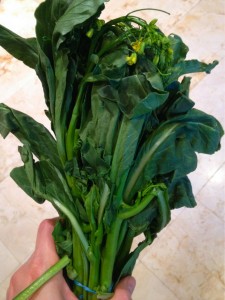
Chinese Broccoli resize

I buy it at the farmer’s market from a Vietnamese lady who tells me it’s called “Chinese broccoli”.  A little online research shows its real name is kai lan.  Its leaves are like spinach, and its cooked stems have the consistency of asparagus.  If you can’t find it, use spinach instead…although the Chinese broccoli has a stronger, more bitter flavor.

I made this with whole chicken legs – skin, bones and all – but I think next time I’ll try it with just boneless, skinless thighs.  Chicken skin in the crockpot is not a nice thing – we actually peeled it off before we ate the Curry Chicken the first night because it just seemed kind of rubbery.  But I think the skin and bones do add to the stock for the stew the next day, so it’s up to you.  Either way, you get two healthy, delicious meals out of one crockpot – you can’t beat that!

Crockpot Curry Chicken

Ingredients:

  • 3 pounds whole chicken legs
  • 1 can of coconut cream, or use coconut milk (not low-fat)
  • 3 tablespoons curry powder or curry paste of your choice
  • juice of 1 lemon or lime
  • 1 tablespoon salt

Directions:

  1. In a large crockpot, set the time for 8 hours on low or 4-6 on high.  Put the chicken legs on the bottom.
  2. Mix together the coconut cream, curry, lemon juice and salt.  Pour over the chicken and stir to combine.
  3. Cook until a thermometer reads 180*F.  Remove chicken legs from the pot and cover them with foil.  Pour the coconut broth into a large pan and simmer for about 15 minutes.  It will reduce a little.  Serve chicken legs with coconut broth.

Now, at this point, I had 2 very large legs leftover and about a cup of coconut broth.  I put them together in a Tupperware container.  Then the next day, I made…

Curry Chicken Stew

Ingredients:

  • 1 tablespoon butter, coconut oil or olive oil
  • 8 ounces mushrooms, quartered
  • 1 pound Chinese broccoli, cut into 2-inch pieces  (or use fresh spinach)
  • 2 large cooked chicken legs (or use 1 pound of chicken thighs)
  • leftover coconut broth – as much as you have
  • optional chicken broth
  • optional jasmine rice to serve

Directions:

  1. In a large pan, saute the mushrooms in 1 tablespoon butter, coconut oil, or olive oil.  Stir, and after five minutes, add the Chinese broccoli and cover.
  2. While the mushrooms are cooking, prepare the chicken:  peel off the skin and any subcutaneous fat you find from the cooked chicken legs.  Remove the meat from the bones and roughly chop.
  3. Add the chopped chicken and remaining coconut broth to the mushrooms and Chinese broccoli.  If you want it to be soupier, add some chicken broth.  Cook until the chicken is hot, about ten minutes.

This would be lovely with some steamed jasmine rice!  I ate this for lunch, and liked it so much I ate it again for breakfast.


Explore, experiment, enjoy! — Dana


To view even more of Dana’s unique recipes, you can visit her at Frugal Girlmet!
Shrimp with Corn and Black Bean Salad

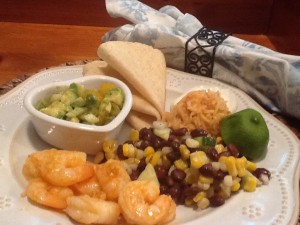
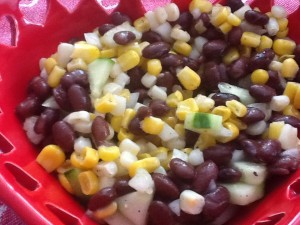
So, remember last week I shared my husband’s epiphany in realizing he really does like Tex-Mex, Cal-Mex, Mexican type foods?  Ok…n-o-w he is requesting it as part of our weekly menu!   The following is an easy, quick-to-make weekday supper that is healthy but oh-so-yummy!  First dish is a Black Bean and Corn Salad along with some delicious Tex-Mex influenced shrimp.  I am definitely going to keep this in the summertime meal rotation…light, refreshing, and won’t heat up the kitchen!

Black Bean and Corn Salad

2014-06-01 15.44.41

ingredients:
2 cups corn (fresh or frozen)
1/2 cup cucumber, peeled, small diced
1 small jalapeno, seeded and finely diced (optional)
1 (15 ounce) can black beans, drained and rinsed
1/2 cup sweet onion, finely diced
juice of 1/2 large lime
1 teaspoon olive oil
sea salt and freshly ground pepper, to taste

salad directions:
combine all ingredients; pour into a storage bag or container and refrigerate for at least 30 minutes for flavors to combine.

Tex-Mex Shrimp

marinade ingredients:
juice of 1/2 large lime
1 tablespoon olive oil
1 tablespoon chipotle chili powder
1 heaping tablespoon chopped garlic
1 teaspoon honey
pinch of cayenne pepper (optional)
sea salt to taste (I used a lemon-pepper-salt combo)
1/2 # medium to large shrimp, tails removed

marinade directions:

  • simply whisk ingredients together in a medium-sized glass bowl
  • add in shrimp and refrigerate for 30 minutes.

To finalize your dish

  • heat a saute pan over medium-high heat
  • pour shrimp and some of the marinade into the pan
  • cook for 1-2 minutes ‘til starting to turn pink
  • immediately flip over and cook other side for additional 2 minutes
  • remove from heat; do not over cook

2014-06-01 19.45.41

To serve:
I warmed up a couple of gluten free flour tortillas, and placed them (folded up) on each plate with a portion of the Black Bean and Corn Salad and some of the marinated shrimp. On the side, we also had some Spanish rice, fresh guacamole, and a dollop of sour cream.

This would also be delish (and low-carb) served with lettuce leaves to spoon the shrimp and salad into and roll up. I would love to hear of some of your ideas for serving and side dishes!


♥   ♥   ♥   ♥   ♥

God loves you!  ♥  (Don’t ever forget that!)

♥  coleen

Grilled Caesar Salad


Grilled Caesar Salad resize

Before we go any further:  Yes, you grill the lettuce.  Say what?!  I first encountered this recipe at an Italian restaurant in our neighborhood a few years back.  It was a revelation—you can grill lettuce! And  instead of making it nasty and squishy, just a tiny bit of char adds so much flavor and texture as to change the whole dish!  Then I saw the idea again in a magazine last week and, that was it, I had to try it at home.  (Okay – I made my husband do the actual grilling.  But I supervised, I promise!)

The dressing comes together in a snap in the food processor (or you can do it old-school in a wooden salad bowl with a fork, but I find it is hard on my forearms!)  The only ingredient you may not have is anchovy paste.  It’s pretty cheap and lasts forever in your fridge, and it adds that “umami” flavor you can’t get anywhere else.  It’s also great in spaghetti sauce, if you’re worried you won’t make a lot of Caesar salad.  This dressing also calls for a raw egg yolk.  I would highly recommend buying the highest quality eggs you can find – check your local farmer’s market – or at least getting organic, free-range, or both.  (If you are immunosuppressed you could substitute a spoonful of store-bought mayonnaise, but it’s just not the same.)  Also, you’ll notice there are no croutons on my plate.  We almost never eat bread, but if croutons are your thing, go ahead and pile them on!

This salad was a side dish to a dinner of grilled steaks and grilled veggies.  Feel free to chop up some grilled chicken and make it a whole meal!  For a side dish, plan on one half of a head of lettuce per person.  If you are making it the main dish, serve a whole head of lettuce per person.  Curious?  Let’s go!

Grilled Caesar Salad

Ingredients:

  • 2 cloves garlic, peeled
  • 1 teaspoon Dijon mustard
  • 1/2 teaspoon Worcestershire sauce
  • 1 egg yolk
  • 1 teaspoon anchovy paste
  • juice of one lemon
  • 1/4 – 1/3 cup olive oil
  • 1 head romaine lettuce
  • croutons and grated parmesan cheese to serve

Directions:

  1. Prepare the dressing:  In a food processor, blend together the garlic, mustard, Worcestershire sauce, egg yolk, anchovy paste,  and lemon juice.  Blend in 1/4 cup of oil.  Taste to see if you like the consistency.  If you want it more diluted, add more oil.  Refrigerate until ready to serve.
  2. Prepare the lettuce:  Slice it vertically down through the core.  You have two long halves now.  Wipe with a dry paper towel.  The lettuce needs to be completely dry or else it will stick and wilt.  No washing it, no oiling it!  Place the lettuce on the grill, cut side down, for 2 minutes without moving it.  With tongs, take it off the grill and lay it grilled-side up on a plate.  Don’t cover it or it will get soggy.  Drizzle with dressing, and add croutons or grated cheese to serve.  Eat it now!

Explore, experiment, enjoy! — Dana


To view even more of Dana’s unique recipes, you can visit her at Frugal Girlmet!
Creamy Butternut Casserole

Yes, yes…that does say ‘butternut squash.’ I know, I know…a fall vegetable. But please indulge me! You know my love for butternut…and they had some beauties at the grocery store…and so I just HAD to buy just one more! And then I remembered that I had found a casserole recipe in an older (1994) little recipe book that I came across awhile back. The following has been adapted from the original.

This makes for a great meatless meal! Or perhaps you could cook up some chops or chicken breast to serve alongside for the meat-eaters. This casserole fits in so well with our healthy but oh-so-yummy POV, too! And, while butternut squash is a bit more carb-heavy than some other veggies, balanced out with the fiber and protein contained in it, makes for a great option for those of us keeping our carbs in check. Here is some nutritional info.  Oh!  And this would be an excellent use for Dana’s recipe for Homemade Ricotta!

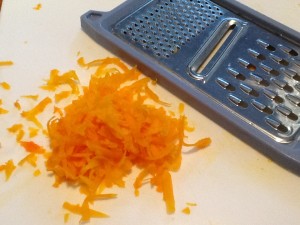
I would strongly suggest using a food processor to shred this much butternut…or you could work on your upper arm muscles!  I did shred a bit using the largest holes on my handheld grater; so it does work!

2014-05-18 19.23.00

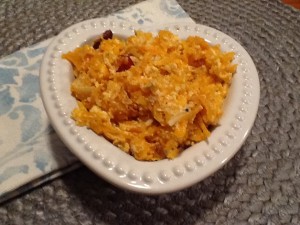
This is a dish with a lot of texture…this is NOT your gramma’s pureed butternut squash casserole traditionally served at Thanksgiving dinner! Try it, I do think that you will thoroughly enjoy it!

And, buh-bye, butternut squash…see you in the Fall!

Creamy Butternut Casserole

2014-05-18 22.16.44

(makes approximately 10 side dish servings)

ingredients:
5 cups peeled and shredded butternut squash
juice of 2 lemons, approximately 1/4 cup *see tip
1/2 cup golden raisins
1/2 cup craisins
1 large mango, cut into small cubes
1 (15 ounce) container ricotta cheese
2 medium eggs
1 (5 ounce) container plain Greek yogurt (or sour cream)
1 teaspoon ground cinnamon2014-05-18 19.43.55
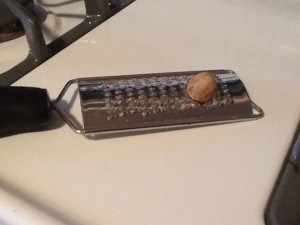
1/8 teaspoon ground nutmeg (fresh is best!)
1/4 teaspoon ground cardamom (optional)
LOTS of kosher salt and freshly ground pepper (I used lemon pepper)
1/2 cup shredded flavorful cheese (I used provolone)

directions:

  • preheat oven to 375
  • lightly grease an 11 inch x 7 inch (2 quart size) baking dish
  • in a large bowl, toss shredded squash with lemon juice. put half in the bottom of the baking dish
  • sprinkle the fruits over the top of the shredded butternut
  • in a separate bowl, lightly beat the eggs and then combine with the ricotta, yogurt, spices and a generous amount of salt and pepper (this is a dish that requires seasoning!)
  • spread the ricotta mixture over the top of the shredded squash in the baking dish
  • add the remaining squash, spreading evenly over the dish
  • cover TIGHTLY with foil (this will steam the butternut)
  • bake at 375° for 30 minutes
  • remove from oven, stir thoroughly, recover and return to oven for 15 minutes
  • remove foil and sprinkle the top with the shredded cheese (if you are using); bake for an additional 10 minutes
  • allow to sit for 5 minutes before serving

*tip: to get the most juice out of a lemon, heat in microwave for 15 seconds on 50% power. Then place on your countertop and roll back and forth ‘til it gets a little ‘squishy’. Cut in half (keep all the juice!) and squeeze into a measuring cup.

♥  ♥  ♥  ♥  ♥

God loves you!  ♥  (Don’t ever forget that!)

♥  coleen

Three Mistakes to Avoid in Your Exercise and Eating Program

Avoid
Think back with me for a minute…Did you decide at the beginning of the year to start exercising again and eating better? Maybe you bought the new socks, shoes, workout clothes… purchased all of the food and ingredients for the diet which you heard gets results?  If so, here is my question: Did you stick with it or did you make one of the three mistakes that need to be avoided in an Exercise and Eating Program to be successful?

Over the past 20 years in the fitness industry, I have seen so many who start out with good intentions to exercise and eat healthy, but quickly throw in the towel when it seems to be too much. If that sounds familiar, have you ever felt:

  • Overwhelmed because it feels impossible to work for your schedule?
  • Frustrated because you cannot maintain a healthy weight when things get too busy?
  • A lack of confidence in making the right food choices because you follow a prescribed “diet”?
  • Unclear of HOW to take the knowledge you have and actually do it?
  • A lack of peace and balance because this one area of your life is affecting so many other areas?

If you ever felt that way, I would like to share three mistakes to avoid which can lead to a consistent program and give you results.  This week, we will focus on:

Setting Unrealistic Goals and Expectations

It is too much of a shock on your body and lifestyle to go from no exercise to attempting to exercise 5-7 days a week; nor is it realistic to try and change everything in diet.

Before writing an exercise plan for my clients, we look at their schedule to assess what type, intensity, and duration would be best for them to meet their fitness goals as well as accommodate their lifestyle.  Do you evaluate your goals and plan to assess if they are realistic and doable for your schedule as opposed to setting out to exercise with no rhyme or reason?  For example, you may have been able to work out at the gym every day at one time in your life, but now it is more realistic to exercise at home 3 days a week.  With the appropriate type and intensity, you can still get results.

Instead of trying to eliminate everything you think is unhealthy from your diet all at one time, consider making minor changes that are doable and will build your confidence to continue.  Small changes may look like:

  • adding 2 servings of fruits and vegetables a day,
  • preparing a healthy lunch to take to work instead of eating out,
  • cutting out just one unhealthy choice

Be realistic and avoid this mistake in your exercise and eating program by  setting realistic expectations that fit into your schedule.  You will see that you can have  CONTINUOUS success.

This week, I challenge to you think about how you can set realistic expectations for yourself.  Next week, I will share the 2nd mistake to avoid to have a consistent program.

In Good Health,
Crystal

Thai Tea with Coconut Cream Condensed Milk – Vegan

2014-05-11 19.54.27

Thai food fans…what beverage do you indulge in when you go out to enjoy a meal at your favorite Thai restaurant? For me, it is a tall Thai iced tea!  Yum!  But this truly is a decadent indulgence, for sure.  Now the ‘tea’ part is usually not the problem…it is the addition of the creamy, very sweet ‘milk-y’ portion that is of concern.

So, when my daughter, Kassia, and I were planning our Mother’s Day meal, we decided NOT to cook but to get Thai takeout… some sushi, some pineapple fried rice, a couple of (rice) noodle-based dishes, and some curry.  Delish!  But we thought that we would make the dessert, soup, and beverages to accompany the restaurant-prepared food.

She chose a recipe for a black rice (rice) pudding topped with toasted coconut flakes and homemade coconut milk whipped topping. I was given responsibility for the soup (I made Tom Kha Ga–a coconut milk-based soup with chicken and mushrooms fantastically flavored with lemongrass, lime, and ginger; Dana has a wonderful recipe here; check it out!) and the  beverages. We put out a selection of flavored seltzers, some mango 100% juice for the grandkids, a nice bottle of Reisling, and a big pitcher of Thai iced tea and (to keep to our choices to eat healthier) a small bowl of homemade condensed milk made with coconut milk and agave nectar. This fit right into our healthy but oh-so-yummy point of view so I thought that I would share it with you! Enjoy!

Coconut Condensed Milk

Ingredients:
(1) 14 ounce can full-fat coconut milk2014-05-12 02.26.01
1/4 cup coconut sugar (or sweetener* of your choice)

Directions:

  • Pour the coconut milk into a small, heavy-bottomed stainless saucepan, and heat over medium-high heat ‘til it comes to a boil, about 5 minutes
  • Whisk in the sweetener of your choice ‘til thoroughly blended
  • Bring back to a boil, and immediately reduce heat to medium-low maintaining a constant simmer; whisk every 5 minutes or so
  • Continue to simmer for 35-45 minutes, ‘til the content is reduced by about half

To serve, fill a tall glass with ice cubes. Fill almost up with Thai tea, and then add 1-2 tablespoons of your homemade, healthier condensed milk.

You can, of course, use whatever spicy tea that is your favorite. To replicate that delicious beverage served in most Thai restaurants, use traditional Thai tea which produces a vibrant orange-colored, full flavored tea.

* I prefer using coconut sugar or honey as my natural sweetener, but agave nectar, pure maple syrup, coconut nectar, or stevia should work just fine. Adjust sweetness to taste; enjoy!

♥  ♥  ♥  ♥  ♥

God loves you!    (Don’t ever forget that!)

♥  coleen

Never Give Up!

never Give Up

I blew it…again.  I am a failure.  Why should I even bother?  I will never get it.

Any of these sound familiar? I’ve been there, experienced and felt it. What I am learning and continue to learn is that “blowing it” gives us an opportunity to re-evaluate how to do it next time.

For example: It’s Saturday night, a group of friends call to go out for Mexican food. Dinner is great, but the next morning you wake up feeling bloated. Not only that, but you feel guilty and like you are the world’s biggest failure (which is a common feeling for many women).

You have two choices:

1.  Continue in the same pattern because you feel like there is no use in even trying

OR

2.  Evaluate how you could have done it differently and have a plan for the next time you go out for Mexican food

My advice to get over the feelings of guilt, is option number 2. You have never messed up so bad that you can’t get back up and try again. Need some more words for encouragement?  Listen here to one of my favorite songs by TobyMac, Never Give Up.   Read these words.

 “Our greatest weakness lies in giving up. The most certain way to succeed is always to try just one more time.”  Thomas Edison

Glazed Baby Beets and Carrots

Wait ‘til you see what I found at the grocery store!

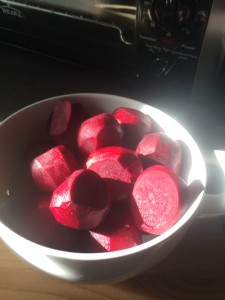
2014-04-27 17.32.46

So with my list in hand, I started wandering through the produce department… sweet potatoes; check.  Cantaloupe; check.  Red grapes; check.  Broccoli crowns; check! And then I noticed this mound of small brownish-purplish balls filling the case beneath the broccoli…what?  They were baby beets!  Not on my list…but who cares? AND (thank You, Lord!) they were only 99cents per pound! So, 3 pounds came home with me!

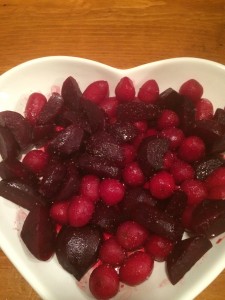
I knew that I wanted to feature them in our At Home w/ GCH blog today, but I had to come up with a different way to prepare them. It couldn’t be my favorite way to serve (ok, eat!) beets—roasted over baby greens with goat cheese! We’ve already done that here … so I perused the Internet and found a number of recipes for glazed beets. Here’s my version; enjoy!

Glazed Baby Beets and Carrots

2014-04-27 19.58.42

Ingredients:
1 pound baby beets, peeled
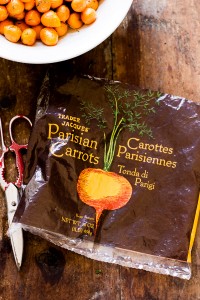
1/2 pound small frozen carrots (we use these from Trader Joe’s)tjsparisiennecarrots
2 cups juice or chicken broth (I used mango 100% juice)
1 tablespoon honey
3 tablespoons white balsamic vinegar (I used honey balsamic)
sea salt, freshly ground black pepper

Directions:

  • Steam beets and carrots ‘til almost done (when a thin-bladed knife goes through with just a bit of resistance).
  • Set aside the (almost cooked) veggies, and dump the water out of the pan.
  • Into the same pan, add the liquid of your choice and bring to a boil.
  • Pour the veggies back into the pan along with the honey. Stir ‘til combined and bring to a boil.
  • Reduce heat so that the liquid is gently simmering.
  • Continue to cook veggies for 5 minutes or so, spooning the liquid over them occasionally so that they get good and coated.
  • Stir in the balsamic vinegar and simmer for another five minutes.
  • Remove pan from heat, and pour into a serving bowl scraping in all of the liquid, too.
  • Season well with sea salt and freshly ground pepper.
  • Makes approximately 4 servings.

♥  ♥  ♥  ♥  ♥

God loves you!    (Don’t ever forget that!)

♥  coleen


Dijon Dill Green Beans

Dijon Dill Green Beans resize

If I remember correctly, this is a recipe from the South Beach Diet book.   In any case, regardless of origin, these Dijon Dill Green Beans are delicious and healthy…and sure to please!

The Dijon dill dressing is very light and won’t hide the sweetness of the green beans.  I’ve used both dried dill and fresh, and they both taste great, so don’t fret or make a trip to the store if you only have dried.  Low-carb, low-cal, and tasty for sure, this veggie side will taste great with whatever main dish you’re making tonight!

Dijon Dill Green Beans

Ingredients:

  • 1 pound green beans, fresh or frozen
  • 2 tablespoons butter
  • 1 tablespoon Dijon mustard
  • 2 tablespoons chopped fresh dill (or one scant teaspoon dried dill)
  • salt and pepper to taste
  • squeeze of lemon, optional

Directions:

  1. Prepare the green beans:  (If using fresh, take off the ends and cut into 2-inch lengths.)  Steam or microwave the beans until they are still a little firm.
  2. While the beans are cooking, heat a large pan over medium and add the butter and dill.  Stir to keep the dill from burning and cook for a few minutes until the butter is bubbly and starting to brown.  Add the Dijon mustard and salt and pepper.
  3. Drain away any excess water from the beans, then add to the dill mixture.  Stir to coat the beans, then serve hot with a squeeze of lemon or another pinch of salt.

Leftovers?  I ate mine cold, with a can of tuna mixed in and (surprise!) a little more lemon juice squeezed over the top.  Yum!

Explore, experiment, enjoy! — Dana


To view even more of Dana’s unique recipe, you can visit her at Frugal Girlmet!
 

Honey Corn and Scallion Quinoa….an Easy Side Dish

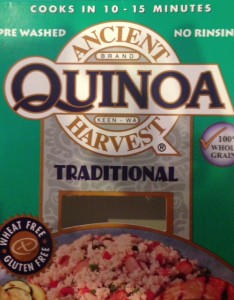
quinoa

Eating out does not have to be the only option during a busy week.  There are simple strategies and recipes that you can implement at home to save money and calories. One of my new favorite dishes is Honey, Corn, and Scallion Quinoa.

If you have followed me for a while, you know that I love quinoa.  It is easy and higher in nutrients than the typical rice or pasta side dish. Once again, I love it because I can cook quinoa in my rice cooker which makes it easy and quick to prepare this delicious dish of Honey, Corn, and Scallion Quinoa.

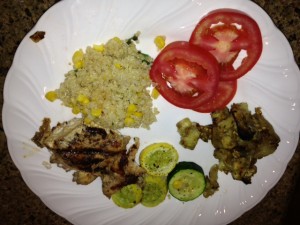
While preparing my meals for a busy week ahead, one of my strategies is to cook enough chicken for a couple of meals. I then change up my side dishes with simple healthy choices that can be prepared in less than 30 minutes. Here is what a mid-week meal may look like after a busy hectic day.

photo (5)

The chicken was ready to eat and my only task was to roast zucchini and eggplant in the oven and prepare my quick and easy Honey, Corn, and Scallion Quinoa side dish.  It CAN be that simple.

Ingredients:

  • 2 cups uncooked quinoa
  • 1 (15 ounce) can of corn, drained
  • 1 tablespoon of fresh lemon juice
  • 1 tablespoon of fresh lemon zest
  • 1 tablespoon of honey
  • 1 tablespoon of  “I Can’t Believe it’s Not Butter”
  • 4 Scallions
  • Salt and Pepper to taste

 Directions:

  • Prepare quinoa according to directions (I cook in rice cooker)
  • Melt butter and mix all ingredients together
  • Pour over and mix well with quinoa
  • Salt and pepper

Nutritional Facts:

  • Makes 8 servings
  • Calories – 160
  • Fat – 3gms
  • Protein 6gm
  • Fiber 3gms

Adapted from Gourmet Magazine

In Good Health,

Crystal