November 24, 2024

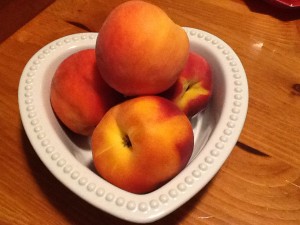
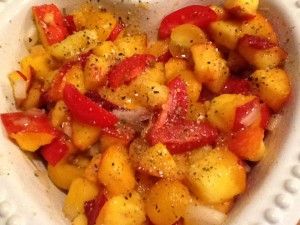
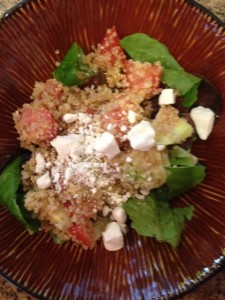
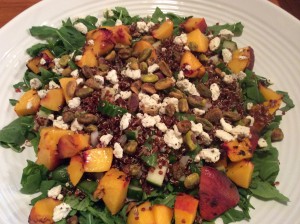
Arugula, Peach, Quinoa Salad

Recently a friend told me about this delicious ‘rice’ salad that she and her family were enjoying that she purchased at her favorite grocery store from the fresh salad bar. Well, as it turns out it wasn’t rice (when I questioned her thoroughly) but red quinoa!  Oh, I do love quinoa…so I was quite interested!  Here is my variation on this salad.  You can surely make this ‘your own’ by varying the fresh veggies added, what type of fruit you put in (berries would also be lovely!), the kind of vinaigrette you use (perhaps use your family’s favorite bottled vinaigrette!), and what variety of nuts you sprinkle across the top!  I would love to hear how you changed it up; leave a comment below!

Quinoa <kEEn-wah> is a grain but it is the seed that we eat! (Good news for those who eat low-carb, right?)  And it is jam-packed full of protein.  Have you and your family enjoyed quinoa before?  To find quinoa in your grocery store, check the natural food section, or the rice/pasta aisle.  Usually when I prepare a pot of quinoa, I make extra to use for another meal. Our favorite is ‘red’ quinoa although it also comes in white (or golden), and black variations. Check out these nutritional facts.  This light salad fits well into our ‘healthy but oh-so-yummy’ POV since it has a great vegetable protein base, and lots of fresh veggies and fruit!  Serve it alongside something yummy from the grill—chicken, shrimp, or salmon, for example.  Oh, and if you DO grill…throw the peaches on the grill for 5 minutes or so, too!  Enjoy!

Quinoa, Peach and Arugula Salad

2014-08-17 19.34.04

ingredients:
1 cup red quinoa
1+3/4 cup water
1/3 cup olive oil
1/3 cup mango (or orange) juice
1 tablespoon honey, agave or maple syrup (optional)
2-3 splashes of white balsamic vinegar
1 teaspoon minced garlic (I use jarred)
sea salt & freshly ground black pepper
3 cups arugula
2 ripe peaches (or mango), chopped
1/2 small red onion, finely diced
1 cup cucumber, small dice
handful of sugar snap peas (defrosted from frozen OR fresh)
3 tablespoons chopped fresh parsley
3 tablespoons chopped fresh mint
1/3 cup nuts (pistachios, pignoli, chopped almonds)
4 ounces goat cheese, crumbled
sea salt & freshly ground black pepper

directions:

  • prepare quinoa: bring water to a boil in a small saucepan; add the quinoa, bring back to boil, stir, cover, and then reduce heat to very low and simmer until the water is absorbed (10-15 minutes).  remove from the heat, keep covered, and let sit for 5 minutes.  fluff up with a fork and transfer to a large mixing bowl to cool2014-08-17 18.59.45 HDR
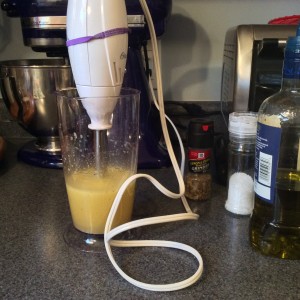
  • make vinaigrette:  whisk together the juice, garlic, sweetener (if using), balsamic, and s&p; slowly drizzle in the olive oil while continuing to whisk away ‘til thoroughly emulsified. (this can be done in your food processor or using an immersion blender)
  • assemble:  add the veggies, arugula and herbs to the quinoa already in the large mixing bowl, ; toss together
  • pour 3/4 of the vinaigrette evenly over the mixed salad; season well with additional s&p to taste
  • top with sliced peaches, nuts, and cheese

♥   ♥   ♥   ♥   ♥

God loves you!  ♥  (Don’t ever forget that!)

♥  coleen
Fruity Energy Bars

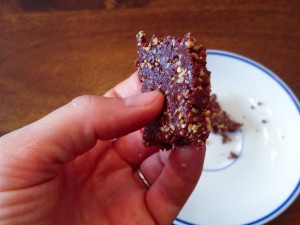
Fruity Energy Bars resize

I’ve got a lot of hoops to jump through when it comes to making snacks for my girls.  I try to eat Paleo myself, and while I do serve my girls grains and legumes, I am always searching for recipes that rely on Paleo ingredients first.  Next, my older daughter is allergic to peanuts and tree nuts.  That eliminates a giant swath of choices in the Paleo category, which excludes grains in favor of nuts.  So for baking, that leaves me either coconut products (which we love and use often), or seeds, like pepitas or sunflower seeds.  I found a recipe that sounded good, reconfigured it for our needs, and now I proudly present:  Fruity Energy Bars!

In the grocery store, you’ll find half an aisle dedicated to energy and granola bars.  I love them and I love that, for the most part, they’re healthy and nutritious.  They are, however, kind of pricy – sometimes two or three dollars a bar!  And it seems like the ones with the fewer ingredients are even more expensive!  (I’m looking at you, Larabar!)  Now, these Fruity Energy Bars couldn’t be quicker – just three minutes in the food processor, and about half an hour to chill and firm up.  I think you could easily exchange the dried cranberries for another dried fruit – apples, apricots, raisins, prunes, or cherries would all work.  If you want to use nuts instead of sunflower seeds, try almonds or walnuts.  They do warm up very quickly and get soft, so keep them in the fridge until ready to eat.  Ready?  Get energized!

Fruity Energy Bars

Ingredients:

  • 1 cup pitted dates
  • 1 cup dried cranberries
  • 1 cup sunflower seeds (I used roasted and salted)
  • 1/4 cup unsweetened flaked coconut
  • 1/4 cup chocolate chips

Directions:

  1. Pour all the ingredients into the bowl of  your food processor.  Pulse to blend, then mix for about 3 minutes.  You can blend it all the way together and it will form a ball, but I took mine out before that so I could still have a little texture to the bars – kind of like the consistency of sticky sand.
  2. Line an 8×8 pan with plastic wrap, or grease with a little coconut oil.  Press the mixture into the pan and press down with the back of a big spoon.  Refrigerate for at least half an hour.  Cut into 1″x4″ bars.  Get energized and go be productive!

Explore, experiment, enjoy! — Dana

—————————————————————————————————
To view even more of Dana’s unique recipes, you can visit her at Frugal Girlmet!

Homemade Strawberry Ice Cream (No Ice Cream Machine Needed!)

rsz_homemade_strawberry_ice_cream

A few months ago, my daughter made vanilla ice cream in her kindergarten class.  She raved about how fun it was to make it, and how the finished product was delicious.  Well, I took her story with a grain of salt (unintentional pun!) because 6 year-olds aren’t really known for their discriminating pallets.  But I researched online, found a recipe, and decided to give it a whirl.  And you know what?  If anything, she undersold it!  This stuff is fantastic!  Here’s my recipe for Homemade Strawberry Ice Cream.

We don’t have an ice cream machine.  It sounds like kind of a waste of space, because it’s not something I’d use too often.  The only equipment this recipe needs is two Ziploc bags!  The technique is easy and is perfect for kids to make.  All the recipes online were the same, so I used one (of several) you can find with a Google search.  But what’s even better than vanilla ice cream?  Strawberry ice cream!  Instead of just sprinkling chopped fruit on top, I made a strawberry puree that, when mixed into the vanilla ice cream, makes a strawberry ice cream as good (or better!) than anything you can get at the grocery store.  Also, the serving size is just right.  It’s big enough that you can satisfy two kids with this recipe, and get a taste or two for yourself.  But it’s small enough that you won’t beat yourself up if you eat the whole thing yourself!

Becky puts in some sweat equity

Becky puts in some sweat equity

Homemade Strawberry Ice Cream (No Ice Cream Machine Needed!)

Ingredients:

For the Strawberry Puree:

  • 1 pint strawberries
  • 1 tablespoon honey
  • 1/4 cup water

For the Ice Cream:

  • 1 cup half-and-half (or use 1/2 cup whipping cream and 1/2 cup whole milk)
  • 2 tablespoons sugar
  • 1/2 teaspoon vanilla
  • 1/2 cup rock salt or kosher salt (whatever you can find that has big grains of salt, the bigger the better)
  • ice
  • sandwich-sized Ziploc bag
  • gallon-sized Ziploc bag

Directions:

  1. First make the strawberry puree:  Wash, hull, and quarter the strawberries.  Over medium-low heat, mix together the strawberries, honey, and water.  Mash with a wooden spoon or potato masher, but leave some chunks.  Cook on low for about 20 minutes until reduced and thickened a little.  Don’t let it burn!  Take off the heat.  (You can do this the day before, if you want.  Just pop it in the fridge when you’re done letting it cool.)
  2. For the ice cream:  In a bowl, stir together the half-and-half, sugar, and vanilla.  Pour the mixture into the small Ziploc bag and make double sure it’s sealed well.
  3. Fill the large Ziploc bag halfway with ice and the salt.  Add the small bag to the ice, then cover with a little more ice.
  4. Shake!
  5. Shake!
  6. Shake!  (My bag got really cold, really fast, so I had to wrap it in a towel so it didn’t hurt my hands.)  Shake for about ten minutes.  You can squeeze the ice cream bag and tell when it’s frozen.
  7. Serve the vanilla ice cream with the strawberry puree.  Voila!
Sweet success!

Sweet success!


Explore, experiment, enjoy! — Dana


To view even more of Dana’s unique recipe, you can visit her at Frugal Girlmet!

Fruit Parfaits (to go!)

Here in our little village, we have a community park which fronts on the river which runs through the village.  Twice each week during the summer season, free concerts are held in the bandshell!  This week the Schenectady Pipe Band was scheduled to play!  Oh, I just love bagpipe&drums!!!  (How about you?)  So Robert asked if I would like to go…ummm, let me think…YES!

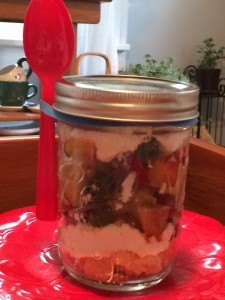
I thought that he would love it if I made some kind of sweet treat to bring along and enjoy out under the stars listening to stirring bagpipes!  Originally I was planning on making some cookies (his favs!) but we had an abundance of gorgeous berries this week. So then I got ready to make a berry crisp…all yummy warm berry sweetness with a healthy topping of cinnamon-y crunchiness!  But THEN I was talking with my daughter, kassia, about the trendiness of mason jars filled with salads, and suppers…and desserts! My mind was made up—Fruit and Cake Parfaits!

2014-07-31 18.51.46

These were super simple to put together.  I prepared all the components earlier in the day: an easy-peasy yellow sheet cake (gluten free, of course), a berry compote, and homemade whipped cream.  After supper, all that was needed was to layer it all up into mason jars, cap ‘em off, and put them into my picnic basket!  I hope you give these a try!  They would be a great dessert to bring along to a bbq, or picnic…or how about taking them to the drive-in?  Enjoy!

Fruit and Cake Parfaits…to go!

components:
mason (or Ball) canning jars2014-08-03 21.13.26
yellow cake or angel food cake
fresh fruit
whipped cream

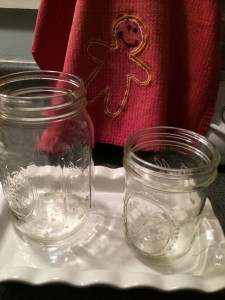
note: quantities are at your discretion! For our parfaits, I used a ‘manly’ quart-size jar and a pint-size jar for me. I would suggest “wide mouth” jars, too (much easier to spoon out the yumminess!).

cake component:

  • I simply baked up a plain yellow cake (use a mix…go right ahead!)
  • when thoroughly cooled, cut up into small cubes

fruit component:2014-07-31 14.55.43

  • we had strawberries, blueberries, raspberries, blackberries, and cut up peaches
  • sprinkle sugar (I used coconut sugar) over the fruit and gently combine
  • proportions: 1 tablespoon sugar to 1 cup fruit (I used 3 cups of fruit)
  • set aside for a minimum of 30 minutes (or up to 2-3 hours) to allow the sugar to draw out the moisture from the fruit creating a syrup

whipped cream component:

  • please indulge and make your own whipped cream
  • I used a half-pint container of heavy cream, 1/2 teaspoon of almond extract, and 2 teaspoons of confectioners (10X) sugar

to assemble:
in this order—cake cubes, macerated fruit, whipped cream—fill up your jars; done!  oh…if taking along with you…don’t forget the spoons!!!  Enjoy!

♥   ♥   ♥   ♥   ♥

God loves you!  ♥  (Please don’t ever forget that!)

♥  coleen
 

Summer Vegetable Curry

Summer Vegetable Curry resize

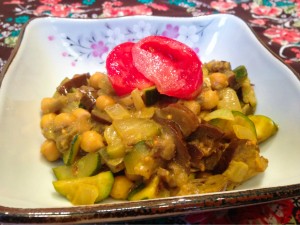
If you think about it, there is a lot of overlap between summer produce here in the United States, and what shows up on Indian food menus.  That’s because what grows where it’s hot there is also what grows in the summer here.  Lots of Indian dishes feature zucchini (also called courgettes), onions, eggplants, and tomatoes – all things coming into season now!  Why not try this Summer Vegetable Curry?

You really can’t mess this up or go wrong.  Don’t like garbanzo beans?  Use another bean, or switch them out for green peas or bite-sized green beans.  Like it spicy?  Add some chopped jalapeños or another chili of your choice.  Use whatever curry powder you have.  Out of coconut milk?  Use water or broth instead.  I didn’t have any cilantro, or I would have chopped up a few tablespoons to stir in right before serving.  See?  There is no wrong way.

For a vegetarian meal, double the amount of beans and serve over basmati rice.  Paleo?  Skip the beans altogether and serve this curry as a side dish to your favorite protein.  Ready?  Let’s go!

Summer Vegetable Curry

Ingredients:

  • 1 large onion
  • 2 tablespoons ghee, butter, or oil
  • 1 tablespoon mustard seeds
  • 1 tablespoon cumin seeds
  • 1 tablespoon curry powder (or more, to taste)
  • 1/2  can coconut milk
  • 2 skinny eggplants
  • 3 zucchinis
  • 1 can garbanzo beans or 1 cup of rehydrated and cooked dried garbanzos
  • cilantro, raw tomato, and rice (optional)  for serving

Directions:

  1. In a very large pot, heat the ghee or butter.  Chop the onion and add to the pot, along with the mustard and cumin seeds.  Fry on medium heat for about 5 minutes, until the onion becomes translucent.  Then add the curry powder and coconut milk and reduce heat.
  2. Cut the eggplants and zucchinis into thin half-moons.  Add to the pot, stir to mix, and cover.  Cook over low heat for about 25 minutes until the vegetables are soft, stirring occasionally to ensure nothing sticks to the bottom of the pot.
  3. Taste for seasoning – add salt or more curry powder if you like.  Stir in the garbanzos and heat through.
  4. Serve with chopped tomato and minced cilantro.  Serve over rice if you like.

This is definitely one of those recipes that is even better the next day, and it’s easy to reheat.  Have some for dinner tonight and save some for lunch tomorrow!

Explore, experiment, enjoy! — Dana


To view even more of Dana’s unique recipes, you can visit her at Frugal Girlmet!

Black Bean, Corn, Mango Salad w/ Honey-Lime Vinaigrette

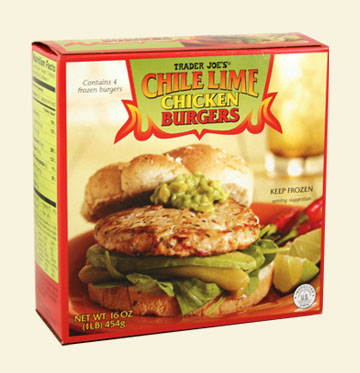
Recently I made a happy little find at Trader Joe’s!  These Chile-Lime Chicken Burgers. They were nicely priced at $3.49 for a 16 ounce package of four burgers. They are made with all-natural ingredients, no preservatives…and are high in protein, low in fat. All which fit right in here with our healthy but oh-so-yummy POV! Do you have a Trader Joe’s near to you? If you haven’t shopped there yet, I would heartily encourage you to give them a try! We are always satisfied with our purchases at Trader Joe’s…and will pick up another package or two of these on our next shopping trip.

traderjoeslimechickenburgers

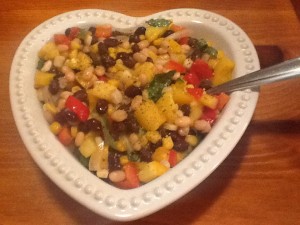
So, these made for a quick meal as they grilled up in approximately ten minutes. But, what to serve with them…this was my question. Hmmmmm….something quick, healthy, fresh…?  I googled ‘…lime, mango, salad…’ and was presented with quite a list and variety of choices. After reading a few recipes, I had a pretty good idea and a plan of action. We were quite satisfied with the burgers and this Black Bean, Corn, and Mango salad with Honey-Lime Vinaigrette to accompany the burgers. This makes quite a large bowlful (I’d venture to say 9-10 cups or so). So consider making this as a side dish to bring along to a BBQ this summer. Enjoy!

Black Bean, Corn and Mango Salad w/ Honey-Lime Vinaigrette

2014-07-23 20.23.00
ingredients :
salad:
2 cup fresh or frozen corn, thawed
1 (15 ounce) can black beans, drained and rinsed
1 (15 ounce) can small white beans, drained and rinsed
1/2 small sweet onion, sliced thin
1 red bell pepper, cored, seeded, and cut into 1/2-inch pieces
1 yellow bell pepper, cored, seeded, and cut into 1/2-inch pieces
1 large mango, peeled, seeded, and cut into 1/2-inch pieces

vinaigrette:
2 small (or 1 large) limes
2 tablespoons honey
2 tablespoons balsamic vinegar
1/4 cup mango (or orange) juice
1/3 cup olive oil
sea salt, freshly ground black pepper
sprinkle of ground red pepper (optional)

garnish:
1/4 cup chopped fresh basil leaves (optional)
zest from the limes

Directions:

  • in a large mixing bowl, combine veggies, beans, and mango
  • zest the limes (putting the zest aside ‘til the end), and squeeze all the juice from the limes
  • combine lime juice, honey, balsamic, and mango juice using a blender, food processor, or simply whisk by hand
  • slowly pour in the olive oil in a slow steady stream ‘til it is fully incorporated with the liquids
  • season the vinaigrette to taste with salt and pepper (and the red pepper, if using)
  • pour the majority of the vinaigrette over the salad, and stir thoroughly but gently to combine (adding more of the vinaigrette, if necessary)
  • allow to set at room temperature for 20-30 minutes to combine flavors (or place in refrigerator ‘til ready to serve)
  • when ready to serve, garnish with the lime zest and basil strips

♥   ♥   ♥   ♥   ♥

God loves you!  ♥  (Please don’t ever forget that!)

♥  coleen
Bacon Corn Fritters

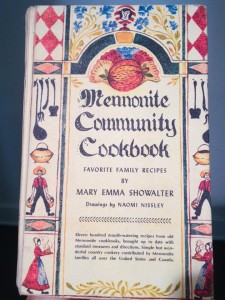
Last week at the grocery store, my older girl informed me that she had never had corn on the cob.  What kind of monster am I to deprive her of that experience? We bought corn and she liked it.  Then more corn came in my CSA box, and I was stumped: what else can I do with it? I like this recipe but I wanted to try something new. So I flipped open this old dear:

danamennoniteckbk

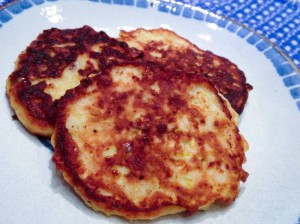
And I stumbled upon this recipe for corn fritters. Yum! But since I can’t leave well enough alone, I added bacon and summer squash to mine. My new recipe: Bacon Corn Fritters!

These mix up quickly and fry quickly too. My girls ate these like pancakes with a little maple syrup. I ate mine with a dollop of plain yogurt (or you can use sour cream) and some shredded cheddar cheese. Fantastic! I bet these would be great with some cheese and lots of fresh sliced tomatoes. Sound interesting? Let’s go!

Bacon Corn Fritters

danabaconcornfritters

· 3-5 slices of bacon, diced
· 3 ears fresh corn
· 2 zucchini
· 2 eggs
· ¼ cup flour
· ½ teaspoon salt
· 1/8 teaspoon pepper
· 1 teaspoon baking powder
· 2 tablespoons plain yogurt (or use sour cream, or whole milk)

Directions:
1. In a large pan, fry the bacon. When crispy, remove to a paper towel-lined plate. Leave the bacon grease in the pan!
2. Using a box grater, grate the corn from the cob into a bowl. Grate the zucchini too.
3. Beat the eggs, and then add to the corn and zucchini. Stir in the flour, baking powder, salt, pepper, and yogurt.
4. Heat the pan again. Drop the corn batter by large spoonsful into the hot bacon fat. Flip and brown again.

Explore, experiment, enjoy! — Dana


To view even more of Dana’s unique recipes, you can visit her at Frugal Girlmet!

Lime Shrimp Quesadillas

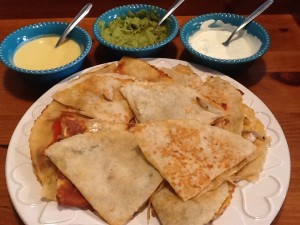
So…I’ve told you before about my husband’s new-found love for Tex-Mex foods. The other day he specifically asked me to make quesadillas. “Why, sure I will!”  😉 But I was a bit stymied how to ‘lighten them up’ from being cheese bombs in our tummies…AND fit them here into our healthy but oh-so-yummy POV.  But then I realized it was simple: ease up on the cheese, and add lots of veggies!  That was easy!

Oh, there’s just one not-so-easy step—the flipping!  Here’s what I did…but if you have a better method…bring it on!  (Please!)  When the bottom tortilla has browned off just a bit (3 minutes or so), slide it carefully out of the pan onto a dinner plate. Then, invert ANOTHER dinner plate on top, hold them together now, flip over, remove the top plate and slide the tortilla back into the pan with the browned side facing up now!  If I can do it, then I have no doubt that you, too, can do it!  Enjoy!

2014-07-20 19.09.42

Lime Shrimp Quesadillas

(makes 2 or 3 finished quesadillas; serves 2-3)

Shrimp
ingredients:
12 oz medium to large raw shrimp

lime marinade:2014-07-20 18.45.29
zest of 1/2 large lime
1/2 teaspoon dried oregano
1/2 teaspoon sea salt
1/2 teaspoon freshly ground pepper
2 tablespoons olive oil
juice of 1/2 large lime
2 teaspoons minced garlic (I use jarred)

directions:

  •  in a medium glass bowl, whisk together marinade ingredients
  • add peeled shrimp; set aside for 15 minutes
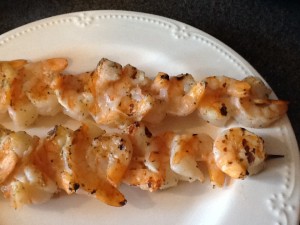
  • thread onto 2-3 wooden skewers
  • grill over indirect heat for 2-3 minutes per side; don’t overcook!
  • remove from skewers; set aside

Veggies
ingredients:
2 tablespoons vegetable oil
1 sweet onion, sliced into halfmoons
1 red bell pepper, sliced
1 yellow bell pepper, sliced
1 teaspoon salt
1 teaspoon ground cumin
1 teaspoon chili powder

directions:

  • saute veggies in olive oil over medium high heat for 7-8 minutes, allowing to brown just a bit
  • remove from heat; set aside

Assembly
12 oz +/- monterey jack cheese, shredded (or similar)
4-6 flour tortillas (I used gluten free)
1 tablespoon butter
directions:

  • in a large nonstick saute pan, melt 1/2 tablespoon butter over low heat; raise temp to medium-high when prepared to start cooking2014-07-20 18.51.06
  • place 1 tortilla shell in bottom of pan
  • layer 2-3 oz shredded cheese, some of the sauteed veggies and some of the shrimp (the amount you use will depend on whether you are making 2 or 3 completed quesadillas)
  • top with a second tortilla shell; pressing down so everything will begin to adhere together
  • allow bottom tortilla to slightly brown; then flip so other side can brown also
  • slide out onto a plate, cut into quarters
  • (if making more than 2 or 3, keep warm in oven)

serve with guacamole, sour cream, mango dipping sauce, salsa…or ? (I would love to hear your ideas, please!)

♥   ♥   ♥   ♥   ♥

God loves you!  ♥  (Please don’t ever forget that!)

♥  coleen
 

Peach Salsa

2014-07-13 21.33.27Oh…does that not say ‘summer!!!’ to you? Yes, to me, too! Here in the NorthEast, we are smackdab in the middle of the peach harvest…and they are so good! There are so very many sweet things that you can do with peaches; oh let me count the ways: pies, cobblers, crisps, crumbles, muffins, jam, ice cream, sorbet, pancakes, smoothies, popsicles, teas, sangria….  I’d love to hear of your favorite way to eat a peach!

But I do love using peaches in savory foods, too!  Now perhaps there aren’t quite as many options…but equally yummy! How about used as a glaze for chicken? Or chopped fine and added to ground chicken for meatballs? Peaches are FABulous added to the grill when you have fish or chicken going! Try simply topping them with a drizzle of really good balsamic vinegar and some goat cheese; oh yeah!

This week, however, I have a REALLY simple recipe for Peach Salsa. Great served with grilled salmon, or chicken breast, or shrimp kabobs!  This recipe comes together so quickly I did it twice this week…once with a ginger sweet flavor and once with a sort-of-spicy tomatillo salsa mixed in. Equally delicious!

2014-07-13 21.58.44

Peach Salsa (Two Ways)

Gingery Peach Salsa
ingredients:
2 large ripe, yet firm, peaches2014-07-13 21.54.56
handful of yellow and red grape tomatoes
1 tablespoon ginger preserves
2 tablespoons red onion, cut into a small dice
zest and juice of 1/2 of a lime
sea salt and freshly ground pepper, to taste

directions:

  • combine ginger preserves and lime juice and zest; mix together
  • remove pit, and cut peaches into bite-size pieces; add to ginger-lime mixture
  • slice grape tomatoes in half; also add these
  • season well; and combine together
  • put to the side for a few minutes and then taste for additional seasoning
  • set aside and let flavors come together while the meat/fish is being cooked

Spicy Peach Salsa
ingredients:
2 large ripe, yet firm, peaches
handful of yellow and red grape tomatoes
2 (or more) tablespoons tomatillo salsa (salsa verde)
2 tablespoons small dice red onion
zest and juice of 1/2 of a lime
sea salt and freshly ground pepper, to taste
directions:

  • combine tomatillo salsa and lime juice and zest; mix together
  • remove pit, and cut peaches into bite-size pieces; add to tomatillo mixture
  • slice grape tomatoes in half; also add these
  • season well; and combine together
  • put to the side for a few minutes and then taste for additional seasoning
  • set aside and let flavors come together while the meat/fish is being cooked

(Here are some facts about the nutrition associated with peaches; good stuff! )

♥   ♥   ♥   ♥   ♥

God loves you!  ♥  (Please don’t ever forget that!)

♥  coleen
Your Healthier Options and What Would You Rather?

Quinoa Salad

This past weekend, I went on a camping trip with my family and some friends. We had a great time sitting around the campfire playing the game “Would You Rather…?” It consists of one person giving someone two unfavorable scenarios to decide which he or she would rather do. With four kids asking the questions, it can go something like this,“Would you rather…eat a big bowl of broccoli for every meal for one week or eat out of a garbage can for one day?”

As I thought about it, there were a few questions and scenarios that came to my mind. So many times, I hear women say, “I struggle to consistently eat healthy and/or exercise. I know I should, but I just can’t seem to do it.” I hear the heart of women who desire to be a good example to their children and grandchildren; to be active and have fun with their husband and kids; to feel confident in who they are on the inside and out.

So here a few questions. (I apologize in advance if this seems harsh.)

  • Would you rather find 30 minutes a day to exercise at your own choosing, or be forced to do it one day by your doctor?
  • Would you rather learn how to eat healthy now and reduce your risk of certain diseases, or miss having a higher quality of life with your kids and grandchildren one day?
  • Would you rather learn how to prepare foods at home, even with a busy schedule, or hear that you have heart disease one day from eating too much fast food?
  • Would you rather be fit and healthy to enjoy activities with your family and friends, or instead sit on the side as a spectator?

Proverbs 21:5 says, The plans of the diligent lead surely to his advantage.

What we do today, prepares us for the quality of life we will have for the future. Let us be wise with our time and resources.

I understand that it can be a challenge to figure out what you should eat and not eat,  and how to fit in exercise along with the busyness of life. So here is another question…

Would you rather spend valuable time trying to figure out HOW to eat healthy and exercise with your busy lifestyle, or would you rather make it easier on yourself and have someone coach you to make the right decisions to attain results?

I know before I buy a house, invest my money, or make a life decision, I look to those who are educated and trained to help me. The same is true for your health. I want to help you learn how to meet your fitness, nutrition, or weight-loss goals and learn how to have a balanced life physically, mentally, and/or spiritually. If you are interested or have been thinking about it, email me today for a FREE consultation at crystal@yourfitnessdesigner.com.

camping

In Good Health,
Crystal