November 18, 2024

At Home with GCH: Freezer Meals (BONUS: Taco Egg Rolls Recipe)


I don’t know about you, but there are plenty of days that I wish I had a private chef…someone who would do all of the meal planning, grocery shopping, food prep, and cooking!  It would make my life a whole lot easier!  But, believe it or not, I like doing these things for my household!  I like planning, prepping, and cooking!  So I’m always looking for fun ways to do these things that will keep me interested in wanting to do more!

This week I want to cover something that some of you may not have heard of; though some of you have, I’m sure.  Freezer Meals! I’m going to make your life a whole lot easier this week, and not only will you love the time this blog is going to save you, but you are going to love the money it will save, as well!

So, are you ready?  Grab a cup of coffee and settle in, and let’s talk about Freezer Meals!

I want to preface this by saying that I am not an expert in this field.  I’m just an ordinary housewife from Southeast Wisconsin, who reads blogs all over the Internet, and scans through tons and tons of recipes on Pinterest.  Put these two worlds together, and viola! … you come up with Freezer Meals!

The first thing I will tell you about Freezer Meals is that it does take some planning and time in the beginning.  But once these meals have gone through preparation stage, and actually become “freezer meals,” you are going to be so glad that you took the time to learn how to do this!

Freezer Meals are meals that you prepare ahead of time…a lot of them…all in one day.  I make 15 to 20 Main Dish meals in one day; put them all in Ziploc® bags, and then put them in the freezer.  They are perfect for the Crock Pot, oven, or stove top.  All I have to do is pull a bag out of the freezer, put it in the crock pot in the morning and let it cook all day long.  When it’s time for dinner, all I have to do is add a vegetable, salad, baked potato, rice or pasta, and dinner is served!  So now, dinner time is done in half the time that it would normally take; leaving me more time to spend with what is most important to me.

*Tip:  Always use crock-pot liners for easy and quick clean-up!  (You’re welcome!)

___________________________

So, let’s talk about Freezer Meals by starting with food preparation first.  The following are steps that I take when preparing Freezer Meals in my own home:

  1. Begin always by washing your hands first!
  2. Take all your raw meat (chicken thighs or breasts, pork chops, pork tenderloin, turkey), as well as cooked shredded chicken and hamburger, etc), divide the meat up into the amount of servings that you will need for your family, and put the total servings into a gallon-sized Ziploc® Freezer Bags.  Before closing the bag, always push out all the air from the inside of the bag.  (I always use Ziploc® Freezer bags, because they don’t allow the meat or veggies to get freezer burnt.)   Regular zip-lock style bags that are not labeled “freezer” may not prevent this from happening.)  Be sure to wash your hands once again, and to thoroughly clean the surface the meat was prepared on.  PS: whatever you do, please don’t clean this surface with bleach!!  You are going to be preparing more food on this surface, and the last thing you want is for the food to come into contact with a bleach-cleaned surface!  For a more natural alternative, use vinegar to clean all surfaces.
  3. Your next step is to cut up all your raw veggies and, once again, divide into how many servings you will need for your family, and place in Ziploc® bags.
  4. For meats and veggies that can be cooked together, just add them all into the same Ziploc® bag, and freeze.
  5. Marinades and some sauces freeze very well.  Sauces that I have found to freeze well are Spaghetti Sauce, Enchilada Sauce, and Alfredo Sauce.  These are the sauces that I use.  You can try others, as well, at your preference.  Salsa is another one that freezes well.  Throw the marinade or sauce of your choice in with the meat, push the air out, and zip the freezer bag shut.  Toss into the freezer!
  6. Breakfast, Bean, and Meat Burritos are great freezer meal candidates!  You can make up two or three dozen ahead of time, put them all in freezer bags, and then cook what you need for a family meal, or you can take out one or two at a time, and cook!  They are perfect for freezer meals!  Beef and Bean Burritos are something I like to make a lot of!  My husband loves to take them to work in his lunch, and they are also just a great thing to heat up for a quick lunch at home, too!
  7. Chili is another favorite of ours.  We always cook up a big batch of Chili, and freeze it in several gallon-sized Ziploc® bags.  Then when it’s time, we have Chili ready for Chili Cheeseburgers, Chili Dogs, Chili-topped Baked Potatoes, and more!  We love Chili in this home!  So many uses for Chili!  It’s also very easy to just throw in a crock pot (in the bag) and let it heat up throughout the day.  Cook up some cornbread and serve with the Chili!  This meal may take you around 30 minutes, at the most, to prepare!  Plus, your Chili is cooked right inside the Ziploc® bag, so there is no messy crock pot to clean! 
  8. BE SURE TO LABEL ALL OF THE BAGS WITH THE CONTENTS BEFORE PUTTING IN FREEZER!

There are just so many different kinds of meals that can be frozen.  They can be cooked in a crock pot, oven, or the stove top.  Personally, freezer cooking has been a huge hit for me. Knowing that dinner is already half-done makes my life so much easier!!  I hope if you have not given this a try yet, that you will take the time to try it.  It truly is a time-saver!

Before I close I would like to share one of my favorite Freezer Meals.  These are so easy to make, and are great when you are in a pinch for something quick for lunch for the kids!

Taco Egg Rolls

2 lbs lean ground beef

2 Tbsp minced onions

1-1/2 pkg of Taco Seasoning

1 pkg of Egg Roll wraps

1-1/2 cups of shredded Fiesta Cheese blend

DIRECTIONS:

Brown ground beef and minced onions in a medium-high skillet; drain.  Add in taco seasoning and stir until blended.  Set aside and allow to cool for about 10 to 15 minutes.

After meat has cooled down, fill each eggroll wrap with 1-2 tbsp of meat mixture.  Sprinkle shredded cheese over mixture, and close wrap beginning with bottom corner; fold in corners. Brush top of eggroll with water, roll wrap up tightly to enclose filling—sealing with top flap.

In the meantime, heat canola oil in a skillet.  Place wraps—fold side down—a few at a time, stirring occasionally, until golden brown (2-3 minutes).  Drain on paper towel.

Wraps can be topped with salsa, lettuce, cheese, tomatoes, black olives, and sour cream; serve with Refried Beans.  Or you can choose to dip them in Ranch Dressing for a snack.

 **********

Here are some other favorite Freezer Meal websites / recipes:

http://www.momontimeout.com/2011/08/breakfast-burrito-bonanza/

http://www.sixsistersstuff.com/2012/09/slow-cooker-freezer-meals-make-8-meals.html

http://onceamonthmom.com/101-fall-freezer-meals/

http://www.realsimple.com/food-recipes/recipe-collections-favorites/quick-easy/freezer-meals-00100000085408/index.html

http://freezermealsforus.blogspot.com/

http://themarathonmom.com/preparing-for-birth-freezer-cooking.htm

http://www.annies-eats.com/2011/03/28/stocking-the-freezer-make-ahead-meals/

http://thehumbledhomemaker.com/2012/09/bless-a-friend-with-freezer-meals.html

http://www.eatingwell.com/recipes_menus/recipe_slideshows/make_ahead_casserole_recipes

http://www.tasteofhome.com/Recipes/Cooking-Style/Freezer-Meal-Recipes


See you next week!

_____________________________ 

If you have any questions about Freezer Meals, or Freezer Meal preparation, please email me at Christi@girlfriendscoffeehour.com.  I’ll be happy to answer your question, or find the answer for you! 

At Home with GCH: Focus on Health

kale saute

When it comes to New Year’s resolutions, I am a champ.  Every year, I swear I’m going to lose weight, exercise more, and eat healthier.  This year, so far, I’ve done really well on one front—eating better.  There probably isn’t anyone in the world who couldn’t stand to give their daily diet a tune-up, and one of the biggest improvements we can make is to eat less “bad stuff” and more “good stuff.”  What’s the good stuff?  Vegetables, of course!  (Don’t roll your eyes at me!)

Let’s introduce the star of this show:  KALE.  It’s a hearty green vegetable in the Brassica family, related to cabbage, broccoli, and Brussels sprouts.  Any veggie you eat in the Brassica family is going to help you. Kale is the the best, and most-studied, of the group.  Kale has been shown to reduce the likelihood of many different types of cancer, and is now being investigated as a treatment for cancer and other diseases as well.  If an apple a day keeps the doctor away, imagine what a serving of kale can do!

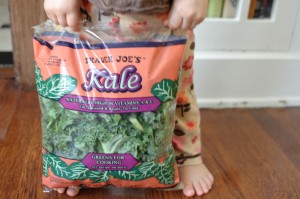
Where I live, kale is in season now.  I’ve seen it at my local farmer’s market lately, as well as at my regular grocery store.  Whole Foods and other health food stores will always have it in stock, and if you are lucky enough to live near a Trader Joe’s, you can find it stemmed, cleaned, and bagged, all ready for your culinary prowess!

Here’s what you need to know to cook with kale:  the stem, which goes all the way up the middle of each leaf, is too tough to eat.  Your best bet is to wash it, then hold the stem in your hand.  Fold the leaf in half and hold the stem with one hand, and pull off the leafy part with your other hand.  Then rip the leaf into bite-sized pieces.  Now what?

Kale is a hearty leaf, and can stand up to long cooking and strong flavors.  Because it is an excellent source of Vitamin K, it is best served with a little fat to aid absorption of  the important nutrients.  Use either olive oil, butter, or (get ready for it)—BACON!  But don’t boil it to death.  Saute it, add it to soups, toss it into salads, or, my favorite, kale chips.  Are you ready for some inspiration?  Let’s go!

kale bag


Let’s start with my favorite, and the most “snacky,” Kale Chips.  (You can probably get your kids to eat these!)

http://www.foodnetwork.com/recipes/melissa-darabian/crispy-kale-chips-recipe/index.html

_____
Here’s one from me, featuring sautéed kale, sun dried tomatoes, and almonds:

http://frugalgirlmet.blogspot.com/2012/08/superfoods-salad-warm-kale-and-oven.html

_____
Kale plays well with others!  Try it in Coleen’s yummy soup recipe:

http://girlfriendscoffeehour.com/2013/01/07/gch-whats-on-your-plate-souppalooza-part-two/

_____

Here’s a salad, for you hearty souls who are ready to take it to the next level and EAT.  YOUR.  GREENS!  (PS: I make a salad similar to this once a week and it is delicious and filling!)

http://www.tastebook.com/recipes/1835410-Emerald-Sesame-Kale

_____

Here is another great way to get your greens in!  It will also work for the kids, too! A lot of people think Green Smoothies are going to taste bad.  Not at all!  Especially when you add  fruit to your ingredients!  I always add a banana, or strawberries, blueberries, blackberries, an apple, and more.  Once all of the ingredients are blended together, the main thing you will taste is the fruit!  So don’t be afraid to try this recipe!  I think you’ll be glad you did!

GREEN SMOOTHIE

Green Smoothie

1 handful of kale or spinach ( I use a combination of both)

1 tbsp of almonds

1 tbsp flaxseed

2 scoops of your favorite protein powder

1 banana

16 oz of filtered water

6 ice cubes

Directions

Using a high-power blender, blend all ingredients on high for at least 1 minute.  If you are using a lower power blender, you will want to blend on high for at least 3 to 4 minutes.  Ingredients should smooth and creamy!  Pour yourself a glass of this delicious drink, and keep the rest of it stored in a Mason jar until you’re ready for your afternoon Smoothie!  Makes just over 1 quart.


Explore, experiment, enjoy! — Dana


Please visit me at Frugal Girlmet for more unique recipes!


If you would like to contact Dana in regards to this blog, please email her at Dana@girlfriendscoffeehour.com

At Home with GCH – Household Binder, Part 2

hb1

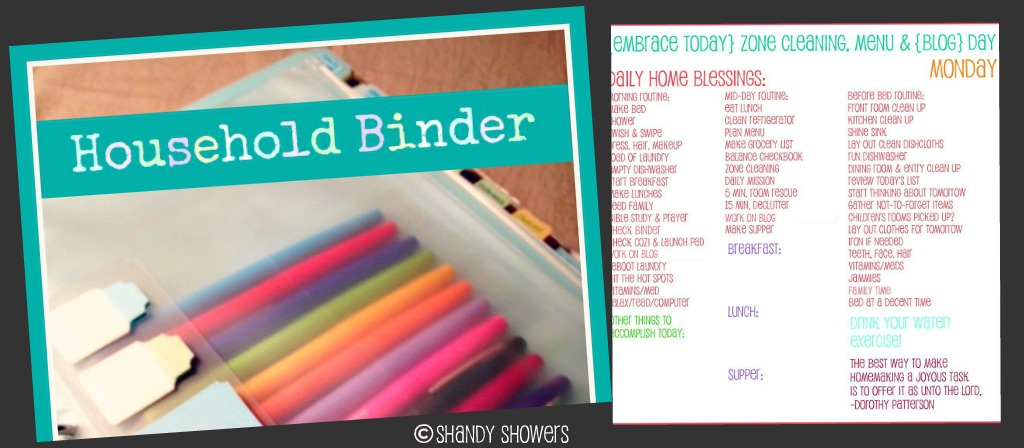
Last week, I gave you a tour of my household binder. (If you missed it, just click HERE.) This week, I’m giving you another peek into my binder, and am sharing my daily cleaning routine. Let’s get started!

I want to share a secret with you. It is life-changing, and is what has helped me more than anything else in keeping a clean home. FlyLady. If you have never heard of the FlyLady before, do yourself a favor and get acquainted. Just click on “Get Started” at the top of the FlyLady’s page. (By the way, making a household binder is one of the steps to get started! She calls it a “control journal”.) You will see on my daily routines, that one of the first things I do in the morning is check the Launch Pad. This is the foundation of my whole system. Another wonderful tool that has been valuable to our family is Cozi. You may have heard of it. It is a very popular web-based calendar and organizer. We’ve been using it for a long time, and last year, we switched to FlyLady’s Cozi. (They partnered up! Genius!) So between FlyLady’s Cozi (there’s an app!) and my household binder, even the most domestically challenged person can get their house clean and organized!

Let’s take a look at my daily cleaning routines.

cleaning routines

You’ll notice that each day is dedicated to a certain set of tasks…

Monday: Zone Cleaning, Menu & Blog Day 

Tuesday: About Town Day

Wednesday: Just the Basics Day

Thursday: Weekly Home Blessing Day

Friday: Paperwork & Clean Out Day

Saturdays & Sundays are my days to relax, so I only do the basics – cooking, cleaning up after meals, loading the dishwasher, etc.

If you click on the picture above (then click on the one that pops up) you will see what I do every Wednesday. Don’t let the amount of the words on the page overwhelm you! I have almost everything I do in a day on these charts. I am not a slave to my house. 😉 In fact, I find plenty of time in the day for hobbies, catching up with my friends, watching a show on television, playing games with my family, etc. The chart just lays everything out for me and keeps me on task. And should I get sick, my girls can look in my binder and see what needs to be done any given day!

Let’s take a closer look at Wednesday.

You’ll see that after I’m dressed and have my daughter fed and off to school, I check my binder, and then I check  FlyLady’s Launch Pad. The Launch Pad tells me what “zone” I’m cleaning that week (this week it is the master bedroom) and it also gives me a “mission.” For example, this Wednesday’s mission is to dust off the tops of the door jambs and windows. Easy peasy! So on Wednesday mornings, I do my everyday tasks like laundry & dishes, and then after lunch I get my cleaning done.

To see each day’s detailed list, click HERE.

And as promised, here’s another peek into my binder:

hb3

On the left is “My Monthly Bill Planner” from the “Finances” section of my binder. In the left column, I write down everything that is due each month. Then in the boxes, I write down what day each bill is due (if it’s always on the same day) and simply check it off once it’s been paid. If the payment is the same every month, I also write that in the left column.

In the middle is a picture of my beautiful daughter, Gabriella. I made a cute printable for each family member and slipped each one into a sheet protector. These act as the dividers in our “Family” section. Behind each person’s picture is important information that pertains to them. So for Gabbie, her medical, school, and cheerleading information is in her own dedicated section of the binder. This makes life so much easier!

On the right is my “Weekly Menu Planner” from the “Menu Planning” section of my binder. I do meal planning on Mondays, and each day’s breakfast, lunch, and dinner is written down on this chart. There’s a section for snacks on the far right of the chart, but I don’t police what everyone munches on when they want a snack. I simply write a variety of things at the top that I need to plan on having in the pantry.

That wraps up our household binder. I know some of you have started making yours, and others are updating theirs. I’m so glad this has been a help! It’s also fun to see what others have done with theirs as it may give us new ideas!

I’ve really enjoyed the comments that you’ve been emailing me! If you have any questions, or would like to know how I manage something in particular that hasn’t been covered, just ask away in the comments below, or send me an email.

You’re welcome to share a picture of your binder with me as well!

Love & Blessings,

Shandy

Be sure to visit Shandy’s personal blog Aprons ‘n Pearls for crafts, recipes, homekeeping tips & more!

__________________

If you would to send a private email to Shandy in regards to this blog, please email her at Shandy@GirlfriendsCoffeeHour.com


At Home with GCH – SoupPalooza, Part 4

SoupPalooza Part 4 – Creamy Homemade Tomato Soup

Here on our At Home with GCH  blog, Monday’s are always focused on healthy but oh-so-yummy! recipes.  We are continuing to celebrate soup, soup, and soup since this is National Soup Month!  Each week we will explore soup basics sometimes along with a bonus recipe for you to serve to your loved ones.

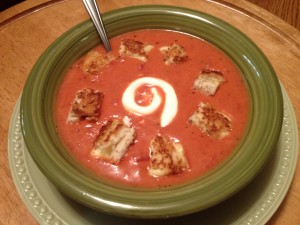
This week we are making Creamy Homemade Tomato Soup with Grilled Cheese Croutons. Such a comfort food and indulgence!  The way we manage to stay within our ‘healthy’ parameters is that this soup contains evaporated milk instead of heavy cream.  Using evaporated milk saves approximately 80 calories AND 12 grams of fat (yes, you read that right!) in each serving.  All the yummy creaminess…and now—since you have kept the soup lower in calories—you can thoroughly indulge in those grilled cheese croutons; oh my!

2013-01-18 22.14.54

Creamy Homemade Tomato Soup

1 Tablespoon butter
1 Tablespoon olive oil
1 onion, chopped small
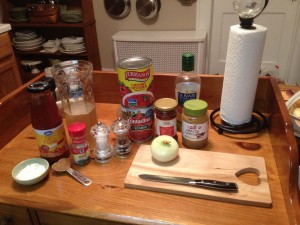
1 Tablespoon chopped garlic (I use jarred)2013-01-18 21.23.16
1 Tablespoon dried basil
Kosher salt and freshly ground black pepper
2 cups broth
1 cup red wine, or additional cup of broth
1 can crushed tomatoes (28 ounces)
1 can tomato puree (28 ounces)
1 small jar of roasted red peppers, chopped small, optional
1 portion homemade condensed tomato soup (see recipe below)
1 can evaporated milk

In a medium-sized saucepan (4 quarts or so), melt butter and olive oil together over medium heat.  Add chopped onion and saute for 5 minutes until softened and transparent.  Add garlic and basil; cook for 1 minute stirring continuously.  Pour in red wine to deglaze pan; then add broth, all tomato products (also roasted red peppers, if you are using them) and salt & pepper.  Stir really well.  Bring up to a boil then reduce heat to low and simmer for 20-25 minutes. Stir occasionally, making sure to mix up from the bottom.  Carefully taste for seasoning, adding if necessary. Finally, add in evaporated milk and heat through.  Keep warm.

Another aspect of this recipe that fulfills our healthy but oh-so-yummy needs is the homemade condensed soup.  You know… just like in the can BUT no wheat, no additives, no un-pronounceable ingredients, no high fructose corn syrup!  So easy and quick to pull together!

Homemade “Condensed” Tomato Soup

8 ounces tomato puree or sauce
1 Tablespoon brown sugar
1 Tablespoon cornstarch
1/2 teaspoon kosher salt

In a small saucepan over low-medium heat, stir all ingredients together.  Bring just up to a boil, reduce heat to very low and simmer for 2-3 minutes.  Ready to use!

OK!

Now the part that (some of you!) have been waiting for…Grilled Cheese Croutons!  Actually, no recipe 🙂 Prepare your most incredible, delicious, gooey grilled cheese sammies!  You choose the bread (I would suggest cutting off the crusts!)…you choose the cheese!  Make sure that they are really nicely crunchy and toasted! Let them cool for just a minute or two, and cut up into small squares.  Serve alongside the soup…toss them in as you go because you wouldn’t want them to get soggy!  Comfort food that is healthy but oh-so-yummy !

God loves you!  ♥ (Don’t ever forget that!)

♥ coleen

_________________________________________________________________

If you would like to send a personal message to Coleen concerning this series, you may email her at:  Coleen@girlfriendscoffeehour.com

At Home with GCH: Greek Salad

Greek Salad

We are big salad eaters at my house.  (And when I say “we”, I mean my husband and I.  My girls won’t go near the lettuce unless it’s shredded in a sandwich, and even then it’s touch and go!)  We’ll have a big salad for dinner at least once a week, sometimes more.  I’m always on the lookout for ways to eat healthier, get more veggies, and eat less refined carbohydrates.  This Greek Salad really fits the bill!

If you’ve made this salad before or had it at a restaurant, you know it’s fresh, bright and simple.  The two things that make it spark and give it that clean taste are the dressing and the cheese.  The dressing is maybe the easiest vinaigrette around—all you need are dried oregano, lemon juice, and olive oil!  Taste it, add salt, pepper and a pinch of sugar to taste, and you’re done!  The cheese is a crumbly white cheese called feta.  It tastes sort of like goat cheese, but it’s a little saltier, a little drier in texture.  It’s also very low in calories, so feel free to add a few tablespoons to your salad.

We had this salad last night, in huge bowls, with braised chicken.  If you want to make it a one-dish meal, add diced chicken or grilled shrimp right to the salad.  Healthy and delicious—it’s what’s for dinner!

Greek Salad

Ingredients:

  • 2 heads romaine lettuce
  • 1/2 red bell pepper, thinly sliced
  • 1/2 cucumber, peeled and sliced in half, then into half-moons
  • 1/4 red onion, sliced as thin as possible
  • 1/4 cup black olives (I like Kalamata; make sure you buy pitted olives – I hate spitting out the pits!)
  • 1/4 cup crumbled feta cheese
  • 1 teaspoon dried oregano
  • 1 lemon, juiced
  • salt, pepper, and a pinch of sugar
  • 1/4 cup olive oil

Directions:

  1. Make the dressing:  In a small Tupperware cup with a tight-fitting lid, mix together the oregano, lemon juice, salt, pepper, and a pinch of sugar.  Set aside – this gives the oregano time to “bloom” in the lemon juice and release it’s flavor.  If you add the oil too soon, you coat the oregano and it’s flavor won’t be as strong.
  2. Cut the lettuce into bite-sized pieces and wash well.  To compose, fill a large bowl with the lettuce, then top with bell pepper, cucumber, onion, olives, and feta.
  3. Add the oil to the oregano and lemon juice, shake well to combine, and pour over salad.

Notes:  This recipe makes 2 big salads, or  4 side salads.  Many people add tomato to a Greek Salad, and I encourage you to try it out—in the summer, when they are in season.  If you have leftover salad ingredients, this makes a great wrap—just roll it all up in a tortilla and eat like a burrito – especially great with chopped, cooked chicken! 

Explore, experiment, enjoy! — Dana


Please visit me at Frugal Girlmet for more unique recipes!

If you would like to send Dana a private message in regards to this recipe, please email her at: Dana@girlfriendscoffeehour.com.

At Home with GCH: Meal Planning Week 3


Shopping Tips & Coupons

One of the first things I do when it comes to Menu Planning is check my local grocery ads.  I have two grocery stores here in my hometown, and two Walmart stores within 15 miles of where I live.  I also have two other grocery stores I shop that are about 30 miles from where I live.  Which store I shop at depends on which store has the best deals.

At first, when I started shopping this way, I thought it was nuts to drive 30 miles out of the way to buy just a few items on sale.  But let me say this first.  I don’t drive out of my way unless it is a REALLY good sale!  Why do I do it this way?  One reason is because I am married to a penny-pincher husband.  I say that with much love!! 🙂 He will shop for weeks on end before he will purchase something.  He has turned me into a penny-pincher, too!  But, I also recognize that my time is valuable, too!  So if I’m only going to save 15-cents on one item, I refuse to drive 30 miles out of my way to save just 15-cents!  To do that, makes no sense at all.  So it has to be one really good sale before I will drive out of my way.

When I grocery shop, I will always shop the outer edge of the grocery store first.  That is where you will find the best foods for you and your family; vegetables, fruits, grains, and etc.  The inside aisles of the grocery stores are more for canned goods, and processed foods.

I have learned over the years that most times it makes more sense to cook from scratch.  It is definitely healthier for you and your family.  Processed foods were created to help you save time in the kitchen, yes.  But, when you really truly look at it, processed foods are not good for you, if you truly knew what was being used in those foods!  So, another tip I can give you is to cook from scratch when possible!  Make the time to cook this way, to offer healthier meals for your family.  Most times, cooking from scratch doesn’t take any longer than cooking from a box of processed food!  You will love it because you know you are taking good care of your family!

Another tip when grocery shopping is to look at the price per unit.  You will be amazed at how much money you can save if you compare unit prices!!  This is something I learned from my husband.  I used to be the one that would go in the grocery store, and just grab and run.  I was always in a hurry!  I just wanted to get in and out of the store, get home, get it cooked, and get it on the table.  I was not price-conscious in any way!  But, after I learned how to do this, and began to see just how much money I was saving by doing this, I don’t shop any other way now!

The next tip I will share is the benefit of using coupons.  Coupons can save you tons of money, and you don’t have to be a Coupon Queen to make that happen!

I am the first to admit that I am not a Coupon Queen.  I find them time consuming, and I always seem to forget them when I head to the store!  BUT, what I mean by this statement is that I am not a Coupon Queen like you see on the reality shows!  I just do not have the time to put into couponing like these ladies do.  But, I DO use coupons.

When I clip coupons, I only clip ones that I know I will use.  I don’t stockpile grocery items in my garage or in closets in my home!  I use the coupons for food, or items that I know I will use within the next couple of weeks.

There is a lot to learn about using coupons.  Much of it can be found on the Internet if you do a search for Coupon 101.

Here are some tips that I have learned along the way:

  • Where do I find coupons?
    • Magazines
    • Newspapers
    • Internet
    • Coupons Groups on Facebook
    • Friends/Family
    • Direct from Manufacturer
    • Weekly Grocery Store ads
    • Tear pads located in the stores
    • Peel-off’s located on the product
    • Free Samples from manufacturer
  • Keeping your coupons organized
    • 3-ring binder with baseball card holders (Wal-mart, etc)
    • Coupon caddy (Dollar store)
    • Some women use what is called a Couponizer (www.couponizer.com)
  •  Categories to include in your Coupon-holder
  • Baby
  • Bakery (I put all breads, rolls, etc here)
  • Baking
  • Canned/Boxed Items
  • Beverages
  • Condiments
  • Meat/Produce
  • Dairy /Refrigerated
  • Frozen
  • Household (things such as batteries, light bulbs, etc)
  • Laundry / Cleaning Products / Dishwashing
  • Medicine
  • Paper/Plastic (includes disposable dinnerware to toilet tissue)
  • Hair Care
  • Oral Care
  • Soap/Body Wash
  • Personal Care (Shampoo, Deodorant, Beauty, Feminine Care)
  • Snacks
  • Retail Outlets
  • How to Use Your Coupons: (Again, there is so much to learn about coupons.  I am just going to cover the basics here, today.)
    • One Per Rule – Means the coupon can be used by one customer only.  You are a customer; your husband is a customer; your daughter is a customer.  J  So remember, if you need more than one of an item, ring it up as individual customers!
    • Per Transaction:  Means the coupon can only be used for that transaction, for that shopping trip.  You are restricted by the number of times you can use that particular coupon in that shopping trip.
    • BOGO:  Buy One – Get One FREE.  Buy one item at regular cost get a second item of the same price, free.  Most manufacturers will put a limit on how many items can be purchased.
    • Expiration Dates:  You must redeem coupons by midnight by a certain date before it is no longer valid.


Next, I want to take you through the steps of using a Shopping List.

A shopping list is a must if you want to save money with Meal Planning!  There is no way around this!  A list is your lifesaver when shopping.  Never leave home without it!

How many times have you gone to the grocery store to buy a gallon of milk, only to come home with over $100 in groceries?!?!  It used to happen to me all the time!  Why?  Because I didn’t plan ahead!  My lack of planning cost me extra money every time I go to the store without a list!  So the BEST advice I can give you is to never ever shop without a list and to STICK TO YOUR LIST!

As we learned last week, we must first plan out our meals; checking food pantry and freezer to see what you have on hand first.  This is a definite must before going grocery shopping.  I used to always go to the grocery store, without my list, and pick up things that I just knew I was out of, only to find that I had that exact item on hand once I arrived home!  Grrrr!!  More money that I did not need to spend on that trip!

God calls us to be good stewards of what He has provided for us, and each time we shop without planning ahead, we are disobeying God’s command to be good stewards of His provisions.

So here is my first rule:  ALWAYS SHOP WITH A LIST & STICK TO THE LIST!

First check your pantry and freezer.  Next plan your meals for the month, and then break it down to a weekly menu.  Then decide what groceries you need to prepare the meals on your Menu Planner for that week.  What you don’t have on hand is what will go on your list.

I have some favorite grocery lists that I have found on the Internet.  I would like to share those links with you, so you can choose which one works best for you.  These sites offer FREE printables.  Remember, just a simple piece of notebook paper will work, too!

This will give you a good start.  You can find more by doing an Internet search.

I will conclude this week’s blog here.  Just remember …. TIME IS MONEYMake time to save moneyPlan ahead to save moneyUse coupons to save money!  Never shop without a list!

Next week, we will talk about food preparation.  I will share some tips for preparing your meals ahead of time to save time, and money!  I hope you are enjoying this series, so far!  If you have questions, please feel free to post them below.  I will be happy to answer them myself, or find the answer for you!
Until next week,

Christi


A Virtuous Woman plans ahead before making purchases and spends money wisely. She is careful to purchase quality items which her family needs. (Proverbs 31: 14, Proverbs 31: 16, Proverbs 31: 18, 1 Timothy 6: 10, Ephesians 5: 23, Deuteronomy 14: 22, Numbers 18: 26)


If you would like to send Christi a personal email in regards to this blog, please email her at: Christi@girlfriendscoffeehour.com

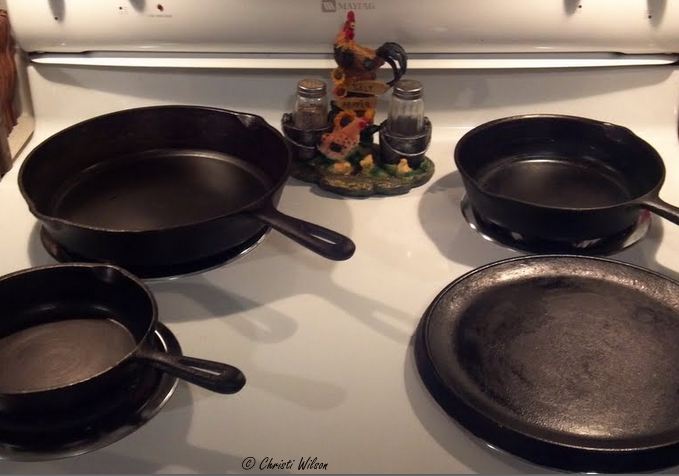
At Home with GCH: Cooking and Caring for Cast Iron

Cast Iron


I must admit that I until I met my husband, I never used cast iron; nor did I like it!  It was heavy, awkward, and everything I cooked in it was burnt to a crisp!  It was hard for me to clean afterward, too.  I’m definitely no expert in cooking with, or cleaning cast iron, but I have learned a few things over the years from my husband, who I call the Cast Iron Guru! 🙂

After a few lessons in the proper way to cook in and care for cast iron, I have to say today that it’s one of my favorite pieces of cookware!  So I would like to share some tips about cast iron that I have learned along the way!  You can find many other tips on the Internet, but these tips are just a few that I practice in my own kitchen.

  •  Cast iron needs to be seasoned before you used it.  The best way to season cast iron is with canola oil, and then bake it in a warm oven—around 300 degrees, for 2 hours.  Put the cast iron cookware in the oven and let it heat up – with the oven.  To season, you will rub canola oil all over the pan, both inside and out.  Place it upside down on a cookie sheet, and place in the oven.  Once you remove it from the oven, wipe the inside of the pan out once again, using paper towels.  BE CAREFUL! It will be HOT once it comes out of the oven!  A properly seasoned cast iron will develop a non-stick surface, and make cooking in cast iron so much more enjoyable!
  • To remove light rust from cast iron, rub a combination of salt and oil over the areas of rust until the rust is gone.  Once the rust is removed, you will need to re-season your cast iron.  If the rust is pretty set in and deep into the cast iron, you will want to begin by scraping the rust off with a stiff wire brush.  Scrape off all of the loose rust— anything that will come off of the pan.  (You can also use a cordless drill with a wire brush attachment to remove the rust if it is really bad!)  Next, put your cast iron in another container that will allow the cast iron to fit flat in the bottom of the container.  Cover it with a 1:1 solution of water and white vinegar.  Make sure you cover your mouth and nose when doing this step, or do this step outside.  The vinegar will help remove the rust the rest of the way.  Then you will season the cast iron as you directed above. (Some people suggest you use an oven cleaner for a deeply rusted cast iron.  I DO NOT recommend using harsh chemicals on cast iron. All natural products are the only way to go, in my opinion!)
  •  When cleaning cast iron, never use soap, an SOS pad, or stainless steel.  Always use a strong-bristle brush and water.  As soon as cast iron is cleaned, put the skillet on the stove burner, and heat it up in order to evaporate the moisture.  As soon as the water has evaporated, once again, rub the inside of the cast iron with canola oil to season.
  • Never try to cool your cast iron by putting it in cold water; doing so could cause the cast iron to crack!
  • Never cook any acidic ingredients, like tomatoes or tomato sauce, in cast iron.  It can damage the seasoned surface, and cause a metallic taste in your food.
  • Never start cooking with cast iron on a high-heat.  Start with low heat, and gradually increase as needed. If you are going to bake with cast iron, use an older piece of cast iron cookware, and keep the newer cast iron for frying and sautéing.
  • Sometimes cast iron will get a gunky, sticky feel to it.  The best way to remove this gunky, sticky mess is to put the cast iron cookware on the stove,; adding a couple of quarts of water.  Bring to a boil.  Wash in hot water, using a strong nylon brush.  Once you have washed the cast iron, you will heat it up again on the stove until the moisture has evaporated.  Remove from the stove and with a thick glove on, season with canola oil, once again.

Cast iron can be great cookware to cook with.  It does take some extra special care, but once you get the hang of it, you won’t want to use any other kind of cookware; take good care of it and it will stick around for years!  My father actually still has the cast iron skillet that his mother used to cook with.  It’s 60+ years old!!  It’s thinned down over the years, but he’s still able to cook with it!!

So, don’t be afraid to try cast iron.  It’s not only a great piece of cookware; it’s a great workout tool, too, because of its weight!! LOL

Now that your cast iron is all seasoned and nice and clean, it’s time to make a batch of cornbread in it!! 🙂  I LOVE Cornbread made in my cast iron skillet!  I just use a box of Jiffy Cornbread mix.  Mix milk and eggs into the cornbread mix, and pour it into the cast iron skillet, and follow directions on the package for baking!  Oh Yummmm….

Enjoy!

Christi Wilson


If you are interested in sending Christi a private email, you may email her at: Christi@girlfriendscoffeehour.com

At Home with GCH – Household Binder, Part 1

household binder Recently, I’ve had several people ask me about my household binder and for help in getting a system in place that will help keep their homes clean and organized. Today and a week from today, I will be sharing my binder with you. You will get to see what it looks like, how I have it organized, and what I use to keep my home in order. Plus I will share with you where I purchased all my supplies and where I found some of the printables it contains. Grab a pen and a notepad, find a cozy spot, and read on… and in just a few minutes, you’ll be on your way to a more organized home!

The first thing you see when you look at my binder is an adorable cover, personalized with my monogram. I found this over at lee, me, and the girls. Does your binder have to be cute to be functional? Absolutely not, but it sure helps!

bcollage

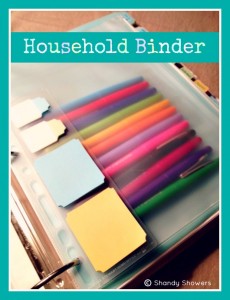
Open the cover, and you will find an assortment of labels, tabs, sticky notes, and a pouch… all from the Martha Stewart line at Staples. (I also bought my big Avery binder and sheet protectors there years and years ago when I first made my binder, and it still looks new!) I just went there to replenish supplies, and I thought maybe I was in Heaven. I love, love, love this line of products! The young man at the checkout figured that out fast. The first words out of his mouth were, “You must like Martha Stewart!” Why, yes. Yes, I do. In fact, I drove an hour one way just to get these items. No Staples near me. Booo! But I digress. Inside the pouch are my favorite Paper Mate Flair pens (another Staples find.) Colorful, and they don’t bleed through the paper! A set of twelve lets me color-code everything to my heart’s content!

Next, we come to the first section of my binder… Family Planner.” It contains:

calendar

The next section is called Keeping House.” In this section, you will find:

  • the Homemaker’s Creed
  • my daily routines
  • detailed cleaning lists
  • many, many, MANY reference sheets regarding cleaning
  • a special section for my Shaklee product information

Then, I have a section titled, Blog,” specifically for my personal blog. It includes planning sheets and more.

Next up is my “Ministry” section, with sub-sections for Girlfriends Coffee Hour and projects I work on throughout the year for various ministries (church, Operation Christmas Child, etc.)

Our family’s “Directory” is next. It includes:

The very important “Finances” section is next. In this section, you will find:

Our “Family” section is next. It includes sub-sections for each family member with tabs for:

  • medical
  • school/sports
  • work

The family section also includes:

  • a cemetery info tab so I can keep on top of my dad’s and grandparents’ graves (maintenance, flowers, etc.)
  • online info tab

Last is my “Menu Planning” section, which has:

  • weekly menu planner
  • perforated task list sheets (Martha Stewart line again!) – I can plan my meals on these awesome sheets, and write the ingredients I need to buy at the store on the right side, which then tears off to take to the store!
  • secure top sheet protectors (you guessed it… Martha!) – These are divided in half, so I get two “envelopes” per page, where I keep my coupons organized by category.

That’s it in a nutshell! Be sure to come back next week to learn about my cleaning routine, to find out what has been the single biggest help to me with cleaning, and to get another peek into my binder! In the meantime, you can start thinking about what you want to have in YOUR binder. Start brainstorming! Then have fun gathering or shopping for the materials you need to make one of your own. If you have any questions, just ask away in the comments below, or send me an email at: shandy@girlfriendscoffeehour.com

Love & Blessings,

Shandy

Be sure to visit Shandy’s personal blog Aprons ‘n Pearls for crafts, recipes, homekeeping tips & more!


At Home with GCH – SoupPalooza Part 3

SoupPalooza, Part Three

Here on our At Home with GCH  blog, Monday’s are always focused on healthy but oh-so-yummy! recipes.  We are continuing to celebrate soup, soup, and soup since this is National Soup Month!  Each week we will explore soup basics sometimes along with a bonus recipe for you to serve to your loved ones.

Last week I shared that I made a commitment to Mr. Hayden to serve soup at least once each day for the month.  So far…so good!  He’s enjoyed  Homemade Mini-Meatball Soup, White Bean & Kale Soup w/Chicken Sausage, as well as Vegetable Tortellini Soup, and homemade Creamy Tomato Soup.

IMG_1387

This week we are making French Onion Soup accompanied by the traditional baguette with a yummy, cheesy topping.  Whenever I think of this soup, I always remember Julia Child!  Any other Julia fans out there?  For fans, or those who would love to be entertained while learning from the best, I have attached a short video of Julia preparing her version of French Onion Soup.    Bon Appetit!

IMG_1386

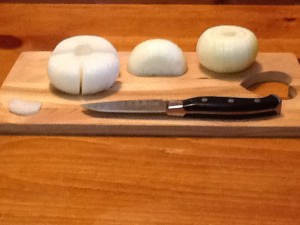
Onto our preparation…  This soup is fairly uncomplicated but it does take some time. One important part of the preparation for this recipe is the manner in which the onions are cut…really.  In this recipe this is the shape onion that works best.  Onions sliced from top to bottom, or “pole to pole” also cook more evenly.  And they have a shape and size that ‘eats well.’  You don’t want long, stringy pieces of onion falling off your spoon!  Try this: Peel the onions and slice off the ends.  Cut the onion in half through the middle (think: along the equator).  Then lay the half of the onion down and make thin (1/4″) cuts from top to bottom.

Ingredients:

1/4 cup (½ stick) unsalted butter
5-6 small to medium-sized onions (approximately 2#), sliced thin **
2 tablespoons chopped garlic
1 tablespoon dried thyme, 1 teaspoon dried crushed rosemary
Kosher salt and freshly ground black pepper
1 cup red wine, or additional cup of broth
3 tablespoons flour
2 quarts broth (beef, chicken, or veggie)
1 loaf French, or Italian, bread
3/4 cup shredded Swiss cheese (traditionally Gruyere is used; pricey!  I use Jarlsberg)
1/4 cup shredded Parmesan cheese

Melt the stick of butter in a large stockpot over medium heat.  Add all the onions, the herbs and a few grinds of salt and pepper.  Stir well making sure to thoroughly coat all of the onions with the butter. Now just allow the onions to cook; occasionally, give a thorough stir up from the bottom of the pan.  After 10 minutes, turn the heat down just a bit.  The onions will need to cook for an additional 20 minutes or so; during the last minute or two, stir in the chopped garlic.  You will see the onions getting very soft and turning a light brown.  This is called caramelization.  Do Not Let Burn…just brown…this is where the majority of all the yummy flavor of the soup will come from.

Add the wine and raise the heat to bring to a quick boil.  Immediately reduce the heat to low and simmer until the wine has evaporated and the onions appear almost dry, about 5 minutes.  Dust the onions with the flour; give them a stir.  Cook for 5 minutes to cook out the raw flour taste. Now slowly add in the broth, and raise the heat to bring the soup back to a simmer; cook for 15 minutes. Season, to taste, with salt and pepper.

When you’re ready to eat, preheat the broiler.  Cut the bread on the diagonal into 1″ slices that will fit into your soup bowl or mug.  Place the bread on a baking sheet in a single layer. Sprinkle the slices with the cheeses (mound it up!) and broil until bubbly and golden brown, 3 or 4 minutes. Watch they don’t burn!  I usually make a few extra for dipping.

Ladle the soup into the bowls and float the bread slice on top.  Voila!  French Onion Soup!

God loves you!  (Don’t ever forget that!)

♥ coleen


For all the Julia Child fans, I give you Julia at her best—she always gives wonderful tips and ideas!  My favorite here is how to get the onion-y smell off your hands!

http://video.pbs.org/video/2261536742/

** Here is a tutorial about all types of onion cuts, if you would like to check it out: HOW TO CUT ONIONS


If you would like to send a personal message to Coleen, in regards to this blog, please email her at: Coleen@girlfriendscoffeehour.com.

Meal Planning 101 – Week 2 – Meal Planning Binder & Menu Planners


Hello!  Welcome to Week 2 of Meal Planning 101!  I’m glad you decided to come back and learn more about being successful in Meal Planning!  Meal Planning takes some effort, and that effort takes some organization.  Once you have a “system” in place, it’s just a matter of input from that point on!  So this week I want to talk about creating a Meal Planning Binder and Menu Planners.  This binder will help get you and keep you organized in your meal planning efforts.

My Meal Planning Binder is something that I look at least a couple of times a day!  I know… I get little nuts about it… but I am always looking for new recipes to add to my binder.  I love to try new recipes!  I have discovered some amazing meals by experimenting with my own created recipes, along with ones that I have been given by family, friends, and those I find right here by our “GCH:What’s on Your Plate?” page, and Pinterest.

Instead of giving you directions on how to make my own binder, I’m going to reference a couple of Pinterest links that will give you all kinds of binder ideas!  It’s really up to YOU how you want your binder to look and feel.

For my own binder, I include sections that include my Menu Planner for the Month, and for the Week, along with a Grocery list, Pantry/Freezer List, and a Recipes section.  I also keep a zippered pencil holder (like they use in school) to keep all my coupons in.  Personally, I am not a big coupon person!  I like them, but I do not go crazy with them!  I pick out a few that I know I will use, for products that I know we love and use on a regular basis!  You may be different than I am.  I have seen women who have coupon binders that are in 3-inch 3-ring binders, and it’s loaded with baseball card protector sheets that hold their coupons.  Way more effort than I want to put into my grocery shopping!  We’ll talk about this further in a later blog!

But before I forget, here are the Pinterest links to the Menu Planner binders: 

http://pinterest.com/search/pins/?q=Meal+Planner+Binders

http://pinterest.com/search/pins/?q=Menu+Planning+binders

.

Now, let’s start with the first things that will be placed inside your binder:  Monthly Menu, Weekly Menu, Freezer / Pantry List, Grocery List, and of course, your coupons.  But for now, let’s talk about your Menu Planner.

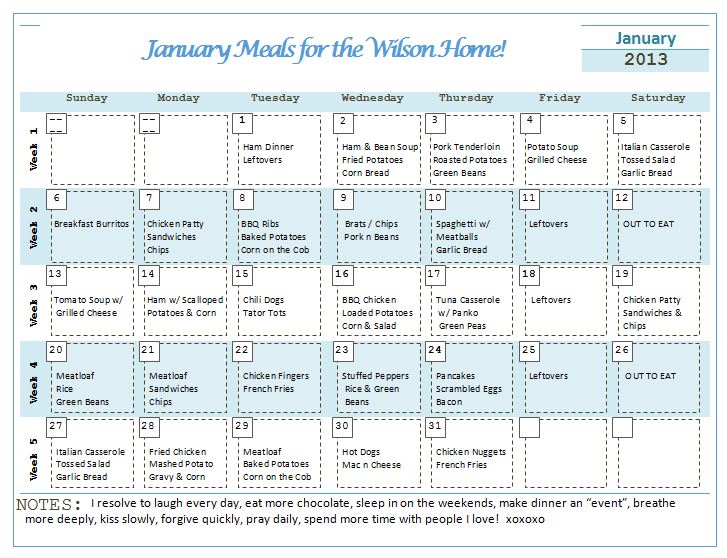
In looking through tons and tons of Pinterest links for the perfect Menu Planner, I stumbled across one located at: www.amybayliss.com.  She offers customizable Menu Planners such as the one below.  I love this because I can type this up on my computer and make it look nice and neat!  I can change it anytime I want, and create new meals each month.  Sometimes, I leave certain meals on the menu planner because they are some of our favorites!  So this is really a convenient planner for me to us.  You may choose the planner that allows you to write in the meals for the month, or the week.  Again, it’s just a personal preference.  There is no right or wrong way to do this!  It’s all about doing it, and then finding the system that works for YOU!

Monthly Menu Planner

This exact form was found on: http://amybayliss.com/2011/08/planners-goals-calendars-church-and-ministry-sections-part-2/.   I just used the “Calendar” download.  You can change the name of the month, so you have a new form to use each month.  Amy’s site offers a lot of awesome free printables!

In my meal planning, I always start by making a list of what I have in my pantry and freezer.  That way I know what I have on hand, and what I will need to purchase.

My next step is to make a list of all of the meals that we love.  Each week, I also include a “Leftovers” night and I add this to my Menu Planner!  I hate to see food go to waste!  Nothing gripes me more than to have to throw something away just because I didn’t add it into a new meal!  So I plan at least one night a week for leftovers!  Some people don’t like leftovers…again, personal preference!

We also plan for at least two nights a month for going to a restaurant.  This might include our Date Night meal, or a meal out with friends; whichever one it happens to be, it gets put on my Menu Planner.  So what that means is that I have to plan ahead for these nights.  My husband has the craziest work schedule where he works 3 days on, and 3 days off.  So we never have a normal weekend like most couples do!  We take our weekends as we can get them!  So I take his work calendar and sit down and choose one night a month for our Date Night, and leave room for at least one more night for eating with friends.  Again…put it on your Menu Planner!!

Once I have my list of groceries on hand from my pantry and freezer, and I have written down all of my favorite meals, I start making my menu for the month!  My freezer, pantry, and favorite meals lists can just be updated as I go!  This is the first time-consuming activity that you will have, but once it’s done, it’s pretty easy to maintain!  We’re getting you closer to Menu Planning success!   Trust me, once you make your binder and a monthly menu, it will make your life so much easier for the remainder of the month!  No more planning for another 30 days!

After you have completed your Monthly Menu, your next step is to break down the Monthly menu into a Weekly menu.  Here is where you will see just seven days of menus.  Write out a Weekly menu for every week on our Monthly menu.  Once you do it, it’s done for the month, and for each week; then it’s just a matter of grabbing the next weeks form to see what’s on the menu.  You can even just use a simple piece of notebook paper to do this, if you wish.  You really don’t need any special forms, etc.  You’ll be glad you took the time at the beginning of the month to do this!  Trust me!

For Meal Planner forms, do a search on Pinterest for “free weekly meal planner printables”; there are many of them out there.  I use a lot of Amy’s forms from her site because they are customizable!  I just love the way she has formatted them, and makes it so easy for me to input my own information!  Again, you will want to search for forms that are going to work for YOU!  If they don’t work for YOU, you won’t keep up with it!  So find something that works for you and one that you enjoy working with!

Now that we have our meals planned for the month and week, it’s time to put together our Shopping List.  We’ll discuss our Shopping List and coupons next week.  You will store all of this inside your Menu Planning Binder, in the proper sections.

I hope you are enjoying this series.  If you want, please share a link to the Menu Planner that you use!  You never know if someone else will find your Menu Planner convenient for them, as well!

See you next week!

Christi

********************

A Virtuous Woman uses her time wisely. She works diligently to complete her daily tasks. She does not spend time dwelling on those things that do not please the Lord. (Proverbs 31: 13, Proverbs 31: 19, Proverbs 31: 27, Ecclesiastes 3, Proverbs 16: 9, Philippians 4:8)


If you were interested in checking out any of our online Bible studies, click HERE. Once we receive your registration, we will email you with further details.

If you would like to send a private message to Christi in regards to this blog, please email her at: Christi@girlfriendscoffeehour.com