December 26, 2024

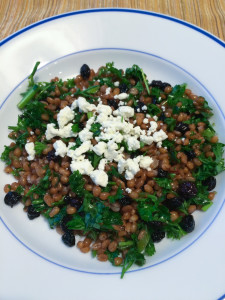
Wheat Berry Salad

Wheat Berry Salad

If you’ve never had wheat berries, you’re in for a treat!  These grains have a delightful chewiness and enough fiber to fill you up.  Combine them with a mild vinaigrette, some fresh vibrant herbs, and a little tangy fruit, and you have the perfect salad.

You may need to search around to find wheat berries, also known as hard winter wheat.  Whole Foods and other health food stores will have them in the bulk section.  They cook up just like any other grain (barley or rice); I actually cooked mine in my rice cooker.  This salad keeps in the fridge for a few days…so have some with dinner, or breakfast, or whenever you like.  Also try subbing out the dried blueberries with raisins, dried cherries, minced dried apricots, dried cranberries – you get the idea.

Wheat Berry Salad

Ingredients:

  • 1 cup wheat berries
  • 1/2 cup dried blueberries
  • 1/2 cup chopped parsley
  • 3 green onions, diced
  • 3 tablespoons olive oil
  • 1/2 lemon, juiced
  • salt and pepper
  • optional:  a few tablespoons of crumbled feta or goat cheese

Directions:

  1. In a heavy pot with a lid, or in a rice cooker, pour in the wheat berries, as well as two cups of water.  Bring to a boil, then cover and simmer for about 30 minutes.
  2. The wheat berries should absorb all the water from the pot.  If not, drain them.  Pour them into a large bowl.  Add the blueberries, parsley, and green onions.  Toss to mix.
  3. Add the olive oil, lemon juice, and salt and pepper.  Taste for seasoning.  Keep  in the fridge until ready to eat.  When serving, you can sprinkle some crumbled feta or goat cheese over the top.

Explore, experiment, enjoy! — Dana


To view even more of Dana’s unique recipe, you can visit her at Frugal Girlmet
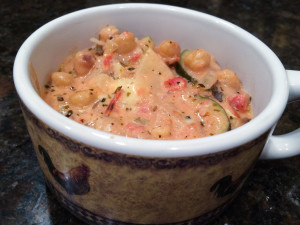
Italian Vegetable Cheese Soup

Italian Vegetable Cheese Soup


I remember my Mom made a version of this dish probably 25 years ago, and it was FANTASTIC.  It was one of those things that was so rich and luxurious that the memory stayed with me for a quarter century!  I asked my sister, who is now in possession of my mother’s recipe box, to find the recipe, but to no avail.  After some hunting online, I think I found something close.  As is my modus operandi, I tweaked it and made it my own, and now I’m sharing with you:  Italian Vegetable Cheese Soup!

It’s a very simple recipe, and of course, I always encourage you to make it how you and your family will like it best.  Feel free to add more vegetables to the soup.  This recipe is pretty basic, but please keep the zucchini, lots of onions and garlic, and the garbanzo beans.  I guess you could sub in another bean – Great Northerns would work – but I like the firm texture of dried garbanzos that have been cooked just to al dente.  Do NOT skip the wine in this recipe.  You only need half a cup, but it adds so much flavor.  As for the cheese, I used a combination of cream cheese, goat cheese, and a very sharp white cheddar.  You use what you like – maybe some Asiago would be nice, and Fontina would definitely be delicious.

This is not diet food, but a small bowl will fill you up, so it’s okay!  Eat this for lunch with a green salad and enjoy!

Italian Vegetable Cheese Soup

Ingredients:

  • 1/2 pound dried garbanzo beans (or use one can of garbanzos)
  • 2 onions, diced
  • 1/2 stick butter
  • 6 cloves garlic, minced
  • 2 zucchini, sliced into half-moons
  • 1 can crushed or diced tomatoes (I used fire-roasted with peppers, and it added a welcome spicy kick!)
  • 1 teaspoon dried Italian herbs (or use a combo of dried oregano and basil)
  • 1/2 cup white wine
  • 1/2 cup whole milk
  • 4 ounces cream cheese
  • 1 ounce goat cheese (or more!)
  • 2 ounces sharp cheddar or other cheese (parmesan, mozzarella, fontina, gouda, asiago…)

Directions:

  1. If you are using dried garbanzos, pour them into a pot, cover with a  few inches of water, and simmer for about an hour.  If you are using canned, skip to step 2.
  2. In a large pot, cook the onions in the butter for about five minutes until soft.  Add the zucchini and garlic and cook for another 3 minutes.  Drain the water from the beans and add to the vegetables.
  3. Add in the can of tomatoes and the dried Italian herbs.  Add the wine, cover the pot and let simmer for 5 minutes.
  4. Add the milk and cheeses. Stir to combine and cover, over medium low heat.  Let simmer for five minutes, then stir again.  Don’t let the cheese stick to the bottom of the soup!
  5. I like it thick, but you can thin this out more with either milk or wine.  Serve hot!

Explore, experiment, enjoy! — Dana


To view even more of Dana’s unique recipes, you can visit her at Frugal Girlmet!


Veggie Burritos

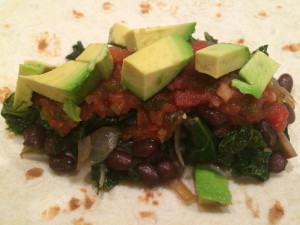
veggie burrito

Despite what restaurants would have you believe, a burrito (or taco, for that matter) doesn’t have to be the same boring combo of meat, rice, and beans.  Believe it or not, you can make burritos or tacos with whatever you have.  I have a great cookbook by Rick Bayless, who despite his gringo name, is one of the preeminent Mexican chefs in America.  His book has recipes for mushroom tacos, squash tacos – you name it, you can make it into burrito or taco filling.  Following his lead, I steered clear of the meat-rice-beans set-up and created my own version of the Veggie Burrito!

Of course, you can use whatever veggies you like, and please feel free to add or subtract vegetables from my recipe.  This one features toothy black beans (instead of the heavy refried beans you usually find plastered to the inside of a tortilla), onions, chopped mushrooms and sautéed kale.  Then get crazy with the accoutrements:  salsa, cheese, diced avocado, sour cream (or Greek yogurt in my case).  Need something a little more filling?  Replace the boring rice with quinoa!  You get more protein that way.

If you have leftover veggie mix, you can just heat it up and serve with a fried egg on top for a healthy breakfast, or make a burrito bowl:  veggie mix, quinoa, avocado, salsa – basically everything but the tortilla!

Veggie Burritos (Makes 2 burritos)

Ingredients:

  • 2 tablespoons butter
  • 1/2 teaspoon salt
  • 1 small onion, chopped
  • 4 cups chopped kale, washed
  • 8 ounces mushrooms (white or cremini), sliced
  • 1 can black beans, drained
  • salt and pepper
  • 2 tortillas
  • salsa, grated cheese, sour cream or Greek yogurt, chopped avocado, cooked quinoa – your choice of any or all

Directions:

  1. In a large frying pan with a lid, add the butter, salt, and chopped onion.  Cook over medium for about five to ten minutes to get a little color.  Don’t let them burn!
  2. While the onions are cooking, prepare the kale – wash and spin it.  It doesn’t need to be dry, since a little water will help it steam and get tender.  Slice the mushrooms.
  3. Stir the washed kale into the onions in the frying pan and cover with a lid.  Cook for about 5 minutes.  Then remove the lid and add the mushrooms.  Cook for five to ten minutes, until most of the water has evaporated and the mushrooms are cooked through.  Add the black beans and stir for another minute.
  4. Put the two tortillas on a plate and cover with a damp dish towel.  Microwave for 30 seconds, then fill with a heaping scoop of the veggie mix.  Top with salsa, cheese, et cetera, and fold tortilla to close.

Explore, experiment, enjoy! — Dana


To view even more of Dana’s unique recipe, you can visit her at Frugal Girlmet!

CrockPot Black Bean Soup

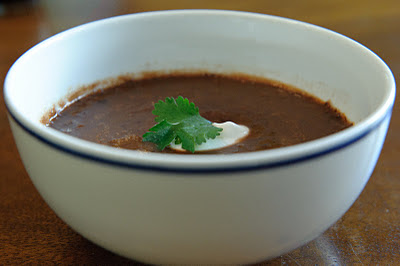
I love my Crockpot. I have found, however, that almost all the recipes in my Crockpot cookbooks are for meat-based entrees. That’s all well and good, but there are some times you want something lighter, or vegetarian (or that isn’t made with a can of cream of chicken soup!) I ordered a book on Amazon.com, hoping to find something new and different, and I did: “Fresh From the Vegetarian Slow Cooker” by Robin Robertson.

The recipe for Black Bean Soup was easy to follow, and I had everything I needed for it already in my pantry and fridge – and I’m betting you do, too. This came out better than I expected!  The texture was both chunky and smooth after I used my immersion blender (you can put your soup in the blender or food processor and pulse lightly, or even use a potato masher to get your desired consistency.)
Serve this with chopped green onions, cilantro, sour cream, shredded cheese, salsa, tortilla chips—any or all of the above.  Terrific!
 
(Sorry about the photo. It’s bean soup, and it’s delicious and nutritious, but there’s just no way to make it look glamorous in a photo!)
gchdanablackbeansoup
 
Black Bean Soup
(recipe courtesy “Fresh From the Vegetarian Slow Cooker” by Robin Robertson)
 
Ingredients:
  • 1 tablespoon olive oil
  • 1 medium onion, chopped
  • 1 carrot, chopped
  • 1/2 green (I used red) bell pepper, seeded and minced
  • 2 garlic cloves, minced
  • 2 cans (15.5-ounces each) black beans, drained and rinsed
  • 1 can diced tomatoes, left undrained
  • 4 cups stock (I used less, probably closer to 3 cups)
  • 2 bay leaves
  • 1 teaspoon ground cumin
  • 1 teaspoon dried thyme
  • 1/4 teaspoon cayenne pepper
  • salt and pepper
  • 2 teaspoons fresh lemon juice (optional)
Directions:
  1. Heat oil in a large skillet over medium heat. Add the onion, carrot, bell pepper, and garlic; cover and cook until softened, about 5 minutes.
  2. Transfer the cooked vegetables to a slow cooker, add the beans, tomatoes and their juice, stock, bay leaves, cumin, thyme, and cayenne, and season with salt and black pepper. Stir to combine. Cover and cook on LOW for 8 hours.
  3. Remove and discard the bay leaves and taste to adjust the seaosonings.  Just before serving, stir in the lemon juice, if using. To thicken, puree at least 2 cups or up to one half of the soup solids with an immersion blender used right in the CrockPot, or ladled into a regular blender or food processor and returned to the CrockPot.  Serve hot.

Explore, experiment, enjoy! — Dana


To view even more of Dana’s unique recipe, you can visit her at Frugal Girlmet!

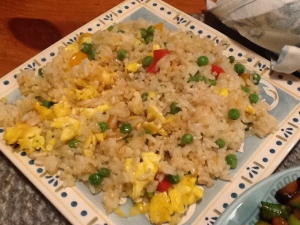
Veggie Fried Rice


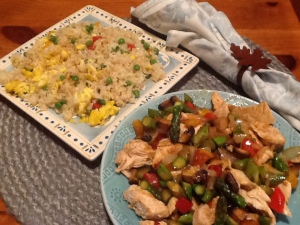
2014-11-07 20.47.12

Veggie Fried Rice

OK, I admit it…I do really, really, really love fried rice!  So yummy!  And totally limitless in variety…. You can prepare it with or without chicken or shrimp or ham or tofu! And so many choices of veggies to add: onions, mushrooms, peppers, broccoli, asparagus, green beans,…some folks even toss in a bag of frozen mixed veggies!  You can even vary the type of rice or grain that you choose: plain white, or a scented rice (like jasmine or basmati); brown rice, wild rice…or even quinoa!  The point is you make it to your own liking!  But there is one thing you MUST have—cold rice (preferably a day old).

Really!  Reason being if the rice you use is still warm and ‘fresh’ it will stick together and be clumpy.  Not pretty!  I always try to remember when preparing rice or quinoa to make an extra 1+1/2 cups so that it is sitting in the ‘fridge just waiting to be turned into Fried Rice.

This dish is also an excellent way to use up bits and pieces of fresh veggies, like half of an onion or a piece of red or yellow bell pepper.  Even some leftover cooked veggies from last night’s supper can be added in at the last minute!

Trying a new recipe that includes an ingredient or two not usually found in your pantry or ‘fridge is a great way to add those ingredients!  Our Dana Kim has been an inspiration to me as she has introduced me, through her wonderful recipes, to some items I didn’t have on hand.  (Use the ‘Search’ bar on our home page for Dana’s recipes!)  One item I always keep in my ‘fridge is sesame oil.  It has such a distinctive flavor and a teaspoon or two added to a stir fry dish or a marinade or Fried Rice is just delicious!  You can find it at any grocery store, I would imagine, right in the ethnic foods aisle.  It almost always comes packaged in a glass bottle and the oil itself is very dark.  Try it!

Here is my basic recipe…I would love to hear how you made it your own!  Enjoy!

2014-11-07 20.47.23

ingredients:
1 large egg, beaten lightly
2-3 tablespoons olive oil
2 teaspoons sesame oil
1 small onion, chopped fine
2 tablespoons finely chopped garlic (I used jarred)
1 cup (or more) finely sliced cabbage (napa is especially nice)
1 small red bell pepper, finely chopped
1/2 cup frozen tiny peas, defrosted
2-3 cups COLD cooked rice
1/2 cup finely chopped pineapple, drained WELL (I use crushed from a can)
2 tablespoons soy sauce
1-2 tablespoons your favorite stirfry sauce (optional)

salt and pepper (optional)
1 tablespoon sesame seeds, for garnish (optional)
½ cup green onion slices, for garnish (optional)

directions:

  • add a few drops of olive oil to a large nonstick skillet and warm over medium heat
  • pour the beaten egg into the middle of the pan. allow to cook, undisturbed just ‘til cooked through (will only take 1 minute or so). remove the egg ‘pancake,’ set aside and chop into bits
  • pour in an additional 1 tablespoon of olive oil; when the oil is hot, add the onion, saute for about 5 minutes
  • stir in the bell pepper along with any other raw veggies; continue to cook for 5-6 minutes ’til the peppers start to soften
  • add the chopped garlic and any leftover (cooked) veggies; stir constantly for about 1 minute ‘til garlic is fragrant
  • add in the rice and peas; mix with a wooden spoon to break up any lumps. (if necessary, add a bit more olive oil.)  saute the rice veggie mixture, stirring just once or twice, allowing the rice to just begin to lightly brown (about 5-6 minutes)
  • add in the crushed pineapple; stir to incorporate
  • pour the sesame oil and the soy sauce (and stirfry sauce) into the mixture
  • reduce heat to medium-low and cook ‘til everything is heated through
  • toss the chopped cooked egg over top

♥    ♥    ♥    ♥    ♥

God loves you!  ♥  (Don’t ever forget that!)

  coleen

Chickpea Cranberry Salad

Chickpea Salad resize

When I was in 10th grade, I decided to become a vegetarian.  My mom made no objections, but she did make it known that it was up to me to make sure I was eating a balanced diet, and that I should do some research.  “You can’t live on cheese sandwiches!” she told me more than once.  So I read up (in actual books.  It would have been so much easier to go online, but the internet hadn’t been invented yet!) and found out which foods were good sources of vegetable protein.  Chickpeas are your meatless champions!  Try this Chickpea Cranberry Salad and see for yourself!

Whether you are a vegetarian (or making lunch for someone who is), or if you just want a few meatless options, chickpeas are your friend.  Stock up on canned chickpeas for making hummus or adding to soups and salads.  I like to buy them dried.  They’re cheap and they pretty much last forever in your pantry.  Soaking them the night before you make this will cut down on cooking time, and also helps eliminate some of the chemicals that can cause gas and bloating in more sensitive tummies.  I like them better this way, because you can cook them to your preference—you can make them soft like the canned kind, or (and I highly recommend this) a little bit al dente.  The toothsome texture makes them seem more filling to me.

Serve this Chickpea Cranberry Salad between slices of bread, like a sandwich, or wrap it in lettuce.  Out of lettuce, like I was?  Use half of a sweet bell pepper as a taco shell!  Crunchy, delicious, meatless, marvelous!

Chickpea Cranberry Salad

(makes two servings)

Ingredients:

  • 1/2 cup dried chickpeas (or use 1 regular can of chickpeas)
  • 1 stalk celery
  • 1/4 cup walnuts
  • 1/4 cup dried cranberries
  • 1-2 tablespoons mayonnaise
  • salt and pepper to taste
  • squeeze of lemon juice

Directions:

  1. The night before you make the salad, pour the chickpeas into a large bowl and cover with water by at least an inch or two.  Cover the bowl with a plate and leave on the counter overnight.
  2. After soaking, drain the chickpeas.  Place in a pan and cover with water.  Simmer, covered, for about an hour.  Taste one and see if you like the texture.  Cook longer if you like.  When done, drain off the water and pour the chickpeas into a bowl.  Mash with a potato masher or the back of a fork.  I like to leave them a little chunky.
  3. Add in the rest of the ingredients and stir to combine.  Refrigerate until ready to serve.

Explore, experiment, enjoy! — Dana


To view even more of Dana’s unique recipe, you can visit her at Frugal Girlmet!

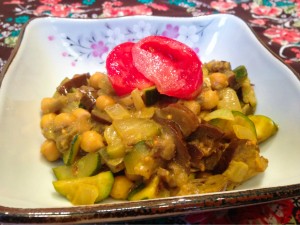
Summer Vegetable Curry

Summer Vegetable Curry resize

If you think about it, there is a lot of overlap between summer produce here in the United States, and what shows up on Indian food menus.  That’s because what grows where it’s hot there is also what grows in the summer here.  Lots of Indian dishes feature zucchini (also called courgettes), onions, eggplants, and tomatoes – all things coming into season now!  Why not try this Summer Vegetable Curry?

You really can’t mess this up or go wrong.  Don’t like garbanzo beans?  Use another bean, or switch them out for green peas or bite-sized green beans.  Like it spicy?  Add some chopped jalapeños or another chili of your choice.  Use whatever curry powder you have.  Out of coconut milk?  Use water or broth instead.  I didn’t have any cilantro, or I would have chopped up a few tablespoons to stir in right before serving.  See?  There is no wrong way.

For a vegetarian meal, double the amount of beans and serve over basmati rice.  Paleo?  Skip the beans altogether and serve this curry as a side dish to your favorite protein.  Ready?  Let’s go!

Summer Vegetable Curry

Ingredients:

  • 1 large onion
  • 2 tablespoons ghee, butter, or oil
  • 1 tablespoon mustard seeds
  • 1 tablespoon cumin seeds
  • 1 tablespoon curry powder (or more, to taste)
  • 1/2  can coconut milk
  • 2 skinny eggplants
  • 3 zucchinis
  • 1 can garbanzo beans or 1 cup of rehydrated and cooked dried garbanzos
  • cilantro, raw tomato, and rice (optional)  for serving

Directions:

  1. In a very large pot, heat the ghee or butter.  Chop the onion and add to the pot, along with the mustard and cumin seeds.  Fry on medium heat for about 5 minutes, until the onion becomes translucent.  Then add the curry powder and coconut milk and reduce heat.
  2. Cut the eggplants and zucchinis into thin half-moons.  Add to the pot, stir to mix, and cover.  Cook over low heat for about 25 minutes until the vegetables are soft, stirring occasionally to ensure nothing sticks to the bottom of the pot.
  3. Taste for seasoning – add salt or more curry powder if you like.  Stir in the garbanzos and heat through.
  4. Serve with chopped tomato and minced cilantro.  Serve over rice if you like.

This is definitely one of those recipes that is even better the next day, and it’s easy to reheat.  Have some for dinner tonight and save some for lunch tomorrow!

Explore, experiment, enjoy! — Dana


To view even more of Dana’s unique recipes, you can visit her at Frugal Girlmet!