December 22, 2024

Sausage & Mushroom Stuffed Shells with Pumpkin Sage Béchamel

sausage pumpkin shells

Whoo, that’s a long title!  And I’ll be honest – this does take a bit of time to prepare.  But if you have an extra hour on a Sunday night and want to make a delicious dinner with generous portions that you can eat the whole week through and not stop loving – try these Sausage and Mushroom Stuffed Shells with Pumpkin Sage Béchamel.

I was going to post my take on this recipe, since I made a few changes for my family, but I didn’t take careful note of my measurements. Food blogger fail!  So I’m just giving you the recipe I found at A Beautiful Bite.  I do want to note that I switched out cottage cheese for ricotta in this recipe, and it worked great.  Just buzz it in the food processor for a few seconds and it’s indistinguishable from the pricier ricotta.  Also, I ran out of sage and I had to garnish with parsley.  In any case, this recipe was a big hit, and it reheats well, so we’ll be seeing this again in our house.

 Sausage and Mushroom Stuffed Shells with Pumpkin Sage Béchamel

(Recipe Courtesy of A Beautiful Bite)

Ingredients:

  • 1 pound pasta shells, cooked al dente
  • 32-ounce ricotta cheese (or use cottage cheese)
  • 2/3 cup Parmesan cheese, grated
  • 1 egg
  • 1 teaspoon salt
  • ground pepper to taste
  • 1 pound Italian sausage (I used sage breakfast sausage)
  • 2 large yellow onion, diced
  • 2 cloves garlic, minced
  • 2 cups fresh mushrooms, sliced
  • 4 fresh sage leaves, thinly sliced
  • 3 tablespoons butter
  • 2 tablespoons flour
  • 3 cups milk
  • 1 cup pumpkin puree
  • 1 cup Greek yogurt
  • 1/2 cup Parmesan cheese, grated
  • 1/3 cup ricotta cheese
  • 6 fresh sage leaves, thinly sliced
  • 1 1/2 teaspoon salt
  • pepper to taste
  • 1/2 cup Parmesan cheese, grated for topping (I skipped this)

Directions:

  1. In a large mixing bowl, combine ricotta cheese, Parmesan, egg, salt and pepper.  Set aside.
  2. Cook shells according to directions on box.  Drain and let cool.
  3. While shells are cooking, brown sausage in a large skillet.  Remove from skillet and place meat on a paper towel to drain.  Reserve 1 tablespoon of the fat to cook the onions in.
  4. Cook onions in fat over medium heat until translucent.  Add garlic and cook for just a minute.  Add mushrooms and sage and cook for another four to five minutes.  Remove from heat and add cooked sausage.   Allow to cool for several minutes.
  5. Stuff shells with ricotta mixture, then top with sausage mixture.  Place shells in a 9×13 baking dish.  Set aside while you prepare béchamel sauce.
  6. In a large heavy pot, melt butter over medium heat.  Add flour and cook, stirring, for several minutes.  Add milk, pumpkin, yogurt, Parmesan, and ricotta.  Cook for a few minutes to thicken.  Add sage, salt and pepper.
  7. Pour béchamel over shells.  Top with extra grated Parmesan.  Bake at 350*F for forty minutes.

Explore, experiment, enjoy! — Dana


To view even more of Dana’s unique recipe, you can visit her at Frugal Girlmet!
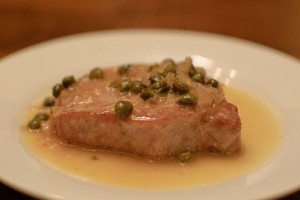
Oven-Roasted Pork Chops with Lemon-Caper Sauce

Pork Chop with Capers
Where others have a sweet tooth, I have a sour tooth.  I’ve been known to use only vinegar, and skip the oil, when dressing my salad.  I eat cornichons like other people eat bonbons.  So when I saw this recipe for Oven-Roasted Pork Chops with Lemon-Caper Sauce , I knew I was going to like it.
Using a recipe from my “Complete America’s Test Kitchen TV Show Cookbook”, I skipped the step of brining my pork chops, mostly because I didn’t read the recipe far enough in advance to do it before dinner. They came out fine without it, and were very juicy. These were easy, quick, and nearly fool-proof. They were tart and tangy (but not puckery, so if you are not a sour-lover like me, you won’t be put off.) 
 
Oven-Roasted Pork Chops with Lemon-Caper Sauce
(adapted from The Complete America’s Test Kitchen TV Show Cookbook)
 
Ingredients:
  • 4 pork chops, about 1+1/2 inches thick, trimmed of excess fat
  • 2 tablespoons vegetable oil
  • 1 medium shallot, minced
  • 1 cup chicken broth
  • 1/4 cup juice from 2 lemons
  • 2 tablespoons capers, drained
  • 3 tablespoons butter, softened
Directions:
  1. Preheat oven to 450 degrees. Heat the oil in a large skillet over high heat, and brown the pork chops on one side, for about 2 minutes. Flip and brown the other side, another 2 minutes.
  2. Transfer the chops to a foil-lined baking sheet, or large, wide baking dish (so they aren’t crowded or touching each other.) Roast in the oven until the internal temperature reaches 140 to 145 degrees on a thermometer, about 15 minutes, turning them over halfway through the cooking time. Remove from the oven, place on a platter, and cover with aluminum foil. Let them rest for about 5 minutes, and check to make sure the internal temperature has reached 150 degrees.
  3. While the chops are in the oven, add the shallot to the skillet you cooked the pork chops in, and cook over medium heat until softened, about 30 seconds.
  4. Increase the heat and add the broth, stirring to scrape up any bits stuck to the pan. Add the lemon juice and capers and cook until the sauce reduces to about 1/3 cup, about 4 minutes.
  5. Off the heat, whisk in the butter, and pour over the pork chops.

Korean Sweet and Spicy Chicken


Korean Sweet and Spicy Chicken

This Korean Sweet and Spicy Chicken is GOOD.  My family scarfed it up last night.  If you don’t have gochujang – Korean red pepper paste that is both fruity and fiery – you can add hot sauce instead.  The longer you marinate the chicken, the better, but don’t go more than 24 hours.  You can put this together in the morning before work and come home and cook it.  Serve with rice, a salad, or a full table of ban chan!

Korean Sweet and Spicy Chicken

Ingredients:

  • 2 pounds boneless, skinless chicken thighs, sliced into strips
  • 1/4 cup soy sauce
  • 1 tablespoon gochujang – or more! – or hot sauce of choice
  • 2 tablespoons ketchup
  • 3 tablespoons brown sugar or honey
  • 1 teaspoon grated ginger
  • 3 cloves garlic, minced
  • 2 tablespoons rice or apple cider vinegar
  • 1 tablespoon sesame oil
  • 1 tablespoon vegetable or olive oil
  • sliced green onions and sesame seeds, to serve

Directions:

  1. Place the chicken in a large Ziplock bag, or other resealable / Tupperware-type container.  Add the soy sauce, gochujang, ketchup, brown sugar, ginger, garlic, vinegar, and sesame oil.  Mix thoroughly to combine.  Let marinate at least one hour, but less than 24 hours.
  2. In a large skillet, add 1 tablespoon vegetable or olive oil.  When hot, add the chicken in two batches, stirring occasionally, and making sure both sides get browned, about 5-8 minutes per batch.  Discard any leftover marinade.  Serve chicken heaped in a bowl, topped with sliced green onions and sesame seeds.
Explore, experiment, enjoy! — Dana

To view even more of Dana’s unique recipe, you can visit her at Frugal Girlmet

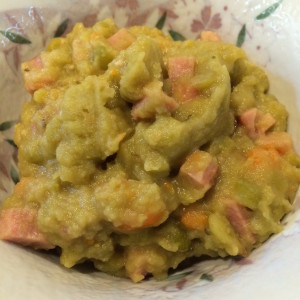
Pease Porridge

Pease Porridge

“Pease porridge hot, pease porridge cold, pease porridge in the pot, nine days old!”

 Yes, it’s a real dish; and, yes, it’s delicious hot (but I would recommend skipping it cold – and DEFINITELY don’t eat anything left out for a week!)  With fall coming next week, I thought I’d beat the rush and share my recipe for Pease Porridge.

Okay, I’ll be honest…this is just Split Pea Soup with less liquid added.  It comes out more like a stew—or even a pudding—when I make it like this.  Same ingredients though — if you want soup, just add 2 more cups of water or broth.  Easy!   You can add other ingredients to it as well – maybe a diced potato along with the veggies, or a smoked turkey leg as well as the ham.  Warm up your belly with this old favorite!

Pease Porridge

Ingredients:

  • 8 ounces of ham, diced (use Soyrizo for a vegetarian version)
  • 1 onion, diced
  • 1 cup diced carrots
  • 1 cup diced celery
  • 1 pound bag of split peas
  • 4 cups chicken broth
  • 2 cups water
  • 1 bay leaf
  • salt and pepper

Directions:

  1. In a large pot, saute the ham for a few minutes.  Add the onion, carrots, and celery and stir over medium heat until the onion is translucent.
  2. Add the peas, broth, water, and bay leaf.  Cover and simmer until thickened, 30 – 45 minutes.  Add more water if you like a thinner consistency (or add up to a full two or more cups of water or broth to make split pea soup.)  Taste and season with salt and pepper.

Explore, experiment, enjoy! — Dana


To view even more of Dana’s unique recipe, you can visit her at Frugal Girlmet

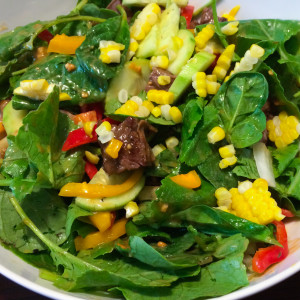
Summer Thai Steak Salad

Thai Salad

There were lots of adjectives to sift through in trying to create a name for this recipe!  ‘Salad’ had to be in there, of course…and ‘Thai,’ too, because of the peanut dressing.  But feel free to use chicken instead of steak, and you can switch out the veggies used to suit your tastes.  This Summer Thai Steak Salad is really flexible!  Ready?  Let’s go!

Summer Thai Steak Salad

(recipe makes two salads)

Ingredients:

  • 1 heaping tablespoon peanut butter
  • 1 tablespoon rice vinegar (or use a little less apple cider vinegar)
  • 1 teaspoon sugar, honey, or maple syrup
  • 1/2 teaspoon soy sauce
  • 2 tablespoons sesame oil (use grapeseed or olive oil, if you have to)
  • a few handfuls of salad greens
  • 1/2 pound cooked steak or chicken, diced
  • 1 large or 2 small bell peppers, thinly sliced
  • 1/4 sweet or red onion, thinly sliced
  • 1 cucumber, peeled and sliced into half-moons
  • 1/2 cup cooked corn kernels
  • other options:  tomatoes, avocado, basil, cilantro, carrots

Directions:

  1. In a food processor, blend together the peanut butter, vinegar, sugar, soy sauce, and sesame oil.  Taste for seasoning – add more sugar, or more vinegar, or whatever you want.  You can even give it a hit of Sriracha if you like!  Set aside.
  2. Wash greens and divide between two really big salad bowls.  Top with diced steak and thinly sliced veggies.
  3. Toss with lots of peanut dressing.
  4. Do a little happy dance in your chair!

Explore, experiment, enjoy! — Dana


To view even more of Dana’s unique recipe, you can visit her at Frugal Girlmet

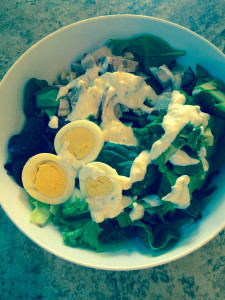
Cobb Salad with Homemade Bleu Cheese Dressing

Cobb Salad with Homemade Bleu Cheese Dressing

I think you guys know how much I love a big salad for dinner.  One of my favorites is this Cobb Salad with Homemade Bleu Cheese Dressing, because it’s got so many different components.  So satisfying!

Of course you can use store-bought dressing, but I decided to make my own.  You can really control how salty, how creamy, how peppery it is when you make it yourself – plus there are no binders, stabilizers, thickeners, et cetera like there are in bottled dressing.  (How else do you think they make that stuff shelf-stable?)  This is a basic recipe; feel free to jazz it up with a little lemon juice, hot sauce, or Worcestershire sauce to take it to the next level.  You can also add more veggies to the salad or change up the protein.  Have at it!

Cobb Salad with Homemade Bleu Cheese Dressing

Ingredients (for 2 servings):

  • 1/2 cup crumbled bleu cheese or gorgonzola
  • 1/4 cup mayonnaise
  • 1/2 cup plain yogurt
  • 1/4 cup whole milk
  • lots of ground pepper
  • washed salad greens, any kind
  • 2 hardboiled eggs, sliced
  • 1 avocado, diced
  • 1 large chicken breast (or use two chicken thighs), cooked and diced
  • 2 (or more!) slices bacon, cooked crisp
  • sliced or cherry tomatoes (would be great, but I don’t like raw tomatoes)

Directions:

  1. In a mixing bowl, stir together the bleu cheese, mayo, yogurt, and milk.  Grind in lots of black pepper.  Let chill in the fridge until you are ready to eat.  (Do it a day before and get an even better-tasting dressing!)
  2. In two large salad bowls, divide the washed salad greens.  Into each bowl, add a sliced egg, half of the avocado, the diced chicken, and some bacon crumbles.  Drizzle with dressing and serve.

Explore, experiment, enjoy! — Dana


To view even more of Dana’s unique recipe, you can visit her at Frugal Girlmet

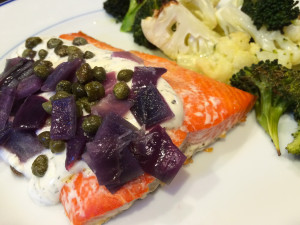
Salmon with Dill Cream Cheese Sauce

Salmon Dill Cream Cheese Sauce

I’m still struggling to find a good name for this recipe.  Two weeks ago, I had an omelet that had smoked salmon inside, and was topped by a cream cheese dill sauce.  It was so good!  It was like my favorite way to eat a bagel – without the bagel!  So I played around at home, eliminating the omelet factor in the equation, and got straight to the point—Salmon with Dill Cream Cheese Sauce!

Eat this with a salad or some roasted broccoli or asparagus.  The sauce recipe makes about half a cup, which is more than you’ll need to feed a family of four.  But fear not, it won’t go to waste!  It’s great on those same roasted vegetables, baked potatoes, and even as a dip for carrots (let it chill in the fridge for this, and maybe add a little more plain yogurt or diced green onion.)

Salmon with Dill Cream Cheese Sauce
(serves 4)

Ingredients:

  • about 1.5 pounds salmon fillets
  • drizzle of olive oil
  • 1 lemon
  • 1 heaping tablespoon cream cheese
  • 1 heaping tablespoon mayonnaise
  • 1 heaping tablespoon plain yogurt
  • 1/2 teaspoon dried dill (or use 1 teaspoon or more fresh dill)
  • salt and pepper
  • capers and diced red onion to serve

Directions:

  1. Heat the oven to 400*F.  Line a baking dish with parchment paper (optional, but it makes clean up much easier).  Lay salmon in baking dish in one layer – you may need to use another dish, or you can even use a sheet pan.  Drizzle with olive oil and season with salt and pepper.  Bake for about 14 minutes.
  2. Meanwhile, cut lemon in half and squeeze it into the bowl of a food processor.  Scoop in the cream cheese, mayo and yogurt.  Pulse to combine.  Add in dill, salt and pepper, and blend again.  Taste, adjust seasoning, and refrigerate until ready to serve.
  3. To serve, spoon a little sauce over the fish, and garnish with lots of capers and red onion.

Explore, experiment, enjoy! — Dana


To view even more of Dana’s unique recipe, you can visit her at Frugal Girlmet!
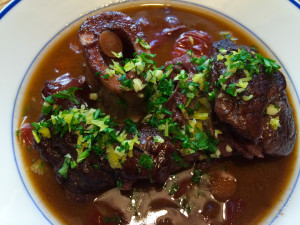
Braised Beef Shanks with Gremolata


Braised Beef Shanks with Gremolata


…otherwise known as “Osso Buco”.   I didn’t use veal, so I’m calling it something else.  When you’re the boss in the kitchen, you can do that!  These Braised Beef Shanks with Gremolata would be perfect for Easter or any other lazy Sunday afternoon.  Make them now, before spring heats up and you don’t want to have your oven on for three hours!

Yes, I said three hours, but the prep is pretty easy.  Then you just pop this dish in the oven letting the low and slow cooking turn something pretty plain into magic!  Look for thick cross-sections of shank (the leg) with a large bone in the middle, or ask your butcher.  The meat will fall off the bone, the marrow will soften and become delicious, and you top it off with a bright and flavorful gremolata.  Serve with roasted potatoes and vegetables and eat like a king!

Braised Beef Shanks with Gremolata

Ingredients:

  • 4 pounds of cross-cut beef shanks (or ask for ‘osso buco’ cut)
  • 1/4 cup flour, seasoned with 1 teaspoon salt and 1/2 teaspoon pepper
  • 2 tablespoons olive oil
  • 2 tablespoons butter
  • 1 large onion, diced
  • 3 carrots, diced
  • 1 stick celery, diced
  • 1/2 teaspoon celery salt (or plain salt)
  • 1 can of tomatoes (I used fresh tomatoes – just dice them, about one cup)
  • 2 cups red wine
  • 2 cups water
  • 1 lemon, zested (or peeled, and mince the peel)
  • 1 large clove garlic, minced
  • 1 small handful parsley, minced

Directions:

  1.  Preheat oven to 300*F.  Place the seasoned flour in a wide bowl or pie plate, and dredge all the shank pieces.  In a very large pot, heat the oil and butter together, and brown the meat.
  2. When browned, remove the meat to a plate, and add the diced onions, carrots, celery, and celery salt to the pan.  Sauté for about five minutes, or until starting to soften.  Add the tomatoes, wine, and water, then  simmer for five minutes.
  3. Add the meat back to the pan, and make sure it is submerged in the vegetable and wine mixture.  Cover with a lid and bake for 2.5 – 3 hours, or until done and very tender.
  4. Remove the meat from the pot and return the pot to the stovetop.  Stir the juices and vegetables over medium heat and let it reduce while you make the gremolata.
  5. To make the gremolata:  mix together the lemon zest, minced garlic, and minced parsley.  Stir to combine.
  6. To serve:  Spoon some veggies and juice into your bowl.  Place a shank on top, and garnish with a spoonful of gremolata.

Explore, experiment, enjoy! — Dana


To view even more of Dana’s unique recipes, you can visit her at Frugal Girlmet!


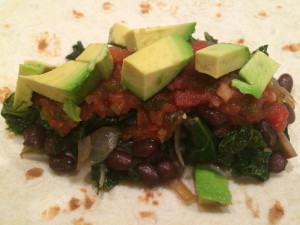
Veggie Burritos

veggie burrito

Despite what restaurants would have you believe, a burrito (or taco, for that matter) doesn’t have to be the same boring combo of meat, rice, and beans.  Believe it or not, you can make burritos or tacos with whatever you have.  I have a great cookbook by Rick Bayless, who despite his gringo name, is one of the preeminent Mexican chefs in America.  His book has recipes for mushroom tacos, squash tacos – you name it, you can make it into burrito or taco filling.  Following his lead, I steered clear of the meat-rice-beans set-up and created my own version of the Veggie Burrito!

Of course, you can use whatever veggies you like, and please feel free to add or subtract vegetables from my recipe.  This one features toothy black beans (instead of the heavy refried beans you usually find plastered to the inside of a tortilla), onions, chopped mushrooms and sautéed kale.  Then get crazy with the accoutrements:  salsa, cheese, diced avocado, sour cream (or Greek yogurt in my case).  Need something a little more filling?  Replace the boring rice with quinoa!  You get more protein that way.

If you have leftover veggie mix, you can just heat it up and serve with a fried egg on top for a healthy breakfast, or make a burrito bowl:  veggie mix, quinoa, avocado, salsa – basically everything but the tortilla!

Veggie Burritos (Makes 2 burritos)

Ingredients:

  • 2 tablespoons butter
  • 1/2 teaspoon salt
  • 1 small onion, chopped
  • 4 cups chopped kale, washed
  • 8 ounces mushrooms (white or cremini), sliced
  • 1 can black beans, drained
  • salt and pepper
  • 2 tortillas
  • salsa, grated cheese, sour cream or Greek yogurt, chopped avocado, cooked quinoa – your choice of any or all

Directions:

  1. In a large frying pan with a lid, add the butter, salt, and chopped onion.  Cook over medium for about five to ten minutes to get a little color.  Don’t let them burn!
  2. While the onions are cooking, prepare the kale – wash and spin it.  It doesn’t need to be dry, since a little water will help it steam and get tender.  Slice the mushrooms.
  3. Stir the washed kale into the onions in the frying pan and cover with a lid.  Cook for about 5 minutes.  Then remove the lid and add the mushrooms.  Cook for five to ten minutes, until most of the water has evaporated and the mushrooms are cooked through.  Add the black beans and stir for another minute.
  4. Put the two tortillas on a plate and cover with a damp dish towel.  Microwave for 30 seconds, then fill with a heaping scoop of the veggie mix.  Top with salsa, cheese, et cetera, and fold tortilla to close.

Explore, experiment, enjoy! — Dana


To view even more of Dana’s unique recipe, you can visit her at Frugal Girlmet!

Stuffed Cabbage Soup

Stuffed Cabbage Soup

In the dead of winter, there’s nothing better than a hot bowl of soup.  With this Stuffed Cabbage Soup, you get all the flavors of a delicious, labor-intensive meal, without all the hard work!

I based this soup on a dish your Polish grandmother might make—called galumpkis—meat, rice and vegetables rolled up in soft cabbage leaves and baked in a savory tomato sauce.  Don’t have a Polish grandmother?  Never fear!  This soup comes together in half an hour and is very forgiving.  No green onions?  Garnish with dill!  Don’t eat rice?  Serve with a dollop of sour cream or Greek yogurt!  You can use ground beef, pork, or even turkey here.  Or do what I did and use leftover meatloaf or hamburgers.  See?  Easy!

Stuffed Cabbage Soup

Ingredients:

  • 2 cloves garlic, minced
  • 1 tablespoon olive oil or bacon fat
  • 4 cups thinly sliced cabbage
  • 2 cups chicken, beef, or vegetable stock
  •  2 cups water
  • 1 pound cooked ground beef (I used last night’s leftover meatloaf and broke it into small pieces)
  • 1/2 cup minced carrots
  • 1 15-ounce can of diced tomatoes
  • 1 teaspoon paprika
  • 1 teaspoon toasted and ground fennel seeds (or use ground fennel or anise)
  • 2 green onions, minced
  • rice, to serve

Directions:

  1. In a very large pot, sauté the minced garlic in the oil for one minute.  Add the sliced cabbage and stir.  Cook for about 5 minutes.
  2. Add the stock and the water.  Crumble the meat into the soup and add the carrots.  Stir to combine.
  3. Add the tomatoes, paprika, and ground fennel.  Turn the heat to medium-low and cover with a lid.  Cook for about 15 minutes.
  4. To serve:  Ladle soup into a big bowl.  Add a scoop of rice and sprinkle with minced green onions.  Eat hot!

Explore, experiment, enjoy! — Dana


To view even more of Dana’s unique recipe, you can visit her at Frugal Girlmet!