November 5, 2024

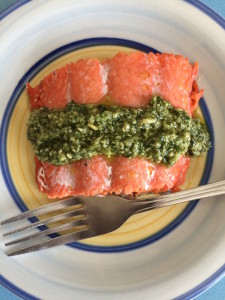
Baked Salmon with Pesto Sauce


Baked Salmon with Pesto Sauce

Salmon is my favorite fish to make at  home.  It seems more substantial than fish like sole or trout, and its strong, meaty texture and flavor give it a lot of flexibility.  Make this Baked Salmon with Pesto Sauce and find out for yourself!

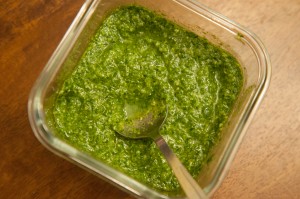
You can of course use store-bought pesto, but if you have basil growing in your garden, the rest is easy to rustle up at home.  This is how I like pesto – you can alter this to suit your tastes.  If you have any leftover pesto, try it on scrambled eggs, roasted vegetables, chicken, and of course over pasta!  (Or, want a different spin on pesto?  Try Coleen’s version!)

Baked Salmon with Pesto Sauce

Ingredients:

  • 1 large salmon filet, about 1/2 pound or more
  • 1 tablespoon olive oil
  • salt and pepper
  • 1 cup basil leaves
  • 2 garlic cloves
  • juice of 1/2 lemon
  • 1 tablespoon grated Parmesan cheese
  • 2 tablespoons pine nuts
  • 3 tablespoons – 1/3 cup olive oil

Directions:

  1. Preheat your oven to 375*F.  Line a baking sheet with aluminum foil.
  2. Place the salmon skin-side down on the baking sheet, and drizzle with one tablespoon of olive oil.  Season the salmon with salt and pepper.  Bake for 10 minutes, or until firm in the thickest part of the filet.
  3. While the salmon is in the oven, put the basil and garlic cloves in the bowl of a small food processor.  Pulse to combine.
  4. Add the lemon juice, Parmesan cheese, and pine nuts, and blend again.  Add 3 tablespoons of olive oil and blend.  Taste for seasoning – more lemon?  More Parmesan?  More garlic?  You can add more olive oil for a thinner texture – as much as half a cup if you like your pesto really thin.
  5. Serve the salmon hot from the oven with a healthy pour of pesto over the top.  Refrigerate leftovers.

Explore, experiment, enjoy! — Dana


To view even more of Dana’s unique recipe, you can visit her at Frugal Girlmet
At Home with GCH: Chicken en Papillote with Pesto

chicken en papillote

I know chicken breasts are good for me.  I know I should eat lots of lean protein.  But sometimes the idea of choking down a dry, mealy, overcooked hunk of chicken makes me shudder.  Yuck!  The trick to cooking chicken breasts is to keep them moist and flavorful, because once they get dry, they’re only good for throwing on top of a salad and drenching with dressing.  So I needed something to keep the moisture locked in.  If you have all day, use a crock pot.  If you only have an hour, use parchment paper!

Cooking something “en papillote” is French for cooking “in paper.”  You might already have parchment paper if you do a lot of baking, but if not, you can find it near the aluminum foil in the baking aisle.  This recipe is infinitely customizable—just use whatever combination of vegetables you like, plus chicken breasts, and some seasoning on top.  Bake for an hour, open and enjoy!

This recipe is even better slathered with homemade pesto.  Basil is pretty easy to grow in the yard, so if you have a garden, you can make pesto this summer!  The recipe has the proportions that I like.  You may want to use less garlic, or more oil, to make a thinner sauce.  Also, most pesto recipes add a little parmesan cheese – maybe a tablespoon, grated – to the mix; but I left it out since I am still eating on the Paleo diet.  If you have leftovers, pesto goes great over pasta of any kind.  I had a little pesto leftover and I ate it on scrambled eggs – delicious!

pesto


Chicken en Papillote with Pesto

Ingredients:

  • 4 boneless, skinless chicken breasts
  • 1 cup baby carrots
  • 2 large zucchini, cut the same size as the baby carrots
  • salt and pepper
  • 2 teaspoons butter

For the pesto:

  • 2 cups basil leaves
  • 2 cloves garlic
  • 1/4 – 1/2 cup olive oil
  • 2 tablespoons pine nuts (keep in the freezer so they won’t go rancid)
  • 1 lemon
  • salt and pepper

Directions:

  1. Preheat the oven to 400*F.  Cut two pieces of parchment paper, about 12 x 24 inches.  Fold them in half width-wise, then open.  On one half of the paper, make a bed of half the carrots and zucchini slices; repeat on the second paper.  Season with salt and pepper.  Top each bed of vegetables with two chicken breasts, and season with salt and pepper again.  Divide the butter and drop half a teaspoon of butter on each chicken breast.
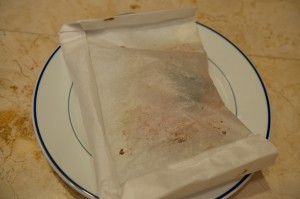
  2. Fold the paper in half, to cover the chicken.  Now you should have an envelope or packet.  Fold over the long end a few times, then make a triangular fold at each of the corners.  Now fold over the two short ends several times.  (There are many ways you can fold the paper to keep it shut.  I’ve even gotten frustrated before and stapled them shut!  Here are some ideas for folding the paper.)  When you have the two packets closed up, place on a cookie sheet and put them in the oven.  Cook for one hour, rotating the cookie sheet halfway through to make sure the packets cook evenly.

papillote packet


  1. While the chicken is cooking, make the pesto:  In a food processor, blend the basil leaves, garlic, and 1/4 cup of olive oil.  Scrape down the sides, add the pine nuts, and blend again.  Scrape down the sides again, cut the lemon in half, and add the juice to the pesto.  If you want the pesto thinner, add more oil.  Taste…if you want a stronger lemon flavor, you can add the zest from the lemon too.  If you are adding parmesan cheese, now is the time!  Blend again.
  2. To serve, open the packets—carefully!  Don’t get burned on the steam!  You can put the packets on a plate, or open them in the kitchen and throw out the paper if you like.  Pass the pesto!

Explore, experiment, enjoy! — Dana


To view even more of Dana’s unique recipes, you can visit her at Frugal Girlmet!

At Home with GCH: Spaghetti Carbonara


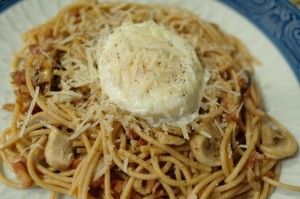
Spaghetti Carbonara

Inspiration can strike anywhere, at any time.  I was reading a magazine in the bathtub last night.  It had a page about eggs as super foods, and the different ways to prepare them.  As I was looking at photos of beautifully poached eggs, it came to me:  Spaghetti Carbonara!

Let me back up a minute.  Spaghetti Carbonara is usually made with pancetta (or bacon), onions, and is finished by adding whipped eggs to the hot pasta at the very end.  The resulting sauce is smooth, creamy, and delicious – but it’s also a little risky, since the eggs aren’t really cooked all the way.  For most people, eating uncooked or underdone eggs is not a big deal, but I thought I might be able to make it my way, and improve the food safety quotient in the process.  Instead of an egg sauce, this recipe uses poached eggs—serve with one or two, your choice.

The ingredients for this recipe are probably in your house right now.  I used whole wheat spaghetti in this recipe, but honestly, I like regular spaghetti better.  You could also use another long noodle—fettucini or linguini—if that’s what’s in your pantry.  If you want to splurge on the pancetta, feel free, but I had bacon ready to go.

This recipe serves two.  Make it for dinner tonight, with a green salad.  (Don’t worry, I don’t have an Italian Grandmother who’s rolling over in her grave right now.  Unorthodox?  Maybe, but that doesn’t mean it’s not tasty!)  Mangia!

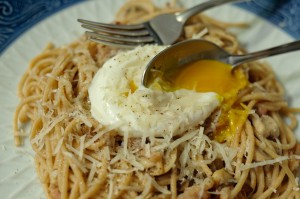
Spaghetti Carbonara Egg

The Poached Egg, aka The Sauce Bomb!

 Spaghetti Carbonara

Ingredients:

  • 1/2 pound spaghetti
  • 1 teaspoon butter or olive oil
  • 4 slices bacon, diced
  • 1/2 onion, diced (use a sweet onion, if you have it)
  • 1/2 pound mushrooms, chopped
  • 2 eggs
  • salt and pepper
  • 1/4 cup grated Parmesan cheese
  • 1/2 lemon

Directions:

  1. Place a large pot of salted water on the stove.  When it boils, add the spaghetti and cook until almost al dente.  
  2. While the pasta boils, cook the bacon and onion together in the olive oil in a large, high-sided pot.  After five minutes, when the bacon is getting crispy and the onion is turning golden, add the mushrooms.  Stir and continue to cook.
  3. When the pasta is just barely underdone, remove from the water and place in the bacon pot, but DO NOT drain the water!  Keep the pasta water simmering over very low heat.  Stir the pasta and bacon mix together over the lowest heat.  Turn off the heat and continue to combine.
  4. In a teacup or small bowl, carefully crack an egg.  Gently lower the egg into the pasta water, and poach.  This will take 3 or so minutes over low heat.  Use a slotted spoon to keep the egg white together.
  5. While the egg is poaching, plate your pasta—make a big pile of spaghetti carbonara, and make a little nest in the top.  When the egg is done—still jiggly but cohesive—place on top of the spaghetti.  Sprinkle generously with Parmesan cheese, and season with salt and pepper.  Squeeze half a lemon lightly over the whole thing.
  6. To eat:  break open the egg, and stir to combine and mix together.

Explore, experiment, enjoy! — Dana


To view even more of Dana’s unique recipe, you can visit her at Frugal Girlmet!


If you would like to contact Dana in regards to this blog, please email her at Dana@girlfriendscoffeehour.com

At Home with GCH: Indian-Spiced Drumsticks

Indian-Spiced Drumsticks

It’s funny how some foods are relegated to specific dates on the calendar.  For instance, canned pumpkin is on the shelves in my grocery store twelve months a year, and yet we only think about pumpkin pie for one, maybe two months a year.  If you were to show up to an Easter brunch with a pumpkin pie, I guarantee you’d get some really strange looks!  Likewise, Buffalo wings have been pigeonholed into being a “party” food, and rarely show up for the family dinner.  Why is that?

Wings are not hard to make, but I feel like they’re a little hard to eat.  So I made a recipe that is a twist on the fiery-hot Buffalo wings, and is easier to eat, because it calls for drumsticks instead of wings.  There’s no frying, you control the level of heat, and they are easy to make and eat.  What’s not to love?

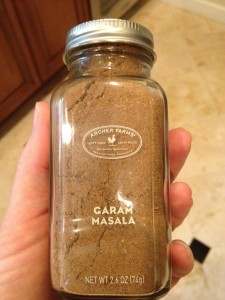
The secret ingredient is not-so-secret, since I bought it at Target!  It’s an Indian spice blend called garam masala.  Garam masala recipes vary by neighborhood and family in India, so there’s no one authentic combination of spices.  The one that I bought features black pepper, cardamon, coriander, and cinnamon.  It smells sort of like Chai tea, but is not sweet in and of itself.  If you can’t find garam masala, you can substitute one part ground cumin and one part pumpkin pie spice.

garam masala

The traditional accompaniment to Buffalo wings is carrot and celery sticks with bleu cheese dressing.  To make this a dinner, why not serve a big salad with bleu cheese dressing, or even a fancy wedge of iceberg lettuce with bleu cheese and diced bacon?

Indian-Spiced Drumsticks

Ingredients:

  • 10-12 drumsticks
  • 1/2 stick butter
  • 1/4 teaspoon granulated garlic
  • 2 tablespoons (or more!) hot pepper sauce, like Tabasco or Sriracha
  • 1 teaspoon garam masala, or 1/2 teaspoon ground cumin and 1/2 teaspoon pumpkin pie spice
  • 1/2 lime, lemon, or orange, juiced
  • a few shakes of Worcestershire sauce
  • salt and pepper

Directions:

  1. Preheat oven to 375*F.  Line a baking sheet with aluminum foil.  Spray with cooking spray, and lay out the drumsticks.  Don’t crowd them – make sure there’s plenty of room around them!  Bake for 30 minutes.  Remove from oven and lower temperature to 250*F.
  2. Make the sauce:  In a very large pot, add all the remaining ingredients.  Stir together over medium-low heat.  When the sauce is simmering, add the drumsticks and stir for 5 minutes, making sure to coat the drumsticks thoroughly.
  3. Remove wings from sauce and place back on the baking sheet.  Bake for 15 minutes.  Serve hot, with extra hot sauce if desired.

Note:  I really apologize for the shoddy quality of the photo.  I made these drumsticks on a whim for my husband and his brother for the Super Bowl.  I wanted time to set them up, make them pretty, maybe add a garnish – but no!  The men needed protein NOW!  Next week I promise to have an attractive photo for a tasty dish.


Explore, experiment, enjoy! — Dana


To view even more of Dana’s unique recipe, you can visit her at Frugal Girlmet!


If you would like to contact Dana in regards to this blog, please email her at Dana@girlfriendscoffeehour.com

At Home with GCH: Greek Salad

Greek Salad

We are big salad eaters at my house.  (And when I say “we”, I mean my husband and I.  My girls won’t go near the lettuce unless it’s shredded in a sandwich, and even then it’s touch and go!)  We’ll have a big salad for dinner at least once a week, sometimes more.  I’m always on the lookout for ways to eat healthier, get more veggies, and eat less refined carbohydrates.  This Greek Salad really fits the bill!

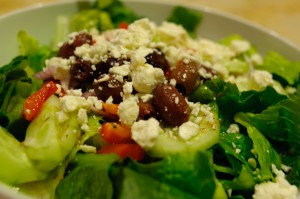
If you’ve made this salad before or had it at a restaurant, you know it’s fresh, bright and simple.  The two things that make it spark and give it that clean taste are the dressing and the cheese.  The dressing is maybe the easiest vinaigrette around—all you need are dried oregano, lemon juice, and olive oil!  Taste it, add salt, pepper and a pinch of sugar to taste, and you’re done!  The cheese is a crumbly white cheese called feta.  It tastes sort of like goat cheese, but it’s a little saltier, a little drier in texture.  It’s also very low in calories, so feel free to add a few tablespoons to your salad.

We had this salad last night, in huge bowls, with braised chicken.  If you want to make it a one-dish meal, add diced chicken or grilled shrimp right to the salad.  Healthy and delicious—it’s what’s for dinner!

Greek Salad

Ingredients:

  • 2 heads romaine lettuce
  • 1/2 red bell pepper, thinly sliced
  • 1/2 cucumber, peeled and sliced in half, then into half-moons
  • 1/4 red onion, sliced as thin as possible
  • 1/4 cup black olives (I like Kalamata; make sure you buy pitted olives – I hate spitting out the pits!)
  • 1/4 cup crumbled feta cheese
  • 1 teaspoon dried oregano
  • 1 lemon, juiced
  • salt, pepper, and a pinch of sugar
  • 1/4 cup olive oil

Directions:

  1. Make the dressing:  In a small Tupperware cup with a tight-fitting lid, mix together the oregano, lemon juice, salt, pepper, and a pinch of sugar.  Set aside – this gives the oregano time to “bloom” in the lemon juice and release it’s flavor.  If you add the oil too soon, you coat the oregano and it’s flavor won’t be as strong.
  2. Cut the lettuce into bite-sized pieces and wash well.  To compose, fill a large bowl with the lettuce, then top with bell pepper, cucumber, onion, olives, and feta.
  3. Add the oil to the oregano and lemon juice, shake well to combine, and pour over salad.

Notes:  This recipe makes 2 big salads, or  4 side salads.  Many people add tomato to a Greek Salad, and I encourage you to try it out—in the summer, when they are in season.  If you have leftover salad ingredients, this makes a great wrap—just roll it all up in a tortilla and eat like a burrito – especially great with chopped, cooked chicken! 

Explore, experiment, enjoy! — Dana


Please visit me at Frugal Girlmet for more unique recipes!

If you would like to send Dana a private message in regards to this recipe, please email her at: Dana@girlfriendscoffeehour.com.

GCH: What’s on Your Plate? Tonkatsu (Japanese Pork Cutlet)

pork-tonkatsu

Don’t let the name fool you – there’s a good chance you’ve had Tonkatsu before.  A staple of Japanese restaurants, this pounded, breaded and fried pork cutlet is a crunchy counterpoint to rice and Miso soup.  Another place you may have come across Tonkatsu is on vacation!  Tonkatsu is the most popular choice on Hawaii’s “plate lunch” menus, served alongside rice and macaroni salad.  If you are still unfamiliar with this deep-fried Asian delicacy, don’t give up – it is incredibly easy to make at home, and it’s just as tasty and satisfying as a bowl of potato chips!

The only ingredient you may not have in your pantry is panko.  Panko is Japanese breadcrumbs, and it’s what takes this dish from Shake-and-Bake to “Arigato!”  You can find it in your grocery store if it has an “Asian” section, or at any Whole Foods or Japanese market.  Aside from making Tonkatsu and Tempura so delicious and crispy, I use it in place of regular breadcrumbs on top of casseroles.  It stays fluffy and crunchy and doesn’t get soggy.  Trust me and use it on top of baked macaroni and cheese – fantastic!

As far as serving Tonkatsu, you have a lot of options.  There are many brands of Katsu sauce (katsu is the name of the preparation, so you could make chicken katsu, ground beef katsu, even ham katsu, if the mood struck), but through much arduous research and hours of scholarly pursuit, I found you can easily make it at home.  (Just kidding – I read the ingredients on all the bottles!)  I’ve included my take on Katsu sauce, but you can also serve it with other Asian sauces – Citrusy Ponzu sauce, Sweet and Spicy Chinese Plum sauce, or like the Hawaiians, with a bottle of fiery Sriracha at hand!

Don’t feel like Miso Soup as an accompaniment?  Don’t worry.  Serve Tonkatsu with a green salad and pasta.  Serve it Korean-style, with banchans, kimchee and rice.  Get wacky and serve it on a roll as a sandwich!  Next time I make it, I’m serving it club-style on wheat bread, with lettuce, avocado, and maybe a jury-rigged spicy mayo.  The sky’s the limit; get frying!

Tonkatsu

Ingredients:

  • 4 thin-cut, boneless pork chops
  • salt and pepper
  • 1/4 cup flour
  • 1 egg
  • 1/2 cup panko (Japanese breadcrumbs)
  • oil for frying – I’ve used grape seed oil, plain vegetable oil, and the best was rendered bacon fat!
  • 1/4 cup ketchup
  • 1 teapoon soy sauce
  • 1 tablespoon sugar or honey

Directions:

  1. Prepare your pork chops:  If they are thicker than 1/4-inch, lay them out on a piece of plastic wrap, and pound with a meat tenderizer.  You want them flat and pounded down to a 1/4-inch thickness, and you want to try to get it as even as possible, so the cutlets cook evenly.  Trim any excess fat and season with salt and pepper.
  2. Make a breading station:  in one bowl, add the flour; in a second bowl, beat the egg with a teaspoon of water; and in a third bowl, pour in the panko.
  3. Heat the oil in a small pan – cast iron works really well here, but whatever you have is fine.  Smaller is better because it means you can use less oil and fry the cutlets quicker.  You want about 1/4 cup of oil, so that it will come about halfway up the side of the cutlet, but adjust the amount of oil depending on the size of your pan.  While the oil is heating, prepare your first cutlet:  dredge in flour, dip in egg, then coat in panko, pressing it to make it stick and ensure even coverage.  Lay the cutlet gently in the hot oil – careful for splatters!  Now is a good time to wear an apron!  Cook for about 3 minutes, and flip when the bottom is medium-golden brown.  Cook the other side for about 2-3 minutes.  These go from underdone to too-dark pretty quickly, so no wandering away!
  4. Prepare the rest of the cutlets the same way, adding more oil if necessary, adjusting the heat so the cutlets brown but not burn.
  5. Make the dipping sauce:  stir together the ketchup, soy sauce and sugar or honey.  Add a few drops of hot sauce if you like, or a bit of hot mustard if you like.  In the photo above, I added some minced onion.  Drain the oil from the tonkatsu on a paper towel-lined plate, and sprinkle with salt.

Explore, experiment, enjoy! — Dana

Find more recipes from Dana, Asian and otherwise, at Frugal Girlmet!