January 27, 2025

Broccoli Salad

Summertime get-togethers…how many have you gone to or hosted this summer?  This past weekend we celebrated the 80th birthday of my dad, Jack McElroy—{4 great-grandchildren, 10 grandchildren, 4 daughters, 3 sons-in-law, our stepmom, and a few others who love him}.  Our family loves to pitch in and all contribute to the meal.  But this Broccoli-Craisin Salad always seems to be requested.

Recently, I have tweaked the recipe to include (or NOT include) about half of the mayonnaise I originally have made this with and I <shhhh! not everyone knows!> substituted plain Greek yogurt.  It worked amazingly well…and lowered the calories/fat grams by approximately 650 calories (yes, you read that correctly) and 80 grams of fat.  And added a significant hit (about 10-11 grams) of healthy protein.  And, honestly, you could even further reduce the mayo/increase the yogurt because of all the flavor variations in this salad.

This is a beautiful raw salad, a very healthy but oh-so-yummy addition to the array of delicious salads on the picnic table.  It has a slightly smoky (from the bacon), slightly sweet (from the Craisins and honey), slightly tart (from the vinegar), very mellow taste.  I have had MANY supposed broccoli haters be prompted to try just one tiny taste…only to find they enjoy it and come back for more!  We enjoy this salad all year long!  Hoping that your family enjoys it, too!

Broccoli Salad

ingredients:

2 heads broccoli crowns, cut into tiny florets
1/2 pkg Craisins (dried cranberries)
6 slices bacon, cooked and crumbled, optional
1/2 red onion, very thinly sliced
1/2 cup mayonnaise
1/2  cup plain Greek yogurt
3-4 tablespoons honey, warmed
3 tablespoons apple cider vinegar
1 cup roasted/salted sunflower seeds
freshly ground pepper

directions:

  • in a small bowl, stir together mayonnaise, Greek yogurt, honey, and vinegar; set aside
  • in a large bowl, combine first 4 ingredients. take liquid mixture and pour over broccoli mixture, tossing gently <go ahead!  use your hands!> to thoroughly coat and massage that  broccoli
  • pour the dressed mixture into a large zip-top bag to go into the fridge.  every once in a while, give the bag a flip-over and a couple of squeezes to spread the yumminess all around
  • when ready to go onto the table, pour the salad out into a serving bowl and top with sunflower seeds and a generous amount of freshly ground pepper.
  • easy-peasy!

notes:

–  definitely prepare this at least 4 hours beforehand…up to 24 hours or so

–   the biggest hint I can offer to you for this salad is to cut the broccoli florets as small as you possibly can.  consider this a ‘labor of love’ and, oh, so worth it!  this will make it  MUCH more palatable to have little florets in your mouth as you munch on this salad rather than a big chunk of broccoli!  and the chopping can be done ahead of time, even a day or so, and simply stored in the fridge.  honestly, i have been known to sit in front of the television while doing it!  😉

♥     ♥     ♥     ♥     ♥

God loves you!    (Please don’t ever forget that!)

♥  coleen

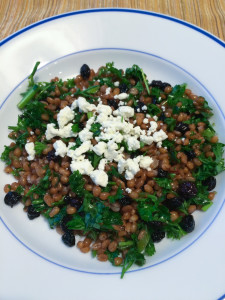
Wheat Berry Salad

Wheat Berry Salad

If you’ve never had wheat berries, you’re in for a treat!  These grains have a delightful chewiness and enough fiber to fill you up.  Combine them with a mild vinaigrette, some fresh vibrant herbs, and a little tangy fruit, and you have the perfect salad.

You may need to search around to find wheat berries, also known as hard winter wheat.  Whole Foods and other health food stores will have them in the bulk section.  They cook up just like any other grain (barley or rice); I actually cooked mine in my rice cooker.  This salad keeps in the fridge for a few days…so have some with dinner, or breakfast, or whenever you like.  Also try subbing out the dried blueberries with raisins, dried cherries, minced dried apricots, dried cranberries – you get the idea.

Wheat Berry Salad

Ingredients:

  • 1 cup wheat berries
  • 1/2 cup dried blueberries
  • 1/2 cup chopped parsley
  • 3 green onions, diced
  • 3 tablespoons olive oil
  • 1/2 lemon, juiced
  • salt and pepper
  • optional:  a few tablespoons of crumbled feta or goat cheese

Directions:

  1. In a heavy pot with a lid, or in a rice cooker, pour in the wheat berries, as well as two cups of water.  Bring to a boil, then cover and simmer for about 30 minutes.
  2. The wheat berries should absorb all the water from the pot.  If not, drain them.  Pour them into a large bowl.  Add the blueberries, parsley, and green onions.  Toss to mix.
  3. Add the olive oil, lemon juice, and salt and pepper.  Taste for seasoning.  Keep  in the fridge until ready to eat.  When serving, you can sprinkle some crumbled feta or goat cheese over the top.

Explore, experiment, enjoy! — Dana


To view even more of Dana’s unique recipe, you can visit her at Frugal Girlmet

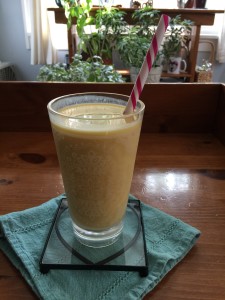
Mango Lassi

This past weekend, my sister and niece were visiting from Minnesota <happy me!>.  On Sunday, rather than cooking another meal together, we decided to treat ourselves to some yummy Indian take-out…yup!  (Actually, Amy “treated” us all!)

So I wanted to add a couple of special beverages and decided on these lovely shakes and a big pitcher of iced sweet&spicy chai tea.  They turned out to add just that extra touch to our smorgasbord (I know, I know…crossing cultures here!) of delightful Indian curries, chickpea salad, lovely appetizers…and, of course, a pile of naan to scoop it all together!  According to Wikipedia, a lassi is a traditional, yogurt-based drink and is popular in India.

Whether you enjoy this beverage to cool yourself on a hot summer’s day or, as we did, to accompany some hot & spicy Indian food—this is refreshing and delicious.  And it fits perfectly into our POV—healthy but oh-so-yummy!  I used a few ripe mangoes as the base for ours, but this would be equally delightful prepared with strawberries, or papaya, or bananas!  Enjoy!

2015-08-10 16.29.24

Mango Lassi

(this makes enough for (4) four tall glassfuls)

ingredients:

2 large mangoes, pitted&peeled – cut into chunks (about 2 cups)
8 ounces plain Greek yogurt
1/2 cup sweetened almond milk (or regular milk)
2 tablespoons honey
dash or two of ground cardamom
1 cup ice cubes

directions:

  • place mango and milk into blender; puree
  • add balance of ingredients; blend thoroughly ’til ice is crushed and all is frothy

♥     ♥     ♥     ♥     ♥

God loves you!  ♥  (Don’t ever forget that!)

♥  coleen
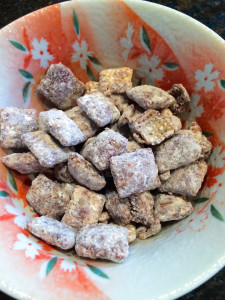
Muddy Buddies

… also known as People Puppy Chow.  I really can’t describe for you how delicious and addictive this stuff is.  I first had People Puppy Chow at a friend’s house as a kid, and it was a game changer!  From then on it always showed up at parties and potlucks and is an easy win.

Full disclosure:  I didn’t make this batch.  A friend dropped it off for us, and I’ve had to hide it, because my older girl is allergic to peanut butter, and I didn’t want to salivate over this stuff when she can’t have any.  My days of Muddy Buddies may be limited, but yours don’t have to be.  Make this for the next party / movie night / kids sleepover, and enjoy!

People Puppy Chow

Muddy Buddies / People Puppy Chow

Ingredients:

  • 2 cups of chocolate chips
  • 1 cup smooth peanut butter
  • 1/2 stick butter
  • 1/2 teaspoon vanilla extract
  • 1 box of Crispix or Chex cereal
  • 1 box powdered sugar

Directions:

  1. In a saucepan over medium-low heat, stir together the chocolate chips, peanut butter, butter, and vanilla, until smooth and melted.
  2. Empty the box of cereal into the largest bowl you have.  Pour the chocolate mixture over the cereal and stir to completely coat.
  3. In a large paper grocery bag, pour in the powdered sugar, then pour in the coated cereal.  Close up the top and shake and toss to cover the cereal in powdered sugar.
  4. Dump it all out of the bag onto a few baking sheets to cool.  Separate any big clumps.  Try not to eat it all at once!

Explore, experiment, enjoy! — Dana


To view even more of Dana’s unique recipe, you can visit her at Frugal Girlmet


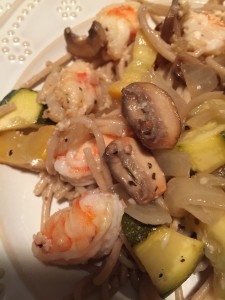
Shrimp, Pasta and Veggies

During the summer months, I like to have a few healthy but oh-so-yummy meals in the rotation that are quick to prepare, don’t heat up the kitchen (and the cook!), but are still delicious and satisfying.  You, too?  I find the easiest way to accomplish this is to keep the ingredients on hand for these few meals.

This recipe is a good example.  The frozen shrimp is a standard in our freezer (oh…the possibilities!).  Mushrooms and onions are always on hand, too…and any fresh green veggie (broccoli, for example) would work well, too.  Everything else is pretty much a pantry staple.  Be sure to generously season this dish as you go along…and taste just before serving to add more, if needed.  Enjoy!

Shrimp, Pasta and Veggies

2015-07-22 20.53.05


ingredients:

2 tablespoon extra virgin olive oil, divided
2 tablespoons butter, divided
1# large raw shrimp, peeled and cleaned
lemon pepper seasoning
10 ounces mushrooms, sliced
1 small sweet onion, chopped
1 medium zucchini, sliced in half lengthwise, then into half moons
2 tablespoons minced garlic, I use jarred
1-1/4 cups chicken broth (I subbed in white wine for 1/4 of broth)
8 ounces dry spaghetti
1/2 cup freshly grated parmesan cheese
1/4 cup packed basil, chopped (or 2 teaspoons dried basil)
juice from 1/2 lemon

directions:

  • heat 1 tablespoon olive oil in a large saute pan over medium heat
  • pat shrimp dry then season on both sides with lemon pepper seasoning
  • add to pan,  saute until pink on both sides and just barely cooked through, less than 2 minutes per side; set aside in a separate bowl
  • add remaining tablespoon of olive oil and 1 tablespoon butter to pan along with mushrooms and onions.  saute ‘til mushrooms are golden brown, 7-8 minutes; then add zucchini and cook ‘til veggies are just turning tender
  • add garlic and season with additional lemon pepper seasoning; stir continually for about 1 minute ‘til garlic is aromatic
  • pour in chicken broth then turn heat up to high and boil ‘til broth has reduced by approximately 1/2
  • meanwhile, bring a large pot of salted water to a boil; add spaghetti and cook according to package direction ’til just al dente (spaghetti will cook a bit more in the sauce). drain and set aside
  • once broth has reduced, turn heat to medium low; then add basil, lemon juice, and remaining 1 tablespoon butter; stir to combine
  • add pasta and veggies to sauce;  toss to coat the pasta w/ sauce and distribute veggies
  • finally add shrimp and parmesan cheese; toss ‘til combined

♥     ♥     ♥     ♥     ♥

God loves you!  ♥  (Don’t ever forget that!)

♥  coleen
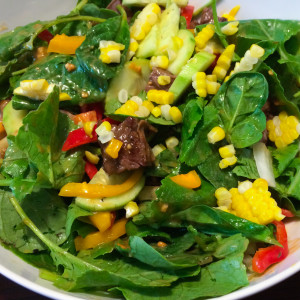
Summer Thai Steak Salad

Thai Salad

There were lots of adjectives to sift through in trying to create a name for this recipe!  ‘Salad’ had to be in there, of course…and ‘Thai,’ too, because of the peanut dressing.  But feel free to use chicken instead of steak, and you can switch out the veggies used to suit your tastes.  This Summer Thai Steak Salad is really flexible!  Ready?  Let’s go!

Summer Thai Steak Salad

(recipe makes two salads)

Ingredients:

  • 1 heaping tablespoon peanut butter
  • 1 tablespoon rice vinegar (or use a little less apple cider vinegar)
  • 1 teaspoon sugar, honey, or maple syrup
  • 1/2 teaspoon soy sauce
  • 2 tablespoons sesame oil (use grapeseed or olive oil, if you have to)
  • a few handfuls of salad greens
  • 1/2 pound cooked steak or chicken, diced
  • 1 large or 2 small bell peppers, thinly sliced
  • 1/4 sweet or red onion, thinly sliced
  • 1 cucumber, peeled and sliced into half-moons
  • 1/2 cup cooked corn kernels
  • other options:  tomatoes, avocado, basil, cilantro, carrots

Directions:

  1. In a food processor, blend together the peanut butter, vinegar, sugar, soy sauce, and sesame oil.  Taste for seasoning – add more sugar, or more vinegar, or whatever you want.  You can even give it a hit of Sriracha if you like!  Set aside.
  2. Wash greens and divide between two really big salad bowls.  Top with diced steak and thinly sliced veggies.
  3. Toss with lots of peanut dressing.
  4. Do a little happy dance in your chair!

Explore, experiment, enjoy! — Dana


To view even more of Dana’s unique recipe, you can visit her at Frugal Girlmet

Garlicky Green Beans and Pignoli

Who has memories of sitting with their gramma or favorite aunt and snapping green beans?  Such a simple, enjoyable way to accomplish a task that takes time AND have a great conversation.  Oh, and the end result? A big pile of fresh veggies just waiting to be prepared in the simplest of ways.  And truly it didn’t matter whether they were boiled or steamed or roasted (or microwaved…!), they were DELISH!!!  Just remember—only snap the stem end NOT the end with the little tail!  😉

The recipe I am sharing today uses a pile of green beans which have been steamed for just a few minutes. Click here  for a few ways to steam any veggies.  Meanwhile a simple sauce (yet VERY flavorful!) is prepared.  This sauce could also top any variety of fresh veggies…perhaps some broccoli or zucchini or carrots, even. And it all fits nicely within our healthy but oh-so-yummy POV, too! Enjoy!

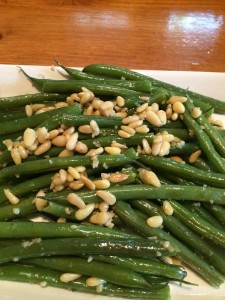
2015-06-16 19.12.19

Garlicky Green Beans with Pignolis

ingredients:
1# fresh green beans, snapped and rinsed
2 tablespoons butter (or a combo of butter and olive oil)
2 (or more) tablespoons finely minced garlic (I used jarred)
2 ounces pignoli (pine nuts)
sea salt, freshly ground pepper (I used a lemon-pepper blend)
zest and juice of 1 small lemon (optional)

directions:

  • steam the prepped green beans in the manner of your choice
  • in a large skillet, melt the butter/olive oil over a medium-low heat
  • add the garlic and pignoli stirring constantly for 2-3 minutes making sure they do not burn; remove from heat
  • add the cooked, drained green beans and toss together along with a generous amount of salt & pepper (and the optional lemon, if using)

♥   ♥   ♥   ♥   ♥

God loves you!  ♥  (Don’t ever forget that!)

  coleen

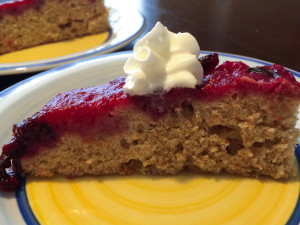
Plum and Basil Upside-Down Cake

Plum Basil Upside Down Cake

I  hadn’t really planned on baking a cake today.  But every Friday, I need to have a post up for you fine ladies, and sometimes…{sigh}.  The kids are acting crazy, work is busy, the husband has to work late—you know how it is.  So, you make all the family favorites for dinner because it’s easy and you don’t have to think about it.

This week, however, I was really stumped.  I looked in my fridge:  I had a LOT of plums to deal with that were edging toward soft.  I also have a basil plant in my front yard that I’m in love with!   I am plucking off leaves daily and trying to find new uses for it.  Well, I did a Google search for “plums and basil”…and guess what came up?  This Plum and Basil Upside-Down Cake!

It was easy to make and, while not instantaneous to whip up, I could still do it in steps—in between washing dishes, or folding some laundry.   You don’t need the basil in this recipe, but it adds a lovely complexity to the flavor and elevates it from being just another sweet cake.  If you don’t have plums, use nectarines or peaches – both taste great with basil.

Plum and Basil Upside-Down Cake

(click here for the original recipe)

Ingredients:

  • 1/4 cup plus 2 teaspoons butter, divided use
  • 1 pound large plums – any kind, or peaches or nectarines – pitted and quartered (about 6 plums)
  • 1 1/4 cups sugar, divided use
  • 1/2 cup packed fresh basil leaves, roughly chopped
  • 1 1/2 cups whole wheat flour (or use regular flour)
  • 1 1/2 teaspoons baking powder
  • 1/4 teaspoon salt
  • 2 eggs
  • 3/4 cup buttermilk (I used plain yogurt instead)

Directions:

  1. Melt 2 teaspoons butter in a large nonstick skillet over medium heat. Add plums, and cook for 3 minutes.  Add 1/2 cup sugar, basil, and a pinch of salt.  Cook for 10 minutes or until plums are tender, stirring frequently.  Remove plums from pan using a slotted spoon.  Bring cooking liquid to a boil.  Cook 5 minutes or until liquid is very thick, like jam.  Strain liquid through a sieve to remove basil.
  2. While the liquid reduces, arrange plums in the bottom of a 9-inch cake pan (I used square, but the author recommends round) coated with cooking spray.  Pour the liquid over the plums.  Let cool.  (I actually reserved about 3 tablespoons of the liquid for another use – read on!)
  3. Preheat oven to 350F*.  In a medium bowl, whisk together the flour, baking powder, and salt.  In a separate bowl, beat the remaining 1/4 cup butter and remaining 3/4 cup sugar with an electric mixer until fluffy.  Add one egg at a time, beating well. Add flour and buttermilk (or yogurt) alternately to sugar blend, beginning and ending with flour.  Pour batter over plums, spreading evenly.
  4. Bake for about 50 minutes, or until a wooden toothpick comes out clean.  Let cool for 10 minutes.  Run a knife around the edge of the cake.  Invert onto a plate.  Cool and serve plain, or with whipped cream, or even vanilla ice cream!

I saved a bit of the plum syrup.  My husband got a promotion today (Praise the Lord!), and I’m going to surprise him with a glass of sparkling wine with a teaspoon of the plum syrup stirred in for a champagne cocktail!  If you don’t like champagne, I bet this plum syrup would be delicious stirred into sparkling water or iced tea too.

Explore, experiment, enjoy! — Dana


To view even more of Dana’s unique recipe, you can visit her at Frugal Girlmet

Shrimp and Broccoli

Probably most of us have a favorite Chinese takeout dish…yes?  For me, when done well, it is Shrimp and Broccoli.  Not too spicy but garlic-y…with tender shrimp and broccoli with a bit of crunch (that’s my style).  But often I find a dish like this is just as easy to prepare at home. AND less expensive.

This fits so well into our healthy but oh-so-yummy POV!  It is full of fresh veggies, the shrimp is high protein, and the whole dish has around 300-350 calories!  Here’s the recipe we enjoy…and I would love to hear about your favorite takeout!

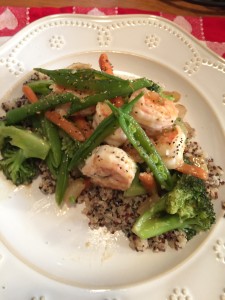
2015-07-13 19.37.35

Shrimp and Broccoli

ingredients:

1/4 cup chicken broth
1 tablespoon rice vinegar
2 tablespoons low-sodium soy sauce
2 teaspoons cornstarch
1 teaspoon sesame oil
1/3 cup chicken or vegetable broth
1/8 (or more) teaspoon crushed red pepper, optional
1 pound large shrimp, peeled and cleaned
1 teaspoon lemon-pepper seasoning
1 large head broccoli crowns, cut into florets
1-2 tablespoons coconut oil, divided
1 medium sweet onion, cut into wedges
big handful fresh sugar snaps or snow pea pods, optional
handful of baby carrots, optional
1 tablespoon minced  ginger (I use jarred)
toppings: 1/2 teaspoon sesame seeds, 1/4 cup sliced green onions
directions:
  • in a small bowl, whisk together the rice vinegar, soy sauce, honey, cornstarch, sesame oil, and broth; set aside
  • season the shrimp with 1 teaspoon lemon-pepper seasoning; set aside
  • prep all veggies: cut onion into small wedges, carrots in half length-wise, pea pods in half if necessary
  • steam broccoli for 5 minutes; remove from steamer and set aside
  • heat 1/2  tablespoon of coconut oil in a large skillet over medium-high heat
  • add the shrimp and cook, turning once, ’til just pink and slightly browned (4 minutes  or so); remove from pan, set aside
  • add another tablespoon of coconut oil to the pan, along with the carrots and onion; stir fry for 5 minutes or so allowing to brown just a bit
  • toss in the sugar snaps and garlic, and stir gently for 1-2 minutes
  • toss in the steamed broccoli
  • give a quick stir to the sauce mixture and pour into the pan; stir thoroughly but gently to coat all the veggies
  • add in the cooked shrimp while continuing to stir ’til the sauce is thickened (another minute or so)
  • remove from heat; scatter the optional toppings across the entire dish
  • serve with cooked quinoa or rice

    ♥   ♥   ♥   ♥   ♥

    God loves you!  ♥  (Don’t ever forget that!)

    ♥  coleen
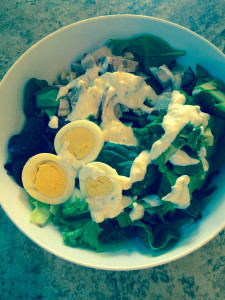
Cobb Salad with Homemade Bleu Cheese Dressing

Cobb Salad with Homemade Bleu Cheese Dressing

I think you guys know how much I love a big salad for dinner.  One of my favorites is this Cobb Salad with Homemade Bleu Cheese Dressing, because it’s got so many different components.  So satisfying!

Of course you can use store-bought dressing, but I decided to make my own.  You can really control how salty, how creamy, how peppery it is when you make it yourself – plus there are no binders, stabilizers, thickeners, et cetera like there are in bottled dressing.  (How else do you think they make that stuff shelf-stable?)  This is a basic recipe; feel free to jazz it up with a little lemon juice, hot sauce, or Worcestershire sauce to take it to the next level.  You can also add more veggies to the salad or change up the protein.  Have at it!

Cobb Salad with Homemade Bleu Cheese Dressing

Ingredients (for 2 servings):

  • 1/2 cup crumbled bleu cheese or gorgonzola
  • 1/4 cup mayonnaise
  • 1/2 cup plain yogurt
  • 1/4 cup whole milk
  • lots of ground pepper
  • washed salad greens, any kind
  • 2 hardboiled eggs, sliced
  • 1 avocado, diced
  • 1 large chicken breast (or use two chicken thighs), cooked and diced
  • 2 (or more!) slices bacon, cooked crisp
  • sliced or cherry tomatoes (would be great, but I don’t like raw tomatoes)

Directions:

  1. In a mixing bowl, stir together the bleu cheese, mayo, yogurt, and milk.  Grind in lots of black pepper.  Let chill in the fridge until you are ready to eat.  (Do it a day before and get an even better-tasting dressing!)
  2. In two large salad bowls, divide the washed salad greens.  Into each bowl, add a sliced egg, half of the avocado, the diced chicken, and some bacon crumbles.  Drizzle with dressing and serve.

Explore, experiment, enjoy! — Dana


To view even more of Dana’s unique recipe, you can visit her at Frugal Girlmet