April 24, 2024

Apple-Butternut Soup

Oh!  ‘Tis the season…apple season, that is!  Here in NY State, our farmers grow a huge portion of the country’s apple crop…and it is a GOOD one this year!  We are going apple picking next week but I didn’t want to wait to start with the recipes.  This one, Apple-Butternut Soup, included a few tart green Granny Smith apples. The tartness of the apple along with the sweetness of the squash melded together nicely.  This recipe is simple and easy, (and quick too!) and makes a smooth, thick soup which was very filling and satisfying.  If you would like to keep your soup vegetarian (or vegan), just use vegetable broth.  This soup fits perfectly into our healthy but oh-so-yummy POV, too.  Enjoy!

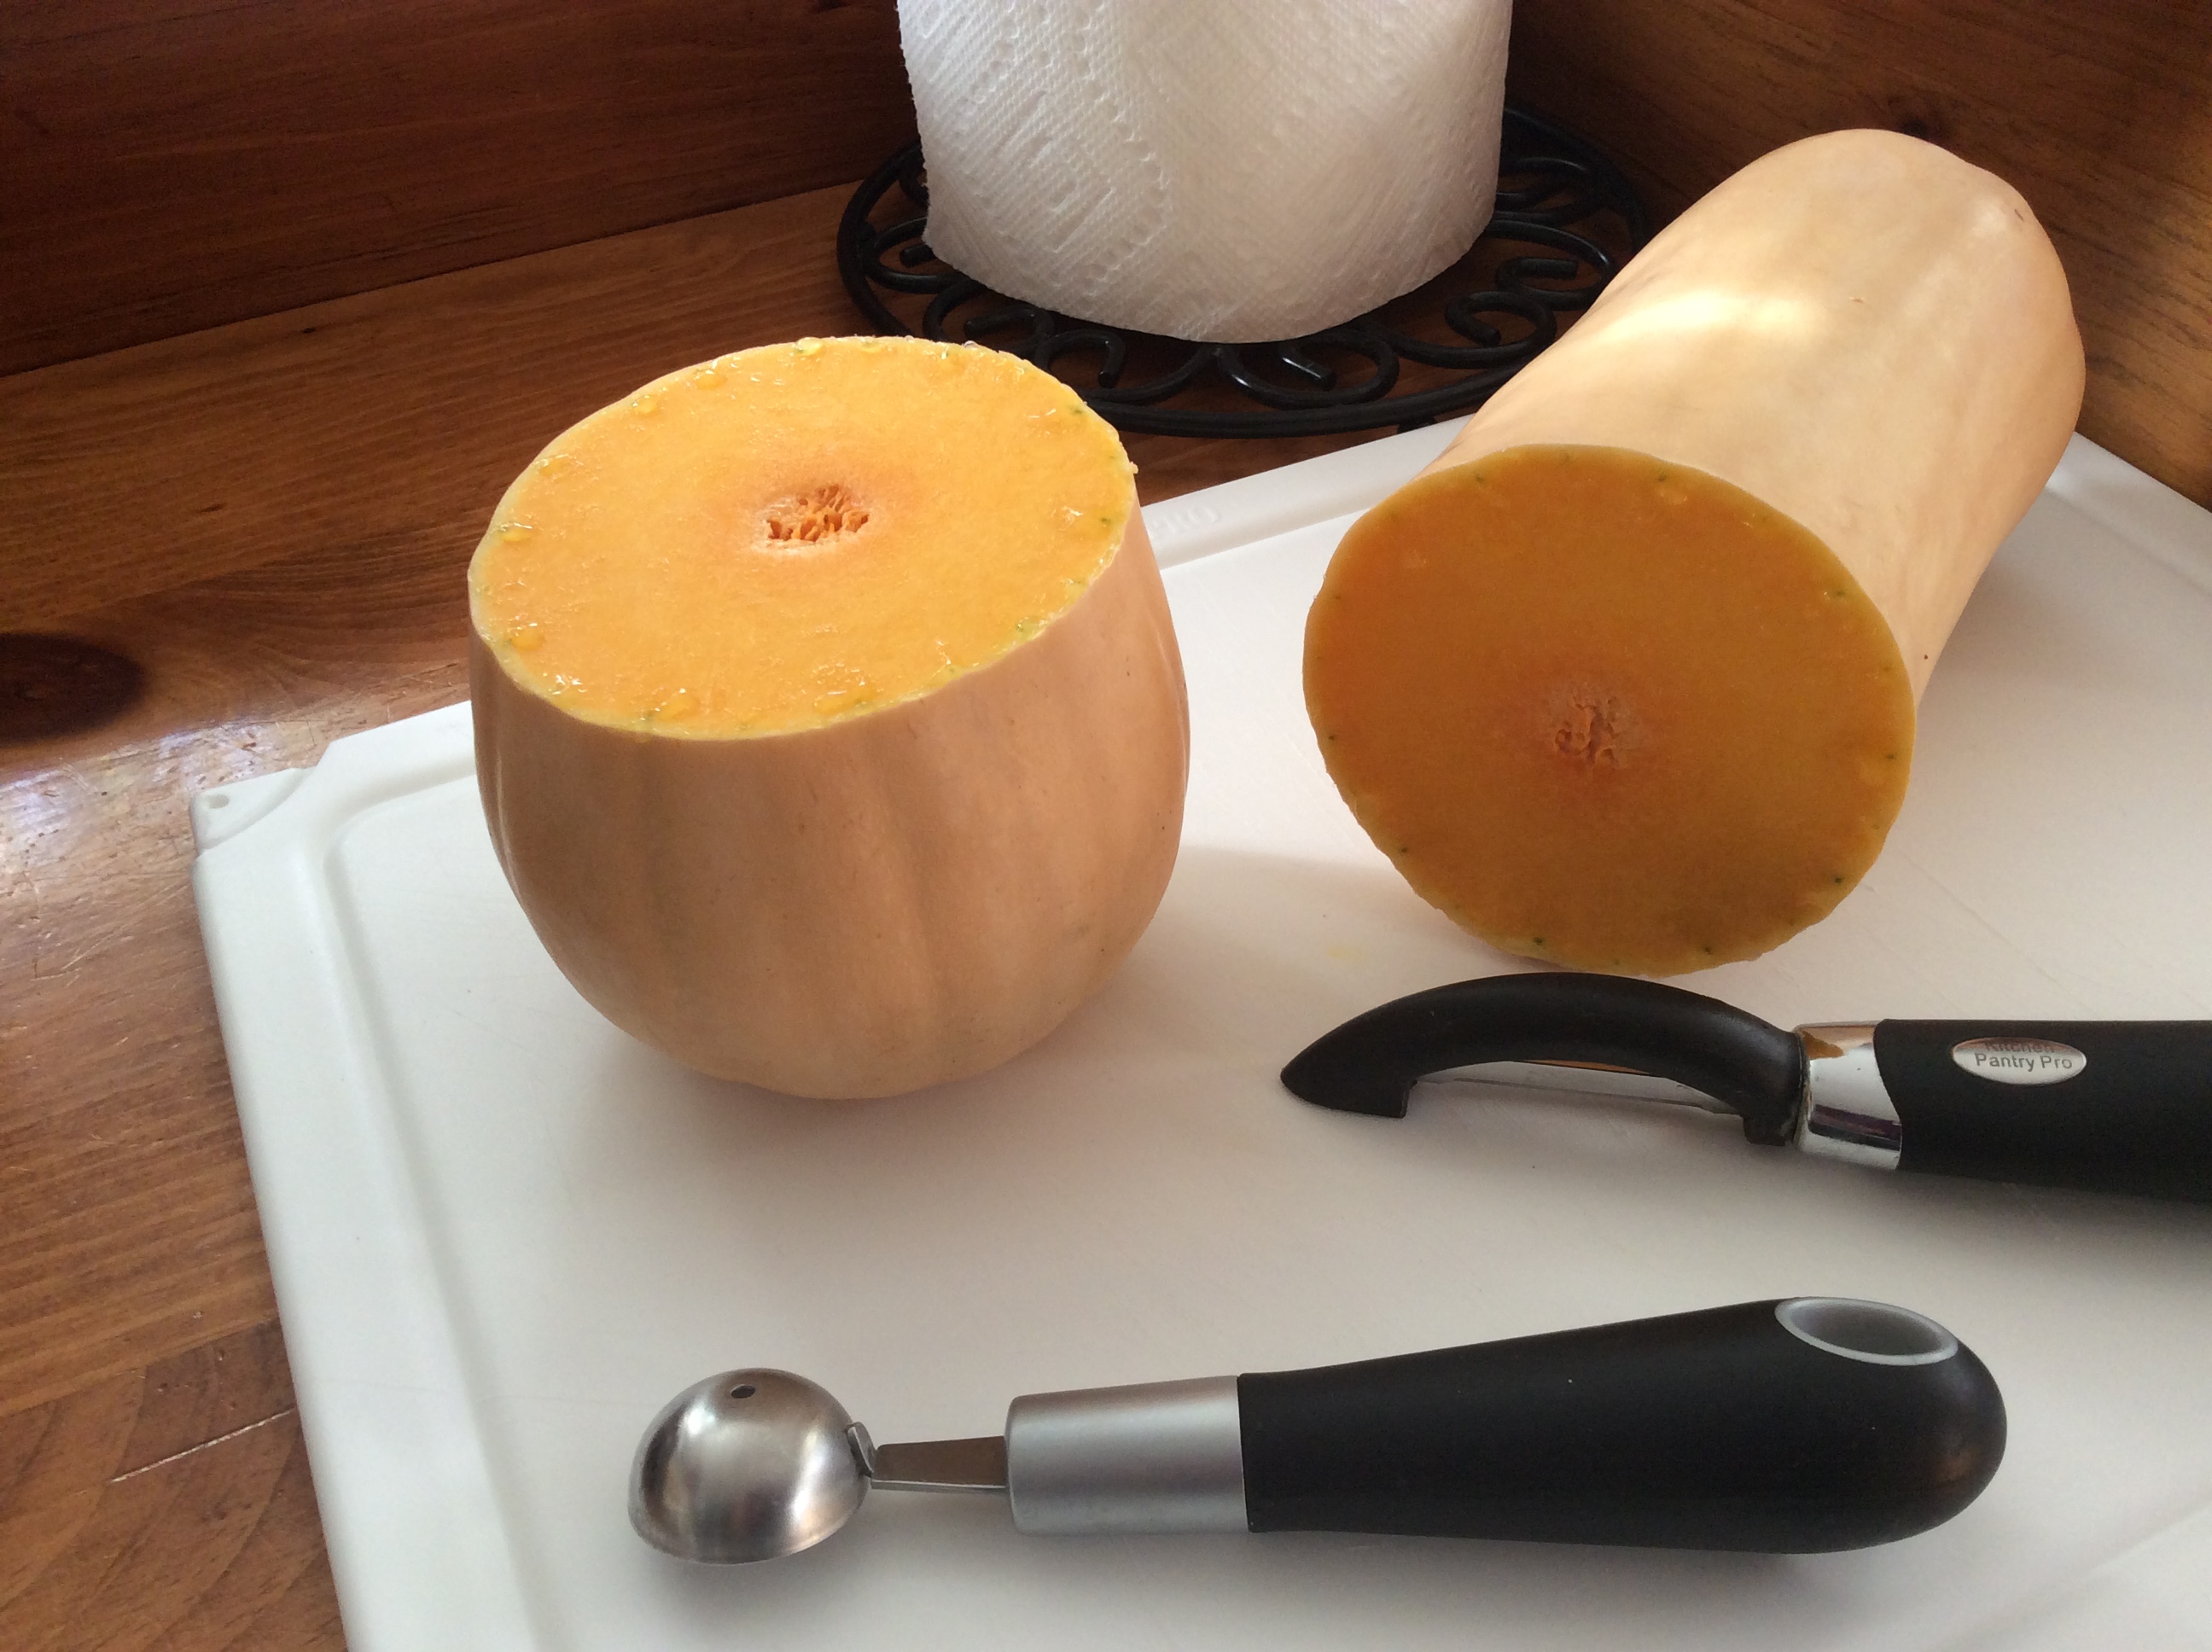
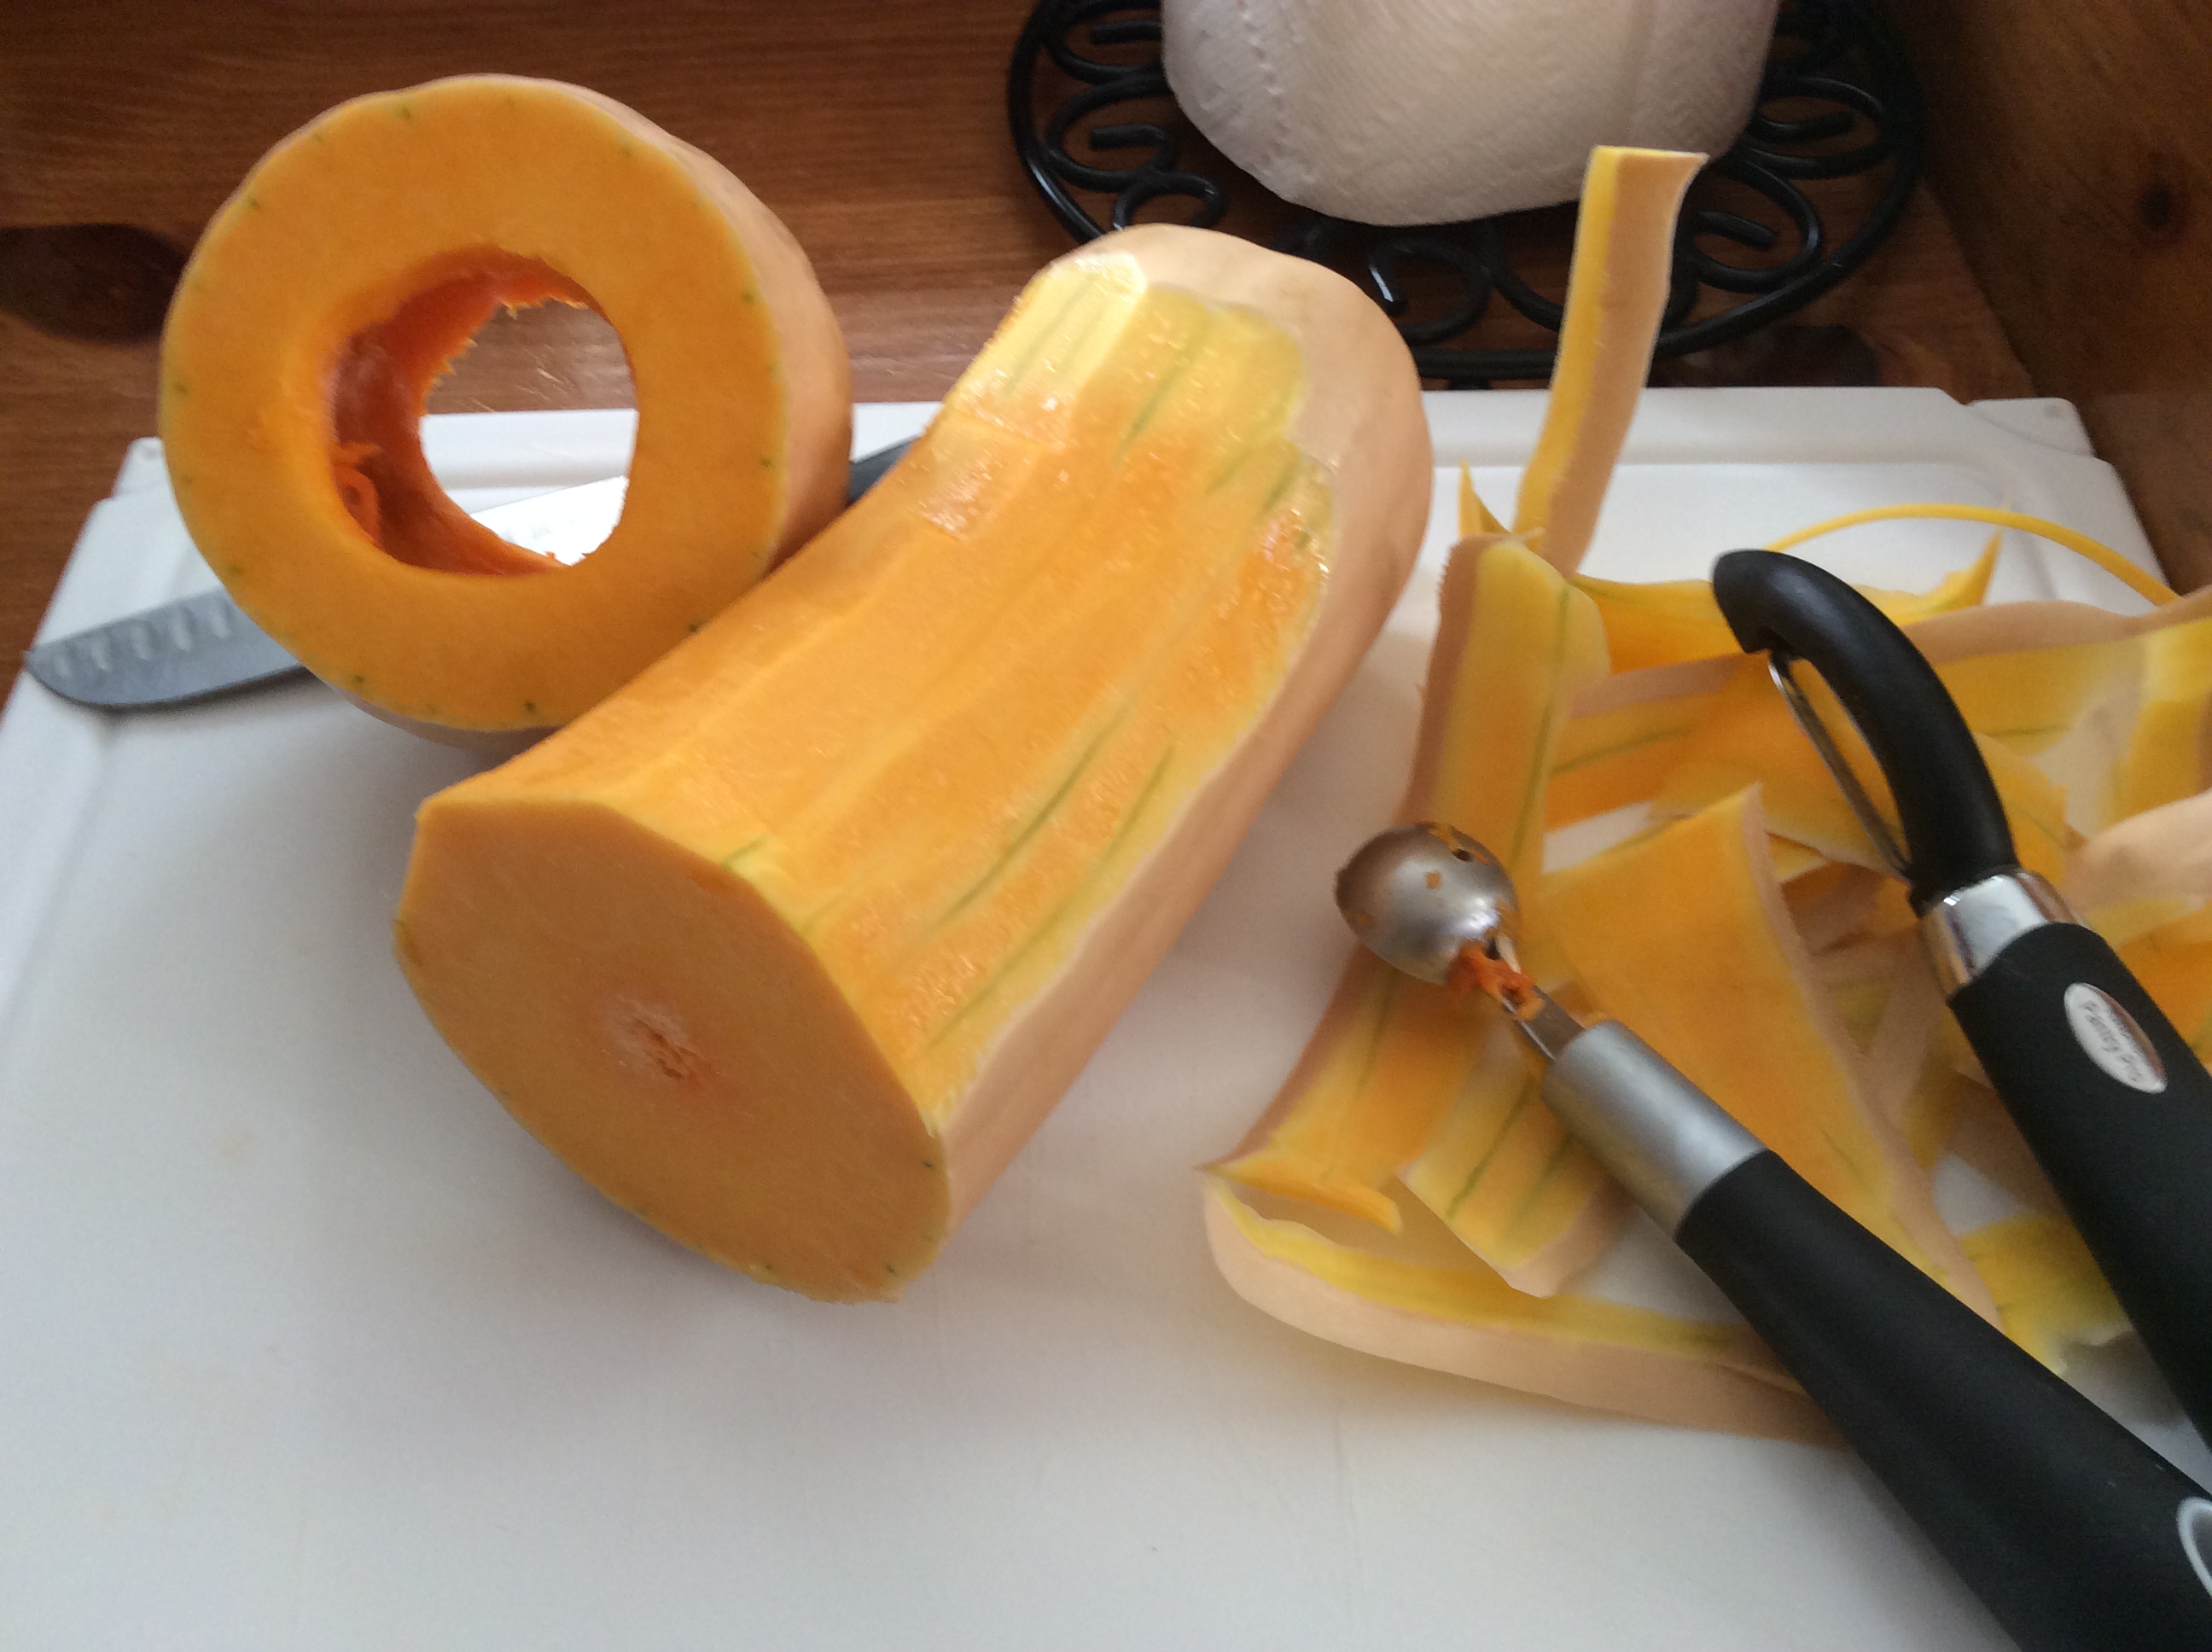
And please don’t let the task of cutting up the squash scare you off!  Be sure to use a sharp knife and just be careful.  I used a melon baller to scoop out the seeds and all the string-y business.  Here are a couple of pics of the process.

2015-09-26 16.43.57

2015-09-26 16.48.37


 Apple – Butternut Soup

2015-09-26 18.38.34

ingredients:

1 large butternut squash (3#), peeled and seeded, cut into 1-1+1/2″ cubes
2-3 tablespoons extra-virgin olive oil, divided
sea salt and freshly ground pepper (I use lemon-pepper blend)
1 sweet onion, chopped small
2 tablespoons finely minced fresh ginger
2 tablespoons chopped garlic (I use jarred)
2 or 3 apples, peeled and chopped
2 quarts chicken stock
1 cup cider (or additional broth)
1 cup water
big handful fresh greens (baby spinach, kale, arugula), sliced thinly

directions:

  • preheat oven to 425
  • line large baking sheet with parchment paper
  • in a large bowl, use just enough olive oil to lightly coat the squash and season well w/ s&p
  • pour seasoned squash onto the baking sheet; spread them out in a single layer…use two pans if necessary (I needed two)
  • roast until just beginning to brown, about 20-25 minutes; remove from oven and set aside

meanwhile…

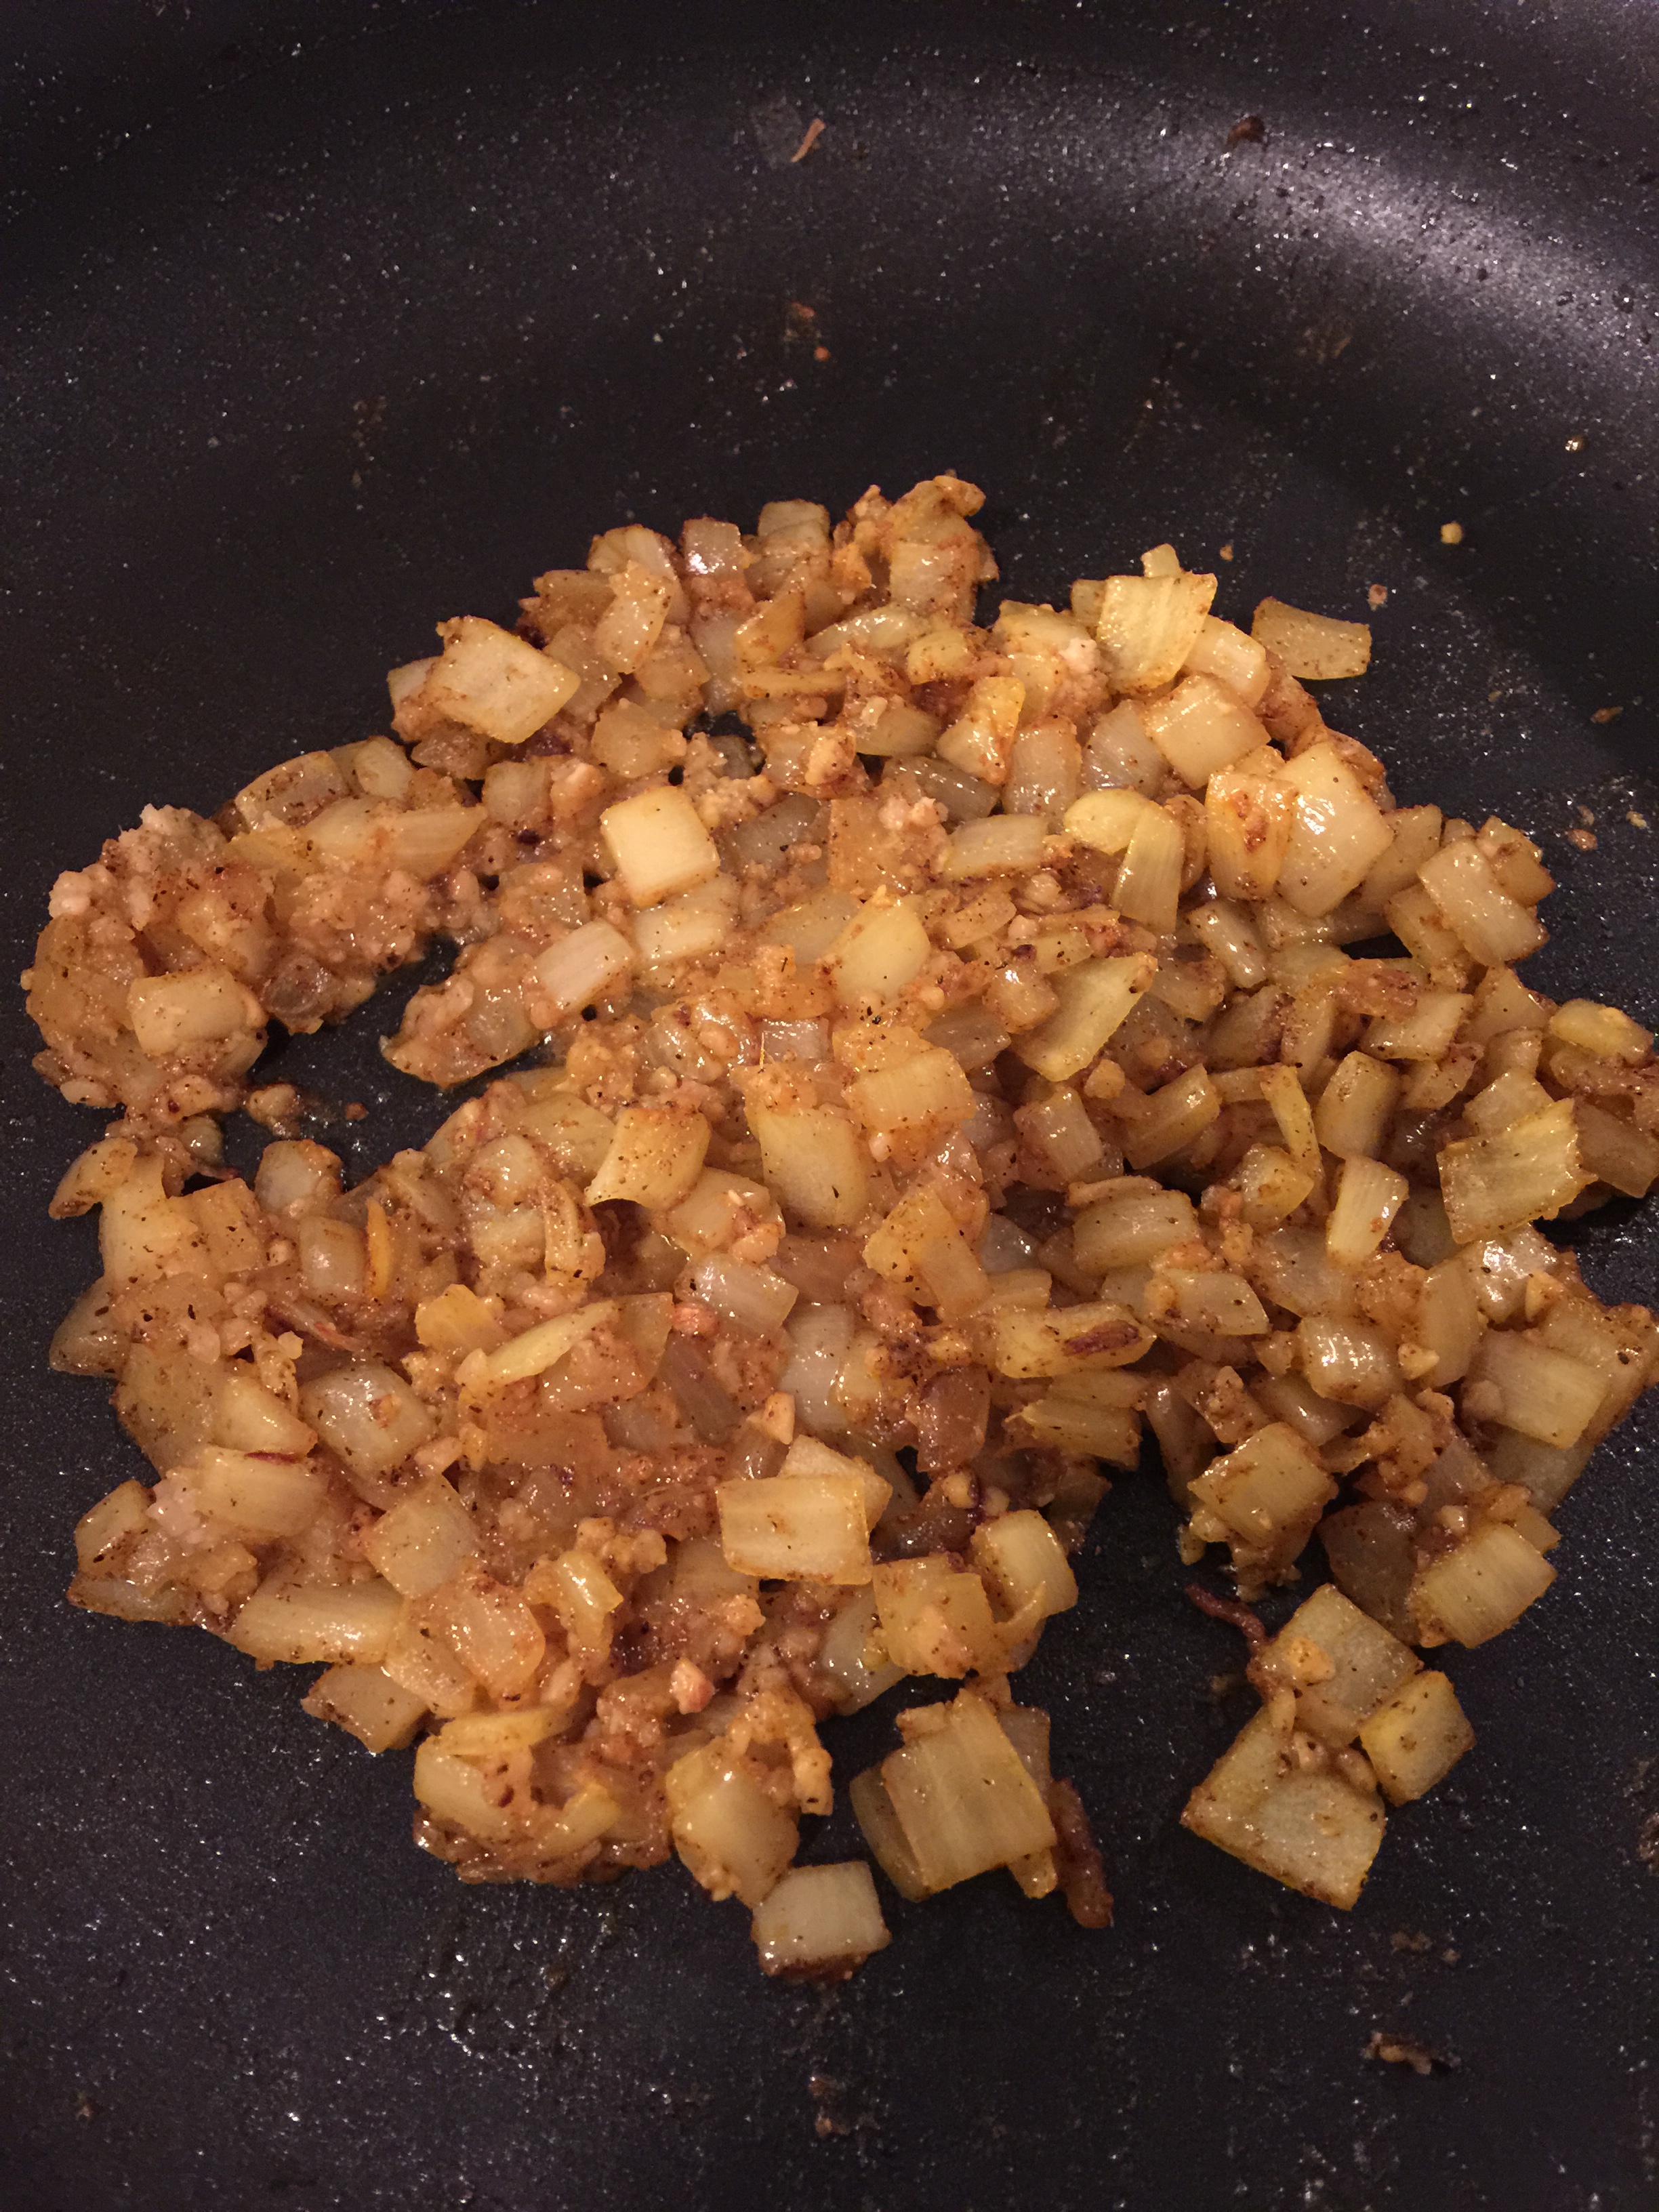
  • in a 6 quart stockpot, heat 1 tablespoon olive oil and saute onion for 8-9 minutes over medium heat (or  ‘til softened and translucent)
  • reduce heat to low; add ginger and garlic and continue to cook for 1-2 minutes stirring constantly ’til fragrant
  • add chopped apples, cider, chicken stock and water; bring to a boil, reduce heat to a simmer
  • save out a cup or so of the roasted butternut; add the rest to the pot and simmer  for 15 minutes or  so
  • using an immersion blender**, puree soup ’til almost smooth
  • carefully taste and season, if necessary, with salt and pepper
  • place a handful of sliced greens and some of the reserved squash in bottom of bowl; fill with soup

**also can be pureed in a standard blender but be very careful and puree in batches

   ♥      ♥      ♥      ♥      ♥ 

God loves you!   ♥  (Don’t ever forget that!)

♥  coleen

Chocolate Zucchini Muffins

choc zucchini muffins

Happy Fall, everyone!  Time to harvest – clean out your garden, gather all your herbs, and start prepping for the cold.  If you have any zucchini left on your vines, pick them and make this!  Ready?  Go!

Chocolate Zucchini Muffins

Ingredients:

  • 1/3 cup unsweetened cocoa powder
  • 2 cups flour (I used half regular flour, half whole wheat)
  • 1 teaspoon baking powder
  • 1 teaspoon baking soda
  • 1/2 teaspoon salt
  • 1/2 teaspoon cinnamon
  • 1 teaspoon vanilla
  • 1 stick butter, melted 
  • 2 eggs
  • 1 ripe banana
  • 1/2 cup brown sugar
  • 2 zucchini, grated
  • 1/2 bag chocolate chips (about 6 oz. or 2/3 cup)
Directions:
  1. Preheat oven to 350F.  Grease muffin tin or use paper liners.  (I just use Pam.)
  2. In a bowl, combine first six ingredients (all the dry ones).  
  3. In a larger bowl, whisk vanilla and melted butter into eggs, then mash the banana and add that to the mixture.  Whisk in sugar and stir in grated zucchini.  Stir in the chocolate chips.
  4. A little at a time, stir the dry ingredients into the wet.  Pour into muffin tin and bake for 20-25 minutes.  
This recipe made 18 muffins for me.  We ate a bunch and froze the rest.  To thaw, microwave for 30 seconds, but be careful, the chocolate chips get all hot and melty again!
Explore, experiment, enjoy! — Dana

To view even more of Dana’s unique recipe, you can visit her at Frugal Girlmet

Veggie-full Chicken Chili

It’s getting to be that time of year when a soup or a stew or a chili are often on the menu around here; how about at your house?  If you have followed this blog for a little while you have heard how VERY MUCH my husband enjoys soup—any kind of soup…the more variety the better!  So, I figured I should dust off my soup recipes and find a few more that I could add to our soup repetoire.

This—Veggie-full Chicken Chili—filled a vacancy amongst the recipes I rely on.  And it fits so well into our healthy but oh-so-yummy POV.   NOTE: Important to keep the size of the veggies approximately the same size so that they will cook well together.

And this easily could be adapted in a few different ways to make it just exactly the way YOUR family would enjoy it:
–  increase the spices
–  use a different bean (or more beans)
–  add more liquid
–  skip the tomatoes (now it is a White Chicken Chili)
–  add more variety of veggies and leave out the chicken

I would love to hear how you tweaked it and made it your own!  Enjoy!

2015-09-19 19.37.04

Veggie-full Chicken Chili

ingredients:

2 to 3 tablespoons olive oil
1# ground white-meat chicken
1 medium onion, diced
1 large red, orange or yellow bell pepper, seeded and diced
2 small zucchini, diced2015-09-19 19.10.50
5-6 ounces baby bella mushrooms, diced
2 tablespoons minced garlic
1 teaspoon ground cumin
1 tablespoon chipotle powder
2 teaspoons dried coriander, or oregano
1 teaspoon sea salt
1 tablespoon freshly ground black pepper
1 (15 ounce) can chickpeas, rinsed and drained
1 jar of salsa (I used salsa verde)
2 heaping tablespoons tomato paste
1/2 of a 28 ounce can chunky crushed tomatoes
2 cups chicken broth
toppings: chopped fresh cilantro, diced avocado, shredded cheese, sour cream


directions:

  • heat 1 teaspoon of oil in a large saute pan over medium-high heat
  • carefully add the chicken; cook for 5-6 minutes, gently chopping so that it breaks down into small pieces and ‘til the chicken is cooked through
  • remove to a bowl and set aside
  • add a tablespoon of oil to the pan; when heated, add the onion and peppers. cook for 5 minutes
  • then add in the zucchini and mushrooms; stir together to distribute the oil (adding a bit more if necessary); cook ‘til all veggies are softened
  • lower heat; add garlic and spices; stir constantly for 1 minute or so ‘til fragrant
  • increase heat again to medium and add in the chickpeas, salsa, tomato products and broth; stir well to thoroughly combine; bring up to a simmer
  • reduce heat and allow to simmer for 15 minutes or so
  • serve along with any of the toppings you prefer

♥  ♥  ♥  ♥  ♥

God loves you!  ♥  (Don’t ever forget that!)

♥  coleen

Pease Porridge

Pease Porridge

“Pease porridge hot, pease porridge cold, pease porridge in the pot, nine days old!”

 Yes, it’s a real dish; and, yes, it’s delicious hot (but I would recommend skipping it cold – and DEFINITELY don’t eat anything left out for a week!)  With fall coming next week, I thought I’d beat the rush and share my recipe for Pease Porridge.

Okay, I’ll be honest…this is just Split Pea Soup with less liquid added.  It comes out more like a stew—or even a pudding—when I make it like this.  Same ingredients though — if you want soup, just add 2 more cups of water or broth.  Easy!   You can add other ingredients to it as well – maybe a diced potato along with the veggies, or a smoked turkey leg as well as the ham.  Warm up your belly with this old favorite!

Pease Porridge

Ingredients:

  • 8 ounces of ham, diced (use Soyrizo for a vegetarian version)
  • 1 onion, diced
  • 1 cup diced carrots
  • 1 cup diced celery
  • 1 pound bag of split peas
  • 4 cups chicken broth
  • 2 cups water
  • 1 bay leaf
  • salt and pepper

Directions:

  1. In a large pot, saute the ham for a few minutes.  Add the onion, carrots, and celery and stir over medium heat until the onion is translucent.
  2. Add the peas, broth, water, and bay leaf.  Cover and simmer until thickened, 30 – 45 minutes.  Add more water if you like a thinner consistency (or add up to a full two or more cups of water or broth to make split pea soup.)  Taste and season with salt and pepper.

Explore, experiment, enjoy! — Dana


To view even more of Dana’s unique recipe, you can visit her at Frugal Girlmet

Indian-spiced Chicken and Spaghetti Squash

Have you noticed ALL the squash at the grocery store (even more abundant, probably, at your local farmer’s market)?  Oh, h-a-p-p-y me!  This week there were quite a few small-ish spaghetti squash…so I snatched up 3 of ’em!  They are the perfect size for a meal for two (and some leftovers).  Spaghetti squash, as most of you know I am sure, is a really good substitute for traditional spaghetti…minus most of the carbs.  Here is some nutrition info for spaghetti squash.  This fits in so well with our ‘healthy but oh-so-yummy‘ POV.

My husband Robert’s favorite rendition of “spaghetti squash and…” is with Italian spaghetti sauce and meatballs.  But me…I am not a huge fan of so much liquid being dolloped over top the prepared spaghetti squash.  So this is what spaghetti squash #1 became….  The ‘warmth’ of the garam masala, the cumin, and turmeric spices added so much to fairly flavor-less ground chicken and spaghetti squash.  Enjoy!

Indian-spiced Spaghetti Squash

2015-09-14 20.40.38

ingredients

small (2#) spaghetti squash
1 pound ground chicken (or turkey)
1 tablespoon + 1 teaspoon coconut oil (or extra-virgin olive oil)
1 small sweet onion, diced
1/2 teaspoon cumin
1 teaspoon turmeric
1 tablespoon garam masala
1/2 teaspoon sea salt
1 teaspoon freshly ground black pepper
2 teaspoons minced garlic
10-12 ounce package frozen chopped spinach, defrosted and squeezed dry
handful (or two) of cherry or grape tomatoes, halved
1 cup frozen peas
1/2 cup chicken broth (or water)

directions

  • cook the spaghetti squash (wash the skin off first). I usually just microwave it…in 5 minute increments ‘til the outside is softened and a sharp knife easily pierces the skin. (there are a number of other methods, click this link for some suggestions.) when done, set aside ’til cool enough for you to scoop it out
  • in a large saute pan, add 1 T of the oil and heat over medium heat
    add the ground chicken and cook, stirring occasionally, for 8-10 minutes; remove from pan and set aside…season w/s&p
  • add the diced onion to the pan (and additional 1 tsp of oil, if necessary); 2015-09-14 20.15.50saute for 5 minutes or so
  • reduce heat and then add the seasonings and the garlic; continue to cook, stirring constantly, for another 3-4 minutes to allow flavors to blend together
  • then add the spinach, halved tomatoes, and peas; stir to combine.  pour broth evenly over top; cover the pan and simmer ‘til broth has been absorbed (just a few minutes).
  • meanwhile, using a fork, scrape out strands of spaghetti squash; season well with some additional s&p.  pile up in serving bowl to make a nest of the ‘noodles’; top with meat mixture (NOTE: if spaghetti squash has gotten cold, place in a small saute pan along with a pat of butter and gently heat)

♥  ♥  ♥  ♥  ♥

God loves you!  ♥  (Don’t ever forget that!)

♥  coleen

Pickled Okra


Pickled Okra

When we moved to Texas last year, I wanted to find some plants to grow in the flower bed.  I put in some basil, which I have to water nearly every day to keep alive and healthy, and the rosemary is pretty hardy.  The other edible that does well here in the sun is okra, but I hadn’t eaten enough of it last year to really decide if it was something I wanted to grow.  Then I had a Bloody Mary at a Cajun restaurant – and instead of olives on my toothpick, I found Pickled Okra!  It was love at first bite.

This is really my first time doing anything with these little guys, and I still have a  lot to learn.  They turned out tangy, crunchy, and delicious…and make me want to experiment more with them.  So, if you like a good cheese plate, add some of these offbeat pickles and keep everyone on their toes!

Pickled Okra

Ingredients:

  • 1 large clamshell small fresh okra (between 1 and 2 pounds)
  • 2 cups water
  • 2 cups white vinegar
  • 1/2 cup salt – use Kosher if you have it
  • 6 cloves garlic, peeled and smashed
  • 1 tablespoon mustard seeds
  • 1 teaspoon dried dill
  • 2 tablespoon sugar
  • 2 chopped hot peppers, or 1 teaspoon dried pepper flakes (optional)

Directions:

  1. Prepare the okra:  wash them and trim the tops.  You still want a little stem left, but not too much – I think between 1/4 – 1/2″ inch is good.
  2. Make the brine:  Add the rest of the ingredients to a large pot and bring to a boil.
  3. Pack the cleaned and trimmed okra into pint jars for canning.  First make a layer that point up, with the stems on the bottom.  Fill the jar with more okra, pointing down with the stems facing up, and jam them in there.  Depending on the size of the okra and how tight you pack them in, this will fill 2 or 3 pint jars.
  4. When the brine is boiling, pour the brine over the okra.  Make sure to spoon in the garlic cloves and spices – don’t waste that flavor!  If you don’t have enough brine to cover your okra, add boiling water to the jar so all your jars are filled to the top.
  5. At this point you can either hot water process them so they are shelf-stable, or just put the lids on tight and store in the fridge.  They’ll be good for a couple weeks in there if the brine goes to the top of the container.

Explore, experiment, enjoy! — Dana


To view even more of Dana’s unique recipe, you can visit her at Frugal Girlmet

Quinoa-Sausage Stuffed Zucchini

{hu·mon·gous}
(h)yo͞oˈmäNGɡəs,-ˈməNG-/
huge; enormous; extraordinarily large

Yup…that describes the two zucchini that have been (literally)  hanging out on our kitchen counter for a while now.  What to do…what to do…what to do with them; I think I have asked myself this almost every day for a week.  So, this is what I did.

2015-09-05 20.14.08

Quinoa-Sausage Stuffed Zucchini

And they were sooo yummy!  They made a complete meal.  I think that this ‘stuffing’ mixture would work equally well in any number of ways: in portobello mushroom caps, in stuffed peppers, in acorn squash.  Anything else you can think of?  (I’d love to hear your suggestions in the comments below!)

Here’s the other thing about this recipe (besides fitting perfectly into our healthy but oh-so-yummy POV!) — really quick and so easy!   Enjoy!

ingredients:

1/2 cup quinoa
1 cup water
1 humongous (or 2 medium) zucchini
1/4 teaspoon (each) sea salt, freshly ground pepper
1/2 tablespoon extra virgin olive oil
12-16 ounces italian seasoned chicken sausage (sweet or hot)
1 small red onion, diced
2 tablespoons of minced garlic
1 teaspoon dried marjoram
1 cup halved grape or cherry tomatoes
4 tablespoons (or more) shredded mozzarella or Monterey Jack cheese
2 tablespoons freshly grated Asiago (or Parmesan) cheese

directions:

  • get the quinoa going right away (cook according to package directions)
  • cut the humongous zucchini in half lengthwise (if needed, cut a thin slice off the bottom to get them to sit firmly);  scoop out the pulp, leaving a 1/4″ shell
  • put the zucchini boats on a microwave safe plate, season with s&p, and microwave on high for 3-4 minutes, ’til just tender.  place the zucchini onto a broiler-safe pan
  • chop the scooped out zucchini into 1/2″-sized chunks; set aside
  • heat the olive oil in a large saute pan over medium-high heat
  • add the sausage, onion, and zucchini chunks; cook for about 5-6 minutes (’til there’s no pink left), breaking the sausage into bits as it cooks
  • reduce heat to low; add the garlic stirring constantly for 1 minute
  • toss in the tomatoes and marjoram; stir to combine and turn the heat off
  • preheat the broiler of your oven and place a rack in the top position
  • (when quinoa is done) combine with the sausage-veggie mixture
  • scoop into the zucchini boats and sprinkle with the mozz or monterey jack
  • place under broiler ’til the cheese is melted, 1-2 minutes
  • plate and sprinkle the grated Asiago or Parm over top

♥   ♥   ♥   ♥   ♥

God loves you!  ♥  (Please don’t ever forget that!)

♥  coleen

Baked Salmon with Pesto Sauce


Baked Salmon with Pesto Sauce

Salmon is my favorite fish to make at  home.  It seems more substantial than fish like sole or trout, and its strong, meaty texture and flavor give it a lot of flexibility.  Make this Baked Salmon with Pesto Sauce and find out for yourself!

You can of course use store-bought pesto, but if you have basil growing in your garden, the rest is easy to rustle up at home.  This is how I like pesto – you can alter this to suit your tastes.  If you have any leftover pesto, try it on scrambled eggs, roasted vegetables, chicken, and of course over pasta!  (Or, want a different spin on pesto?  Try Coleen’s version!)

Baked Salmon with Pesto Sauce

Ingredients:

  • 1 large salmon filet, about 1/2 pound or more
  • 1 tablespoon olive oil
  • salt and pepper
  • 1 cup basil leaves
  • 2 garlic cloves
  • juice of 1/2 lemon
  • 1 tablespoon grated Parmesan cheese
  • 2 tablespoons pine nuts
  • 3 tablespoons – 1/3 cup olive oil

Directions:

  1. Preheat your oven to 375*F.  Line a baking sheet with aluminum foil.
  2. Place the salmon skin-side down on the baking sheet, and drizzle with one tablespoon of olive oil.  Season the salmon with salt and pepper.  Bake for 10 minutes, or until firm in the thickest part of the filet.
  3. While the salmon is in the oven, put the basil and garlic cloves in the bowl of a small food processor.  Pulse to combine.
  4. Add the lemon juice, Parmesan cheese, and pine nuts, and blend again.  Add 3 tablespoons of olive oil and blend.  Taste for seasoning – more lemon?  More Parmesan?  More garlic?  You can add more olive oil for a thinner texture – as much as half a cup if you like your pesto really thin.
  5. Serve the salmon hot from the oven with a healthy pour of pesto over the top.  Refrigerate leftovers.

Explore, experiment, enjoy! — Dana


To view even more of Dana’s unique recipe, you can visit her at Frugal Girlmet

Homemade Buttermilk Ranch Dressing

It has been quite some time since a packet of that kind of famous ‘Ranch Dressing and Dip Mix’ has been in my pantry!  We have been pursuing this healthy but oh-so-yummy POV for about 3 years now.  But it took a little while ’til I realized that there were quite a few additives in that little packet.  (Have you looked at the list of ingredients?  I suggest you do.)  Nowadays I read the ingredient list as well as the nutrition label on every food item I purchase.

However, there is one person in our little household of 2 who simply loves Ranch Dressing.  He enjoys it on salad, of course, but also as a dip…and as a baked potato topping and as a spread on deli sandwiches.  So I continued to try to find (and purchase!) bottles of prepared dressing that were “better.”  But I have only found 2 that are on the ‘healthier’ end…and they are so expensive!  So I did a tiny bit of research…really less than an hour or so…and found that, for less $ and hardly any time, I could mix up a batch that IS healthy but oh-so-yummy!  happy me…happy hubby!

I suggest you give this a try!  Three tablespoons of this mix = 1 packet of store-bought “ranch dressing” seasoning mix.   Also, click here for a great list of ideas/recipes using Ranch Dressing/Dip!

Down below is a recipe using this mix to make Avocado Ranch dressing…really, really delicious!  And made with only two tablespoons of mayo (or, as I make it, with NO mayo)! Enjoy!

Homemade Buttermilk Ranch Dressing/Dip Mix

2015-08-24 17.23.03

ingredients:

1/2 cup dry buttermilk powder
2 tablespoons dried parsley + 1 teaspoon extra
1 teaspoon dried dill + 1/2 teaspoon extra
2 teaspoons garlic powder or ground garlic flakes
2 teaspoons onion powder2015-08-24 17.08.11
2 teaspoons dried onion bits
1 teaspoon ground black pepper
1/2 teaspoons smoked paprika
1 teaspoon dried chives
1 teaspoon sea salt
1/8-1/4 teaspoons cayenne (optional)


directions:

  • for a finely-ground mix, pulse the mixture in a food processor until it is a uniform consistency
  • stir in the extra parsley and dill for texture (or simply whisk all ingredients together until blended)
  • store in a small airtight container in the fridge for up to 3 months

Avocado Ranch Dressing

2015-08-24 17.56.07

ingredients:

3 tablespoons homemade ranch dressing mix
1 ripe avocado (peeled and pitted) *KEEP the pit*
1/4 cup 0% fat Greek Yogurt
2 tablespoons mayonnaise (optional)
juice of half a lemon
2 teaspoons white balsamic vinegar
1/4 cup olive oil
1/4-1/2 cup milk or buttermilk (add milk to adjust consistency)

directions:

  • in a blender or food processor, combine first 6 ingredients; blend until semi-smooth
  • then, in a slow stream, pour in olive oil continuing to blend together
  • then add 1/4 cup of milk or buttermilk (adding more if needed) ‘til desired consistency is reached
  • store in an airtight container in fridge ‘til ready to serve **place the pit into the container, too**
  • stays fresh about 4-5 days in an airtight container

Moo-less Chocolate Pie

moo-less chocolate pie

If you’ve never had tofu before, this Moo-less Chocolate Pie may be the dish to break you in softly.  Soft tofu is a master of disguise, and here it takes the place of dairy and eggs to form a soft custard base.  Serve this to anyone who swears they hate tofu, and see if you can change their mind!

There are dozens of ways you can customize this.  Use a graham cracker crust like I did, or a regular pie crust instead of the chocolate pie crust.  Drizzle with homemade caramel, or serve with strawberries.  Walnuts or pecans would be delicious too, with a light pour of hot fudge.  Or go classic and just serve with whipped cream.

Moo-less Chocolate Pie
(Recipe Courtesy of Alton Brown)

Ingredients:

  • 2 cups chocolate chips
  • 1/3 cup coffee liqueur (or use black coffee)
  • 1 block silken tofu
  • 1 teaspoon vanilla extract
  • 1 tablespoon honey
  • 1 prepared chocolate wafer crust

Directions:

  1. Place a small metal bowl over a sauce pan of simmering water.  Melt the chocolate chips and the coffee liqueur together in the bowl.  Stir in the vanilla.
  2. Pour the chocolate mixture into the jar of a blender or food processor.  Add the tofu and honey and mix until liquified and smooth.
  3. Pour the chocolate-tofu mixture into the pie crust and refrigerate for two hours, or until set.

Explore, experiment, enjoy! — Dana


To view even more of Dana’s unique recipe, you can visit her at Frugal Girlmet