November 16, 2024

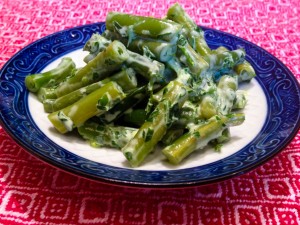
Tarragon Green Bean Salad

Tarragon Green Bean Salad resize

Green beans – get ’em while they’re hot!  Or cold.  They’re in season now, so green beans are cheap and plentiful.  My husband likes them best splashed with olive oil and roasted in the oven, but sometimes you don’t want to heat up the house.  For a yummy, summery green bean dish that’s delicious warm or cold, try this Tarragon Green Bean Salad!

Fresh herbs are a joy, and this recipe uses parsley, tarragon, and green onions.  Technically this may be a green goddess salad dressing, and it IS wonderful on a salad with fresh tomatoes.  You will have enough dressing left over to do just that!  Make the dressing while the beans are cooking and this recipe is ready in a snap.  Let’s go!

Tarragon Green Bean Salad

Ingredients:

  • 1 pound fresh green beans
  • 2 cloves garlic
  • 1-inch squeeze of anchovy paste or one small anchovy fillet (you can sub soy sauce if you must)
  • 1 fist full of parsley
  • 1 fist full of tarragon leaves
  • 2 green onions
  • 2 tablespoons mayonnaise
  • 2 tablespoons yogurt (or sub sour cream)
  • juice of 1 lemon (or sub tarragon vinegar, if you’re fancy!)

Directions:

  1. Prep the green beans:  cut off tops and tails and cut the beans into 1-inch pieces.  Put the beans in a covered dish with some water and cover.  Microwave for about six minutes.  You want the beans tender-crisp.
  2. While the beans are steaming, make the dressing:  Blend all the rest of the ingredients in a food processor.  It doesn’t have to be homogeneously smooth, but you don’t want to bite down on a big chunk of garlic!
  3. To serve:  Toss the beans in half of the dressing.  Serve warm, or refrigerate until ready to serve.  It’s great cold too, especially with grilled meats.  Serve the leftover dressing with salad and tomatoes, or use it as a dip for carrots and peppers.

Explore, experiment, enjoy! — Dana


To view even more of Dana’s unique recipe, you can visit her at Frugal Girlmet!
Mango-Pineapple Guacamole with Tajin

I think that many of you will agree with me that one of the best things about faceBook is the opportunity to meet women who love God, who desire to seek Him and serve Him…and to become friendly with them.  Yes?  My heart has been encouraged and admonished and helped by my fB friends!  I am so very thankful to God for this good use of technology!

And I love the virtual conversations I’ve had with these friends about oh, well, everything, practically! they’ve run the gamut from spiritual matters—prayer, the meaning of a particular passage of Scripture, doctrinal questions to relationship (aka, marriage) problems to ‘foodie’ talk to political discussions to grandchildren boasting to…y’know, EVERYTHING.

so recently, one friend from California was ‘sharing’ how much she was enjoying a new spice she had gotten at the grocery store.  LOTS of comments were made about the awesomeness of this product!  So I chimed in saying how it didn’t appear to be available in our area, and that I was going to check it out on amazon.com (doesn’t everyone buy groceries from amazon?)…and THEN one of my Texas girlfriend’s messaged to say she was sending me some!  Woo-Hoo!  How sweet and kind is THAT?!?  Just sayin’!  Needless to say…not too long afterward…the mailman left an awkwardly-shaped package along with the day’s mail.  For the life of me, I could not figure out WHAT it was…’til I turned it over and read the return address!  Then I knew exactly what it was…’love in the mail’ for sure!

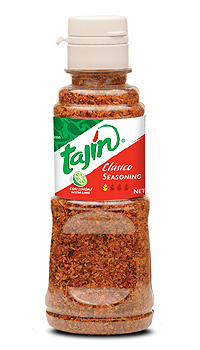
tajin

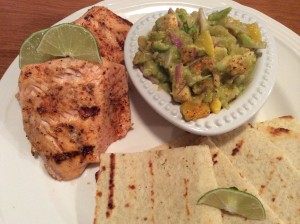
For any of you who are NOT familiar with Tajin seasoning…it has 3 ingredients: chiles, lime, salt.  Really…not kidding.  AND, (shhh!) it is NOT too spicy!  Really…not kidding.  Tajin’s claim to fame (from what my fB friends tell me) is as a condiment on fruit—mango, watermelon, cantaloupe, pineapple, etc.  So I thought that I would make a mango-pineapple guacamole.  This was delicious over some grilled salmon.  Enjoy!  (And thank you to my sweet and spicy friend, Melanie!  xo)

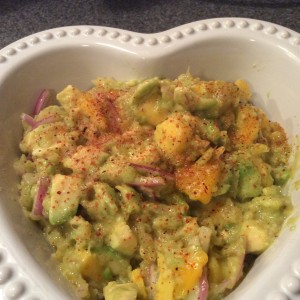
Mango Pineapple Guacamole (with Tajin)

2014-08-23 20.02.21

ingredients:
2 ripe avocados, peeled, pitted, cubed
1 large mango, peeled, pitted, cubed
1/2 large lime
1/2 cup crushed pineapple, drained
2 tablespoons pineapple juice
1/2 small red onion, very finely diced
sea salt, freshly ground pepper (I use lemon pepper mixture)
Tajin 1 tablespoon (or MORE)

directions:

  • using a large mixing bowl, put 1/2 of the avocado into the bowl and mash slightly
  • then add the rest of the avocado, the mango, the pineapple, the onion
  • squeeze the juice from the lime and the pineapple juice over all; gently stir together
  • add the seasonings and again stir; taste and add more seasoning if you like

2014-08-23 20.17.03

Pssst!  I also sprinkled the Tajin over top the salmon before it went onto the grill!

♥   ♥   ♥   ♥   ♥

God loves you!  ♥  (Don’t ever forget that!)

♥  coleen

Korean-Style Tuna Salad

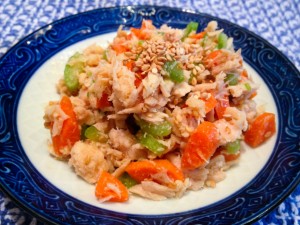
Korean Tuna Salad resize

Now that school is starting up again, it’s time for some lunchbox ideas.  One of my favorites as a kid was tuna salad.  Growing up, I had it only two ways:  with mayonnaise, and the way my Mom made it, which was with mayo and chopped celery.  It wasn’t until I was in high school that I had tuna salad made with mayo and pickle relish.  (Thanks, Mrs. Carson!)  It’s really easy to believe that a food will only taste good if prepared in the way you’re familiar with.  I mean, even 15 years ago, I would have been hard-pressed to believe that I would like tuna salad made without mayonnaise.  But old dogs can learn new tricks, so here I present to you:  Korean-Style Tuna Salad!

My husband asked me to make this for him several years ago, because this is the way he grew up eating canned tuna.  Believe it or not, Koreans do enjoy tuna salad, and even make a dish called Tuna Kimbap with it – tuna salad rolled up in rice and seaweed (kind of a Korean sushi roll.)  In this Korean-style dish, the mayonnaise is gone, replaced by savory sesame oil.  The celery is joined by minced carrot and green onion, and the whole dish is seasoned with a little vinegar and a healthy shake of sesame seeds.  It’s a whole new take on tuna!

Try this wrapped in lettuce or served on crackers for lunch.  Ready to break out of your comfort food comfort zone?  Let’s go!

Korean-Style Tuna Salad

Ingredients:

  • 2 cans tuna, drained
  • 2 green onions
  • 1 large carrot
  • 2 celery stalks
  • 2 tablespoons sesame oil (or more, to taste)
  • 1 teaspoon rice vinegar (or use lemon juice)
  • 2 tablespoons sesame seeds
  • 1/2 teaspoon salt

Directions:

  1. In a mixing bowl, add the tuna.
  2. Finely mince the green onion, carrot, and celery.  Add to the tuna.
  3. Pour in the sesame oil and rice vinegar.  Toss to combine.
  4. In a small bowl, combine the sesame seeds and salt. Crush them together with the back of a spoon until most of the seeds are crushed.  (You can also do this quickly in a mortar and pestle, if you have one.)  Pour the sesame seed salt mixture over the tuna and mix well.  Taste – now you can add more sesame oil, vinegar, or salt.  Refrigerate until ready to serve.

Explore, experiment, enjoy! — Dana


To view even more of Dana’s unique recipe, you can visit her at Frugal Girlmet!
 

High Fiber Quick and Easy Lunch

Beans

Fiber! It is one of the things we know we need to add to our diet. The benefits of fiber have been shown to protect against cardiovascular disease, help with weight control, reduce risk of type 2 diabetes and be a source of cancer-fighting antioxidants, vitamins, and minerals.

Today’s woman should be consuming 15-25 grams of fiber a day (14gms for every 1,000 calories). However, for busy women, it is hard enough to find the time to eat anything healthy (consistently) much less worry about adding in fiber.

Adding fiber to your diet isn’t as hard as it may seem. It just takes a little know-how and some motivation. It can be as easy as choosing nutrient-rich foods such as legumes, whole grains, and fresh (or frozen) fruits and vegetables. Dried fruit, carrot sticks, a whole-grain pita and even popcorn are also a good choice.

Another reason some women may not get enough fiber is because they get in a rut of eating the same thing every day… grilled chicken salad.  Do you want something new and easy? Try this quick salad. I love it because you can quickly prepare it on Sunday evening to have for lunches during the week or as a side for an evening meal. The best thing is it will provide almost half of your daily fiber requirements.

Three Bean Salad
1/4 cup red wine vinegar

3 tbsp Equal® Spoonful (or use 4.5 packets of Equal® sweetener)

1 tbsp olive oil

3/4 tsp Italian seasoning

1 small clove garlic, minced

1/4 tsp salt

1/8 tsp black pepper

1 can (14.5 oz) cut green beans,
drained

1 can (15 oz) garbanzo beans, rinsed, drained

1 can (15 oz) dark kidney beans, rinsed, drained

1/4 cup sliced green onions

  • Combine vinegar, Equal®, olive oil, and seasonings; mix well.
  • Stir in remaining ingredients.
  • Refrigerate, covered, several hours or overnight, stirring occasionally.

Serves 6
Calories – 159
Fat – 3 gms
Protein – 8gms
Fiber – 8gms

** adapted from Calorie King

** Add grilled chicken if you desire; however, nutritional content will change.


In Good Health,
Crystal

Arugula, Peach, Quinoa Salad

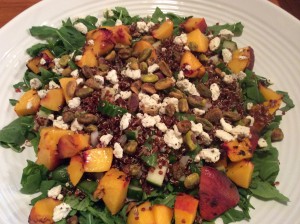
Recently a friend told me about this delicious ‘rice’ salad that she and her family were enjoying that she purchased at her favorite grocery store from the fresh salad bar. Well, as it turns out it wasn’t rice (when I questioned her thoroughly) but red quinoa!  Oh, I do love quinoa…so I was quite interested!  Here is my variation on this salad.  You can surely make this ‘your own’ by varying the fresh veggies added, what type of fruit you put in (berries would also be lovely!), the kind of vinaigrette you use (perhaps use your family’s favorite bottled vinaigrette!), and what variety of nuts you sprinkle across the top!  I would love to hear how you changed it up; leave a comment below!

Quinoa <kEEn-wah> is a grain but it is the seed that we eat! (Good news for those who eat low-carb, right?)  And it is jam-packed full of protein.  Have you and your family enjoyed quinoa before?  To find quinoa in your grocery store, check the natural food section, or the rice/pasta aisle.  Usually when I prepare a pot of quinoa, I make extra to use for another meal. Our favorite is ‘red’ quinoa although it also comes in white (or golden), and black variations. Check out these nutritional facts.  This light salad fits well into our ‘healthy but oh-so-yummy’ POV since it has a great vegetable protein base, and lots of fresh veggies and fruit!  Serve it alongside something yummy from the grill—chicken, shrimp, or salmon, for example.  Oh, and if you DO grill…throw the peaches on the grill for 5 minutes or so, too!  Enjoy!

Quinoa, Peach and Arugula Salad

2014-08-17 19.34.04

ingredients:
1 cup red quinoa
1+3/4 cup water
1/3 cup olive oil
1/3 cup mango (or orange) juice
1 tablespoon honey, agave or maple syrup (optional)
2-3 splashes of white balsamic vinegar
1 teaspoon minced garlic (I use jarred)
sea salt & freshly ground black pepper
3 cups arugula
2 ripe peaches (or mango), chopped
1/2 small red onion, finely diced
1 cup cucumber, small dice
handful of sugar snap peas (defrosted from frozen OR fresh)
3 tablespoons chopped fresh parsley
3 tablespoons chopped fresh mint
1/3 cup nuts (pistachios, pignoli, chopped almonds)
4 ounces goat cheese, crumbled
sea salt & freshly ground black pepper

directions:

  • prepare quinoa: bring water to a boil in a small saucepan; add the quinoa, bring back to boil, stir, cover, and then reduce heat to very low and simmer until the water is absorbed (10-15 minutes).  remove from the heat, keep covered, and let sit for 5 minutes.  fluff up with a fork and transfer to a large mixing bowl to cool2014-08-17 18.59.45 HDR
  • make vinaigrette:  whisk together the juice, garlic, sweetener (if using), balsamic, and s&p; slowly drizzle in the olive oil while continuing to whisk away ‘til thoroughly emulsified. (this can be done in your food processor or using an immersion blender)
  • assemble:  add the veggies, arugula and herbs to the quinoa already in the large mixing bowl, ; toss together
  • pour 3/4 of the vinaigrette evenly over the mixed salad; season well with additional s&p to taste
  • top with sliced peaches, nuts, and cheese

♥   ♥   ♥   ♥   ♥

God loves you!  ♥  (Don’t ever forget that!)

♥  coleen

Fruity Energy Bars

Fruity Energy Bars resize

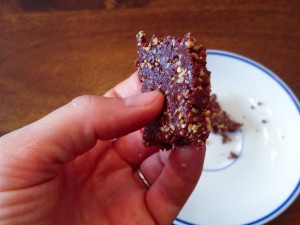
I’ve got a lot of hoops to jump through when it comes to making snacks for my girls.  I try to eat Paleo myself, and while I do serve my girls grains and legumes, I am always searching for recipes that rely on Paleo ingredients first.  Next, my older daughter is allergic to peanuts and tree nuts.  That eliminates a giant swath of choices in the Paleo category, which excludes grains in favor of nuts.  So for baking, that leaves me either coconut products (which we love and use often), or seeds, like pepitas or sunflower seeds.  I found a recipe that sounded good, reconfigured it for our needs, and now I proudly present:  Fruity Energy Bars!

In the grocery store, you’ll find half an aisle dedicated to energy and granola bars.  I love them and I love that, for the most part, they’re healthy and nutritious.  They are, however, kind of pricy – sometimes two or three dollars a bar!  And it seems like the ones with the fewer ingredients are even more expensive!  (I’m looking at you, Larabar!)  Now, these Fruity Energy Bars couldn’t be quicker – just three minutes in the food processor, and about half an hour to chill and firm up.  I think you could easily exchange the dried cranberries for another dried fruit – apples, apricots, raisins, prunes, or cherries would all work.  If you want to use nuts instead of sunflower seeds, try almonds or walnuts.  They do warm up very quickly and get soft, so keep them in the fridge until ready to eat.  Ready?  Get energized!

Fruity Energy Bars

Ingredients:

  • 1 cup pitted dates
  • 1 cup dried cranberries
  • 1 cup sunflower seeds (I used roasted and salted)
  • 1/4 cup unsweetened flaked coconut
  • 1/4 cup chocolate chips

Directions:

  1. Pour all the ingredients into the bowl of  your food processor.  Pulse to blend, then mix for about 3 minutes.  You can blend it all the way together and it will form a ball, but I took mine out before that so I could still have a little texture to the bars – kind of like the consistency of sticky sand.
  2. Line an 8×8 pan with plastic wrap, or grease with a little coconut oil.  Press the mixture into the pan and press down with the back of a big spoon.  Refrigerate for at least half an hour.  Cut into 1″x4″ bars.  Get energized and go be productive!

Explore, experiment, enjoy! — Dana

—————————————————————————————————
To view even more of Dana’s unique recipes, you can visit her at Frugal Girlmet!

Pesto Pasta with Grilled Chicken

Look what someone who loves me gave me today?  Oh happy me!

2014-08-07 17.34.47

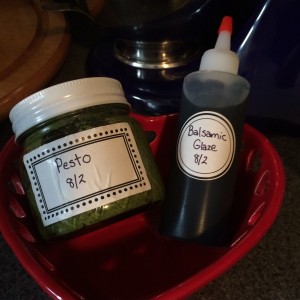
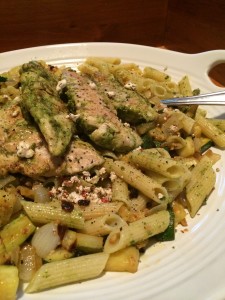
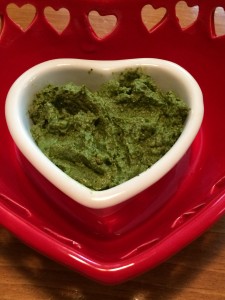
My daughter, Kassia, lovingly gifted me with a jar of her healthy but-oh-so-yummy pesto (and luscious balsamic reduction)!  This is precious stuff…what to make, what to make?  Eventually, I just decided to keep it simple: I took a couple of tablespoons to marinate chicken tenderloins, which we then grilled; and then topped off sauteed zucchini and onions with another couple of tablespoons and combined it all together with some gluten-free penne pasta. So yummy!

2014-08-07 19.31.01

Kassia graciously is sharing her pesto recipe with us today…. This recipe is vegan and dairy-free (along with being intrinsically gluten free, soy free). Her secret ingredient? “Nutritional yeast.” Yup! Don’t knock it ‘til you try it! (Oh, speaking of trying it…dust your freshly popped popcorn with it!) Here’s a fun link loaded with lots of good info about nutritional yeast, or noosh, and some ideas where to purchase it. Enjoy!

Pesto

ingredients:
1/4 cup walnuts2014-08-10 17.47.41
1/2-1 tablespoon finely minced garlic (she uses jarred garlic, like her momma!)
2 cups fresh baby spinach
1 cup fresh basil (leaves only!)
1 tablespoon nutritional yeast flakes
1 tablespoon lemon juice
1/4 cup+/- extra virgin olive oil
sea salt, freshly ground black pepper (to taste)

directions:

  • in a food processor, process the walnuts and garlic until minced
  • add the spinach, basil, nutritional yeast and lemon juice; process by pulsing until spinach is finely ground
  • with food processor running, s-l-o-w-l-y pour the oil down the food chute ‘til all is well incorporated
  • season with salt and pepper, to taste
  • this will make approximately 3/4 cup (about 12 tablespoons) of pesto. I only used 5 tablespoons in the entire dish pictured above which made 4 generous servings!

♥   ♥   ♥   ♥   ♥

God loves you!  ♥  (Please don’t ever forget that!)

♥  coleen


Homemade Strawberry Ice Cream (No Ice Cream Machine Needed!)

rsz_homemade_strawberry_ice_cream

A few months ago, my daughter made vanilla ice cream in her kindergarten class.  She raved about how fun it was to make it, and how the finished product was delicious.  Well, I took her story with a grain of salt (unintentional pun!) because 6 year-olds aren’t really known for their discriminating pallets.  But I researched online, found a recipe, and decided to give it a whirl.  And you know what?  If anything, she undersold it!  This stuff is fantastic!  Here’s my recipe for Homemade Strawberry Ice Cream.

We don’t have an ice cream machine.  It sounds like kind of a waste of space, because it’s not something I’d use too often.  The only equipment this recipe needs is two Ziploc bags!  The technique is easy and is perfect for kids to make.  All the recipes online were the same, so I used one (of several) you can find with a Google search.  But what’s even better than vanilla ice cream?  Strawberry ice cream!  Instead of just sprinkling chopped fruit on top, I made a strawberry puree that, when mixed into the vanilla ice cream, makes a strawberry ice cream as good (or better!) than anything you can get at the grocery store.  Also, the serving size is just right.  It’s big enough that you can satisfy two kids with this recipe, and get a taste or two for yourself.  But it’s small enough that you won’t beat yourself up if you eat the whole thing yourself!

Becky puts in some sweat equity

Becky puts in some sweat equity

Homemade Strawberry Ice Cream (No Ice Cream Machine Needed!)

Ingredients:

For the Strawberry Puree:

  • 1 pint strawberries
  • 1 tablespoon honey
  • 1/4 cup water

For the Ice Cream:

  • 1 cup half-and-half (or use 1/2 cup whipping cream and 1/2 cup whole milk)
  • 2 tablespoons sugar
  • 1/2 teaspoon vanilla
  • 1/2 cup rock salt or kosher salt (whatever you can find that has big grains of salt, the bigger the better)
  • ice
  • sandwich-sized Ziploc bag
  • gallon-sized Ziploc bag

Directions:

  1. First make the strawberry puree:  Wash, hull, and quarter the strawberries.  Over medium-low heat, mix together the strawberries, honey, and water.  Mash with a wooden spoon or potato masher, but leave some chunks.  Cook on low for about 20 minutes until reduced and thickened a little.  Don’t let it burn!  Take off the heat.  (You can do this the day before, if you want.  Just pop it in the fridge when you’re done letting it cool.)
  2. For the ice cream:  In a bowl, stir together the half-and-half, sugar, and vanilla.  Pour the mixture into the small Ziploc bag and make double sure it’s sealed well.
  3. Fill the large Ziploc bag halfway with ice and the salt.  Add the small bag to the ice, then cover with a little more ice.
  4. Shake!
  5. Shake!
  6. Shake!  (My bag got really cold, really fast, so I had to wrap it in a towel so it didn’t hurt my hands.)  Shake for about ten minutes.  You can squeeze the ice cream bag and tell when it’s frozen.
  7. Serve the vanilla ice cream with the strawberry puree.  Voila!
Sweet success!

Sweet success!


Explore, experiment, enjoy! — Dana


To view even more of Dana’s unique recipe, you can visit her at Frugal Girlmet!
I Believe You CAN Get Off the Roller Coaster of Eating and Bingeing


roller coaster capture


My client Jan (not her real name) once said, “I do good for two weeks and then I fall off the wagon. I am eating well and then I get invited to dinner with friends, go on vacation, or attend a baby shower and it all goes downhill. It feels like…

“I am on a roller coaster of eating and bingeing.”

So why do Jan (and so many others) fall into this trap?

  1. She was trying to follow a meal plan that is unrealistic to follow; and had not learned how or what to eat if she needed to deviate from the plan.
  2. She attempted to cut ALL sugar and carbohydrates and then binged because she did not know how to eat them responsibly.
  3. She was attempting to eat healthy for one reason only—just to lose weight—which led to giving up because she no longer cared.

In a recent article, A nation of weight watchers: Is our obsession with thin making us fat?, Siri Steinmo, a health psychology practitioner said, “If you spend your life dieting and bingeing, you fall into the eat, repent, repeat cycle.  You don’t eat any carbs all week and then at the weekend have the ‘what the hell effect’ and then you’re repenting again and hating yourself throughout the whole cycle.  This is something women identify with more than men, but men are also under a lot of pressure with body image.”

Boy, did he get it right on the money!  Often times I am asked if I write meal plans and the answer is “no.”  I teach women how to incorporate healthy eating habits and live in the real world as well as how to budget in their favorite foods instead of bingeing one day a week until the point of nausea.

For example, here are two strategies I teach my clients:

  • How to budget in an occasional favorite food, and make allowance for it in other places.
  • How to follow the healthy plate design whether preparing quick healthy meals at home or dining out.

I believe if you can make 2-3 healthy behaviors a HABIT, you can get off of the roller coaster of eating and bingeing. For today, begin with just one new habit.

In Good Health,
Crystal

Fruit Parfaits (to go!)

Here in our little village, we have a community park which fronts on the river which runs through the village.  Twice each week during the summer season, free concerts are held in the bandshell!  This week the Schenectady Pipe Band was scheduled to play!  Oh, I just love bagpipe&drums!!!  (How about you?)  So Robert asked if I would like to go…ummm, let me think…YES!

I thought that he would love it if I made some kind of sweet treat to bring along and enjoy out under the stars listening to stirring bagpipes!  Originally I was planning on making some cookies (his favs!) but we had an abundance of gorgeous berries this week. So then I got ready to make a berry crisp…all yummy warm berry sweetness with a healthy topping of cinnamon-y crunchiness!  But THEN I was talking with my daughter, kassia, about the trendiness of mason jars filled with salads, and suppers…and desserts! My mind was made up—Fruit and Cake Parfaits!

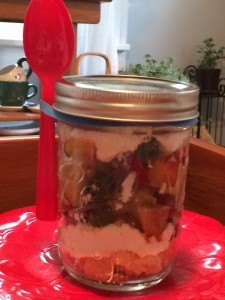
2014-07-31 18.51.46

These were super simple to put together.  I prepared all the components earlier in the day: an easy-peasy yellow sheet cake (gluten free, of course), a berry compote, and homemade whipped cream.  After supper, all that was needed was to layer it all up into mason jars, cap ‘em off, and put them into my picnic basket!  I hope you give these a try!  They would be a great dessert to bring along to a bbq, or picnic…or how about taking them to the drive-in?  Enjoy!

Fruit and Cake Parfaits…to go!

components:
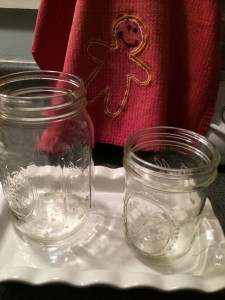
mason (or Ball) canning jars2014-08-03 21.13.26
yellow cake or angel food cake
fresh fruit
whipped cream

note: quantities are at your discretion! For our parfaits, I used a ‘manly’ quart-size jar and a pint-size jar for me. I would suggest “wide mouth” jars, too (much easier to spoon out the yumminess!).

cake component:

  • I simply baked up a plain yellow cake (use a mix…go right ahead!)
  • when thoroughly cooled, cut up into small cubes

fruit component:2014-07-31 14.55.43

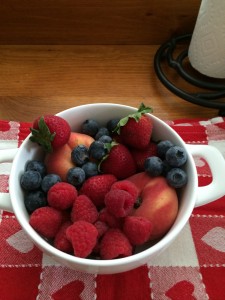
  • we had strawberries, blueberries, raspberries, blackberries, and cut up peaches
  • sprinkle sugar (I used coconut sugar) over the fruit and gently combine
  • proportions: 1 tablespoon sugar to 1 cup fruit (I used 3 cups of fruit)
  • set aside for a minimum of 30 minutes (or up to 2-3 hours) to allow the sugar to draw out the moisture from the fruit creating a syrup

whipped cream component:

  • please indulge and make your own whipped cream
  • I used a half-pint container of heavy cream, 1/2 teaspoon of almond extract, and 2 teaspoons of confectioners (10X) sugar

to assemble:
in this order—cake cubes, macerated fruit, whipped cream—fill up your jars; done!  oh…if taking along with you…don’t forget the spoons!!!  Enjoy!

♥   ♥   ♥   ♥   ♥

God loves you!  ♥  (Please don’t ever forget that!)

♥  coleen