November 16, 2024

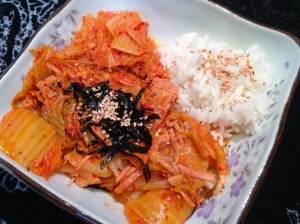
Kimchee Jjigae (Kimchee Stew)

Kimchee Jjigae resize

My blog is called The Frugal Girlmet, because I like to use everything I can in the kitchen and do my best to make sure nothing goes to waste.  Kimchee Jjigae is the Korean embodiment of this principle.  A little background:  Kimchee is a fermented, spicy cabbage dish that, together with rice, is the backbone of Korean cuisine.  Traditionally, Korean families made kimchee in the summer, in gigantic clay pots.  They buried the pots in the ground to preserve them, and the family ate the kimchee over the course of the winter.  Winters are very cold in Korea, so that helped preserve the kimchee…but it still got old.  What to do with overripe kimchee – throw it away?  NO!  Koreans use every last bit of their resources, which is how Kimchee Jjigae came to be.  They made a stew out of the last of their kimchee, adding  meat to make it more filling, and served it with rice for a complete and frugal meal.

The only ingredient you MUST use in this stew is kimchee.  Everything else can vary by region, resources, or personal taste.  One of the most common varieties has pork as the protein component, and this is the way I make it.  You can cut up a few pork chops, or use any leftover pork you have.  I made a pork roast in the crockpot the night before and reserved about 2 cups of meat for this stew.  Other types of Kimchee Jjigae use canned tuna, tofu, other seafood or fish, and even Spam!  During the Korean War, American GIs brought Spam with them, and Koreans adopted it too.  Another variation that was born in the Korean War is called Budae Jjigae, which translates to “Army Stew.”  American soldiers made their own version of Kimchee Jjigae by adding ramen noodles, meat, seafood, and other vegetables to make their rations last longer.

If you like spicy foods, you will love this.  If you feel a cold or sinus infection coming on, this will clear it right out (it’s loaded with Vitamin C and probiotics)!  If your family likes chili, you should really give this Kimchee Jjigae recipe a try.  Feeling brave?  Feeling frugal?  Read on!

Kimchee Jjigae

Ingredients:

  • 1 small onion, sliced fine, or one bunch of green onions, sliced
  • 1 tablespoon sesame oil (or other oil)
  • 2 cups pork (see note above)
  • 2 cups kimchee, preferably old kimchee
  • about 1/2 cup kimchee juice (that red pepper water in the bottom of the jar!)
  • 2 cups water
  • rice to serve
  • sesame seeds, dried seaweed, or sliced green onions for garnish

Directions:

  1. In a large pot with a lid, add the sliced onions and oil.  Cook over medium heat for a minute or two.
  2. While the onion is cooking, chop the pork.  If you are using raw pork, you have two options:  you can add it in whole and then remove it when it’s cooked and chop it up.  You can also slice it thinly and add it now.  I think it’s easiest to use leftover pork that you can quickly chop or shred.
  3. Add the pork, kimchee, kimchee juice, and water to the pot.  Adjust the heat so the stew simmers.  Cover with a lid and cook for 30 minutes.
  4. Serve with rice, and garnish with sesame seeds, dried seaweed, or green onion tops.

Leftovers will keep in the refrigerator for about a week.


Explore, experiment, enjoy! — Dana


To view even more of Dana’s unique recipe, you can visit her at Frugal Girlmet!
 

Spiced Chicken&Butternut in the Slow Cooker

Show of hands…who is thankful for their CrockPot (or slow cooker)?  Meeee…I am, too! And do you find that you use it more in the cold weather months than in the summertime? I do…not quite sure why.  Around the start of autumn, my slow cooker finds it’s way onto the countertop…and usually stays there for quite awhile. Ready to be used for something yummy, whether it’s a batch of apple (or pear!!!) sauce, or some variation of chili, or soup (of course!).  Hey!  What is the best thing that comes out of your slow cooker?  (Leave your answer below in the comments, please!)  Here are a few links that will give you hints and tips as to how to use the slow cooker to your best advantage.

7 Tricks for Better Slow Cooking in your Crockpot

Back to Basics: How to Use a Slow Cooker

Stockpiling Moms: CrockPot Hints and Tips

And here are a few of mine, too….

  • I find that mushrooms get quite mushy if cooked very long in the slow cooker. So I saute them early on and keep in the refrigerator ‘til 30-45 minutes until your food is finished cooking. Toss them in and give everything a good stir.
  • Today’s slow cookers are much more efficient than earlier models. No longer do I put together a meal in my slow cooker early on and let it cook all day long. Now, usually 4-5 hours before suppertime, I will layer everything in and let it start cooking.  Most often I set it on high for 1 hour and then 3-4 hours on low.
  • Keep the lid on!  I’ve read that every time you take the lid off, you add 15 minutes of cooking time!
  • Aspire to attain a programmable slow cooker.  (I’m still working on this!)

This recipe makes enough for 6 generous servings.  And with the yummy, thick ‘sauce’ made by pureeing the veggies there is no need to thicken with flour or sour cream!  This fits in perfectly with our healthy but oh-so-yummy POV!  Enjoy!

Spiced Chicken and Butternut Squash

2014-09-17 20.22.31

ingredients:

2# boneless chicken breast or thighs, cut into large pieces
1/2 large (3# or so) butternut squash, peeled and cut into large cubes
1 large sweet onion, sliced
3 large carrots, cut into large chunks
1 cup chicken broth
1 can coconut milk
2 tablespoons soy sauce
1 tablespoon garam masala seasoning
2 teaspoons curry powder
1 (10 ounce) package of baby bella mushrooms, wiped clean and cut into quarters
1 (10 ounce) bag frozen petite peas, defrosted

2 cups basmati or jasmine rice (when prepared this equals 4 cups)

directions:

  • mix together the spices and liquids; pour into slow cooker
  • turn slow cooker on ‘high’ at this point
  • add (in this order) the butternut squash, onions, carrots, and chicken pieces
  • cover and allow to cook on high for one hour
  • turn knob to low, and cook for 3-4 additional hours
  • don’t forget to toss in the mushrooms towards the end of cooking time

finishing and serving

  • about 15 minutes before you would like to serve, place all of the cooked chicken and about 1/2 of the veggies into a large serving dish
  • use an immersion blender* to carefully puree the rest of the veggies together with the liquid right in the slow cooker bowl
  • taste for seasoning, adding salt&pepper if necessary
  • stir in the defrosted peas
  • pour this ‘sauce’ right over the set aside chicken & veggies

* you can also use a blender, CAREFULLY pureeing the veggies and liquid in small batches.

♥   ♥   ♥   ♥   ♥

God loves you!  ♥  (Don’t ever forget that!)

♥  coleen

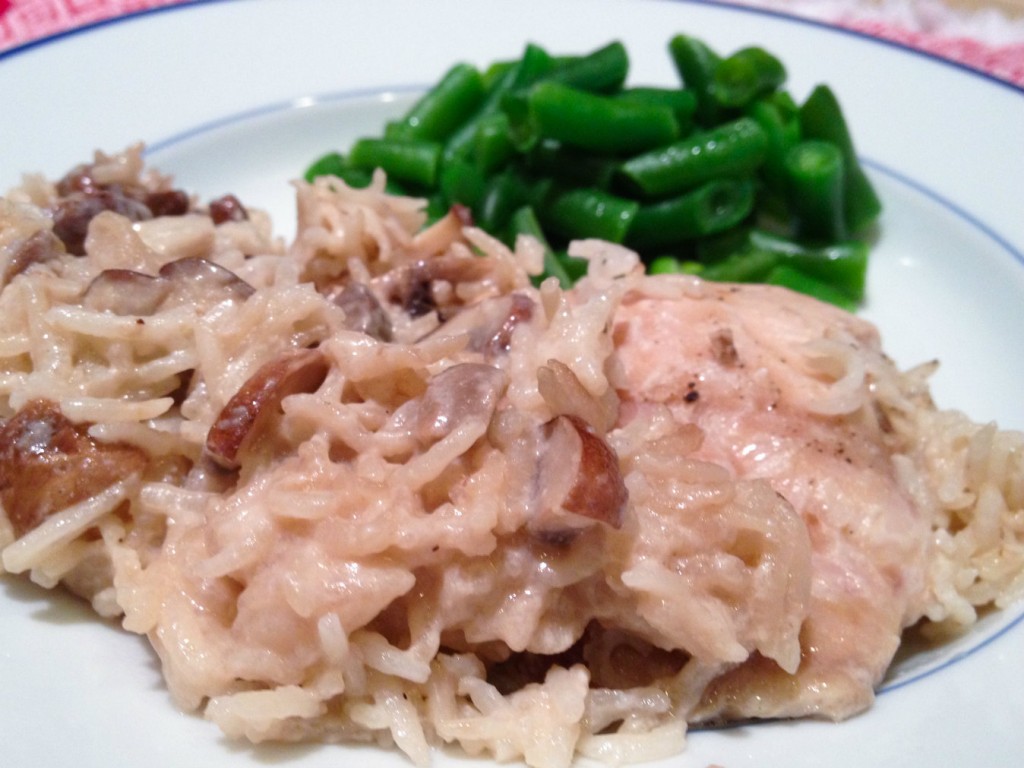
Chicken and Rice


Chicken and Rice resize

This is a recipe I learned when I was in 7th grade Home Economics. (Do they still offer that in schools?)  I liked it so much, I brought the recipe home and asked my Mom if I could make dinner for the family for the first time.  I did – and it was a success!  How’s that for boosting your kitchen self-confidence?  Your kids can make this too:  Chicken and Rice!

There are any number of variations you do make:  add onions or garlic to the rice.  Sauté the mushrooms in wine and herbs before you add them to the casserole.  Marinate the chicken in Italian dressing first.  Parboil brown rice and use that instead of white rice.  The sky is the limit, or you can keep it simple.  I made it like this last night and my whole family loved it.  Yours will too!

Chicken and Rice

Ingredients:

  • 1 can cream of mushroom soup
  • 1 can of milk (see below)
  • 1 cup white rice
  • 8 ounces fresh mushrooms, chopped
  • 6 boneless, skinless chicken thighs
  • salt and pepper

Directions:

  1. Preheat the oven to 375*F.  In a large casserole or baking dish, spray some cooking spray on the bottom and sides.  Evenly place the six chicken thighs in the dish.  Season with salt and pepper.
  2. In a large bowl, empty the can of cream of mushroom soup.  Fill that empty can with milk and mix with the soup.  Add in the rice.  Chop the mushrooms and add to the soup mixture.  Add salt and pepper, stir, and pour over the chicken.  You want the rice mixture to be evenly distributed in the dish.  Depending on the size of your dish, that may mean it nearly covers the chicken, or not even halfway.  Just spread it out so it lies pretty flat.
  3. Cover the dish with foil and bake for an hour.  Check for doneness – you want the thighs to be 175*F.  Serve hot!

Explore, experiment, enjoy! — Dana


To view even more of Dana’s unique recipe, you can visit her at Frugal Girlmet!


Do You Dream of More Time?

More Time
In the busyness of life, do you dream of more time?  As women, we have so many titles—there is the employee/employer, committee leader, wife, mom, coach, church and/or community volunteer, taxi driver and friend.  Is it possible to give 100% in each role and find time to take care of our spiritual and physical health? In my opinion, the answer is no.

If you find yourself in a constant state of go, here is a question…

Is your busyness keeping you from knowing, and fulfilling,
God’s purpose for your life?”

If the answer is yes, then how do you prioritize your time to know God’s purpose?

Ladies, we will never know the answer until we make time with God each day our first priority through prayer and studying His Word. If we make Him a priority, He will begin to show us how to prioritize our time to fulfill HIS PLAN each day. You may be in a season of your life that you need to give up certain responsibilities, ideas, or selfish ambitions.  He is ready to show you.

Jeremiah 29:11-13 says,
For I know the plans I have for you,” declares the Lord, “plans to prosper you and not to harm you, plans to give you hope and a future. Then you will call upon Me and come and pray to Me, and I will listen to you. You will seek Me and find Me when you seek Me with all of your heart.”

Jeremiah 29:11 is a verse we hear quite often that gives us hope that God has created us for a purpose. However, verses 12 and 13 tell us how we can find that purpose—by SEEKING HIM.  God wants time with us with no distractions.  Just as we want our husband/boyfriend to give us his full attention, God expects the same.

When you give Him your undivided attention, I promise He will show you
• Where your time should be spent each day
• How your time can best be used for His purpose
• How you can use your time to take care of your physical and spiritual fitness

I understand the challenge of knowing when and where to make Him a priority each day.  If you feel that way and dream of more time, I would love to help you. Email me at crystal@yourfitnessdesigner.com to receive a free time assessment called “Fitting it In.”  Within 5 minutes of completing this assessment, you will discover how to find time to focus on your priorities and take care of your physical and spiritual well-being.

Don’t let the busyness of this world keep you from growing with God and fulfilling His purpose for your life.

In Good Health,
Crystal

Mediterranean Fish Soup

It has been quite ch-ch-chilly here in the NorthEast over the past few days.  And I have been just waiting to bake!  But yesterday my husband asked, ‘So, is it time to make soup again?’  I am sure you have heard me mention once or twice (or a dozen times!) how very much Robert loves his soup!  And homemade soup has not been on our menu over the summer months, for sure!  Being it is just the onset of soup season, I had not made a vat of stock since the Spring so I thought long and hard about a really flavorful soup that wouldn’t need to rely on homemade stock.  This Mediterranean Fish Soup is the result.  He thoroughly enjoyed it…with the only thing missing being a loaf of homemade bread.  (“Maybe tomorrow!”, I said.)

This soup is fairly forgiving.  Choose varieties of fish (maybe even some mussels or small clams!) that your family enjoys.  And the choices of vegetables can be switched up, too.  If I had had a head of cauliflower, it definitely would have joined the pot!  I did steam a couple of handfuls of fresh green beans that I found in the veggie drawer…they were a nice addition!  (I would love to hear what you decide to add to your rendition of this soup; please leave a message in the comments section, ok?)  Enjoy!

Mediterranean Fish Soup

2014-09-14 20.36.05

ingredients:
2 tablespoons olive oil
1 red onion, diced small
2 stalks celery, cut into narrow slices
5 or 6 medium-sized baby bella mushrooms, chopped medium
1 cup chopped leeks use ONLY white part (approx. 2 leeks)
2 tablespoons chopped garlic (I use jarred)
1 cup dry white wine (or additional stock)
1 (28 ounce) can chunky crushed tomatoes
1 quart good chicken (or vegetable) stock
1/2 small butternut squash, peeled and chopped medium
1 teaspoon dried tarragon
1 teaspoon dried thyme
1/2 teaspoon sea salt
few grinds of freshly ground pepper (or lemon pepper!)
1 (6 ounce) salmon fillet (no skin), cut into bite-sized chunks
1 (4 ounce) tilapia fillet (or another mild-tasting white fish), cut into bite-sized chunks
6 ounces raw medium-sized shrimp
½ lemon

directions:
in a large stockpot, heat olive oil over medium-high heat
add onions, mushrooms, and leeks; saute for 7-8 minutes ‘til mushrooms just begin to brown
stir in the chopped garlic and stir constantly for 1 minute
add in the wine, stock and tomatoes; bring to a boil. reduce heat, cover and simmer for 30 minutes
remove lid, add in the butternut and seasonings; stir well. simmer for additional 5 minutes
slide in the salmon and tilapia; continue to simmer for 8-9 minutes
add in the shrimp and simmer for 5 more minutes
reduce heat to very low and carefully taste for additional seasoning; add if needed
serve with rice or small pasta  (a little squeeze of fresh lemon is perfect!)

♥   ♥   ♥   ♥   ♥

God loves you!  ♥  (Don’t ever forget that!)

♥  coleen

Sriracha Butter

Sriracha Butter resize

Are you a griller?  Admittedly, I am not.  The two things I avoid, as far as cooking goes, are baking with yeast (it hates me and refuses to cooperate) and the grill.  I love it when my husband or my Dad grill up something, and I will prepare everything for the fire—as long as I am not the one doing it.  Why?  I don’t know.  I’ve never done it and I guess I’m intimidated.  So even though we live in sunny Southern California, we eat pan-fried steaks much more often than grilled.  Sound boring?  Not when you serve them with Sriracha Butter!

This is a Martha Stewart recipe I found in the back of her magazine this summer.  If you haven’t tried it yet, Sriracha is a brand of hot sauce that is beloved for it’s spicy, fruity bite.  If you don’t have Sriracha handy, try another hot sauce – just not something that’s got too much fire!  The other ingredient that makes this butter special is the anchovies.  I didn’t have any, but I always have a tube of anchovy paste in my fridge (for this Caesar salad recipe and this Green Goddess dressing).  HINT: Any time you see an anchovy fillet in a recipe, you can substitute one inch of anchovy paste.

We ate this on sirloin steaks that were very lean, so the added flavor and fat from the butter were a welcome addition.  My spice-shy daughter loved it and even put some on her steamed cauliflower!  Ready to try it?  Let’s go!

Sriracha Butter

Ingredients:

  • 1 stick butter, softened
  • 2 anchovy fillets, minced (or use a 2-inch squeeze of anchovy paste)
  • 1 tablespoon Sriracha or other chili sauce
  • 1 clove garlic, minced
  • salt to taste (I didn’t add any extra salt to mine)

Directions:

  1. Mash the softened butter together with the anchovies, Sriracha, and garlic.  Taste to see if you want any more salt.  Refrigerate until ready to use.  Melt on steaks, cooked vegetables, or potatoes.

Explore, experiment, enjoy! — Dana


To view even more of Dana’s unique recipe, you can visit her at Frugal Girlmet!
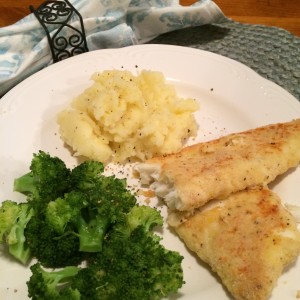
Oven Baked Encrusted Tilapia

Last week, Crystal shared her heart and encouraged us to find ways to prepare A Simple Healthy Meal at Home for our families.  She posted a wonderful recipe for Oven-Baked Chicken in that blog.  (Click the link to see her recipe.)  And she inspired me with an idea for something similar—Oven Baked Encrusted Tilapia.

Now while we all might enjoy a fried piece of fish or chicken…it isn’t very good for us!  Browsing through a few recipes online, I found that baking the fish or chicken versus frying it on the stovetop (or in the deep fryer!) will save, on average, 9-11 grams of fat per serving.  So, the choice is pretty simple, I’m thinking!  And this fits in perfectly with our healthy but oh-so-yummy POV!  You also could substitute a different white fish…cod, orange roughy, or even flounder.  Just remember the thinner the fillet, the shorter the baking time!  The fillets I prepared were actually called ‘loins’ and were about 1+1/2 – 2 inches thick; they took the whole 30 minutes.

This recipe would work out just fine with traditional wheat flour but since we have made the choice to eat gluten-free, I prepared it with almond flour. (You also could use a lesser amount of coconut flour.)  Coating the fish with these non-grain flours also ups the protein, too!  Also both Crystal and I used cooking spray…I have been using this coconut oil spray for quite some time now. I love how well it works!

Oven Baked Encrusted Tilapia

2014-09-03 19.18.14

ingredients:
1# tilapia fillets
1/2 cup almond flour
1/4 cup cornmeal
1/4 cup finely shredded cheese (Parmesan, Asiago)
1 teaspoon lemon pepper
1/2 teaspoon garlic salt
1 egg
1 tablespoon water
1 tablespoon dijon mustard
coconut oil cooking spray

directions:

  • preheat oven to 375
  • line a baking sheet w/parchment (not waxed) paper
  • in a medium-sized bowl, beat egg and water together, then stir in the mustard
  • on a large plate, mix together flour, cornmeal and seasonings
  • run each fillet individually through the egg wash and then lightly coat w/seasoned coating mixture; give a little shake and place on parchment paper-lined baking sheet
  • give each fillet a 2-3 second spray with cooking spray
  • bake for 15-30 minutes total (depending on the thickness of the fillets), flipping over halfway through and giving another quick mist with the cooking spray
  • bake ‘til lightly browned and easily flakes with a fork
  • sprinkle with a pinch of sea salt and a couple of turns of freshly ground pepper
  • serve with a lemon wedge

2014-09-03 19.13.01

♥   ♥   ♥   ♥   ♥

God loves you!  ♥  (Don’t ever forget that!)

  coleen

Chickpea Cranberry Salad

Chickpea Salad resize

When I was in 10th grade, I decided to become a vegetarian.  My mom made no objections, but she did make it known that it was up to me to make sure I was eating a balanced diet, and that I should do some research.  “You can’t live on cheese sandwiches!” she told me more than once.  So I read up (in actual books.  It would have been so much easier to go online, but the internet hadn’t been invented yet!) and found out which foods were good sources of vegetable protein.  Chickpeas are your meatless champions!  Try this Chickpea Cranberry Salad and see for yourself!

Whether you are a vegetarian (or making lunch for someone who is), or if you just want a few meatless options, chickpeas are your friend.  Stock up on canned chickpeas for making hummus or adding to soups and salads.  I like to buy them dried.  They’re cheap and they pretty much last forever in your pantry.  Soaking them the night before you make this will cut down on cooking time, and also helps eliminate some of the chemicals that can cause gas and bloating in more sensitive tummies.  I like them better this way, because you can cook them to your preference—you can make them soft like the canned kind, or (and I highly recommend this) a little bit al dente.  The toothsome texture makes them seem more filling to me.

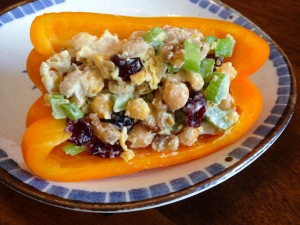
Serve this Chickpea Cranberry Salad between slices of bread, like a sandwich, or wrap it in lettuce.  Out of lettuce, like I was?  Use half of a sweet bell pepper as a taco shell!  Crunchy, delicious, meatless, marvelous!

Chickpea Cranberry Salad

(makes two servings)

Ingredients:

  • 1/2 cup dried chickpeas (or use 1 regular can of chickpeas)
  • 1 stalk celery
  • 1/4 cup walnuts
  • 1/4 cup dried cranberries
  • 1-2 tablespoons mayonnaise
  • salt and pepper to taste
  • squeeze of lemon juice

Directions:

  1. The night before you make the salad, pour the chickpeas into a large bowl and cover with water by at least an inch or two.  Cover the bowl with a plate and leave on the counter overnight.
  2. After soaking, drain the chickpeas.  Place in a pan and cover with water.  Simmer, covered, for about an hour.  Taste one and see if you like the texture.  Cook longer if you like.  When done, drain off the water and pour the chickpeas into a bowl.  Mash with a potato masher or the back of a fork.  I like to leave them a little chunky.
  3. Add in the rest of the ingredients and stir to combine.  Refrigerate until ready to serve.

Explore, experiment, enjoy! — Dana


To view even more of Dana’s unique recipe, you can visit her at Frugal Girlmet!

A Simple Healthy Meal at Home

Oven Fried Chicken

One of the biggest challenges for busy women today is finding the time and knowing how to cook a meal at home. It can seem impossible, but I truly believe that every woman whether preparing for one, two or four, can discover a plan for having a meal at home at least most nights of the week. (We don’t have to try and be perfect 100% of the time!)

Why Am I So Intent on Meals At Home?

  • Its Healthier:  A study posted by the Medical Express revealed that “those who cooked were more likely” to live longer. The possibility of other factors, besides cooking, was also extensively investigated, but the cooking at home still remained an important factor.
  • It Gives You More Control:  When you prepare your meals at home, you can choose how much butter, oil, sauce, sodium, etc. there will be in your food as well as your portion size. According to a study with the Economic Research Service, each meal or snack eaten away from home adds an average of 134 calories, compared with the same meal or snacks prepared at home. If eating out every day, that alone could contribute to over 1/2 pound of weight gain a week, if you did not do anything to counter-balance the additional calories.
  • It Saves Money:  There is no doubt that eating home does not just save you calories, but it will save you money. Let’s take for example, fast food, not even a nice sit down restaurant. For a family of four, you are going to spend, on average, $25 for one meal. Last week, I was able to feed my family, oven fried chicken with two vegetables along with homemade macaroni and cheese for $15. That went a long way considering there were leftover’s for lunch the next day.  Another savings!

How to Do It

  • Plan according to your schedule

What is the easiest method and time of the day for you to put your meal together? Take a few minutes at the beginning of the week to get a plan. Remember your plan may vary from time-to-time or season in your life.

  • Be realistic

Notice I did not say, “attempt to cook 7 days a week.”  Pick the number of days that will work for you and be realistic with what you cook and how you will prepare your meals.

Try This!

Oven Fried Chicken (adapted from Calorie King)

Ingredients:
• 1 cup corn flakes, crushed
• 1/3 cup flour
• 1 teaspoon salt
• 1/2 teaspoon ground red pepper
• 2 egg whites, slightly beaten
• 1/4 cup skim milk
• 2 lb boneless, skinless chicken breast, cut into even strips

Directions:
Preheat oven to 400ºF.  Spray cookie sheet with butter-flavored cooking spray.
Mix all dry ingredients in large bowl. Mix egg whites and milk in small bowl. Dip chicken into egg mixture and then coat with corn flake mixture. Place on cookie sheet, and spray with more cooking spray.  Bake in preheated oven for 15 minutes, then flip pieces and spray with more cooking spray. Continue baking for 10 to 15 minutes or until golden brown.
Calories -156
Fat -1 gram
Protein – 14 grams
With the right motivation and a little preparation, you can save calories, save money, and have more quality time with your family with a simple, healthy meal made at home.

In Good Health,
Crystal

Peach-Raspberry Crumble

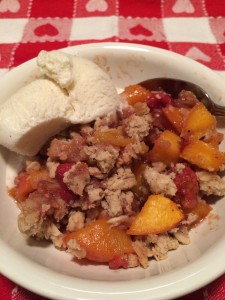
If you can get your hands on some late-season peaches…you really should try this recipe (or your version of it)! And I strongly suggest serving it to your loved ones warm with a scoop of vanilla ice cream…doesn’t have to be a huge scoop even! This is one of those sweet treats that is warm and cold, crunchy and mushy, sweet and not-so-sweet. I, myself am not a huge dessert eater. But this? …just delicious! Perfect for the last weekend of August.

This dish fits well into our healthy but oh-so-yummy POV since there is little added sugar, has a good amount of whole grains and nuts, full of fresh fruits, AND…a little bowl is very satisfying! Now it does have a fair amount of butter in it (about 1 tablespoon per average portion)…but I haven’t figured out how to reduce it without changing the quality of the crumbly goodness. I prepared this recipe using gluten free flour and coconut sugar…but this would come out just as well using traditional all-purpose flour and white/brown sugar; it is up to you. Enjoy (I hope you can find some gorgeous peaches!)!

Peach – Raspberry Crumble

2014-08-31 21.59.43

ingredients:
1+1/2 pounds ripe (yet firm) peaches
12 ounce package red raspberries
1 tablespoon coconut sugar
2 tablespoons ginger jam (or peach, apricot)
1 tablespoon lemon juice (fresh, if possible)
1/4 teaspoon ground cinnamon
1/4 teaspoon nutmeg (freshly ground, if possible)

6 tablespoons cold UNsalted butter
3/4 cup gluten-free oats
3/4 cup gluten free all-purpose flour blend
1 teaspoon lemon zest, finely grated
1/4 teaspoon ground cinnamon
1/4 teaspoon sea salt
1/8 teaspoon xanthan gum (**only if using gluten-free flour)
3-4 tablespoons sliced almonds

directions:

  • cut the cold butter into a small dice; return to refrigerator ‘til ready to use
  • preheat oven to 375
  • butter a 1+1/2 quart ceramic or glass baking dish
  • pit and slice the peaches (for a softer texture, cut a bit smaller)
  • put fruit into a large bowl, and add next 5 ingredients; stir gently together; set aside to get the juices flowing
  • in a separate bowl, whisk together the rest of the ingredients EXCEPT for the butter, and almonds
  • then add the cold butter to the flour-y mixture; toss to coat the butter w/flour. then use your fingertips to ‘cut’ the butter and flour mixture together ‘til the mixture is crumbly and looks like coarse meal
  • stir in the almonds
  • now pour the fruit and juice into the prepared baking dish
  • scatter the oat-flour crumbly mixture over the top of the fruit
  • place the baking dish onto a sheet pan (just in case the juiciness bubble over the sides!)
  • place in oven and bake for 35-45 minutes ‘til juices begin to bubble around the edges and the crumbs are beginning to brown (should they start to brown too early, just lay a piece of aluminum foil over the top)
  • remove from oven, and let set for 5 minutes (just enough time to grab some bowls, spoons, AND the ice cream)

♥   ♥   ♥   ♥   ♥

God loves you!  ♥  (Don’t ever forget that!)

♥  coleen