December 27, 2024

Cookie Week – GF Chocolate Chip Cookies

2013-12-15 23.12.46

Cookies.  A lovely tradition of giving during the Christmas holidays.  There are cookies to make for exchanges.  There are cookies to make to fill tins and baskets that are given to friends and loved ones.  There are cookies to make for the cookie monsters in your own home! (I have one of those…do you, too?)

Our own Dana, Wendy, Amy (and me!) who blog here for At Home w/ GCH are each sharing a favorite cookie recipe!  Dana started us off last Friday with her Monkey Bites (Paleo Banana Chocolate Chip cookies).  They looked so moist and yummy!  And today I am sharing Gluten Free Chocolate Chip cookies. *See below for adaptation for a dairy-free version.*  Can’t wait to see Wendy and Amy’s delicious contributions later in the week, too!

AND…we will be having a ‘virtual’ cookie exchange over among our Girlfriends Coffee Hour – Fellowship group.  Come join us Tuesday through Friday as our sisters post a picture of their own homemade cookies…and possibly share their recipe, too!

My recipe for Gluten-Free Chocolate Chip Cookies starts off with putting together a basic mix.  I would strongly suggest doubling the ingredients so that you can make a batch AND have the basics mix set to go to quickly throw together another batch!  Or perhaps you could take the second batch and put into a large Mason jar and gift someone with it!  Just sayin’!!!

Gluten Free Chocolate Chip Cookie Mix2013-12-15 21.10.34
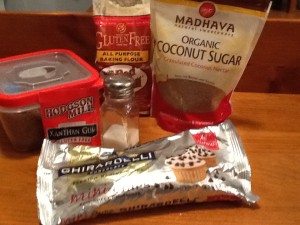
(makes approximately 4 cups; enough for 4 dozen cookies)

Ingredients:
2+1/4 cups good quality all-purpose gluten-free flour blend
1 teaspoon baking soda
1 teaspoon xanthan gum
1/2 teaspoon salt
3/4 cup dark brown sugar
3/4 cup coconut sugar
12 ounce bag semi-sweet chocolate chips

Directions:

Place all ingredients (NOT the chocolate chips) into a large bowl and whisk together well.  If using immediately, pour in the chocolate chips.  If not, pour the mix into a storage jar and add the chocolate chips right on top.  Seal well.

Gluten Free Chocolate Chip Cookies

Ingredients:2013-12-15 21.25.04
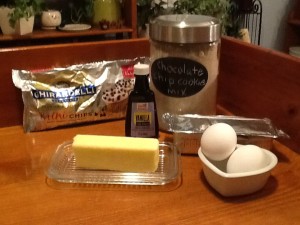
1 batch of above GF Chocolate Chip Cookie Mix
8 tablespoons butter (unsalted), room temperature
2 extra-large eggs, room temperature
1+1/2 teaspoons vanilla extract (NOT imitation, please!)

Directions:

  • Preheat oven to 325.  Line two (2) large baking sheets with parchment paper; set aside.
  • Beat together the room temperature butter and eggs to thoroughly incorporate; stir in the vanilla.
  • Pour 4 cups (or one batch) of the cookie mix into a very large bowl.  Stir in the liquid ingredients and thoroughly blend.
  • Drop balls of dough (approximately 1+1/4″) onto the prepared baking sheets.  Place the baking sheets (one at a time) into the freezer for 5 minutes to firm up.
  • After the chill time, put cookies (one sheet at a time) into the oven.  Bake for 12-14 minutes (depending on the size of your cookie balls) or ‘til the bottoms are beginning to brown.
  • Remove from the oven.  (I carefully remove the cookies ON the parchment paper from the cookie sheet directly onto a cooling rack—works beautifully!)
  • Store in an airtight tin or jar.  Enjoy!

*To make these cookies dairy-free, simply substitute 1 stick of butter-flavor shortening for the 8 tablespoons of butter; and purchase chocolate chips with no milk or milk products.  I use the Ghiradelli or the Enjoy Life brands.

 ♥  ♥  ♥  ♥  ♥

God loves you ♥  (Don’t ever forget that!)

Merry Christmas from mr. hayden and i!

♥  coleen

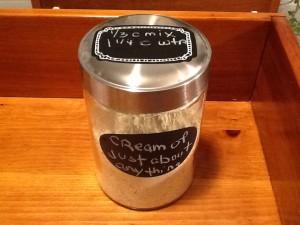
Cream of ‘Just About Anything’ Soup and Sauce Mix

2013-12-08 20.35.59So, if you are like me, you are in the thick-of-it-all…the sewing/knitting/painting of gifts; the baking of cookies (and more cookies); the caroling and school concerts; the shopping (online AND out in the stores); and the wrapping of all these treasures you have shopped for and made with love!  But supper is still expected (I KNOW, right?) on our tables each evening by our loved ones.  Most of us really don’t want to be going through the drive-thru and bringing home ‘less than the best’ to feed our families.  However, time escapes us some days and we have not prepared for suppertime!

2013-12-08 21.36.25


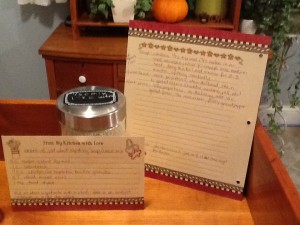
One great solution to this dilemma is to put together a yummy CrockPot meal early in the day.  At this time of year, my CrockPot remains out on the counter…handy and ready to be filled with yummy goodness.  However, I find that many recipes designed for the CrockPot call for a can of condensed soup of one variety or another.  And that creates a problem in our household: 1) canned condensed soup contains wheat (we eat gluten free, remember), and 2) there is just too much sodium (and a few other not-so-good-for-you ingredients) in a can of condensed soup.  Below is a recipe for a mix you can put together and keep in your pantry (OR gift to someone else in a cute little jar with a label giving directions).  Here, too, is a link to a great resource for quite a few ways to use thisCream of Just About Anything’ soup and sauce mix.  Enjoy!

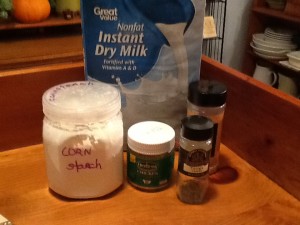
Ingredients: 2013-12-08 20.23.15
3 cups nonfat instant dry milk
1 cup cornstarch
1/3 cup chicken bouillon granules
2 tablespoons dried minced onion
1 teaspoon dried thyme

Directions:

  • Mix all the above ingredients in a large bowl with a whisk.
  • Store in an airtight container in a cool dry place.

On our menu for this week are two recipes using the CrockPot and a portion of this healthy but oh-so-yummy ‘cream of just about anything’ soup.  One will be Chicken and Mushrooms in Wine Sauce and the other will be Beef Stroganoff.  How about you?  Are you already planning on utilizing your CrockPot to save you time but still feed your loved ones a yummy, healthy, satisfying meal?  Please share with us about what’s on your menu this week in the comments below!

 ♥  ♥  ♥  ♥  ♥

God loves you ♥  (Don’t ever forget that!)

♥  coleen

Hot Cocoa Mix (and more!)

“It’s the most wonderful time of the year
There’ll be much mistletoe-ing
And hearts will be glowing when loved ones are near
It’s the most wonderful time, it’s the most wonderful time
It’s the most wonderful time, ♫ ♪ ♫ it’s the most wonderful time of the year!”

Oh, don’t you know it!  There’s all that AND the celebration of God’s love come to earth—Jesus’ birth!  Oh, yes, and baking and cooking and gift-making! Lots of joy and fun and happiness!
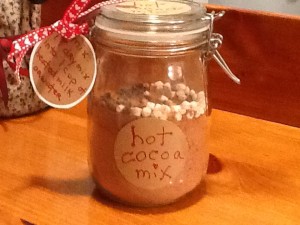
This week I am sharing a homemade Hot Cocoa mix with you. This would be great kept in your own pantry!  However, one of my favorite things to do with it is to package them up in cute little jars with handmade labels and gift them to loved ones. They pack up nicely, too, to be mailed.  If you really want to go over the top, google a recipe for ‘Chocolate Dipped Spoons’…easy-peasy!  Also here is a quick link.

2013-12-02 14.29.40
Next week, I will share a recipe for a ‘Cream of Just-About-Anything’ Soup and Sauce Mix.  What makes me happiest with these mixes is that they are all gluten-free and all fall well within our healthy but oh-so-yummy point of view!  Try them!  Gift them!  Enjoy them!

Hot Cocoa Mix

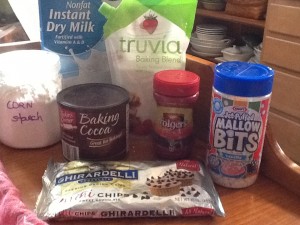
Ingredients: 2013-12-02 14.16.18
6 tablespoons unsweetened cocoa powder
1/2 cup dehydrated nonfat powdered milk
1 teaspoon cornstarch
1/2 teaspoon salt
3/4 cup baking stevia OR 1+1/2 cup “measures like sugar” sweetener (I used Truvia) * of course you can choose to use plain old sugar
Add-ins:
small peppermint candies
mini chocolate chips
tiny marshmallows
Options:
Mocha: substitute 2 tablespoons of instant coffee crystals for a like amount of cocoa powder
Peppermint: include a small jar of peppermint extract (“add 1-3 drops to each prepared cup”)

Directions (for preparing mix):
Mix everything together in a medium mixing bowl until ingredients are well combined. Pour mixture into a closed container, such as a mason jar for a beautiful and festive gift! If you are ‘adding’ anything, just pour onto the top of the mix and cover.

2013-12-02 22.53.52

Directions (print on a tag to attach):
To enjoy hot cocoa, mix 1 tablespoon dry mix with your choice of: 1 cup HOT almond milk, OR skim milk, OR water. Stir until hot cocoa mix is completely dissolved and well combined.  Add additional sweetener (if necessary).

 ♥  ♥  ♥  ♥  ♥

God loves you!  ♥  (Don’t ever forget that!)

♥  coleen

Roasted Beet and Goat Cheese Salad

The countdown has begun!  The lists are made…the shopping for groceries is happening…maybe the forks and knives, plates and napkins have been counted out, too! Just a few days now ‘til we will celebrate Thanksgiving with our loved ones recognizing the goodness of our great God (and eating some yummy food, too)!

For the past few weeks, we have been sharing some of the dishes that we will be preparing to serve and share; did you take a peek at that scrump-diddly-umptious Mocha Brownie Torte that Dana gave us her recipe for?  Today I am sharing my recipe for an equally delicious dish that is in a totally different category: Roasted Beet and Goat Cheese Salad. This recipe keeps within the parameters of our healthy but oh-so-yummy point of view.  A very light vinaigrette is served on this salad.

I hope you each have a wonderful, thanks-filled, counting your blessings kind of Thanksgiving Day!  May we each always remember how very, very much we have to be thankful for and give thanks to the One Who so mercifully and abundantly and graciously provides for our every need!

Oh, that men would praise the Lord for His goodness and lovingkindness and His wonderful works to the children of men!
Let them sacrifice the sacrifices of thanksgiving and rehearse His deeds with shouts of joy and singing!
Psalms 107:21 and 22

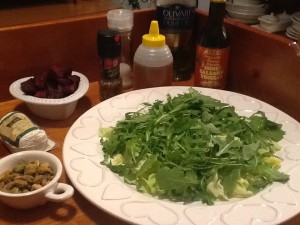
2013-11-24 18.55.52

Roasted Beet and Goat Cheese Salad

Ingredients:

1/4 cup balsamic vinegar
1 tablespoon honey
1/3 cup extra-virgin olive oil
Kosher salt and freshly ground black pepper
3-4 medium beets, peeled and cut into bite-size pieces
6 cups fresh arugula (or your favorite lettuce blend)
1/2 cup pistachios
3 ounces soft fresh goat cheese, coarsely crumbled

Directions:
Line a baking sheet with foil. Preheat oven to 450.
Whisk the balsamic vinegar and honey together in a small bowl to blend.
Slowly whisk in the oil. Season the vinaigrette with salt and pepper.
In a different bowl, toss the beets with just enough of the vinaigrette to coat.
Place the beets on the foil-lined baking sheet and roast ‘til the beets are slightly caramelized, stirring once or twice, for about 30 minutes.  Set aside and cool.
Toss the arugula (and/or other lettuces) along with a small amount of the remaining vinaigrette in a large bowl ‘til lightly coated.
Season the salad, to taste, with additional salt and pepper. Place the dressed salad onto a large serving plate.
Arrange the beets around the salad.
Sprinkle with the nuts and small dollops of the goat cheese.
Serve the balance of the vinaigrette alongside in a small pitcher.

 ♥  ♥  ♥  ♥  ♥

God loves you!  ♥  (Don’t ever forget that!)

♥  coleen

The Five B’s: Butternut, Brussels Sprouts, Baby Bellas, Bacon, and Balsamic

2013-11-06 18.45.34


Raise your hand, please, if you—like me—are planning out and testing recipes to serve at your Thanksgiving Day meal!  Over the next few weeks, both here on the blog and also over in our FaceBook GCH-Fellowship page, we will be chatting about recipes for the big feast.  Last Friday, Dana shared that “…it is always good to have a couple of side dish recipes in mind.”  She gave us her recipe for a delicious-looking side dish salad here on the At Home with GCH blog.

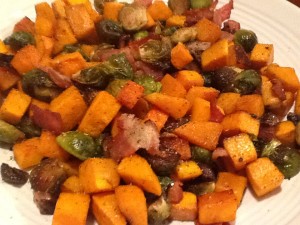
So today I am giving you a recipe entitled The Five B’s: bacon (yum!), butternut (oh, yum!), brussels sprouts (yumm-o!), baby bellas (yum-yum!) and balsamic (yummy!)….silly, I know.  But seriously, consider trying this as a side dish for your Thanksgiving feast!  Easy to prepare (the veggies can be prepped the day before).  And the prepared dish can be popped into the oven the moment you take the bird out!  It will be done and piping hot when your bird has finished resting and been carved.  This dish definitely fits into our healthy but oh-so-yummy point of view!  Enjoy!

2013-11-06 18.45.52

Five B’s: Butternut, Brussels Sprouts, Baby Bellas, Bacon and Balsamic

Ingredients:

3-4 tablespoons olive oil, divided
1/2# thickly sliced bacon, chopped
1+1/2# Brussels sprouts, trimmed and halved
1 medium-large butternut squash, cleaned and cubed
8 ounce container Baby Bellas, cleaned and quartered
3 tablespoons balsamic vinegar
2 tablespoons maple syrup (the REAL stuff, please!)
1+1/2 teaspoon coarse kosher salt
1 teaspoon fresh ground pepper
1/2 teaspoon ground allspice
pinch fresh grated nutmeg

Preparation:

  • Preheat oven to 400.
  • In a medium-sized saute pan, heat 1 tablespoon of oil over medium heat. Add the chopped bacon and cook 8-10 minutes ‘til crispy. Lay out on a paper towel to drain; set aside.
  • Lightly oil a large sheet pan (or two!) with olive oil.
  • In a very large bowl, or stockpot, pour in the prepared veggies…Brussels sprouts, butternut squash, Baby Bella mushrooms…along with 1-2 tablespoons olive oil; stir well to evenly disperse the oil and season well with salt & pepper.
  • In a small bowl, whisk together balsamic vinegar, additional 1 tablespoon olive oil, and maple syrup. Drizzle this mixture over the vegetables and toss so that they are evenly coated.
  • Spread out vegetables in a single layer (very important!) in the pan(s); sprinkle with salt, pepper, allspice and nutmeg.
  • Roast in the oven for about 20 minutes; carefully remove pan(s) stir and flip over the veggies so that the other side can caramelize. Place back in over and continue to cook for an additional 10-15 minutes or ‘til the veggies are slightly brown and caramelized.
  • Remove from oven and, just before serving, top with crumbled bacon

♥  ♥  ♥  ♥  ♥

God loves you ♥  (Don’t ever forget that!)

♥  coleen

Cauliflower Mac and Cheese

Ok…I am really excited about this recipe…hope you like it, too!  Cauliflower Mac and Cheese!  Oh, yeah.  This has all kinds of tags associated with it: healthy but oh-so-yummy, paleo, low-carb, gluten free, low fat, vegetarian, comfort food (if you think of any additional, let me know, please!).
Here on our Monday installment of At Home w/ GCH, we have been featuring recipes which include Fall in-season fruits and veggies.  This week is our final blog on the subject. Our featured veggie is Cauliflower. Here are some nutritional facts about this ‘superfood.’
“We” love cauliflower here in our household.  I say, “we” because every time I tell my husband, Robert, that I have a new way to fix cauliflower, he never (may I repeat, never) responds enthusiastically.  But I am happy to report that every time (may I repeat, every time) he eats the dish I’ve prepared, his response is always (may I repeat, always) enthusiastic.  Ok—it’s taken me a while to figure this out but apparently the cauliflower dishes he grew up eating were just boiled, (overcooked), soggy, gray cauliflower-yucky!   I trust that if you have had experiences similar to Robert’s, you will try this Cauliflower Mac and Cheese and have a new yummy experience!  Enjoy!

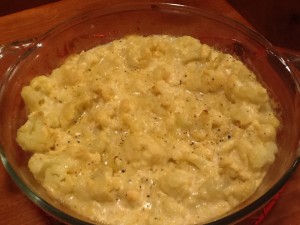
Cauliflower Mac and Cheese2013-11-01 19.11.26

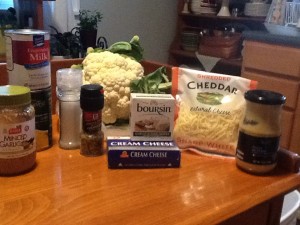
Ingredients:

1 large head cauliflower, cut into small florets
1 can evaporated milk
1/2 cup chicken or vegetable broth 2013-11-01 17.36.09
2 ounces cream cheese, cubed (or goat cheese, or Boursin)
2 teaspoons Dijon mustard
1 tablespoon chopped garlic
1/2 cup shredded sharp Cheddar cheese, plus 1/4 cup for topping the casserole
kosher salt, freshly ground black pepper
1/4 teaspoon nutmeg (freshly grated, if possible)

Directions:

  • Preheat the oven to 375.
  • Bring a large pot of water to a boil, seasoning the water with salt.
  • Lightly grease a 2 quart baking dish with butter or cooking spray.
  • When the water comes to a full boil, toss in the cut-up cauliflower; return to a boil and parboil ‘til crisp-tender, about 5 minutes.
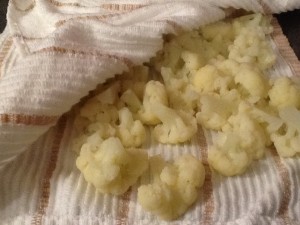
  • Drain well in colander, and then lay out on a clean dishtowel and pat dry. <The drier the cauliflower, the better the cheese sauce will cling to it.>

2013-11-01 18.33.57

  • Transfer the cauliflower to the baking dish and set aside.
  • Bring the evaporated milk and broth to a simmer in a small saucepan over medium low heat.
  • Whisk in the cream cheese, mustard, chopped garlic; continuously whisking ‘til smooth.
  • Add the 1/2 cup of shredded cheese, along with the seasonings and whisk just ‘til the cheese melts, about 2 minutes.
  • Pour the cheese sauce over the cauliflower, and stir gently to combine thoroughly.
  • Top with the remaining 1/4 cup cheese and bake for approximately 15 to 20 minutes. Turn up the oven temp to 425, and bake for 5 additional minutes; just ‘til it begins to brown.
  • Let cool 5 minutes before serving.

♥  ♥  ♥  ♥  ♥

God loves you!  ♥  (Don’t ever forget that!)

♥  coleen

Chili in a Pumpkin

Here on our Monday installment of At Home w/ GCH, we have been featuring recipes which include Fall in-season fruits and veggies.  This week’s recipe is baked in a pumpkin…I’m thinking that you can’t get much more autumnal than a pumpkin!  This is super easy…and makes for a fabulous presentation.  You can use one pumpkin and serve all of your happy eaters a ‘slice’ of pumpkin.  Or (which I am going to do for our Thanksgiving feast) you could purchase those adorable little ‘Jack Be Little’ pumpkins and serve one per customer!  I wouldn’t suggest too large a pumpkin though; they can be very stringy…not appetizing at all!  Optimally, use a pumpkin that is called ‘pie’ pumpkin; these are approximately 1-3 pounds and are of a size that can easily be held in the palm of your hand. Check out these incredible nutritional facts, too.  Alternately, you could make a Vegetarian Chili to serve in your pumpkin; here is a recipe that you might check out.  Or, of course, your family’s favorite chili recipe!  <3

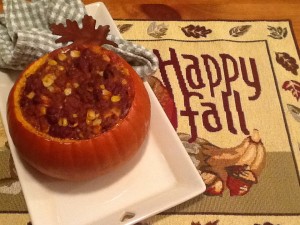
Chili in a Pumpkin

2013-10-24 20.24.55

Ingredients
1 2#-3# “pie” pumpkin 
1# ground beef
2-3 tablespoons olive oil
1 medium-sized sweet onion, chopped
1 large red bell pepper, chopped
4-5 ounces Baby Bella mushrooms, chopped
3 tablespoons chopped garlic (I use jarred)
1-28ounce can crushed tomatoes
1-15 ounce can dark red kidney beans, rinsed
1-15 ounce can black beans, rinsed
1 package taco seasoning (or try this)
1-2 cups frozen corn, defrosted
Optional toppings: sour cream, shredded cheese, chopped avocado, salsa

Directions

Pumpkin:

  • Preheat the oven to 375.
  • Carefully slice the “cap” off of the pumpkin. Discard the cap. Clean the seeds thoroughly out.
  • Lightly oil the inside of the pumpkin, and season well with salt&pepper.
  • Place the pumpkin into a baking pan, and bake for 40-45 minutes (depending on the size of your pumpkin, it will be less or more time).  Remove from oven when a sharp knife inserted into the flesh (inside) of the pumpkin is tender but not mushy.

Chili:

  • While the pumpkin is baking, saute the ground beef ‘til all the pink is cooked out.  Drain away the excess liquid and set the cooked meat aside.
  • In the same pan, add 2 tablespoons olive oil to heat over medium heat; add the chopped onion and mushrooms.  Saute for 5-6 minutes.
  • Add in the chopped bell pepper; stir well.  Saute the veggies for approximately 6-7 minutes ‘til just beginning to get slightly brown.
  • Lower heat and add chopped garlic.  Stir constantly for 1 additional minute.
  • Increase heat to medium-high, pour in the chopped tomatoes and the taco seasoning mix.  Stir.
  • Finally add back the cooked meat as well as the beans; stir well ‘til all is combined.
  • Bring just to a boil; and lower heat so the mixture is gently simmering.
  • Simmer away until the pumpkin is ready.

Assembling:

  • When the pumpkin is tender, remove from oven.
  • Stir the corn into the meat-veggie-bean mixture, and then pour this mixture into the pumpkin.
  • Return to oven and bake for approximately 30 minutes.  (Again, this will depend on the size of your pumpkin.)
  • Remove from oven; slice into serving size pieces.
  • Serve with your choice of toppings.  Enjoy!

♥  ♥  ♥  ♥  ♥

God loves you!  ♥  (Don’t ever forget that!)

♥  coleen

Harvest Soup

2013-10-15 21.49.39

This past weekend some of my large family (I have 7 brothers and sisters, along with their spouses, children, and grandchildren and my own daughter, son-in-law, and their 4 children!) came to celebrate my 58th birthday; happy me!  One dish that we shared was a Harvest Soup, full of veggies and grated apples…very yummy.  This is a slightly sweet soup, very satisfying and filling.  Also, I chose to make it vegan since I was sharing it with my beautiful sister, Brigit.  (The dollop of sour cream in the above pic was in my own bowl of yummy soup!)  This would make a great addition to your own menu when you have vegans, vegetarians, and meat-eaters 😉 sharing a meal together.

Here on our Monday installment of At Home w/ GCH, we have been featuring recipes which included Fall in-season fruits and veggies.  This week, our recipe features a few: apples, cauliflower, and (surprise!) butternut squash.  This week’s recipe fits into our healthy but-oh-so-yummy! category since it is really yummy (did i mention that before?), extremely low in fat, and full of delicious, nutritious vegetables.  Enjoy!  <3

Harvest Soup

Ingredients:
2 butternut squash
1 large head of cauliflower
3 teaspoons olive oil
Kosher salt, freshly ground pepper
1 sweet onion
1 additional teaspoon olive oil
2-3 tablespoons chopped garlic
2 quarts of vegetable stock
2-3 apples, grated
1 can coconut milk (shake well!)

Optional add-ins:
Cooked, crumbled bacon
Sour cream
Shredded sharp Cheddar
Chopped avocado
Sprinkle of cinnamon (try it!)

Directions:

  • Preheat oven to 425.
  • Peel the butternut squash; scoop out the seeds and strings; and cut up into 2″ pieces.  Set aside in a large bowl.
  • Cut up the cauliflower into smallish-size florets; add to bowl.  Pour in olive oil and season veggies with salt and pepper.  Stir well, pour onto a baking sheet and roast for 20-25 minutes.
  • Meanwhile, dice onion fairly small and saute along with 1 teaspoon olive oil over medium high heat for 5 minutes or so; reduce heat to low and add in chopped garlic stirring constantly for 1 minute.
  • Pour in the vegetable stock; add salt and pepper to taste and simmer gently.
  • When the veggies in the oven are done roasting, remove from oven and immediately pour into your stockpot.  Stir well to combine.  Allow to simmer for 20 minutes or so,adjusting heat if necessary.
  • When done, scoop out about 1/3 of the veggies and use an immersion blender to puree what is left in the stockpot.  (This could also be mashed, or, very carefully, pureed in a standard blender in batches.)  Taste (be careful…it’s hot!) for additional seasoning, and add back in the reserved veggies.
  • Add the grated apple and pour in the coconut milk; stir well.  Done!
  • Optional add-ins can be put atop individual bowls of soup.

♥  ♥  ♥  ♥  ♥

God loves you!  ♥  (Don’t ever forget that!)

♥  coleen

Stuffed Acorn Squash

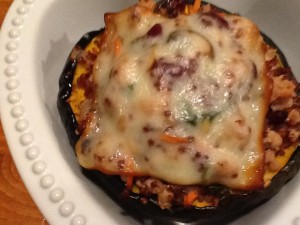
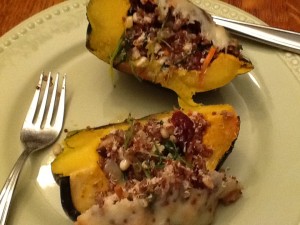
Here on our Monday installment of At Home w/ GCH, we are continuing to focus on Fall in-season fruits and veggies.  This week, our recipe features Acorn Squash.  Ok, ok, I am sure you have noticed that I have a ‘thing’ for winter squash.  I love ‘em all…but my fav’s are Butternut, Spaghetti, Acorn, Delicata, and Sweet Dumpling.  Check out this link for lots more info on winter squashes and details on the incredible nutritional value they have.

This week’s recipe fits into our healthy but-oh-so-yummy! category since it is full of lucious veggies, uses low-fat ground chicken, and almost no added fat.  Also, this could easily become a vegetarian meal by leaving out the meat.  Also, you will have some leftover stuffing so you could enjoy it in a different “container” i.e., portabello caps, or zucchini; thus getting two meals for your effort!  Enjoy!2013-10-09 19.06.00

Stuffed Acorn Squash

Ingredients:
2 acorn squash, rinsed
1 tablespoon butter
salt and pepper
1 cup water
1 cup chicken or vegetable broth
1 cup quinoa (I used red quinoa)
1 medium-sized sweet onion, chopped
4-6 large Baby Bella mushrooms, cleaned and chopped
3 tablespoons chopped garlic
2 large handfuls baby arugula (or spinach) 2-3 ounces, roughly chopped
3-4 tablespoons pine nuts
1/2 cup dried cranberries
2# ground chicken
1 teaspoon thyme
1/2 teaspoon ground sage
1 teaspoon each, kosher salt and freshly ground pepper
4 slices (1 ounce each) of smoked gouda (or muenster, or swiss)

Directions:

  • Preheat oven to 400.
  • CAREFULLY cut each squash in half lengthwise; scoop out seeds and strings. Season the inside of each squash well with a bit of butter, and lots of freshly ground salt and pepper.  Place each half, cavity side up on a baking sheet and roast ‘til tender when pierced with a sharp knife, about 35-40 minutes. Remove from oven and set aside.
  • Reduce oven temperature to 350.
  • Cook quinoa according to package directions, using water and broth. When done, pour into a large bowl; set aside.  (NOTE: the squash and the quinoa can be prepared ahead of time.)
  • Meanwhile, in a large saute pan over medium-high heat, warm 2 tablespoons of olive oil; then add the onion and mushroom pieces.  Stirring often, saute ‘til just turning slighty brown and caramelized.
  • Add the chopped garlic and stir constantly for one minute.
  • Reduce heat and toss in the chopped arugula.  Stir frequently and cook just ‘til the greens are getting wilty; approximately 5 minutes or so.
  • Add this mixture to the cooked quinoa along with the pine nuts and dried cranberries, and stir ‘til all is well-combined.
  • Using the same pan, add 1-2 tablespoons olive oil and the ground chicken and seasonings.  Cook over medium high heat, ‘til the chicken is completely cooked through.  Break up the meat as it cooks.
  • When the chicken is done cooking, add it to the mixture in the large bowl and combine.
  • Fill each squash half equally with veggie-quinoa-chicken mixture and bake, uncovered, ‘til filling is slightly browned on top about 15 minutes.
  • Lay one slice of cheese on each squash half and bake just ‘til cheese begins to melt.2013-10-09 19.11.52

♥  ♥  ♥  ♥  ♥

God loves you!  ♥  (Don’t ever forget that!)

  coleen

Roasted B, B, and B Topping

Ok, so what do you do when your sister food-blogger posts EXACTLY the same recipe you were going to post?  Well, first you tell her how good hers looked (check it out) then you scurry to the refrigerator to see what else you can throw together!

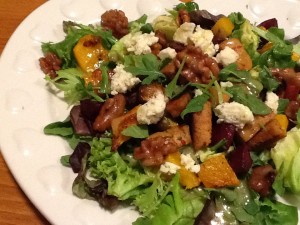
As promised, we are focusing on Fall in-season fruits and veggies for a few weeks.  This week, we have a Roasted ButternutBrussels SproutsBeet recipe.  We enjoyed this topping a salad with goat cheese and candied nuts.   This recipe makes enough for some leftovers, perfect for a Roasted Veggie Lasagna!  Perhaps you might want to try it as a pizza topping, or over pasta or rice.  Enjoy!

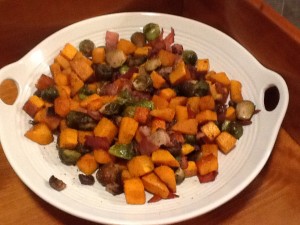
2013-10-04 21.10.46

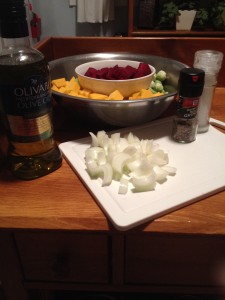
Roasted Butternut Squash, Brussels Sprouts, and Beets

Ingredients:2013-10-04 19.36.19
1/2 large Butternut squash, peeled
1 medium sweet onion, peeled
1 bunch beets (3-5) peeled
6-8 ounces Brussels sprouts
3-4 tablespoons olive oil
kosher salt, freshly ground black pepper

optional:
3-4 tablespoons candied walnuts *
2 links fully-cooked chicken sausage
3 ounces herbed goat cheese

Directions:

  • Preheat oven to 425.
  • Cut squash and beets into 1″ cubes.
  • Cut off end of each Brussels sprout and any leaves that are brown or dry.  If large, halve lengthwise.
  • Cut onion in half around the middle, and then slice into half-moons.
  • In a large bowl, combine squash, sprouts, and onions; drizzle 2 tablespoons olive oil over them, season well and stir to evenly distribute the oil among the veggies.
  • Pour onto 2 rimmed baking sheets.
  • Now pour the cubed beets into the bowl adding up to 1 tablespoon additional olive oil, if necessary.  Add the beets to one area of one baking sheet; this will keep the beets from ‘bleeding’ onto the other veggies.
  • Roast for 15-20 minutes or ‘til the veggies begin to caramelize.
  • Remove from oven, stir well turning pieces over, if possible.
  • Roast for an additional 15 minutes or ‘til the other side begins to caramelize.
  • Test with a knife tip to make sure veggies are cooked through.  Allow to cool.

* Candied Walnuts
1 cup apple cider
3 tablespoons coconut sugar
pinch of sea salt
1 cup raw walnuts

  • Bring apple cider to a boil in a small saucepan; turn down heat but keep at a good simmer.  Let reduce by ½.
  • Lower heat, and add sugar stirring ‘til dissolved.  Add salt and walnuts; stir well.
  • Continue to cook at a low simmer, stirring constantly ‘til liquid is almost evaporated.
  • Remove from heat; pour onto a small plate and allow to harden.

♥  ♥  ♥  ♥  ♥

God loves you!  ♥  (Don’t ever forget that!)

♥  coleen