December 25, 2024

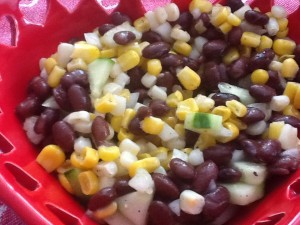
Black Bean, Corn, Mango Salad w/ Honey-Lime Vinaigrette

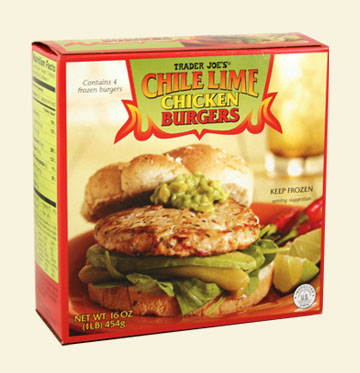
Recently I made a happy little find at Trader Joe’s!  These Chile-Lime Chicken Burgers. They were nicely priced at $3.49 for a 16 ounce package of four burgers. They are made with all-natural ingredients, no preservatives…and are high in protein, low in fat. All which fit right in here with our healthy but oh-so-yummy POV! Do you have a Trader Joe’s near to you? If you haven’t shopped there yet, I would heartily encourage you to give them a try! We are always satisfied with our purchases at Trader Joe’s…and will pick up another package or two of these on our next shopping trip.

traderjoeslimechickenburgers

So, these made for a quick meal as they grilled up in approximately ten minutes. But, what to serve with them…this was my question. Hmmmmm….something quick, healthy, fresh…?  I googled ‘…lime, mango, salad…’ and was presented with quite a list and variety of choices. After reading a few recipes, I had a pretty good idea and a plan of action. We were quite satisfied with the burgers and this Black Bean, Corn, and Mango salad with Honey-Lime Vinaigrette to accompany the burgers. This makes quite a large bowlful (I’d venture to say 9-10 cups or so). So consider making this as a side dish to bring along to a BBQ this summer. Enjoy!

Black Bean, Corn and Mango Salad w/ Honey-Lime Vinaigrette
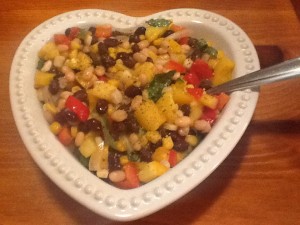
2014-07-23 20.23.00
ingredients :
salad:
2 cup fresh or frozen corn, thawed
1 (15 ounce) can black beans, drained and rinsed
1 (15 ounce) can small white beans, drained and rinsed
1/2 small sweet onion, sliced thin
1 red bell pepper, cored, seeded, and cut into 1/2-inch pieces
1 yellow bell pepper, cored, seeded, and cut into 1/2-inch pieces
1 large mango, peeled, seeded, and cut into 1/2-inch pieces

vinaigrette:
2 small (or 1 large) limes
2 tablespoons honey
2 tablespoons balsamic vinegar
1/4 cup mango (or orange) juice
1/3 cup olive oil
sea salt, freshly ground black pepper
sprinkle of ground red pepper (optional)

garnish:
1/4 cup chopped fresh basil leaves (optional)
zest from the limes

Directions:

  • in a large mixing bowl, combine veggies, beans, and mango
  • zest the limes (putting the zest aside ‘til the end), and squeeze all the juice from the limes
  • combine lime juice, honey, balsamic, and mango juice using a blender, food processor, or simply whisk by hand
  • slowly pour in the olive oil in a slow steady stream ‘til it is fully incorporated with the liquids
  • season the vinaigrette to taste with salt and pepper (and the red pepper, if using)
  • pour the majority of the vinaigrette over the salad, and stir thoroughly but gently to combine (adding more of the vinaigrette, if necessary)
  • allow to set at room temperature for 20-30 minutes to combine flavors (or place in refrigerator ‘til ready to serve)
  • when ready to serve, garnish with the lime zest and basil strips

♥   ♥   ♥   ♥   ♥

God loves you!  ♥  (Please don’t ever forget that!)

♥  coleen
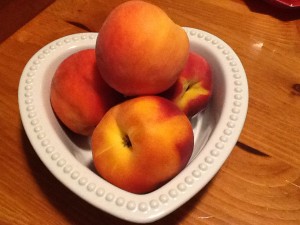
Peach Salsa

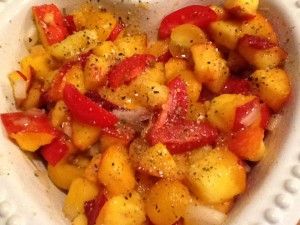
2014-07-13 21.33.27Oh…does that not say ‘summer!!!’ to you? Yes, to me, too! Here in the NorthEast, we are smackdab in the middle of the peach harvest…and they are so good! There are so very many sweet things that you can do with peaches; oh let me count the ways: pies, cobblers, crisps, crumbles, muffins, jam, ice cream, sorbet, pancakes, smoothies, popsicles, teas, sangria….  I’d love to hear of your favorite way to eat a peach!

But I do love using peaches in savory foods, too!  Now perhaps there aren’t quite as many options…but equally yummy! How about used as a glaze for chicken? Or chopped fine and added to ground chicken for meatballs? Peaches are FABulous added to the grill when you have fish or chicken going! Try simply topping them with a drizzle of really good balsamic vinegar and some goat cheese; oh yeah!

This week, however, I have a REALLY simple recipe for Peach Salsa. Great served with grilled salmon, or chicken breast, or shrimp kabobs!  This recipe comes together so quickly I did it twice this week…once with a ginger sweet flavor and once with a sort-of-spicy tomatillo salsa mixed in. Equally delicious!

2014-07-13 21.58.44

Peach Salsa (Two Ways)

Gingery Peach Salsa
ingredients:
2 large ripe, yet firm, peaches2014-07-13 21.54.56
handful of yellow and red grape tomatoes
1 tablespoon ginger preserves
2 tablespoons red onion, cut into a small dice
zest and juice of 1/2 of a lime
sea salt and freshly ground pepper, to taste

directions:

  • combine ginger preserves and lime juice and zest; mix together
  • remove pit, and cut peaches into bite-size pieces; add to ginger-lime mixture
  • slice grape tomatoes in half; also add these
  • season well; and combine together
  • put to the side for a few minutes and then taste for additional seasoning
  • set aside and let flavors come together while the meat/fish is being cooked

Spicy Peach Salsa
ingredients:
2 large ripe, yet firm, peaches
handful of yellow and red grape tomatoes
2 (or more) tablespoons tomatillo salsa (salsa verde)
2 tablespoons small dice red onion
zest and juice of 1/2 of a lime
sea salt and freshly ground pepper, to taste
directions:

  • combine tomatillo salsa and lime juice and zest; mix together
  • remove pit, and cut peaches into bite-size pieces; add to tomatillo mixture
  • slice grape tomatoes in half; also add these
  • season well; and combine together
  • put to the side for a few minutes and then taste for additional seasoning
  • set aside and let flavors come together while the meat/fish is being cooked

(Here are some facts about the nutrition associated with peaches; good stuff! )

♥   ♥   ♥   ♥   ♥

God loves you!  ♥  (Please don’t ever forget that!)

♥  coleen
Grilled Chicken Supper Salad

What do you call the meal you eat in the evening…supper or dinner? Just curious! So it appears that this has turned into a mini-series…these last few recipes have focused on lighter meals that are easier to prepare and don’t heat up the kitchen.  Perfect for summer suppers!  (See, that’s what I call the evening meal.)

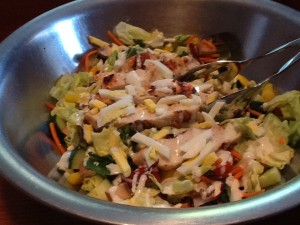
During these warmer months, I prefer to keep a tub of greens all prepared in the refrigerator to make it quicker to pull together one of these supper salads two or three times each week. Fortunately, Robert really enjoys salad for supper, too! And, like most men, he is very appreciative of something hearty either in or served along with the salad.  Oh, and bread too…really enjoys his bread!  So there is no excuse, as far as I can see, not to have the fixin’s for salad ready to go what with all the luscious produce available at the grocery store AND local farmer’s markets. This week, one meal we had was topped with grilled chicken breast…yum! This fits well into our healthy but oh-so-yummy POV! Low in fat, high in protein!

I have a tip that you might find helpful: when I purchase chicken breast, I repackage them into meal-size portions to store in the freezer. And, most times, before freezing it, I pound or flatten them so that they are similarly thick throughout the whole piece. I find this makes them cook more evenly when used whole; and also are easier to dice or slice when you need to cut them up. Here’s a tutorial you might check out...has some great ideas!

I would LOVE to hear of your favorite salad combinations!

2014-06-27 18.11.48

Grilled Chicken Supper Salad

ingredients:
—  chicken breast
—  2-3 tablespoons favorite marinade or salad dressing
greens:  choose your favorite combo of lettuces with a mixture of textures (bibb, butter, romaine, spring mix, radicchio, arugula, cabbage, spinach, kale, etc.
other veggies cut into bite-size bits:  carrots, tomatoes, cukes, celery, onions, sweet peppers, zucchini, mushrooms, etc.
additional add-ins:  olives, avocado, hard-boiled egg, artichokes, nuts, fruit (fresh or dried), fresh herbs
—  salad dressing
—  sea salt and freshly ground pepper

directions:

  • thaw chicken, if necessary.  pour marinade into bag or container along with the chicken and allow to rest for 30 minutes or so
  • grill chicken ‘til thoroughly cooked through (temperature of 160 degrees); set aside to rest ‘til balance of meal is prepared
  • add 2-3 generous handfuls (per serving) of the lettuces to a big serving bowl
  • throw in the veggies of your choice and toss together
  • top with any other add-ins you choose
  • serve with dressing on the side and s&p for seasoning

♥     ♥   ♥  

God loves you!    (Please don’t ever forget that!)

  coleen

Pineapple-Chicken Salad

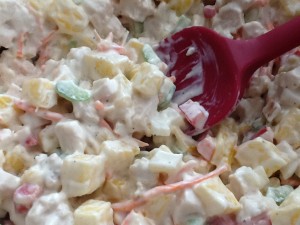
Y’know when a friend is on vacation and they post gorgeous photos of beautiful scenery, fun-in-the-sun…and yummy food?!! (Well maybe just a pic or two of yummy food!)  My friend, Cynda, and her family recently vacationed at the beach in Mexico. She included amongst all of the gorgeous sunrise scenes, and shots of her grandson being adorable, a pic of a delightful chicken salad that she enjoyed for lunch one day. It looked SO good that I was prompted me to make it for supper! This recipe fits the bill for our ‘healthy but oh-so-yummy’ POV since it is loaded with veggies, the fruit of an entire pineapple, and lowfat chicken breast. I also used equal portions of mayonnaise and Greek yogurt to lessen the fat grams/calories of the dressing. Perhaps this isn’t exactly the same recipe as the chef who prepared it for Cynda but we enjoyed it very much…hope you and your family do, too!

NOTE:  This salad should be put together IMMEDIATELY before serving!  Trust me.  I learned this lesson the hard way—I had to prepare this meal TWICE.  While a delightful combo when eaten fresh, pineapple and chicken do NOT marry well to sit around together!

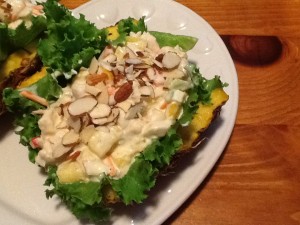
Early one afternoon, I put this salad together and tucked it away in the refrigerator awaiting suppertime. Pulled it out, layered the pineapple shells with Boston lettuce leaves, piled in the salad, scattered the nuts atop, and proudly carried those plates to the table. We sat down, thanked our gracious God for His provision of food and His blessings, scooped up that first bite, popped it into our mouths…and then right back out. Ummm, yeah. YUCK!  Robert immediately blamed the chicken for being bad (but I knew it was just fine).

I did a little sleuthing around the internet and found out that the enzymes in the pineapple had ‘cooked’ the <already cooked> chicken and changed the texture and taste. (I can attest to that!)  EPIC failure!  But I remade the recipe…and this time added the pineapple (as the recipe NOW reads) just prior to serving.  Problem solved…it was delicious!  So, eat it all up…go ahead, I am giving you permission.  This will not be good if you save leftovers for tomorrow’s lunch.

Pineapple – Chicken Salad

2014-06-26 20.04.14

(makes 2 generous portions)

ingredients:
2 cups cooked chicken*, chopped 2014-06-26 15.14.28
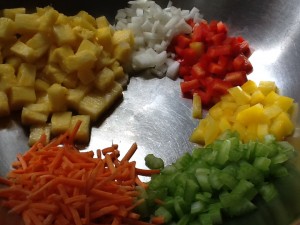
1/3 cup shredded carrots
1/3 cup finely sliced sweet onion
1/3 cup finely chopped celery
1/3 cup EACH diced red and yellow pepper
fruit of 1 fresh pineapple (here is a great tutorial on how to cut  a pineapple)
1/3 cup mayonnaise
1/3 cup plain Greek yogurt
1/2 teaspoon garlic powder
1 teaspoon lemon-pepper seasoning, freshly ground
pineapple boats
lettuce leaves
pitas, or flour tortillas (optional)
slivered almonds (or chopped nuts of your choosing)

*I poached 1# of chicken breast but you could use leftover cooked chicken or rotisserie chicken

directions:

  • whisk together the mayo, yogurt and seasonings; set aside
  • in a large mixing bowl, combine chicken, and all the veggies
  • pour the dressing over the chicken and veggies; combine well
  • refrigerate ‘til ready to serve
  • when ready to serve, add pineapple chunks to the dressed chicken salad
  • scatter nuts across the top

2014-06-26 15.23.40

serving suggestions:  this can be served right in the pineapple ‘shells” (boats), or you can line the pineapple with lettuce leaves, or serve the chicken salad wrapped up in a lettuce leaf, or stuffed into a pita (or folded tortilla wrap). You choose!!!  Enjoy!

♥   ♥   ♥   ♥   ♥

God loves you!    (Please don’t ever forget that!)

♥  coleen

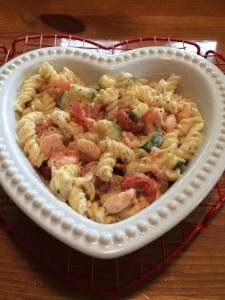
Lemon-y Shrimp Pasta Salad

Here in the NorthEast we are still waiting for the hot days of summer to arrive (not that I am complaining one tiny little bit!).  But this is surely the season for one dish salads that will be a complete meal.  It could be a pasta salad, like this recipe, or a nice full dinner salad!  Eating lighter meals on hot days certainly seems a more welcome choice…as well as meals that don’t require turning on the oven!

We love pasta salads!  But since we’ve made the choice to eat gluten free, I have found that pasta that holds up well when it is refrigerated and coated with a dressing has been difficult to find.  However, recently I purchased some Ronzoni brand gluten free pasta that is excellent!  (Here is a link AND a coupon!)  It is made with a multi-grain blend of white rice, brown rice, corn, and quinoa—nice texture (both hot AND cold), good taste, and holds up well as leftovers.  If you have eaten gluten free pasta before, you know that these three qualities are NOT always a given!  I have served this pasta to friends and family who couldn’t tell that it was a gluten free product.  Happy me!  Perhaps you might want to give it a try!  Enjoy!

Lemon-y Shrimp Pasta Salad (makes 4-5 generous servings)

2014-06-18 12.05.42

ingredients:
3 lemons, juiced plus 1 more for serving
2 teaspoons honey
1 cup fresh dill, chopped (dried ok, too)
1/2 cup extra-virgin olive oil
1/4-1/3 cup mayonnaise (optional)
sea salt and freshly ground black pepper (I use this lemon-pepper seasoning)
1 box (1#) rotini pasta (I used gluten free)
1 # frozen cooked tiny shrimp, defrosted
2 cups grape tomatoes, halved
1 large seedless cucumber, diced

directions:

  • in a large bowl, whisk together the juice of the lemons, the honey and chopped dill. slowly whisk in the olive oil until the dressing is emulsified (or use your blender or food processor). season well with salt and pepper
  • add the shrimp to the vinaigrette, toss to coat well and set aside to marinate
  • cook pasta according to package directions; rinse and cool
  • add the mayonnaise (if using), the cooked pasta, grape tomatoes, and cucumbers to the bowl with the shrimp and toss to combine
  • season well (don’t forget to taste!) with salt and pepper
  • refrigerate ’til ready to serve

♥   ♥   ♥   ♥   ♥

God loves you!  ♥  (Don’t ever forget that!)

  coleen


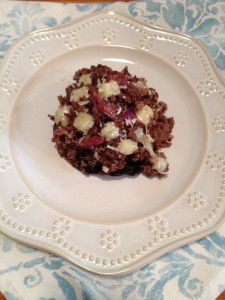
Quinoa-Beef Stuffed Portabellos

2014-06-10 19.36.12

Remember that delicious and so-good-for-you red quinoa recipe from last week? Well, I was looking around for a use for the rest of it and so…these were going to be stuffed sweet peppers but the portobello caps were SUCH a good price!  (Well, y’know I could not resist!)  I par-cooked the mushroom caps on a grill pan but they would be great done on your outdoor grill too!

We enjoyed these as an entree with steamed broccoli–they were VERY filling!  I figure two caps per person unless you choose to serve these as a side dish.  This recipe fit nicely into our ‘healthy but oh-so-yummy’ point of view!  Enjoy!

Quino-Beef Stuffed Portabellos

ingredients:
4 medium-sized portabello mushroom caps plus 1 extra for chopping
1/2 # ground beef (or turkey, chicken, or lamb)
1 cup cooked quinoa
1 cup kale (or spinach), stems removed and chopped
1-2 ounces blue cheese, crumbled (I used havarti)
1 small red onion, cut into 1/2 moons
2 heaping tablespoons chopped garlic
1/2 cup red wine
2 tablespoons balsamic vinegar
olive oil

directions:

  • preheat oven to 375 (heat grill pan, also, if using)
  • in a large saute pan, heat 1 tablespoon of olive oil over medium heat; add sliced onions and cook for 4-5 minutes
  • using a spoon, scoop out the dark gills of each mushroom cap. (if they have stems, add these along with the 1 extra cap for chopping.)  brush the caps with olive oil & place rounded side down on the heated grill pan (or onto a foil-lined baking sheet)
  • bake for 6-7 minutes; remove from oven and set aside to cool slightly
  • chop up the set-aside mushroom cap (and stems, if any) and add to onions in saute pan; cook over medium heat until mushrooms get brown & fragrant (caramelize them), perhaps another 6-7 minutes
  • once onions and mushrooms are done, pour into a large mixing bowl along with the cooked quinoa
  • (using the same skillet), add ground meat. cook over medium high heat ‘til browned.  lower heat just a bit (don’t want to burn the garlic!) and add chopped garlic and saute for another minute or two stirring constantly
  • stir in red wine and chopped kale (or spinach) and cover pan; simmer ‘til liquid is evaporated
  • add meat and kale to the veggie/quinoa mixture in the large bowl
  • stir in the balsamic and mix the ingredients all together in the bowl. season well w/ salt and pepper
  • place scoops of mixture into mushroom caps (I find my hands worked well!) dividing the stuffing mixture equally amongst the caps. top each mushroom with a few crumbles of cheese
  • bake for about 12-15 minutes, ‘til mushroom caps are tender & filling is slightly browned.

♥   ♥   ♥   ♥   ♥

God loves you!    (Don’t ever forget that!)

♥  coleen
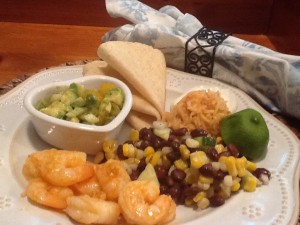
Shrimp with Corn and Black Bean Salad

So, remember last week I shared my husband’s epiphany in realizing he really does like Tex-Mex, Cal-Mex, Mexican type foods?  Ok…n-o-w he is requesting it as part of our weekly menu!   The following is an easy, quick-to-make weekday supper that is healthy but oh-so-yummy!  First dish is a Black Bean and Corn Salad along with some delicious Tex-Mex influenced shrimp.  I am definitely going to keep this in the summertime meal rotation…light, refreshing, and won’t heat up the kitchen!

Black Bean and Corn Salad

2014-06-01 15.44.41

ingredients:
2 cups corn (fresh or frozen)
1/2 cup cucumber, peeled, small diced
1 small jalapeno, seeded and finely diced (optional)
1 (15 ounce) can black beans, drained and rinsed
1/2 cup sweet onion, finely diced
juice of 1/2 large lime
1 teaspoon olive oil
sea salt and freshly ground pepper, to taste

salad directions:
combine all ingredients; pour into a storage bag or container and refrigerate for at least 30 minutes for flavors to combine.

Tex-Mex Shrimp

marinade ingredients:
juice of 1/2 large lime
1 tablespoon olive oil
1 tablespoon chipotle chili powder
1 heaping tablespoon chopped garlic
1 teaspoon honey
pinch of cayenne pepper (optional)
sea salt to taste (I used a lemon-pepper-salt combo)
1/2 # medium to large shrimp, tails removed

marinade directions:

  • simply whisk ingredients together in a medium-sized glass bowl
  • add in shrimp and refrigerate for 30 minutes.

To finalize your dish

  • heat a saute pan over medium-high heat
  • pour shrimp and some of the marinade into the pan
  • cook for 1-2 minutes ‘til starting to turn pink
  • immediately flip over and cook other side for additional 2 minutes
  • remove from heat; do not over cook

2014-06-01 19.45.41

To serve:
I warmed up a couple of gluten free flour tortillas, and placed them (folded up) on each plate with a portion of the Black Bean and Corn Salad and some of the marinated shrimp. On the side, we also had some Spanish rice, fresh guacamole, and a dollop of sour cream.

This would also be delish (and low-carb) served with lettuce leaves to spoon the shrimp and salad into and roll up. I would love to hear of some of your ideas for serving and side dishes!


♥   ♥   ♥   ♥   ♥

God loves you!  ♥  (Don’t ever forget that!)

♥  coleen
Creamy Butternut Casserole

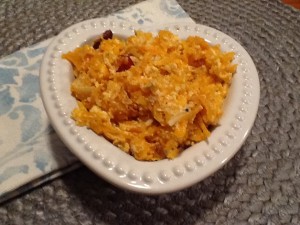
Yes, yes…that does say ‘butternut squash.’ I know, I know…a fall vegetable. But please indulge me! You know my love for butternut…and they had some beauties at the grocery store…and so I just HAD to buy just one more! And then I remembered that I had found a casserole recipe in an older (1994) little recipe book that I came across awhile back. The following has been adapted from the original.

This makes for a great meatless meal! Or perhaps you could cook up some chops or chicken breast to serve alongside for the meat-eaters. This casserole fits in so well with our healthy but oh-so-yummy POV, too! And, while butternut squash is a bit more carb-heavy than some other veggies, balanced out with the fiber and protein contained in it, makes for a great option for those of us keeping our carbs in check. Here is some nutritional info.  Oh!  And this would be an excellent use for Dana’s recipe for Homemade Ricotta!

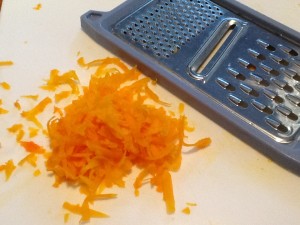
I would strongly suggest using a food processor to shred this much butternut…or you could work on your upper arm muscles!  I did shred a bit using the largest holes on my handheld grater; so it does work!

2014-05-18 19.23.00

This is a dish with a lot of texture…this is NOT your gramma’s pureed butternut squash casserole traditionally served at Thanksgiving dinner! Try it, I do think that you will thoroughly enjoy it!

And, buh-bye, butternut squash…see you in the Fall!

Creamy Butternut Casserole

2014-05-18 22.16.44

(makes approximately 10 side dish servings)

ingredients:
5 cups peeled and shredded butternut squash
juice of 2 lemons, approximately 1/4 cup *see tip
1/2 cup golden raisins
1/2 cup craisins
1 large mango, cut into small cubes
1 (15 ounce) container ricotta cheese
2 medium eggs
1 (5 ounce) container plain Greek yogurt (or sour cream)
1 teaspoon ground cinnamon2014-05-18 19.43.55
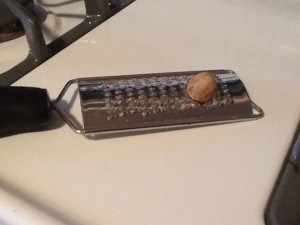
1/8 teaspoon ground nutmeg (fresh is best!)
1/4 teaspoon ground cardamom (optional)
LOTS of kosher salt and freshly ground pepper (I used lemon pepper)
1/2 cup shredded flavorful cheese (I used provolone)

directions:

  • preheat oven to 375
  • lightly grease an 11 inch x 7 inch (2 quart size) baking dish
  • in a large bowl, toss shredded squash with lemon juice. put half in the bottom of the baking dish
  • sprinkle the fruits over the top of the shredded butternut
  • in a separate bowl, lightly beat the eggs and then combine with the ricotta, yogurt, spices and a generous amount of salt and pepper (this is a dish that requires seasoning!)
  • spread the ricotta mixture over the top of the shredded squash in the baking dish
  • add the remaining squash, spreading evenly over the dish
  • cover TIGHTLY with foil (this will steam the butternut)
  • bake at 375° for 30 minutes
  • remove from oven, stir thoroughly, recover and return to oven for 15 minutes
  • remove foil and sprinkle the top with the shredded cheese (if you are using); bake for an additional 10 minutes
  • allow to sit for 5 minutes before serving

*tip: to get the most juice out of a lemon, heat in microwave for 15 seconds on 50% power. Then place on your countertop and roll back and forth ‘til it gets a little ‘squishy’. Cut in half (keep all the juice!) and squeeze into a measuring cup.

♥  ♥  ♥  ♥  ♥

God loves you!  ♥  (Don’t ever forget that!)

♥  coleen
Thai Tea with Coconut Cream Condensed Milk – Vegan

2014-05-11 19.54.27

Thai food fans…what beverage do you indulge in when you go out to enjoy a meal at your favorite Thai restaurant? For me, it is a tall Thai iced tea!  Yum!  But this truly is a decadent indulgence, for sure.  Now the ‘tea’ part is usually not the problem…it is the addition of the creamy, very sweet ‘milk-y’ portion that is of concern.

So, when my daughter, Kassia, and I were planning our Mother’s Day meal, we decided NOT to cook but to get Thai takeout… some sushi, some pineapple fried rice, a couple of (rice) noodle-based dishes, and some curry.  Delish!  But we thought that we would make the dessert, soup, and beverages to accompany the restaurant-prepared food.

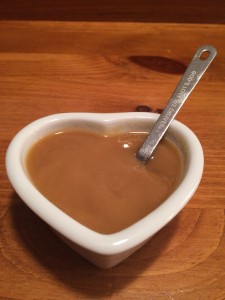
She chose a recipe for a black rice (rice) pudding topped with toasted coconut flakes and homemade coconut milk whipped topping. I was given responsibility for the soup (I made Tom Kha Ga–a coconut milk-based soup with chicken and mushrooms fantastically flavored with lemongrass, lime, and ginger; Dana has a wonderful recipe here; check it out!) and the  beverages. We put out a selection of flavored seltzers, some mango 100% juice for the grandkids, a nice bottle of Reisling, and a big pitcher of Thai iced tea and (to keep to our choices to eat healthier) a small bowl of homemade condensed milk made with coconut milk and agave nectar. This fit right into our healthy but oh-so-yummy point of view so I thought that I would share it with you! Enjoy!

Coconut Condensed Milk

Ingredients:
(1) 14 ounce can full-fat coconut milk2014-05-12 02.26.01
1/4 cup coconut sugar (or sweetener* of your choice)

Directions:

  • Pour the coconut milk into a small, heavy-bottomed stainless saucepan, and heat over medium-high heat ‘til it comes to a boil, about 5 minutes
  • Whisk in the sweetener of your choice ‘til thoroughly blended
  • Bring back to a boil, and immediately reduce heat to medium-low maintaining a constant simmer; whisk every 5 minutes or so
  • Continue to simmer for 35-45 minutes, ‘til the content is reduced by about half

To serve, fill a tall glass with ice cubes. Fill almost up with Thai tea, and then add 1-2 tablespoons of your homemade, healthier condensed milk.

You can, of course, use whatever spicy tea that is your favorite. To replicate that delicious beverage served in most Thai restaurants, use traditional Thai tea which produces a vibrant orange-colored, full flavored tea.

* I prefer using coconut sugar or honey as my natural sweetener, but agave nectar, pure maple syrup, coconut nectar, or stevia should work just fine. Adjust sweetness to taste; enjoy!

♥  ♥  ♥  ♥  ♥

God loves you!    (Don’t ever forget that!)

♥  coleen
Glazed Baby Beets and Carrots

Wait ‘til you see what I found at the grocery store!

2014-04-27 17.32.46

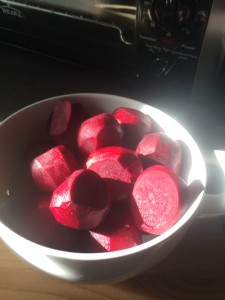
So with my list in hand, I started wandering through the produce department… sweet potatoes; check.  Cantaloupe; check.  Red grapes; check.  Broccoli crowns; check! And then I noticed this mound of small brownish-purplish balls filling the case beneath the broccoli…what?  They were baby beets!  Not on my list…but who cares? AND (thank You, Lord!) they were only 99cents per pound! So, 3 pounds came home with me!

I knew that I wanted to feature them in our At Home w/ GCH blog today, but I had to come up with a different way to prepare them. It couldn’t be my favorite way to serve (ok, eat!) beets—roasted over baby greens with goat cheese! We’ve already done that here … so I perused the Internet and found a number of recipes for glazed beets. Here’s my version; enjoy!

Glazed Baby Beets and Carrots

2014-04-27 19.58.42

Ingredients:
1 pound baby beets, peeled
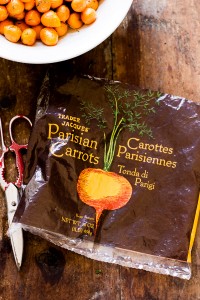
1/2 pound small frozen carrots (we use these from Trader Joe’s)tjsparisiennecarrots
2 cups juice or chicken broth (I used mango 100% juice)
1 tablespoon honey
3 tablespoons white balsamic vinegar (I used honey balsamic)
sea salt, freshly ground black pepper

Directions:

  • Steam beets and carrots ‘til almost done (when a thin-bladed knife goes through with just a bit of resistance).
  • Set aside the (almost cooked) veggies, and dump the water out of the pan.
  • Into the same pan, add the liquid of your choice and bring to a boil.
  • Pour the veggies back into the pan along with the honey. Stir ‘til combined and bring to a boil.
  • Reduce heat so that the liquid is gently simmering.
  • Continue to cook veggies for 5 minutes or so, spooning the liquid over them occasionally so that they get good and coated.
  • Stir in the balsamic vinegar and simmer for another five minutes.
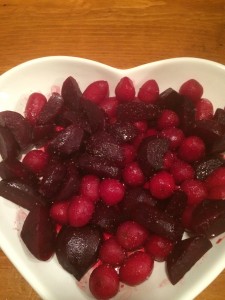
  • Remove pan from heat, and pour into a serving bowl scraping in all of the liquid, too.
  • Season well with sea salt and freshly ground pepper.
  • Makes approximately 4 servings.

♥  ♥  ♥  ♥  ♥

God loves you!    (Don’t ever forget that!)

♥  coleen