December 16, 2024

Sausage & Mushroom Stuffed Shells with Pumpkin Sage Béchamel

sausage pumpkin shells

Whoo, that’s a long title!  And I’ll be honest – this does take a bit of time to prepare.  But if you have an extra hour on a Sunday night and want to make a delicious dinner with generous portions that you can eat the whole week through and not stop loving – try these Sausage and Mushroom Stuffed Shells with Pumpkin Sage Béchamel.

I was going to post my take on this recipe, since I made a few changes for my family, but I didn’t take careful note of my measurements. Food blogger fail!  So I’m just giving you the recipe I found at A Beautiful Bite.  I do want to note that I switched out cottage cheese for ricotta in this recipe, and it worked great.  Just buzz it in the food processor for a few seconds and it’s indistinguishable from the pricier ricotta.  Also, I ran out of sage and I had to garnish with parsley.  In any case, this recipe was a big hit, and it reheats well, so we’ll be seeing this again in our house.

 Sausage and Mushroom Stuffed Shells with Pumpkin Sage Béchamel

(Recipe Courtesy of A Beautiful Bite)

Ingredients:

  • 1 pound pasta shells, cooked al dente
  • 32-ounce ricotta cheese (or use cottage cheese)
  • 2/3 cup Parmesan cheese, grated
  • 1 egg
  • 1 teaspoon salt
  • ground pepper to taste
  • 1 pound Italian sausage (I used sage breakfast sausage)
  • 2 large yellow onion, diced
  • 2 cloves garlic, minced
  • 2 cups fresh mushrooms, sliced
  • 4 fresh sage leaves, thinly sliced
  • 3 tablespoons butter
  • 2 tablespoons flour
  • 3 cups milk
  • 1 cup pumpkin puree
  • 1 cup Greek yogurt
  • 1/2 cup Parmesan cheese, grated
  • 1/3 cup ricotta cheese
  • 6 fresh sage leaves, thinly sliced
  • 1 1/2 teaspoon salt
  • pepper to taste
  • 1/2 cup Parmesan cheese, grated for topping (I skipped this)

Directions:

  1. In a large mixing bowl, combine ricotta cheese, Parmesan, egg, salt and pepper.  Set aside.
  2. Cook shells according to directions on box.  Drain and let cool.
  3. While shells are cooking, brown sausage in a large skillet.  Remove from skillet and place meat on a paper towel to drain.  Reserve 1 tablespoon of the fat to cook the onions in.
  4. Cook onions in fat over medium heat until translucent.  Add garlic and cook for just a minute.  Add mushrooms and sage and cook for another four to five minutes.  Remove from heat and add cooked sausage.   Allow to cool for several minutes.
  5. Stuff shells with ricotta mixture, then top with sausage mixture.  Place shells in a 9×13 baking dish.  Set aside while you prepare béchamel sauce.
  6. In a large heavy pot, melt butter over medium heat.  Add flour and cook, stirring, for several minutes.  Add milk, pumpkin, yogurt, Parmesan, and ricotta.  Cook for a few minutes to thicken.  Add sage, salt and pepper.
  7. Pour béchamel over shells.  Top with extra grated Parmesan.  Bake at 350*F for forty minutes.

Explore, experiment, enjoy! — Dana


To view even more of Dana’s unique recipe, you can visit her at Frugal Girlmet!
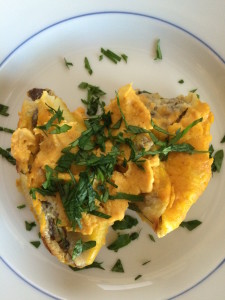
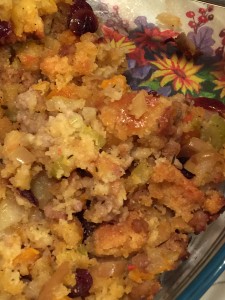
Cornbread Stuffing with Sausage and Veggies

Yummmm…stuffing!  Call me crazy but, if I had to choose just ONE carb-y dish for Thanksgiving dinner, it wouldn’t be pie, or rolls, or potatoes.  It would be stuffing!

This recipe fits well within our healthy but oh-so-yummy POV since it is made with chicken sausage (low in fat) and is loaded with lots of veggies.  Feel free to make this to your family’s preferences:  change up the sausage (spicy is great!), substitute different veggies, season with other varieties of herbs.  This can be made with your favorite cornbread: whether gluten-free or traditional, from scratch or a boxed mix, or even a bag of cubes you purchase.  I would love to hear how you switched it up to please your loved ones!  Enjoy!

2015-11-15 18.25.34

Cornbread Stuffing with Sausage and Veggies

ingredients:

1 batch of your favorite cornbread (I used a GF mix)

coconut or olive oil
1 onion, cut into a small dice
2 stalks celery, sliced thinly
1 fennel bulb, chopped into small pieces
sea salt, freshly ground pepper
1# uncooked sausage, (I used chicken sausage)
2 teaspoons garlic, finely chopped
1 teaspoon each dried thyme, rosemary, sage
1 large apple, cubed
1 cup dried cranberries
3 to 4 cups chicken broth/stock

directions :

  • first thing you need to do is make a batch of cornbread.  you can make this a day or two before.  after removing from baking pan, cool thoroughly, wrap loosely, and store in a cool, dry place.
  • when ready to prepare the stuffing, cut up the cornbread into small-ish cubes and place on a rimmed baking sheet. bake at 250-275 for 30 minutes or so ‘til the cubes are getting crispy and drying out. pour into a very large bowl and set aside
  • heat the oil in a large saute pan, over medium heat, warm the oil
    then add the onions and celery and fennel; season well with s&p and cook until the vegetables start to become soft
  • push to the edges of the pan and add the sausage into the middle; cook ‘til the sausage begins to brown
  • add in the garlic, herbs, and apples; stir all together for a minute or so; remove from heat
  • increase oven temp to 375
  • into the bowl holding the cornbread, add the cranberries along with the cooked sausage/veggie mixture and stir together
  • pour 2 cups of the chicken broth evenly over the whole bowl; knead together with your hands (adding additional broth ‘til the bread is very moist but not mushy)
  • taste to check for seasoning, adding additional s&p if needed
    transfer to a large ovenproof dish/casserole and cover with foil
  • bake the stuffing until it is hot all the way through about 30 minutes.
  • if your family likes some crispy bits, too, remove foil and increase oven temp to 425; bake for additional 10 minutes

♥   ♥   ♥   ♥   ♥ 

God loves you!  ♥  (Don’t ever forget that!)

♥  coleen

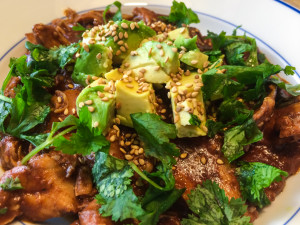
Easy Chicken Mole

Easy Chicken Mole
The first time I had mole (say moe-lay) it was at a small but very well-regarded Mexican restaurant in Los Angeles, La Loteria.  I had heard of mole poblano before and decided to take a chance.  Que rico!  What a glorious taste!  It was rich, a tiny bit spicy, a little bitter, and a little fruity.  It was really a savory fiesta in my mouth.  However, when I went home with the intent to find out more about this magical dish and how to make it, all the recipes I saw were 40 ingredients long and took days to make.  No me gusta – I just didn’t have time to mess with that.  So after some more research, I came up with this recipe – my Easy Chicken Mole!
The two ingredients that most moles share to give them such depth of flavor are dried chiles and chocolate.  Really!  Buy the darkest chocolate you can find.  You can use baker’s unsweetened chocolate, but that will make it bitter, and you’ll probably want to bring it back around with some added honey or brown sugar.  I used bittersweet chocolate, 63% cacao.  I think it worked well, and next time I might even add a little more.
As far as the chiles go, it gets a little confusing.  Oftentimes a chile will have one name when it’s fresh and a different name when it’s dried (I guess kind of like grapes vs. raisins.)  To be honest, I think I bought ancho chiles, but I’m not sure – there were two kinds and neither were labeled!  You want chiles that are a very dark reddish-brown—like the color of dried blood—and about fist-sized.  I used two but I may use three or even four next time.  I removed the seeds, and that’s where the heat resides, so you only get the smoky, fruity flavor of the chiles and not the spiciness.
Try this recipe.  If you’ve never had mole, this is a great place to start.  If you are a mole aficionado, go ahead and tweak my recipe to get the taste you like.  Either way, I bet you’ll say, Que sabor!  (Or if you don’t habla espanol, ‘So tasty!’)
Easy Chicken Mole
Ingredients:
  • 2-4 dried chiles (use ancho, pasilla, or guajillo)
  • 2 onions, chopped
  • 4 tablespoons butter
  • 4 cloves garlic, minced
  • 1/4 cup sesame seeds (or use pepitas, peanuts, or almond butter)
  • 1/4 cup dark chocolate chips
  • 1/4 cup raisins
  • 1/2 teaspoon ground cinnamon
  • 1/2 teaspoon salt
  • 1/2 teaspoon dried oregano
  • 2 cups chicken stock
  • 1/2 cup brewed coffee
  • 2 slices bread
  • 2 pounds boneless, skinless chicken thighs (or use breasts, up to you!)
  • diced avocado, cilantro, sesame seeds to serve
  • rice or tortillas to serve, optional
Directions:
  1. Put the dried chiles in a bowl and cover with boiling water.  Put a plate over the bowl and let the chiles soak for about 15 minutes.  When they have softened, remove the stem and seeds and roughly chop.  Discard the stem, keep some seeds if you want some heat.
  2. While the chiles are soaking, cook the onion in the butter in a very large pot or Dutch oven.  Stir to make sure they don’t burn.
  3. Add the chopped chiles, minced garlic, and sesame seeds.  Stir and cook for 3 minutes.
  4. Add the chocolate, raisins, cinnamon, salt, and oregano.  Stir to combine and cook for another 2 minutes.
  5. Add the chicken stock and coffee.  Crumble in the bread.  Cover the pot with a lid and simmer for 10 minutes.
  6. CAREFULLY transfer sauce to a blender and blend until pretty smooth.  You could use an immersion blender, too.
  7. Return the sauce to the pot and add the chicken.  Tuck them into the sauce and stir.  Make sure the chicken is covered in sauce, then cover the pot with a lid.  Let simmer for about 25 minutes.
  8. The chicken is done when you can shred it with forks.  To serve, ladle the chicken and lots of mole into a bowl.  Garnish with lots of avocado, cilantro and sesame seeds.  You can also eat this in tortillas – just serve with less sauce if you are making tacos.  You can also serve it over rice to soak up the sauce.

Explore, experiment, enjoy! — Dana


To view even more of Dana’s unique recipe, you can visit her at Frugal Girlmet!
Harvest Veggie Soup

Well, we are certainly into full-blown Fall around here!  (How about where you live?)  The brightly colored foliage is fading fast…and the leaves are falling almost faster!  Piles of leaves are on the curbs, our sweaters are unpacked, almost everyone is wearing socks (except me…i still am scooting around in my Birkenstocks! But not for long!)   And we are enjoying soup a few times each week.  One pot of soup that we have enjoyed a few times already is this  Harvest Veggie Soup, full of veggies and grated apples…very yummy.   It is a slightly sweet soup, very satisfying and filling.  I choose to make it vegan/vegetarian but it could easily be made with chicken broth, too.  This would make a great addition to your own menu when you have vegans, vegetarians, and meat-eaters ? sharing a meal together.

Here on our Monday installment of At Home w/ GCH, we have been featuring recipes which included Fall in-season fruits and veggies.  This week, our recipe features a few: apples, cauliflower, and (surprise!) butternut squash.  This week’s recipe fits into our healthy but-oh-so-yummy! category since it is really yummy (did I mention that before?), extremely low in fat, and full of delicious, nutritious vegetables.  Enjoy!

2013-10-15 21.49.39

Harvest Veggie Soup

ingredients:
2 butternut squash
1 large head of cauliflower
2 tablespoons coconut or olive oil
sea salt, freshly ground pepper
1 sweet onion, diced small
1 additional teaspoon olive oil
2-3 tablespoons chopped garlic
2 quarts of vegetable stock
2-3 peeled apples, grated
1 can coconut milk (shake well!)

optional toppings:
cooked, crumbled bacon
sour cream or plain Greek yogurt
shredded sharp cheese
chopped avocado
sprinkle of cinnamon (try it!)

directions:

  • preheat oven to 425; line 2 large baking sheets with parchment paper
  • peel the butternut squash; scoop out the seeds and strings and cut up into 2″ chunks.  set aside in a very large bowl
  • cut up the cauliflower into smallish-size florets; add to bowl
  • pour in oil and season veggies with s&p.  stir together well, pour out onto a baking sheet and roast for 20-25 minutes
  • meanwhile, in a large stockpot, saute onion along with 1 teaspoon olive oil over medium high heat for 5 minutes or so; reduce heat to low and add in chopped garlic, stirring constantly for 1 minute
  • pour in the stock; add additional s&p to taste and allow to simmer gently
  • when the veggies in the oven are done roasting, remove from oven and immediately pour into the stockpot; stir well to combine.  allow to simmer for 20 minutes or so, adjusting heat if necessary
  • when done, scoop out about 1/2 of the veggies and use an immersion blender to puree what is left in the stockpot.  (This could also be mashed, or pureed, very carefully,  in a standard blender in batches.)  taste (be careful…it’s hot!) for additional seasoning, and add back in the reserved veggies
  • add the grated apple and pour in the coconut milk; stir well.  done!
  • optional toppings can be added to each individual bowl of soup

♥  ♥  ♥  ♥  ♥

God loves you!    (Don’t ever forget that!)

♥  coleen

Thai Coconut Chicken Soup (Tom Kha Gai)

Thai Coconut Chicken Soup

I am convinced that every culture, every civilization, has a chicken soup recipe.  Nothing else satisfies, or feels so much like a hug to the tummy, like a big bowl of chicken soup made by someone you love.  If you are like me and are a frugal girl, you buy a whole chicken at least once a week.  I remove the breasts and legs and cook them one night, then cook the carcass for broth and about two cups of shredded chicken left on the body.  If you have a chicken body and the desire to try something new, read on – here comes Thai Coconut Chicken Soup, also known as Tom Kha Gai!

Now that you know how to make coconut milk from scratch, you’ll need about 2 cups of homemade coconut milk, or you can use one can of packaged coconut milk.  There are a few other unusual ingredients for this recipe:  ginger, cilantro, and fish sauce.  Ginger really isn’t that out of the ordinary, and goes great in smoothies and peach dishes; but if you aren’t going to use it soon, you can peel whatever is left and freeze it to use later.  Cilantro shows up in many different cuisines, so if you don’t want to waste half a bunch of cilantro, you have many options (like Mexican or Indian food), or try this  and  this.  Fish sauce is a savory liquid distillation of anchovies, sugar, and salt.  If you can’t find it, you can still make the soup, but fish sauce is the secret ingredient that really brings everything together.  It keeps in the fridge forever, and is a great flavor booster for clam chowder or a substitute for anchovy paste (think Caesar salad.)  The only other ingredients you need are a chicken, some limes, and mushrooms.  Thai restaurants use straw mushrooms (you can find them in a can), but I used dried shiitake mushrooms, and they’re delicious.  You could also use cremini mushrooms.

Try this with Jasmine rice and a green salad for a light but satisfying dinner!

Thai Coconut Chicken Soup (Tom Kha Gai)

Ingredients:

  • 1 chicken body, breasts and legs removed (or use two cooked chicken breasts, diced, plus 3 cups of chicken broth)
  • 1 large piece of ginger, 2 or 3 inches long, peeled and bashed with the handle of your knife
  • 1 can coconut milk, or about 2 cups homemade coconut milk
  • 1 ounce dried mushrooms, broken into little pieces, or 8 ounces fresh mushrooms, chopped
  • 1/2 bunch fresh cilantro, chopped
  • 1/2 teaspoon or so fish sauce (to taste – if you don’t have fish sauce, use salt)
  • 2 limes, juiced

Directions:

  1. In a large pot, cook the chicken carcass with 4 cups of water and the ginger, until the chicken is cooked through. Remove chicken to a large bowl; shred meat from bones and set aside. Strain the broth into another bowl, discarding ginger. Wash the pot and return to stove. Over medium low heat, add the dried mushrooms to the chicken broth and cook ten minutes. (If using fresh mushrooms, add them in Step 2.)
  2. Add back the chicken to the broth, and pour in coconut milk (and fresh mushrooms, if using).  Cook until simmering.  Add chopped cilantro, fish sauce, and lime juice, and stir to combine.  Taste for seasoning – may need more salt, or you may like more lime (you can add the zest of the lime too, if you want a stronger citrus flavor.)  Serve hot with more chopped cilantro.  You can also stir in a little hot sauce or chili flakes if you like!

Explore, experiment, enjoy! — Dana


To view even more of Dana’s unique recipe, you can visit her at Frugal Girlmet!
Twice-Baked Sweets

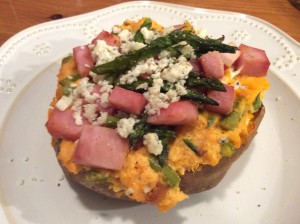
Oh, now this was comfort food!  I guess I was just ‘in a mood’ for something like this—filling, creamy, sweet yet tangy—and it smelled so good!  AND still stayed within the healthy but oh-so-yummy parameters.  This is an easy, quick (minus the baking time for the potatoes) meal to prepare…and could be a simple meatless meal, too.

The “twice-baked” potatoes of my past have been big ol’ russets…with butter a-n-d sour cream.  (how about you?)  The sweet potatoes, while yes, still containing lots of carbs also are high in fiber and lots of good vitamins and minerals i.e., beta-carotene and anti-oxidants.  Enjoy!

2015-10-30 19.46.12

Twice-Baked Sweet Potatoes

ingredients:

2 large – extra large sweet potatoes
1/2 small red onion, diced small
1/2 red or yellow bell pepper, diced small
1/4 – 1/3#  asparagus, trimmed and cut into 1/2-inch pieces
6 ounces ham, diced (I used a ham steak)
1/2 cup Greek yogurt (or sour cream)
4 ounces gorgonzola cheese, crumbled, divided
1/4 teaspoon salt
1/4 teaspoon white or black pepper

directions:

  • bake sweet potatoes at 400 for 35-45 minutes, depending on size ’til soft.  when done, set out to cool for 3 or 4 minutes.  slice off the very tops and, carefully, scoop out the majority of the baked potato. leave the shells to one side and place the filling into a large bowl and mash up.
  • meanwhile, in a large saute pan over medium high heat, heat oil and add the cutup veggies.  cook, stirring occasionally, for 6-8 minutes ’til asparagus pieces are just tender when poked with a sharp knife tip. remove from pan and add to bowl with mashed sweets
  • add the ham chunks to the pan and cook 5 minutes or so, allowing to brown up just a bit
  • add to the bowl with the  veggies
  • add the Greek yogurt along with most of the gorgonzola (save a bit out for topping); mix together completely. season to taste with s&p.
  • place the potato shells into a baking dish and add back the potato mash with veggies and ham (they will be very well-stuffed.)
  • top each stuffed potato with a bit of the remaining cheese
  • place in oven for 10 minutes or so ’til cheese is melting and filling heated piping hot

♥   ♥   ♥   ♥   ♥

God loves you!  ♥  (Don’t ever forget that!)

♥  coleen

Korean-Spiced Pumpkin Seeds

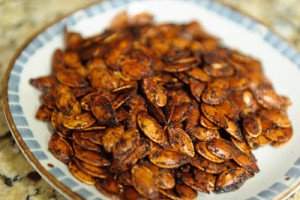
Korean Spiced Pumpkin Seeds
Happy Halloween, everyone!  While it’s not my favorite holiday, I like watching my kids get into it.  When we drive down the street, my little one likes to shout out the neighborhood decorations:  “Mommy, I just saw a skeleton!!!”  “Oh no,” I cower, “I’m scaaaaared!”  “Don’t worry Mommy, it’s just pretend!”  And they really love seeing jack-o-lanterns.

Thank you, Rose the Jack-o-Lantern, for your tasty guts!

My Mom always toasted the pumpkin seeds for us when we were kids, and I loved them so much!  I found a recipe at My Retro Kitchen, which, I think, is the way my Mom made them.  Unfortunately, I was all out of Worcestershire sauce!  Frugal Girlmet to the rescue – I decided to keep the technique and use a different flavor.  Innovate, experiment – voila!  Korean Spiced Pumpkin Seeds!

These have everything you want in a snack – crunchy, salty, spicy (but not TOO spicy – unless that’s how you roll, in which case, double the dried chili pepper powder!) and just a bit sweet.  These would be a great bar snack (in the name of science, I had to test my hypothesis, and these are fantastic with a cold beer!)

Korean Spiced Pumpkin Seeds

Ingredients:

  • 1 1/2 – 2 cups raw pumpkin seeds, rinsed and patted dry
  • 1 tablespoon sesame oil
  • 1 tablespoon soy sauce
  • 1/2 teaspoon sugar
  • 1/2 teaspoon granulated garlic (not to be confused with garlic salt!)
  • 1/4 teaspoon Korean chili powder (or use Cayenne or sriracha)
Directions:
  1. Preheat oven to 275 degrees.  Line a baking sheet with aluminum foil.
  2. In a large bowl, mix everything but the pumpkin seeds.  Make sure you have no lumps of garlic or sugar.  Stir in the pumpkin seeds, then scrape it all out onto the baking sheet.  Spread the seeds out on the sheet so they can cook evenly.
  3. Cook for one hour, stirring every ten minutes.  They get a little sticky, so use a silicon spatula.  After an hour, remove from the oven and let cool for about an hour.  Don’t worry, they’re not sticky anymore.  Remove to a bowl and get snacking!

Sweet&Spicy Turnips and Squash

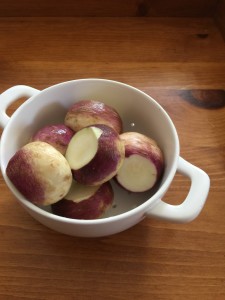
Turnips…do you love ‘em? I do! Whether it’s my Dad’s always delicious, traditional mashed turnips and carrots, or a puree of turnips with butter and brown sugar (I know, I know…), or chunks of turnips in a stew—they are yummy and satisfying. But recently I was looking to do something different with these guys.

2015-10-26 12.06.48

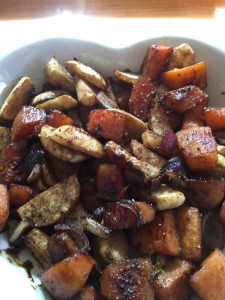
Roasted along with my stand-by fav veggie—butternut squash—they turned out great. A tiny bit sweet, and a little spicy…I believe that fits in nicely with our healthy but oh-so-yummy POV. And, I am thinking they will show up on our Thanksgiving table in a few weeks!  Enjoy.

2015-10-26 13.09.36

Sweet&Spicy Turnips and Squash

ingredients:

1# turnips, peeled
1 small butternut squash (about 1+1/2 – 2#), peeled and seeded
2-3 tablespoons extra-virgin olive oil
1/2 teaspoon sea salt
1/4 teaspoon freshly ground pepper
1 small red onion, halved and sliced
2 tablespoons molasses (or 100% pure maple syrup)
1 teaspoon cinnamon
1/8 teaspoon each nutmeg, ground cloves, star anise Chinese five-spice powder
1/2 teaspoon sea salt

directions:

  • preheat to 450; generously line a large rimmed baking sheet with parchment paper
  • slice turnips in half and then into 1/2# slices; slice butternut crosswise into 3/4″ X 3/4″ sized pieces
  • toss together with oil, s&p in a large bowl until well coated
  • pour onto lined baking sheet and spread out into an even layer (set the bowl aside; don’t wash it just yet!)
  • roast the veggie for 10 minutes. carefully pour back into the bowl (I simply picked up the parchment paper by the edges…don’t worry…it will not burn you.)
  • add in the onions and spices; stir gently to combine. then pour the molasses all around and give another stir to coat thoroughly
  • pour the coated veggies back onto the lined baking sheet
  • return to oven for 20 or so more minutes (give a quick stir about halfway through) ‘til tender
  • sprinkle with additional sea salt before serving

♥   ♥   ♥   ♥   ♥

God loves you!  ♥  (Don’t ever forget that!)

♥  coleen

Spinach Pakoras with Royal Dip

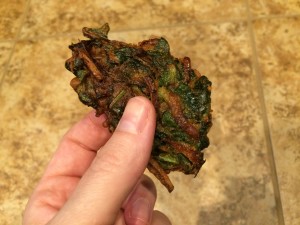
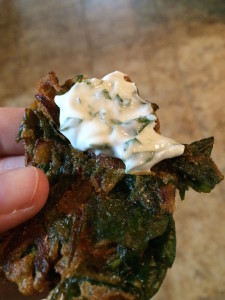
Spinach Pakora

I first had these delicious veggie fritters at a stand at the farmer’s market.  I’d never seen them before, but it was love at first bite!  I swore I’d have to find a way to make them at home – and I did!  Spinach Pakoras with Royal Dip are healthy, tasty, vegetarian and gluten-free too!  These Indian snacks are eaten with a minty yogurt dip and are a popular street food.

The only ingredient that may be a bit tough to find is chickpea flour.  Also called gram flour or besan flour, it’s just dried garbanzo beans ground powder-fine.  I made it at home, and while it took a bit of time because my food processor is wimpy, it worked very well!  If you do grind your own, you will need to sift it through a fine sieve, and return any pebbles to the food processor for a finer grind.  After that, it’s smooth sailing.  If you’re lucky enough to have an Indian grocery store nearby, stop in and buy some chickpea flour – and whatever else catches your eye and tempts your nose!

Spinach Pakora with Royal Dip

Spinach Pakoras with Royal Dip

Ingredients:

  • 1 cup Greek yogurt
  • 1 clove garlic, finely minced
  • 1 tablespoon cilantro, finely minced
  • 1 tablespoon mint, finely minced
  • 1 cup chickpea flour
  • 1 teaspoon curry powder
  • 1/2 teaspoon  ground fennel seeds
  • 2 tablespoons rice flour (or use more chickpea flour, or use regular flour)
  • 2 cups fresh spinach or other hearty greens (mustard, collard, kale), chopped
  • 1/2 onion, cut into very thin strings
  • 1/4 teaspoon salt
  • 1/4 cup water (may use more or less)
  • oil for frying:  grapeseed, coconut, peanut, or vegetable oil

Directions:

  1. Make the Royal Dip:  stir together the yogurt, garlic, cilantro, and mint.  Cover and refrigerate.
  2. Mix together the chickpea flour, curry powder, fennel, and rice flour in a large bowl.
  3. Mix in the spinach and onion. Stir to combine.
  4. Add about 3 tablespoons of water and stir.  Mix it all very well.  You don’t want a thin batter – you just want the flour to be wet and coating the veggies.  Add a bit of water until you make a thick batter.
  5. Heat the oil over a medium burner and drop the pakora batter in by the tablespoonful.  Try to flatten them out a bit so they are pancake-shaped as opposed to spherical.  Cook for about 3 minutes until crispy, then flip and cook the other side.
  6. Remove pakoras to a paper towel-lined plate and sprinkle with a bit of salt.  Serve hot with the Royal Dip.
Explore, experiment, enjoy! — Dana

To view even more of Dana’s unique recipe, you can visit her at Frugal Girlmet

Turkey-Quinoa Meatloaf

Ahhh, meatloaf!  Either you love it…or you hate it.  (Doesn’t it seem that most folks fall into one category or the other?)  How about your family?   Meatloaf is on our menu 2 or 3 times each month…along with the leftovers, too.  So, I am always on the lookout for an additional FABulous ingredient to change it up.   We got over the hurdle of making it gluten free by the addition of dehydrated potatoes (or, even better, dehydrated sweet potatoes…oh!my!).  But that doesn’t fit into our menu right now.  For a month or so now, we have been eating really low-carb…which presents a problem with meatloaf.  So I been thinking of something to sub in for breadcrumbs or dehydrated potatoes.  And I thought perhaps some leftover quinoa…and when I googled some recipes, I found that this was not an original thought. 😉  There’s a ton of recipes and variations out there!  Here is what we enjoyed; hope you and your loved ones do, too!

Turkey-Quinoa Meatloaf

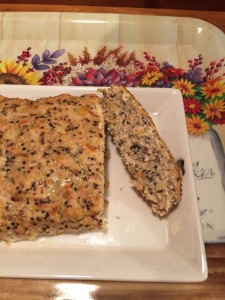
2015-10-13 18.46.21

ingredients :

1 T olive or coconut oil
1 small sweet onion
1 small zucchini
handful of baby carrots
1 stalk celery
1/2 red pepper
1/2 yellow pepper
handful mushrooms
2# ground turkey, 94 or 99%
2 large eggs, whisked
1/4 cup spicy mustard (or bbq sauce, or ketchup)
2 cups cooked quinoa, cooled
1 T dried parsley
1 T dried thyme (or oregano)
1 T each, sea salt and freshly ground pepper

directions :

  • preheat oven to 375
  • line a large baking sheet with parchment paper
  • clean all veggies and cut into chunks
  • in batches (depending on size of your food processor) chop all of the veggies into small-sized dice
  • heat oil in a large sauté pan over medium high heat
  • add the chopped veggies, stir ’til oil is well distributed.  cook veggie mixture ’til softened.  set aside and let cool
  • in a very large mixing bowl, combine turkey, eggs, cooled quinoa and vegetables, herbs and seasonings.
  • mix well by hand ’til thoroughly combined
  • divide in 1/2; shape into two equal loaves about 2-3 inches high on the parchment paper-lined baking sheet
  • bake for 40-45 minutes. done when temp reaches 165. allow to sit for 5 minutes or so to firm up

♥   ♥   ♥   ♥   ♥

God loves you!  ♥  (Don’t ever forget that!)

♥  coleen