December 17, 2024

Pumpkin Chia Pudding

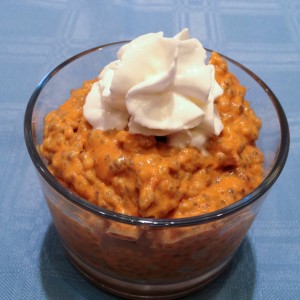
Pumpkin Chia Pudding resize

It seems like when we turn the calendar page to October, we all mysteriously start craving PUMPKIN!   I am not immune.   However, I didn’t want to make a big sugar bomb, so I searched around for something to satisfy the pumpkin craving and not spike my insulin.  Bingo:  Pumpkin Chia Pudding!

If you’ve never made chia pudding, now’s your chance.  I love it – the texture is a crazy blend of creamy and crunchy—like tapioca with attitude!  I make it with coconut milk, but you can try another nut milk or soy milk if that’s your thing.  This was ready to eat in an hour, and tastes just like pumpkin pie.  What more can you ask for?!

Pumpkin Chia Pudding

Ingredients:

  • 1 can full-fat coconut milk (about 2 cups)
  • 1/2 can pumpkin puree (about 1 cup, or use one cup of roasted and mashed pumpkin)
  • 1/2 teaspoon pumpkin pie spice (or combine cinnamon, nutmeg, allspice and cloves)
  • 1/2 teaspoon vanilla extract
  • 2 tablespoons honey or maple syrup
  • 1/4 cup chia seeds

Directions:

  1. In a blender or food processor, blend the coconut milk, pumpkin puree, pumpkin pie spice, vanilla, and honey together.
  2. Pour into a Tupperware container with a tight-fitting lid, or a very large jar with a lid.  Add the chia seeds and Shake!  Shake!  Shake!
  3. Refrigerate.  After another hour, shake again!  If it’s cold, go ahead and eat it!  Garnish with a little whipped cream if you like.

Explore, experiment, enjoy! — Dana


To view even more of Dana’s unique recipe, you can visit her at Frugal Girlmet!
Some of my Favorite Things…and Cheesecake

So it was suggested to me to post a recipe today that is one of my very own favorites…since it is my very own birthday!  Woo-hoo…59 ! So I began to think about some of my favorite things…here are  ♪♬♪ a few of my favorite things! ♪♬♪

anything lemon-y
cheese
thai food
butternut squash (prepared just about ANY way!)
a really good mixed greens and veggie salad

But none of these yummy, delicious things are truly enjoyable to me without being able to share them with others. My FAVORITE things include being able to share a meal and God’s blessings with family and friends around our big old oak table!


2013-10-20 17.41.15

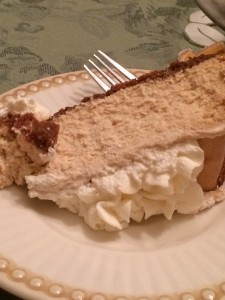
As far as a recipe for one of my favorites…well, I wasn’t quite sure and then decided to post my daughter’s Cheesecake Recipe (with her permission, of couse!). This was our indulgence for my birthday cake this year! This recipe is gluten free and refined sugar free; and prepares a huge cheesecake…enough for many slices! Enjoy!


2014-10-19 19.42.00

Cheesecake ala Kassia

crust
ingredients:
1 cup gf graham cracker crumbs (or traditional)
1/2 cup ground pecans
3 tablespoons softened butter

directions:

  • preheat oven to 400
  • butter sides and bottom of springform pan
  • mix ingredients together
  • pour mixture into springform pan and press firmly onto bottom of pan and up sides approximately 1+1/2″
  • bake for 10 minutes; remove from oven
  • set aside to cool
  • lower oven temp to 325

filling
ingredients:
4 (8 ounce) packages cream cheese or neufchatel (or combination)
1/2 cup coconut sugar
1/2 cup agave nectar (or honey)
16 drops vanilla creme stevia
4 eggs, room temperature
1 cup plain 2% Greek yogurt
2 tablespoons cornstarch
3/4 cup half&half
1 tablespoon vanilla extract
1 tablespoon lemon juice

directions:

  • (set eggs out when starting to make the crust)
  • adjust racks in oven so that one is in the high middle position (not the top position) and one is in the highest low position (#2 and #4 of 5)
  • put a roasting pan on the lower rack and add approximately 1″ water
  • beat cream cheese ‘til light and fluffy
  • gradually beat in sugar ‘til fully incorporated
  • add agave (or honey) and liquid stevia
  • add eggs one at a time, beating after each addition ‘til egg is fully incorporated
  • add cornstarch and beat ‘til smooth
  • add lemon juice and vanilla; beat ‘til fully incorporated
  • add yogurt and half½ beat just ‘til combined
  • carefully pour the filling mixture into the cooled crust
  • place filled springform pan into 325 oven; bake for 70-75 minutes ‘til very center of baked cheesecake is just a tiny bit jiggly when pan is gently wiggled
  • leave cheesecake in oven! turn oven off and leave door slightly ajar for two hours
  • it is best to refrigerate cheesecake for 24-48 hours before serving

topping
can be topped with {your choice} homemade whipped cream, canned pie filling, a drizzle of chocolate sauce, fresh fruit, caramel sauce, etc.

(I would love to hear what your favorite cheesecake topping is!)

♥  ♥  ♥  ♥  ♥

God loves you!  ♥  (Don’t ever forget that!)

♥  coleen

Barley Shiitake Risotto

Barley Shiitake Risotto resize

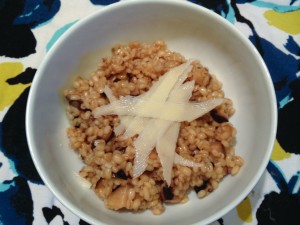
Sometimes I have to peek in my pantry and decide, “Enough is enough!”  Time to use up those odds and ends of things.  I had about a cup of barley left in a bag, so I went in search of a recipe for it.  I found one, made some tweaks, and now I present to you:  Barley Shiitake Risotto!

Barley has a fantastic texture:  firmer than rice, closer to a chewy and delicious wheat berry.  It is wonderful in stews and soups, but it is strong enough to be a star on its own.  This recipe calls for dried mushrooms.  You can use any kind of dried mushroom.  I buy dried shiitake mushrooms at the Korean market, and they’re much cheaper there than what you’ll pay for dried mushrooms at a regular grocery store.  For the broth, I made bone broth…but you can use any kind—chicken, beef, or even vegetable broth, that you like.  The original recipe called for grated parmesan, which I didn’t have.  I used a very hard white cheddar.  You can use any hard cheese you like – if you can grate it, you can use it here!

This is not a forget-it-type recipe.  You do need to stir it every few minutes to get the right texture.  Just start this on the stove while you’re making a salad or prepping the rest of your dinner and it will all work out…I promise!

Barley Shiitake Risotto

Ingredients:

  • 1 cup dried shiitake mushrooms (or other dried mushroom)
  • 1 cup white wine
  • 1 tablespoon olive oil
  • 1/2 small onion
  • 2 cloves garlic
  • 1 cup barley
  • 4-5 cups broth
  • salt and pepper to taste
  • 1/4 cup grated hard cheese (parmesan, very firm white cheddar, or other cheese)

Directions:

  1. Put the dried shiitake mushrooms in a bowl.  Pour over the white wine.  Put another bowl on top of the mushrooms so that they remain submerged in the wine and microwave for 30-60 seconds.  Let the mushrooms rehydrate while you work on step 2.
  2. Mince the onion fine.  In a large, heavy-bottomed pot, heat the olive oil, and add the onion.  Stir over medium heat.  You want the onions to turn golden.  Meanwhile, in a smaller pot, heat the broth to a simmer.  Keep it simmering over low heat.
  3. Mince the garlic, and add garlic and barley to the pan with the onions.  Stir to combine, cooking for 3 minutes.
  4. Squeeze the mushrooms over the bowl and chop.  Add the mushrooms and the wine from the bowl to the barley.
  5. When the wine is almost all absorbed, add a ladle-full of broth.  Stir to combine.  Repeat this process, adding more broth every five minutes or so, when the last addition of broth is nearly absorbed.  You don’t want the pan to get dry, but you don’t want to make soup either.  This should take about 30 minutes for all of the broth to be added, stirred, and absorbed.
  6. After all the broth is added, taste a bit of the barley.  It should be firm and chewy.  If it’s still dry and not al dente, add more stock or water.
  7. When barley is done—chewy and al dente—season with salt and pepper.  Stir in grated cheese and serve hot. (Garnish with extra cheese and take a photo – optional.)

Explore, experiment, enjoy! — Dana


To view even more of Dana’s unique recipe, you can visit her at Frugal Girlmet!

Testimony of a Healthy and Confident Woman

Melanie

2014 was a big year for my client, Melanie, as she became a healthy and confident woman on the inside and out.  As a wife, a mother, and a grandmother, she has a full-time job where she works at home on her computer all day.  Because she could not stay consistent with any ‘program,’ she felt she had lost all motivation to exercise and eat healthy.  She felt it was a constant battle of starting and stopping over and over.

Working from home left her at the mercy of food all day.  She was unsure of how to create an eating plan or the know-how of what to do for an exercise program. After working with me for almost four months, Melanie has lost 20 pounds and has adopted a healthy lifestyle that gives her the confidence to be the woman God has created her to be and fulfill His call on her life.

I am so proud of her accomplishments and asked Melanie to tell me about her new lifestyle. The following is Melanie’s story.

*   ~   ♥  ~  ✞  ~  ♥   ~   *

Crystal: What would be your major accomplishments in the past four months?

Melanie: I would truly have to say my major accomplishment is not the weight loss but the sense of balance I have found in my life.  I have come to realize (as you always say) that this is a journey for me.  It is not a ‘diet’ that I maintain for so many months until a particular goal is reached; but it is a lifestyle—a way of living that improves my life in all areas…physically, emotionally and spiritually.

Crystal: Did you experience a breakthrough or overcome a specific challenge?

Melanie: My major breakthrough was my walking program that I thoroughly enjoy! I would never have imagined when I started the coaching session that I would be walking 3-4 times a week and reaching my goal of 3 miles in an hour! This was truly a major breakthrough for me!

Melanie: Another realization I came to during this process was overcoming the mindset that if I could not do something perfectly, I would not do it at all. I am not near as hard on myself or expecting so much out of myself as I once did. I still want to do my best but when I don’t conquer some goal or meet some deadline I have set for myself, it is not ‘the end’ but rather an opportunity to re-group and see how I can improve and what I may need to do differently. I don’t just give up!

Crystal: What new behaviors have you put into place as a result of us working together?

Melanie: My new behaviors would have to be planning my snacks, trying to incorporate more fruits and vegetables in my diet, and, of course, the exercise.

Crystal: What are your next steps toward your wellness?

Melanie: My next steps for physical, mental and spiritual fitness would be as follows:

  • Physically, as far as the food plan is concerned, I need to continue to try and plan my meals. I have found out that is a major contributing factor to success. Planning is the key and makes a big difference.
  • Mentally, I just need to try and stay focused when obstacles come against me and remind myself that no two days are alike. It is a journey and I can’t let one bad day define a whole week.
  • Spiritually, because of my new-found confidence, I am going to be speaking soon to a ladies group. I know the Lord will continue to give me confidence to say what He would have me say. I am excited about where this may take me. I am 56 years old and I think my becoming who the Lord would have me to be is a journey as well. It is time for me to “step up to the plate” and let Him use me.  And, hey, if I don’t make a home run in my own eyes, it’s ok….He will still be pleased with me!

I seem to have a newfound confidence in myself and in my ability to continue to work toward a healthy lifestyle physically, emotionally and spiritually. I may have lost weight but I gained so much more in the process!”

*   ~   ♥  ~  ✞  ~  ♥   ~   *

Melanie’s story is an amazing testimony of how taking care of your body by learning how to eat healthy and exercise can give you confidence in other areas of your life.  Growing in confidence allows you to have the courage to be the woman God has called you to be and complete the job is calling you to do.

A personal note from Crystal…

I have a heart and passion for coaching women how to be fit physically and spiritually. I believe that no matter the season, or how busy your life or impossible circumstances may be, you can learn how to eat healthy, exercise, and make time with God a priority.  I also believe gaining control of your health can give you confidence to step out and fulfill what God would have you do today.

Girlfriends, at this season of my life, it is time for me to step down from blogging for Girlfriends Coffee Hour. I have been truly blessed by each of you and pray that God will continue to strengthen you physically and spiritually. I believe in each one of you and know you can do it! I would love to continue to be a resource and encouragement in your journey to better health and wellness. You can follow my blog and facebook page to receive weekly encouragement.

I love you all,
In Good Health,
Crystal

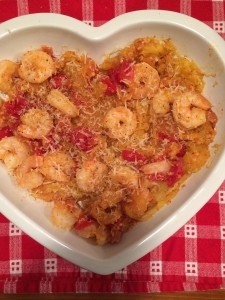
Spaghetti Squash with Garlicky Shrimp and Tomatoes

2014-10-07 20.48.38

Healthy but oh-so-yummy…that’s this dish! I think that, even if you were ‘piggish’ and loaded your plate up with a bigger than usual portion of this dish, you would still be around 300 calories!  Enjoy!

Here’s how I figure that…
– spaghetti squash has 31 calories and less than half a gram of fat per cup
– 4 ounce serving of shrimp is going to set you back 100 calories with less than 1 gram of fat
– the tomatoes contain approximately 25 calories in one cup
– red onion and garlic add maybe 50 or so calories
– of course, the 1 tablespoon of olive oil adds 120 calories; the butter 100 calories; and the grated asiago (like most cheeses) brings 100 more calories
– and there is a good amount of protein in this dish, too!
NOTE: each pound of spaghetti squash will yield approximately 2 cups cooked squash

ingredients:
1 (1+1/2 – 2 pound) spaghetti squash
1 tablespoon olive oil or salted butter
1 medium red onion, finely diced
8 ounces grape tomatoes, halved
2 tablespoons chopped garlic (I use jarred)
1 cup dry white wine (or chicken broth)
1/2# raw shrimp, tails pulled off
sea salt & freshly ground pepper (I use a lemon pepper blend grinder)
1 tablespoon salted butter
3 tablespoons fresh parsley (or 1 tablespoon dried)
1-2 ounces of finely grated asiago (or other strong flavored hard cheese)
lemon slices for finish & garnish

directions:

spaghetti squash (there are a number of other methods, see link for some suggestions):

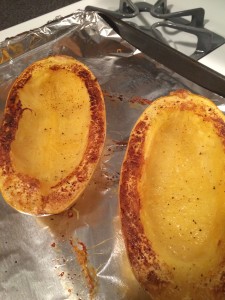
  1. 2014-10-07 18.42.53
    I simply cut one in half; pull out the seeds (only the seeds); rub the cut edges with a tiny bit of olive oil; season with sea salt and freshly ground pepper; place flat sides down on a piece of parchment paper or foil laid on a baking sheet.
  2. bake in a preheated 425 oven for 30 minutes; remove from oven, carefully flip over and allow to cool while you prepare the rest of the dish.
  3. when ready, take a serving spoon and run it along the edge between the skin of the squash and the cooked ‘meat’ of the squash. remove from skin and, using a fork, separate into strands.

shrimp and tomatoes:

  • heat olive oil in a large saute pan over medium-high heat
  • add the minced onion and cook ‘til it begins to soften and slightly brown around the edges, 2-3 minutes
  • add the diced tomatoes (flat side down) and a pinch of salt and a few grinds of pepper. lower heat to medium and allow to cook undisturbed for 6-7 minutes
  • the tomatoes will ‘give up’ some liquid and begin to create a sauce
    scatter the chopped garlic over the tomatoes, and stir constantly for an additional minute ‘til you begin to smell the garlic
  • pour in the wine (or broth), increase heat to medium and simmer ‘til the liquid has reduced by about half as much, maybe 5-6 minutes
  • add in the shrimp, and reduce heat to low; cook ‘til shrimp turn pink on the bottom side; flip over and cook ‘til shrimp are just pink all the way through; do not overcook
  • then when the shrimp have nearly cooked through, add the butter.  stir the butter so that it gets all around the contents of the pan and begins to slightly thicken the sauce
  • when the butter has fully incorporated, add the parsley and the spaghetti squash
  • gently fold everything together, allowing the spaghetti squash to reheat in the sauce for a minute or two so everything becomes the same temperature
  • sprinkle the shredded cheese across top
  • serve immediately with lemon to squeeze over the top; season to taste

♥  ♥  ♥  ♥  ♥

God loves you!  ♥  (Don’t ever forget that!)

♥  coleen

Cheesecake Baked Apples

Cheesecake Baked Apples resize

I love baked apples.  They’re tender yet sturdy, and you can fill them with lovely loads of raisins, spices and nuts.  Since my girl is allergic to nuts, I needed to find something different.  Ta-da!  Cheesecake Baked Apples!

I used Gala apples, and I would suggest you use either Galas or Fujis.  You can top these with whatever you like – nuts, crumbled cookies, or even ice cream!  We kept it simple and added some whipped cream.

You know a dessert is a winner when it suddenly grows quiet in the dining room.  My girls were so serious eating these healthy treats they stopped their near-constant girl chatter.  Try these easy baked apples today!

Cheesecake Baked Apples

Ingredients:

  • 6 apples (use Gala or Fuji)
  • 8 ounces cream cheese, softened
  • 1/4 cup sugar
  • 1 teaspoon vanilla
  • 1 egg
  • 1 teaspoon cinnamon (I added a little ground nutmeg, too)

Directions:

  1. Slice off the top of the apples.  With a knife, cut out the core and scoop out the apple flesh. You want to leave at least 1/4 inch of apple “wall.”   Make sure you don’t cut through the bottom!
  2. In a bowl, blend together the cream cheese, sugar, vanilla, egg, and cinnamon.  If you like, you can add a little bit of the scooped-out apple flesh; just chop it up and stir it in.  Fill the apples about 3/4 full.
  3. Bake for about 20 minutes in a 350*F oven.  Remove and chill in the refrigerator until ready to serve.

Explore, experiment, enjoy! — Dana


To view even more of Dana’s unique recipe, you can visit her at Frugal Girlmet!
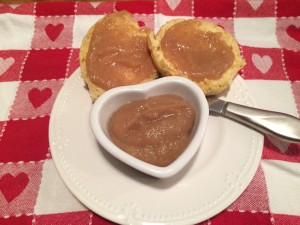
Pear Butter

I’m just warning you—if you make this pear butter, your family is going to be looking around for a pie!  The aroma is amazing!  This is a super simple recipe and requires very little attention as it cooks.  I put it together in the morning, and it gave a very “autumnal” feel to the house inspiring me to <finally> switch out the summery wreaths to more fall-ish ones and adding little bits of fall decor around and about!

This recipe definitely fits in with our healthy but oh-so-yummy POV, too!  If you are someone who knows how to can (not in my skill set…at least as of yet!), this would be an excellent choice to fill some jars and store them away. I am just keeping ours in the ‘fridge while it lasts.  Someone suggested to me to add a small bowlful to a cheese platter; oh, my…wouldn’t that be yummy?!!  Here are a few ideas of ways I am thinking of to use the pear butter.  (I would love to hear your ideas, too…please share!)

  • mixed in with granola and yogurt
  • topping a bowl of hot oatmeal
  • spread on a piece of toast or a bagel w/cream cheese
  • on a peanut butter or almond butter sandwich
  • served with pork chops or a pork tenderloin
  • mixed in with roasted veggies
  • base for a vinaigrette

Pear Butter

2014-10-04 22.26.47

ingredients:
2-2+1/2 pounds of ripe pears, peeled and cored
1 large apple, peeled and cored
1 cup of water
2 chai teabags
3 small pieces of crystallized ginger OR 1/4 cup liquid sweetener
(i.e., honey, agave, maybe even maple syrup or molasses)
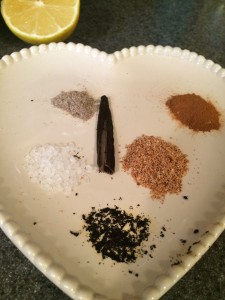
1/2 vanilla bean, seeds scraped out2014-10-04 14.38.27
1/2 teaspoon cinnamon
1/4 teaspoon cardamom
1/2 teaspoon nutmeg
1/4 teaspoon sea salt
juice of 1/2 of a lemon


directions:

  • chop fruit into smallish cubes (1-1+1/2″)
  • in a 2 quart saucepan, bring water, fruit, and tea bags to a boil; lower heat and allow to simmer for 30 minutes
  • discard tea bag
  • using * an immersion blender puree the cooked fruit
  • pour into a mini-crockpot and cook on low for 2 hours, stirring every 20 minute or so
  • after 2 hours, add in the seasonings and the lemon juice; stir really well and cook for 1 more hour. it is finished when the quantity has reduced by 1/4 to 1/3, and it is nice and thick
  • blend to make it REALLY smooth!  done!  enjoy!

NOTE: it is super important not to tightly seal the crockpot or else the pear butter will become watery and not cook down into a nice, thick consistency. I simply propped up the lidon one side the whole time it was cooking with the spatula I was using to stir

* instead of an immersion blender, puree the cooked fruit and liquid very carefully in a standard blender or a food processor…or you could even mash it with a potato masher. the finer it is in the end, the better “butter” you will make.

♥  ♥  ♥  ♥  ♥

God loves you!  ♥  (Don’t ever forget that!)

♥  coleen

Maple-Roasted Chicken and Vegetables

Maple-Roasted Chicken and Vegetables resize

This recipe is one of those great finds:  Nutritious?  Absolutely…and Paleo too (if that’s your thing).  Easy?  You bet!  It’s a one-pot masterpiece with a quick prep time and easy clean-up.  Delicious?  Incredibly!  My family ate it all and there were no leftovers.  What is this delightful dinner?  Maple-Roasted Chicken and Vegetables!

For this recipe, you need chicken thighs with the bone and the skin still on.  Rubbed with a little olive oil, the skin crisps up and keeps the meat tender.  You can use whatever root vegetables you like.  I used baby carrots, Korean sweet potatoes (red skin with white flesh) and onions.  You could also try parsnips, turnips, butternut squash, apples, or even beets!  This recipe also calls for smoked paprika, which gives it a little smoky bite but not a lot of heat.  If you don’t have it, try a sprinkle of dried herbs instead, or even some curry powder!  Ready?  Let’s go!

Maple-Roasted Chicken and Vegetables

Ingredients:

  • 2 pounds chicken thighs, bone-in, skin on
  • 1 cup baby carrots
  • 3 sweet potatoes, peeled and sliced into baby carrot-sized fingers
  • 1 onion, cut into small wedges
  • 2 tablespoons olive oil
  • 2 tablespoons maple syrup
  • salt and pepper
  • 1/2 teaspoon sweet smoked paprika

Directions:

  1. Heat the oven to 400*F.  Use a large Dutch oven or large baking dish.  On the bottom of the pan, toss together the baby carrots, sliced sweet potato, and sliced onion.  Add one tablespoon olive oil and toss with the root vegetables.  Season with salt and pepper.
  2. Place the chicken thighs on top of the vegetables, skin side up.  Pat the skin dry with a paper towel.  Drip a little oil onto the thighs and rub it in with your fingers.  You want a thin coating of oil over all the skin.  Drizzle the maple syrup over the chicken, then season with salt, pepper, and the paprika.
  3. Cook uncovered for one hour or more, until the chicken registers at least 165*F on a meat thermometer.
  4. Serve with the vegetables.

Explore, experiment, enjoy! — Dana


To view even more of Dana’s unique recipe, you can visit her at Frugal Girlmet!
Does Your Time Reflect Your Priorities?

my time
After receiving the news that she would have to drive 45 minutes to pick up her 1 million dollar lottery check, a busy woman states that she “does not have time” and will have to decline her winnings.

Can you imagine? Like me, I am sure you are thinking “I would find the time!” It would be important because I know that:

• My life would change
• I would never HAVE to work again
• My kids college would be paid
• I would never have to worry about money again

Without a doubt, picking up that money would become a PRIORITY that day because of the benefits I would receive by finding 45 minutes in my day.

How often do you say ‘I don’t have time for exercise or daily quiet time’? Could you find just a few minutes in your day because you know the benefits you would receive such as:
• Less stress
• More peace
• Better health
• Look and feel better

Let’s be honest…is it that you don’t have the time OR have you not made exercise and daily quiet time a priority?

WHAT IS A PRIORITY?
A priority has been defined as ‘something afforded or deserving attention’.  The truth is we will make time for the things that are a PRIORITY to us, like picking up a million dollars. We will rearrange schedules, cancel meetings, or say “no.” to certain things so that it can be done.

DOES YOUR TIME = PRIORITIES
Take a couple of minutes today during lunch, waiting in line, or driving, to think and answer these two questions:

#1
In order of importance, what is really important to you?
(Here is an example of what it may look like.)
• God
• Husband
• Family
• Health
• Career

#2
Is your time prioritized each day around what is important to you….in the same order?

If God is a quick prayer in the car, and there is no quality time spent with your husband or kids, and there is nothing done each day toward your physical/mental health such as exercise and/or quiet time—they may not be your TRUE priorities. Our time demonstrates what is a priority in our life and, just like finding the time to pick up the lottery winnings, we can find time for what we say is important.

Just like taking the time to pick up your money would change your life,
how would your life change if your time was better spent toward your priorities?

In Good Health,
Crystal

Granola and Grilled Peaches

This recipe came about backwards…first I was looking for something to do with a few gorgeous, huge, fragrant peaches. Then I saw a picture of a grilled peach topped with homemade vanilla ice cream with a big scoop of granola over top. Oh, yeah!

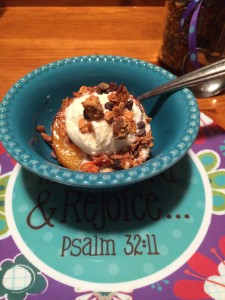
2014-09-28 20.21.19

Grilled Peaches with Ice Cream and Granola

I don’t know if you remember but just a few weeks ago, Dana shared her recipe for “No-Ice-Cream-Machine-Needed” Ice Cream (here’s a link).  THAT would be a great option for the ice cream portion.   To put this yummy simple dessert together, slice a big peach around the middle (the ‘equator’), pull the pit out, and put on a hot grill for 3-4 minutes. (Other options: either place face down on a hot stovetop grill pan or simply broil for a few minutes.)  When the peach halves get a little caramelized, place one (or two!) into a bowl. Top with a couple of tablespoons of granola, a scoop (or two!) of vanilla ice cream, and some additional granola scattered on top.  Get your spoon ready…the ice cream will begin to melt quickly! Enjoy!

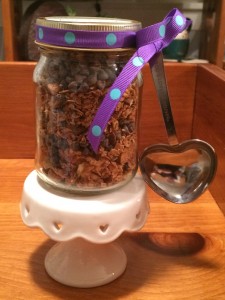
2014-09-28 20.25.33

Your granola will keep well in the pantry in a glass jar with a lid.  I put a small scoop right into or attached to the jar for easy access to a scoop on the fly for my husband. Oh, and he really likes this best when I add a bag of mini chocolate chips (I just mix it in when the granola is cool enough to place in the jar). Just sayin’.

Granola

ingredients:
5 cup rolled oats*
3 cups nuts and seeds (almonds, walnuts, pistachios, pumpkin seeds, sesame seeds, sunflower seeds, etc.)** – give a quick chop to whole nuts
2 teaspoons spice (cinnamon, or cardamon, or pumpkin pie spice, etc.)
1+1/2 teaspoons sea salt
3/4 cup liquid sweetener (maple syrup, honey, agave nectar)
1/3 cup oil (coconut or canola)
1 teaspoon extract (almond or vanilla)
1+1/2 cups mixed dried fruit (apricots, golden raisins, banana chips, pineapple, papaya, etc.)

directions:

  • preheat the oven to 325
  • place parchment paper in a baking or sheet pan (with sides); use enough parchment paper to slightly extend to use as ‘handles’
  • warm the liquid ingredients for 20-30 seconds in the microwave
  • mix dry ingredients, spice, and salt together in a large bowl; stir well
  • pour the warm liquid ingredients over top and stir it all up ‘til all the oats are well coated
  • place the mixture onto the parchment lined pan; with slightly wet hands, press down gently into an even layer. this will help to make some ‘chunks’
  • bake for 15 minutes or so; remove pan from oven and add the dried fruit. stir to incorporate the fruit and so that everything is cooking evenly. try to pull the mixture from the outside edges to the middle, and the middle ‘stuff’ out to the edges of the pan.
  • return to oven and bake for another 15 minutes or so
  • remove pan, add any roasted nuts you were holding out and stir gently again; place back in oven for 15 minutes…or so
  • at this point, your granola quite possibly is done. the goal is not wet, slightly crunchy, and just beginning to turn golden brown. (y’know, like granola!) if done, let cool before popping a handful in your mouth. if not, 10-15 additional minutes should do it
  • let thoroughly cool before placing in glass storage jar (optional: toss in a bag of mini chocolate chips)

Makes 9-10 cups

*    be sure to use ‘old-fashioned, rolled’ oats not ‘quick-cooking oats! the latter will break down as the granola bakes. 🙁
**  IF you are using any nuts/seeds that are already roasted (like the sunflower seeds I used), DO NOT add them ‘til the last 10-15 minutes. Since they are already ‘roasted’ they will burn if added for the entire baking time

  ♥   ♥   ♥  

God loves you!  ♥  (Don’t ever forget that!)

♥  coleen