December 26, 2024

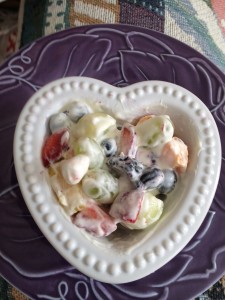
Ambrosia Salad – Remix

2014-04-20 09.54.41

Our extended family gets together (as many as can make the trip, that is!) each year at my Dad and step-mom’s to celebrate Easter together. There are a few things that are constants: the egg hunt including the gold glitter egg with the $5 bill inside, the Polish kielbasa and Easter cheese “ citic “platter, and the array of side dishes to accompany the ham my Dad bakes. This year’s buffet lineup included: Kassia’s gluten-free mac and cheese, Betsy’s coleslaw, Kelly’s apple&spinach salad, Brigit’s layered salad, scalloped potatoes, my broccoli craisin salad, a pickle&olive plate, applesauce, gluten free brioche, croissants, and ambrosia salad. It looked colorful and was so very delicious…made with love!

So, when it fell to me to prepare the ambrosia salad, I decided to do a remix and make it in my p.o.v.—healthy but oh-so-yummy! Here’s how:

  • no canned fruit
  • no Cool-whip
  • no maraschino cherries

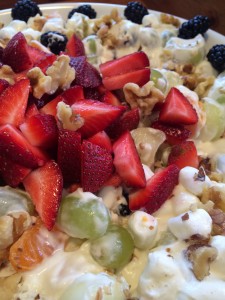
This recipe is full of fresh fruit.  Each time you prepare this dish, you could include a different combination of fruit ingredients!  This fruit salad doesn’t need much sugar added to the whipped cream component because of all the yummy sweetness of the fresh fruit.
Adjust the quantity of the ingredients based on the number of servings you are aiming for!  We had 30 hungry eaters (not including the babies) so I went BIG on the amounts.  Also, ‘some’ people don’t enjoy the shredded coconut component of this salad (crazy, right?)…so I’ve included it as an optional ingredient.  Enjoy!

Ingredients:2014-04-20 09.44.01
Whipped Cream:
1/2 quart heavy cream
2 teaspoons almond (or vanilla) extract
4 tablespoons powdered sugar

Fruit Salad:
1 pineapple
1 cantaloupe (or other melon)
1 pint blueberries
1 pint blackberries (or raspberries)
1 pound strawberries
3 or 4 apples (I used Granny Smith)
5 or 6 clementines
3-4 bananas
2 pounds grapes
2 cups mini marshmallows
1 cup broken pecan (or walnuts)
1 cup Greek yogurt, I used vanilla
whipped cream (recipe above)
1 cup + / – shredded coconut (optional)

Directions:

  • Once the cream is whipped and sweetened, fold in the yogurt, blending together very well. Keep in the refrigerator ‘til ready to use.
  • Prepare the fruit…wash and dry the berries and grapes; peel and core the pineapple; wash, core the apples; peel and section the tangerines; peel and scoop out the seeds in the melon.
  • Cut and chop the prepared fruit remembering to keep all pieces bite-size! I always use a melon baller for any melon; the rounded shapes are so much more fun and interesting!  Prep the bananas last, sprinkling w/a little lemon juice or pineapple juice, to prevent browning.
  • Place into a very large mixing bowl (or just use your largest stockpot).
  • Scatter the mini-marshmallows and the nuts across the top.
  • Pour the whipped cream mixture over top and fold together, gently but thoroughly. Done!

♥  ♥  ♥  ♥  ♥

God loves you!  ♥  (Don’t ever forget that!)

♥  coleen
Strawberry Muffins (GF)

2014-04-03 11.47.32

So, I don’t know about your area, but we have had strawberries in abundance here in upstate NY…and they have been beautiful and fragrant and delicious!  My granddaughter, Kaylie Joy, just LOVES strawberries!  I had made a batch of these muffins and when she tasted one, she asked if we could bake some together…how could i say ‘no’?!  We actually doubled the ingredients and it worked very well. And we baked them up as a dozen standard size muffins and 3 dozen mini-muffins.  In either size, they baked beautifully!

kayliemuffins
This recipe (adapted from a similar one over at the Spunky Coconut – one of my very favorite gluten free, refined sugar free blogger/bakers) fits well into our healthy but-oh-so-yummy point of view:

  • uses honey or agave nectar and liquid stevia rather than refined white sugar
  • are gluten free with protein-rich almond flour and a bit of brown rice flour replacing wheat flour

Strawberry Muffins (make approximately 14)

2014-04-04 14.56.51

Ingredients:
2 cups almond flour
1/2 cup brown rice flour
1/2 teaspoon baking soda
1/2 teaspoon finely ground sea salt
1 cup fresh strawberries
1/2 cup coconut oil, liquified
1/3 cup honey or agave nectar
6-8 drops vanilla liquid stevia
1/2 teaspoon vanilla extract
3 large eggs, at room temperature

Directions:

  • preheat oven to 350
  • line muffin cups with paper liners
  • wash and dry strawberries; chop finely (not mushed, but small)
  • sift together the dry ingredients; set aside
  • pour liquified coconut oil, sweeteners, and extract into bowl
  • using electric mixer, beat for one minute, then add eggs one at a time
  • slowly add dry ingredients, beating just ’til thoroughly combined
  • by hand, gently fold in strawberries
  • scoop into muffin cups, filling almost to brim
  • bake at 350 degrees for about 25 minutes
  • remove from muffin pan onto cooling rack; allow to completely cool


Tip: Coconut oil needs to liquify in order to be blended into a batter. Depending on the time of year (summer..no problem; winter…a problem) you might need to warm it up. You could either scoop out the required amount of coconut oil and place it in a glass measuring cup on your stovetop as the oven preheats. Or it can be microwaved for approximately 30+ seconds (depending on the quantity you need) and then stirred. Either way add it into your mixing bowl and combine with other liquid ingredients prior to adding room temperature eggs.

♥   ♥   ♥   ♥   ♥

God loves you!  ♥  (Don’t ever forget that!)

♥  coleen
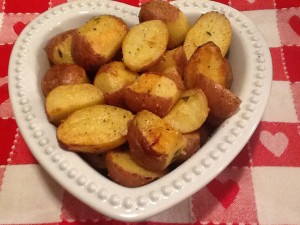
Lemon – Mustard Roasted Baby Potatoes

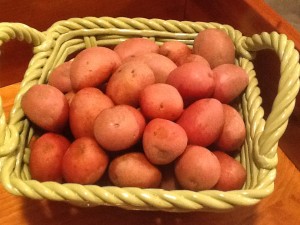
2014-03-29 20.57.45Sometimes I find that I am preparing the same boring side dishes to serve with our meals.  How about you?  So I always have my eye open for little tweaks or twists on the ‘same old, same old’ standards…like roasted potatoes.  These were on my menu this week. So I planned on buying some red potatoes.  And then, when I was at the grocery store, I found some lovely baby red potatoes.  Oh, happy me!

2014-03-29 20.08.29

Take a look around in the produce aisle at the grocery store or at the Farmer’s market.  They come in either red or yellow (Yukon Gold) or (my favorites!) even purple varieties.  When you find them, buy ‘em!  You will not regret it!  They can be boiled, steamed, roasted, baked, grilled…I suppose you could even microwave them.

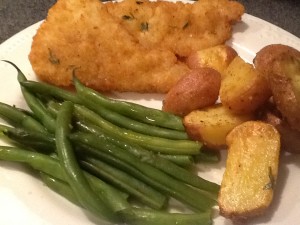
These Lemon-Mustard Potatoes will get some crispy edges and have a yummy coating baked right on!  We enjoyed them with baked tilapia filets and steamed fresh green beans.  This recipe makes approximately 4 servings…easily doubled!

2014-03-29 21.05.09

Lemon – Mustard Roasted Baby Potatoes

Ingredients:
3 tablespoons extra-virgin olive oil
Zest of 1 large lemon
Juice of that lemon (approximately 3 tablespoons)
2 tablespoons Dijon mustard
1 tablespoon fresh thyme (or dried, if that is all you have)
1/2 teaspoon sea salt
1/2 teaspoon freshly ground black pepper (I used lemon pepper)

1 1/2 pounds baby red potatoes
1/2 teaspoon kosher salt
1/2 teaspoon freshly ground black pepper

Directions:

  • Preheat oven to 375. Line a heavy baking sheet with foil. Set aside.

For the vinaigrette:

  • Zest and juice the lemon.
  • In a large bowl, whisk together the lemon juice, lemon zest, olive oil, mustard, thyme, salt, and pepper until smooth. Remove 2 tablespoons of the vinaigrette and set aside. (I used this extra bit to coat the fish filets.)

Prepare the potatoes:

  • Scrub the potatoes.
  • Cut in half any that are larger so that all of the potatoes are approximately the same size.
  • Place the prepared potatoes into the bowl along with the vinaigrette.
  • Stir to thoroughly coat them.
  • Pour out onto the lined baking sheet.
  • Bake for 15 minutes, then turn over.
  • Check the potatoes with a thin-bladed knife after 25 minutes. They are done when the knife easily slides right through the potato. They might take up to 45 minutes depending on their size. (If not quite done, continue roasting.)
  • When done, scoop into a serving bowl and sprinkle with a bit more salt and pepper. Enjoy!

♥  ♥  ♥  ♥  ♥

God loves you!  ♥  (Don’t ever forget that!)

♥  coleen

 

Healthy St. Paddy’s Day Shakes

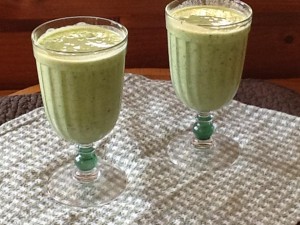
Sorry…breaking into our little series on spring veggies ‘cause I just have to share these healthy but-oh-so-yummy! green minty “shakes” with you!  It is tradition to celebrate St. Paddy’s Day in our family…heritage and all, y’know!  (Your name can’t be coleen ann brigit mcelroy hayden…and not recognize your Irish background!)

So, I have to admit to indulging <in the past!> in a Shamrock Shake from a certain fast food place…uh-huh…you know!  But we are working on having a healthier eating lifestyle now…by God’s grace!…and so I took a little peek ‘n see about the nutrition facts (from the manufacturer) for that minty shake of my past.  Can you say “Holy Saint Paddy!”  530 calories, 86 grams of carbs (of which 73 were sugar carbs, mostly corn syrup), and 15 grams of fat in a 16 ounce cup!

healthyshamrockshake

I think you will find this healthy but-oh-so-yummy version equally satisfying and delicious. I would love to hear from you!

Ingredients:
1 scoop protein powder
2 cups almond milk
1/2 teaspoon almond extract
1/2 teaspoon peppermint extract
1 packet of stevia sweetener
2 hefty tablespoons of vanilla greek yogurt
1 ripe avocado
2 handfuls of raw spinach
2 cut-up frozen bananas
4 or 5 ice cubes

Directions:

  • Start off with all the liquid ingredients, the protein powder and stevia; blend for 10-15 seconds.
  • Layer in the balance of the ingredients. Whirl away ‘til nicely blended!
  • This made more than enough for two big servings; the glasses pictured hold more than 14 ounces each.

** Certainly can be prepared in a standard blender, too. I would suggest doing it in two batches, however, using 1/2 of the ingredients at a time.

♥  ♥  ♥  ♥  ♥

God loves you!  ♥  (Don’t ever forget that!)

♥  coleen

Garlicky Shrimp and Veggies with Red Quinoa

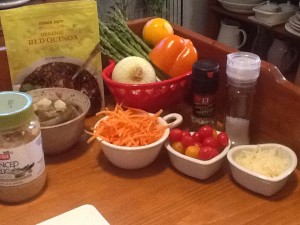
Here we are…getting closer and closer to Spring every day!  Today’s recipe continues to celebrate the return of Spring veggies!  In this veggie-licious dish, we have the first of the season (at least here in NY) sweet onions (I like to use the Vidalias).  Along with asparagus, carrots, tiny tomatoes, and sweet bell peppers.  This is a healthy but-oh-so-yummy dish to serve either on a weeknight (comes together rather quickly!) or to serve to guests.

Garlicky Shrimp and Spring Veggies with Red Quinoa

2014-03-09 19.19.19

Ingredients:
1/2 cup quinoa
1 cup chicken broth
2 tablespoons extra virgin olive oil
1 small sweet onion (Vidalia), halved and sliced 2014-03-09 18.43.48
1/2 red (or yellow or orange) Bell pepper, sliced
1/2 cup shredded carrot
1 pound asparagus, woody ends removed
1 cup grape or cherry tomatoes, halved
1/2 pound uncooked shrimp, peeled and deveined
2 tablespoons minced garlic (I use jarred)
1+1/2 tablespoons freshly ground lemon pepper mix
1-2 tablespoons sea salt
1/4 cup dry white wine
1 small lemon, juiced
4 tablespoons freshly grated Parmesan

Directions:

  • In a small saucepan, stir chicken broth and quinoa. Over medium heat, bring to a boil. Reduce heat to low; cover. Let simmer ‘til broth is absorbed about 20 minutes. When done, remove from heat; leave in pan ‘til ready to serve.
  • In a large saute pan, heat olive oil and add sliced onions and peppers. Cook for 5 minutes, stirring occasionally.
  • In the meantime, cut tips off asparagus; set aside. Cut remainder of asparagus stems into 1″ pieces.
  • Then add shredded carrots and cut-up asparagus stems (not tips) into saute pan. Continue to cook for 7-8 minutes ‘til crisp tender.
  • Remove to a bowl, season with salt and pepper to taste and set aside.
  • Place tomatoes in saute pan (adding a small amount of olive oil IF needed), cut side down. Let cook for 3-4 minutes to soften.
  • Add in shrimp and asparagus tips. Cook for 4-5 minutes ‘til shrimp are beginning to turn pink. Flip over to cook on other side. Add chopped garlic and cook for just one more minute, stirring gently. Remove just the shrimp to a bowl. Season with salt and pepper.
  • Pour white wine and lemon juice into saute pan and simmer for about 3-4 minutes. Stir well. Remove from heat.
  • Add back in sauteed shrimp and cooked veggies. Sprinkle with 2 tablespoons grated Parm.

Serve on a large platter; pour out the quinoa and top with the shrimp/veggie mixture. Sprinkle with the rest of the Parm. Enjoy!

♥  ♥  ♥  ♥  ♥

God loves you!  ♥  (Don’t ever forget that!)

♥  coleen
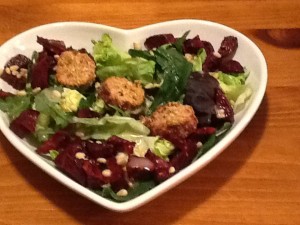
Roasted Beet Salad with Goat Cheese Medallions

2014-03-02 19.11.32

It is almost spring!!!  Yes, yes…I KNOW…it is still snowy (I have looked outside!).

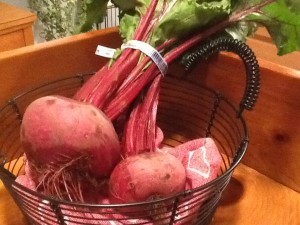
In the produce department, we are starting to see the return of the spring vegetables!  So here we go!  For the next few weeks, we will do a mini-series featuring spring vegetables…last week we featured an Asparagus Pasta Bake.   Today’s recipe is a salad with roasted beets, and baby lettuces such as arugula and kale.  YUMMMMMY!  Enjoy!

Roasted Beet Salad with Warm Goat Cheese Medallions

2014-03-03 00.58.19

Ingredients:
1/4 cup balsamic vinegar (I used honey balsamic)
1 tablespoon honey
1/3 cup extra-virgin olive oil, plus 2 tablespoons
Kosher salt and freshly ground black pepper
3-4 medium beets, peeled and cut into bite-size pieces
2 cups fresh arugula
2 cups baby kale
1 head romaine, chopped (or your favorite lettuce blend)
1/2 cup sliced almonds or pignoli
8 ounce log of goat cheese
1 egg
1 tablespoon water
1/2 cup almond meal/flour
1/2 cup sliced almonds, finely chopped (by hand or with a food processor)

Directions:
Goat Cheese Medallions:

  • Place the goat cheese log into the freezer ‘til firm (10-15 minutes).
  • Remove from freezer and carefully slice with thin, sharp knife into 8 rounds.
  • Preheat oven to 350.
  • Whisk together the egg and water.
  • Spread the almond flour on a paper plate, and the chopped almonds onto a separate plate.  Coat each goat cheese round with almond flour.
  • Dip each round in the egg wash and then roll in the chopped almonds to coat.
  • Place the coated goat cheese rounds on a parchment-lined baking sheet.
  • Bake for 10 minutes. Turn them over and broil on the top rack of the oven for 2-3 minutes, until the almonds turn golden brown. (Watch carefully!) Remove from oven and set aside.

Beets:

  • Line a baking sheet with foil. Raise oven temp to 450.
  • Whisk the balsamic vinegar and honey together in a small bowl to blend.
  • Slowly whisk in the oil. Season the vinaigrette with plenty of salt and LOTS of pepper.
  • Toss the beets in a small bowl with the 2 T of evoo and just a drizzle of the vinaigrette; thoroughly coat.
  • Place the beets on the foil-lined baking sheet and roast ‘til the beets are slightly caramelized, stirring once or twice, for about 30 minutes. Set aside to cool.

Salad:

  • Toss the lettuces along with a small amount of the vinaigrette in a large bowl ‘til lightly coated.
  • Season the salad, to taste, with additional salt and pepper. Place the dressed salad onto a large serving plate.
  • Arrange the beets around the salad.
  • Sprinkle with the nuts and top with the warm goat cheese medallions.
  • Serve with the extra vinaigrette on the side.

♥  ♥  ♥  ♥  ♥

God loves you!  ♥  (Don’t ever forget that!)

♥  coleen
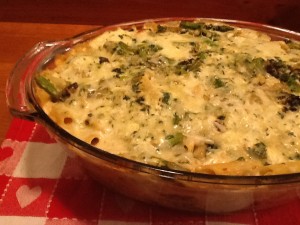
Asparagus Pasta Bake

Have you noticed?  In the produce department, we are starting to see the return of the spring vegetables!  Hip-hip-hooray!  Oh, don’t get me wrong…I love winter veggies, too!  If you have followed the Monday installment of the At Home w/ GCH blog for any length of time, you KNOW we are big fans of butternut squash, brussels sprouts, and other winter veggies.  But, it’s almost spring!  So here we go! For the next few weeks, we will do a mini-series featuring spring vegetables… starting today with asparagus!  Oh, yum!  Today’s recipe features asparagus in a pasta bake.  This recipe could also be prepared using lasagna noodles, if you prefer.

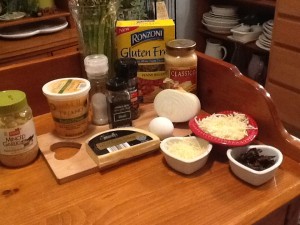
A question and a tip for our gluten-free friends: Have you tried the new pasta that RONZONI has recently brought to the market?  It is fantastic!  Truly the best gluten-free pasta we have tried (and we have tried m-a-n-y different brands).  It is a multi-grain blend of white rice, brown rice, corn, and quinoa.  It cooks up well, holds sauce well, bakes well, even reheats fairly well!  Now it is still pasta so, of course, it has carbs!  But a serving, according to the facts label on the box, has 2g of fiber (8% DV) and 4g of protein even. I highly recommend this product.

2014-02-23 22.10.12

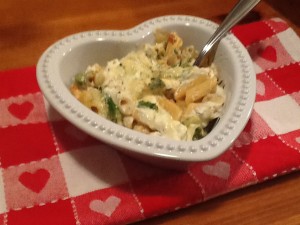
Asparagus Pasta Bake

Ingredients:

1 (12 ounce) box gluten free penne pasta2014-02-23 20.50.20
1 (15 ounce) jar alfredo sauce (I use ‘Classico’ brand; has no additives)
1 cup chicken or vegetable broth
2 tablespoons olive oil
1/2 cup sliced sun-dried tomatoes
1/2 cup fresh basil leaves, packed
1 cup baby spinach, packed
1/2 cup grated Parmesan cheese, plus additional 1/2 cup
1 medium onion, diced
1# asparagus, trimmed and cut into 1-inch pieces
2 tablespoons chopped garlic (I use jarred)
1 large egg
1 (15-ounce) container part skim ricotta cheese
1 tablespoon dried basil
1 teaspoon freshly ground black pepper
2 cups shredded part skim mozzarella cheese, divided

Directions:

  • Pasta:  Cook pasta following directions on box. Drain and set aside.
  • Preheat oven to 350.
  • Heat the Alfredo sauce and the chicken broth together. Set aside.
  • In a food processor combine the sun-dried tomatoes, basil, and baby spinach. Pulse until the mixture is combined.
  • In a medium-sized bowl, whisk the egg and then add in the ricotta, dried basil, 1 cup of shredded mozzarella, and freshly ground pepper.  Stir well; then add in the sun-dried tomato mixture.  Set aside.
  • In a large saute pan, heat 2 tablespoons olive oil over medium heat. Add the diced onion, and cook 4-5 minutes.
  • Add in the cut up asparagus and cook ‘til still crisp-tender, another 5 minutes or so.
  • And finally add in the chopped garlic and cook for 1 more minute, stirring constantly. Turn heat off.
  • In a 9 by 13-inch baking dish, ladle about 1/2 cup of the heated alfredo sauce onto the bottom; spread to cover. Place 1/3 of the cooked pasta, then 1/3 of the ricotta mixture, 1/3 of the cooked veggies, and a sprinkling of shredded mozzarella. Repeat this in order for 2 additional layers.
  • Cover tightly with aluminum foil and bake until the ingredients are just starting to bubble and the cheeses are melting, about 25 minutes.
  • Remove the foil and bump heat up to 425 and heat for 5 more minutes.
  • Remove from oven and let set for 10 minutes; then serve with additional sauce and shredded parmesan alongside.  Enjoy!

2014-02-23 22.13.10


♥  ♥  ♥  ♥  ♥

God loves you!  ♥  (Don’t ever forget that!)

♥  coleen
Homemade Chicken Noodle Soup

Feeling badly that I cannot just pop over to your house and bring you a nice big container of steamy, homemade chicken noodle soup….  🙁  But you live in Michigan, and Florida, and Texas, and Colorado, and South Carolina.  So this recipe and my prayers for your healing will have to suffice, my friends!

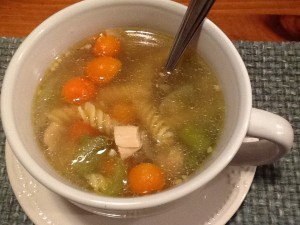
Chicken Noodle Soup truly is good medicine!  Raise your <sanitized> hand if you agree!  And truly so easy to make…lots of variations, too.  Here is my “Not from a Box, Nor from a Can” Homemade Chicken Broth recipe to start with.  Even just the aroma of this simple broth wafting through your home is going to make you feel a teeny bit better!

2014-02-16 19.29.02

Homemade Chicken Noodle Soup  (makes 2+ quarts, approximately 4 servings)

Ingredients:
1 tablespoon butter
1/2 medium sweet onion
2 small carrots, peeled
1 stalk celery
1 (or more!) tablespoon chopped garlic (I use jarred)
2 quarts of your amazing Homemade Chicken Broth
1+1/2- 2 cups (or so) of chicken bits
6-8 ounces egg noodles (we use gluten free noodles)
2 tablespoons chopped parsley

Directions:

  • Melt the butter over medium heat in a 3-4 quart sized saucepan.
  • Slice the onions, carrots (diagonally is nice), and celery into 1/4-inch-thick pieces and add to the pan.
  • Cook until the onions are translucent—about 7 or 8 minutes.
  • Add the chopped garlic and cook, stirring constantly, for an additional minute.
  • Pour in the broth; cover the pan and bring to a boil.
  • Reduce heat and simmer the soup until the vegetables are almost tender approximately 30-45 minutes.
  • Increase heat back to medium and add in the desired amount of chicken along with the egg noodles; bring back to a boil and simmer ‘til the noodles are tender—about 10 more minutes.
  • Carefully taste for seasoning, adding salt and pepper if necessary.
  • Sprinkle with chopped parsley and serve hot. Enjoy!

♥  ♥  ♥  ♥  ♥

God loves you!  ♥  (Don’t ever forget that!)

♥  coleen
Baked Potato Soup – Load It Up

Yum!  Do you enjoy a baked potato with all the fixin’s?  I must admit I do!  What is your favorite topping?  Mine is bacon. And even choosing just what to put on top…when my husband gets done “loading” his potato, it is a masterpiece (and he enjoys every bite)!  But we’ve learned a few things about the balancing act with carbs…and so, a loaded baked potato finds it’s way onto my plate once in a blue moon.  However, this soup…now this i can enjoy perhaps every full moon!

A friend had asked me for a recipe for this soup. (I had never even heard of ‘Baked Potato Soup!’)   You can only imagine the variety of recipes to be found out on the internet!  Well, you can easily guess just what they were “loaded” with—many more calories than I desire to serve to my husband and guests (and me)!   And we surely couldn’t include a recipe like most of those I saw on our Monday post on the At Home w/ GCH blog!

So here is how I made our healthy-but-oh-so-yummy version—this recipe includes cauliflower. Using cauliflower as a main ingredient does a number of things in a healthy and yummy way:

  • provides our bodies with more veggies
  • and for those of you trying to sneak veggies into your family’s repertoire…perfect!
  • keeps the carb count down (approximately the same # of carbs in an entire head of cauliflower as in one russet potato)
  • bulks up the soup so it is thick and creamy without exhorbitant quantities of heavy cream and cheese (lots of fat and calories)

I encourage you to try this soup…it is a very satisfying comfort food but is light on the carbs and the fat calories.  A nice treat!  Enjoy!

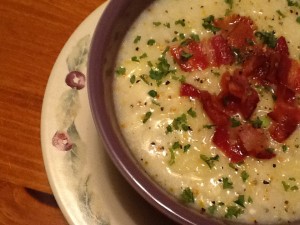
Loaded Baked Potato Soup

Healthy but oh-so-yummy Loaded Baked Potato Soup

Healthy but oh-so-yummy Loaded Baked Potato Soup

Ingredients
soup:
2 medium-sized russet* potatoes, washed and dried
1 head of cauliflower, rough chopped
1+1/2 cups chicken, or vegetable, broth
1+1/2 cups 2% milk (warmed)
salt and freshly ground black pepper
toppings:
2 slices bacon, cooked and crumbled (you can use turkey bacon if you wish)
1/2 cup light sour cream
1 cup shredded very sharp cheddar cheese
dried parsley

Directions

  • First get the baked potatoes going. After scrubbing them, pierce potatoes with a fork in 4 or 5 places. I prepared mine in the microwave oven (on high for 5 minutes; turn over and cook another 3-5 minutes, until tender). Or, you can bake them at 400° for approximately 1 hour or until tender. Either way, when potatoes are done, cool for 10-15 minutes. Then they can be peeled and chopped. This recipe is also a great way to use up leftover baked potatoes!
  • While the potatoes are cooking and cooling, you can prepare the other main ingredients. Here’s how I cook bacon: I stack the slices and, using kitchen scissors, I cut it into approximately 1+1/2″ to 2″ pieces. I find that the bacon cooks much more quickly and evenly this way. Place the pieces into a COLD small frying pan, heat over medium heat. Once the bacon starts frying, I reduce the heat a bit and cook to the desired degree of doneness, keeping a careful eye so that it does not burn. I like to cook bacon over a medium low heat so that most of the fat is rendered out. Using a slotted spoon or spatula, remove the bacon, leaving the drippings, and place onto a couple of paper towels to finish draining. Set aside for topping the soup.
  • Now while the bacon is cooking, place the cut-up cauliflower into a medium-sized pot along with the broth. Bring to a boil, reduce heat, then cover and simmer ‘til tender. Do not drain.
  • Once cauliflower is cooked, add warmed milk and the chopped baked potatoes to the pot, and bring back to a boil. Reduce heat and gently simmer ‘til thoroughly heated, stirring once or twice; this will take just a couple of minutes. Remove pot from heat and scoop out about 1/3 of the veggies; set aside.
  • Now you are going to puree (smooth out) the soup. I use an immersion or stick blender** to puree. Other options would be to use a potato masher, or to puree the soup in your blender. You must be very careful doing it this way because it is hot! See below for tips (just ‘cause God loves you…we don’t want to see you get hurt!). Once pureed, place pot back on very low heat, add back in the reserved veggies, the sour cream, half the parsley, and season to taste with salt and pepper. heat on very low ‘til nice and hot, stirring occasionally.

Now to “load” your potato soup!  Ladle soup into each bowl.  Top each serving with 2 tablespoons of shredded cheese, a sprinkle of the remaining parsley, and some of the crumbled bacon. Healthy but-oh-so-yummy!

   ♥      ♥      ♥      ♥      ♥ 

God loves you!  ♥   (Don’t ever forget that!)

♥   Coleen

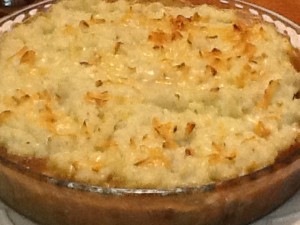
Shepherds Pie with Cauliflower Mash

Oh, so yummy!  My husband loves Shepherd’s Pie—and so I indulge him!   We’ve had Shepherd’s Pie with beef filling, chicken filling, turkey filling, vegetable filling.  We’ve had it topped with traditional mashed potatoes, with mashed sweet potatoes, with mashed turnips, and like this—our favorite way—with mashed cauliflower!  I always have my eye out for new variations!  This recipe fits into our healthy but oh-so-yummy category in a couple of ways:

  • it is low-carb (with the absence of potatoes)
  • it  is made with natural ingredients that you can pronounce (as the gravy is made from scratch), and not a can of cream of something or other
  • it is low in fat/high in protein (using boneless chicken breast as the protein and just 1/3 cup of shredded cheese and 1/3 cup Parmesan)

This recipe could easily be doubled and baked in an 11 x 13 baking dish.  Enjoy!

Shepherds Pie with Mashed Cauliflower Topping 

shepherdspie

Filling Ingredients:

1 sweet onion, chopped in pieces about 1/2 inch dice
4-6 ounces baby bella mushrooms, wiped clean and sliced chunky
2-3 tablespoons chopped garlic in oil (from a jar)
4+ teaspoons olive oil
1# boneless chicken breast, pounded flat, cut into 1″ cubes

1 tablespoon butter, or coconut oil
2 tablespoons brown rice flour (or all-purpose flour)
1/4 cup white wine (or broth)
1+1/4 cups chicken broth

1 bag frozen mixed vegetables (your choice), defrosted

Topping Ingredients:

1 medium-sized head of cauliflower, cored and chopped into small pieces
1/4 cup milk
1/3 cup finely grated parmesan cheese
salt and freshly ground black pepper to taste

1/3 cup shredded cheese (sharp cheddar, smoked gouda) *use a flavorful cheese

Instructions:

  • Preheat oven to 375.
  • Bring a medium-sized pot of salted water to a boil. Add cauliflower and simmer ‘til  soft enough to mash easily (10-12 minutes).
  • Drain cauliflower very well; place back into pot and  “mash” the cauliflower along with the milk and Parmesan.
  • Season very well with salt and pepper to taste.
  • While the cauliflower cooks, heat 2 teaspoons of olive oil in a large frying pan and saute the cut-up chicken.  Cook ’til just getting brown but don’t overcook.
  • Reduce heat to low, and add the chopped garlic for the last minute (don’t let the garlic burn).  Remove pan from stove; set aside cooked chicken.
  • Wipe pan with paper towels to remove bits.
  • Then add 2 additional teaspoons olive oil; and saute chopped onions for 3 minutes.  Add chopped mushrooms and saute for 4-5 minutes more to caramelize.
  • Reduce heat to low; add 1 tablespoon butter, and sprinkle flour over the mushroom-onion mixture, stirring with a whisk or wooden spoon.
  • ‘Cook’ this mixture for 3 minutes (to reduce the flour-y taste) occasionally scraping the pan.
  • Then gradually whisk in the wine ’til the mixture is smooth.
  • Slowly whisk in the  broth and your gravy will come together.  Gently simmer for 5 minutes.
  • Add back the cooked chicken and the defrosted veggies and heat together for 1-2 minutes.
  • Spread the chicken-vegetable-gravy mixture in the bottom of a 8 cup casserole dish.
  • Top with the cauliflower mixture, and spread across the pan almost to the edges.
  • Bake for 20 minutes, and then top with the shredded cheese.
  • Continuing baking another 10 minutes or so ’til bubbly.  (If top is not lightly browned, can be carefully placed under broiler for 2-3 minutes.)  Enjoy!

   ♥      ♥      ♥      ♥      ♥ 

God loves you!     (Don’t ever forget that!)

♥  coleen