
Raise your hand, please, if you like to decorate for (as we call it around here) Happy Hearts Day! Uh-huh…I thought so! Today I have a cute decoration for you to craft! I have totally fallen in love with buntings (aka garland or banners)! They can be made with almost any type of fabric or felt or scrapbook paper or wallpaper or ____! The list goes on & on! They can be made teeny-tiny and used as a cake topper; or really long and used for party decorations; or, my favorite, in a medium size and used to hang almost anywhere in your home. The next time you have 2-3 hours to fritter away, <I know, I know…who does?> run away to Pinterest and you can find oodles and oodles of options, examples, and ideas!
Today, the bunting I’ve made is inexpensive, fairly quick, easily adaptable, and you can totally personalize it! I needed 16 hearts to write out my chosen wording; if you don’t need as many to “say” your phrase, adjust the quantity of paper. You choose your color scheme…then your coordinating papers…then ribbon to match and maybe some different colored markers. Check it out!
Supplies and Tools
(4) sheets 12″x12″ solid color scrapbook cardstock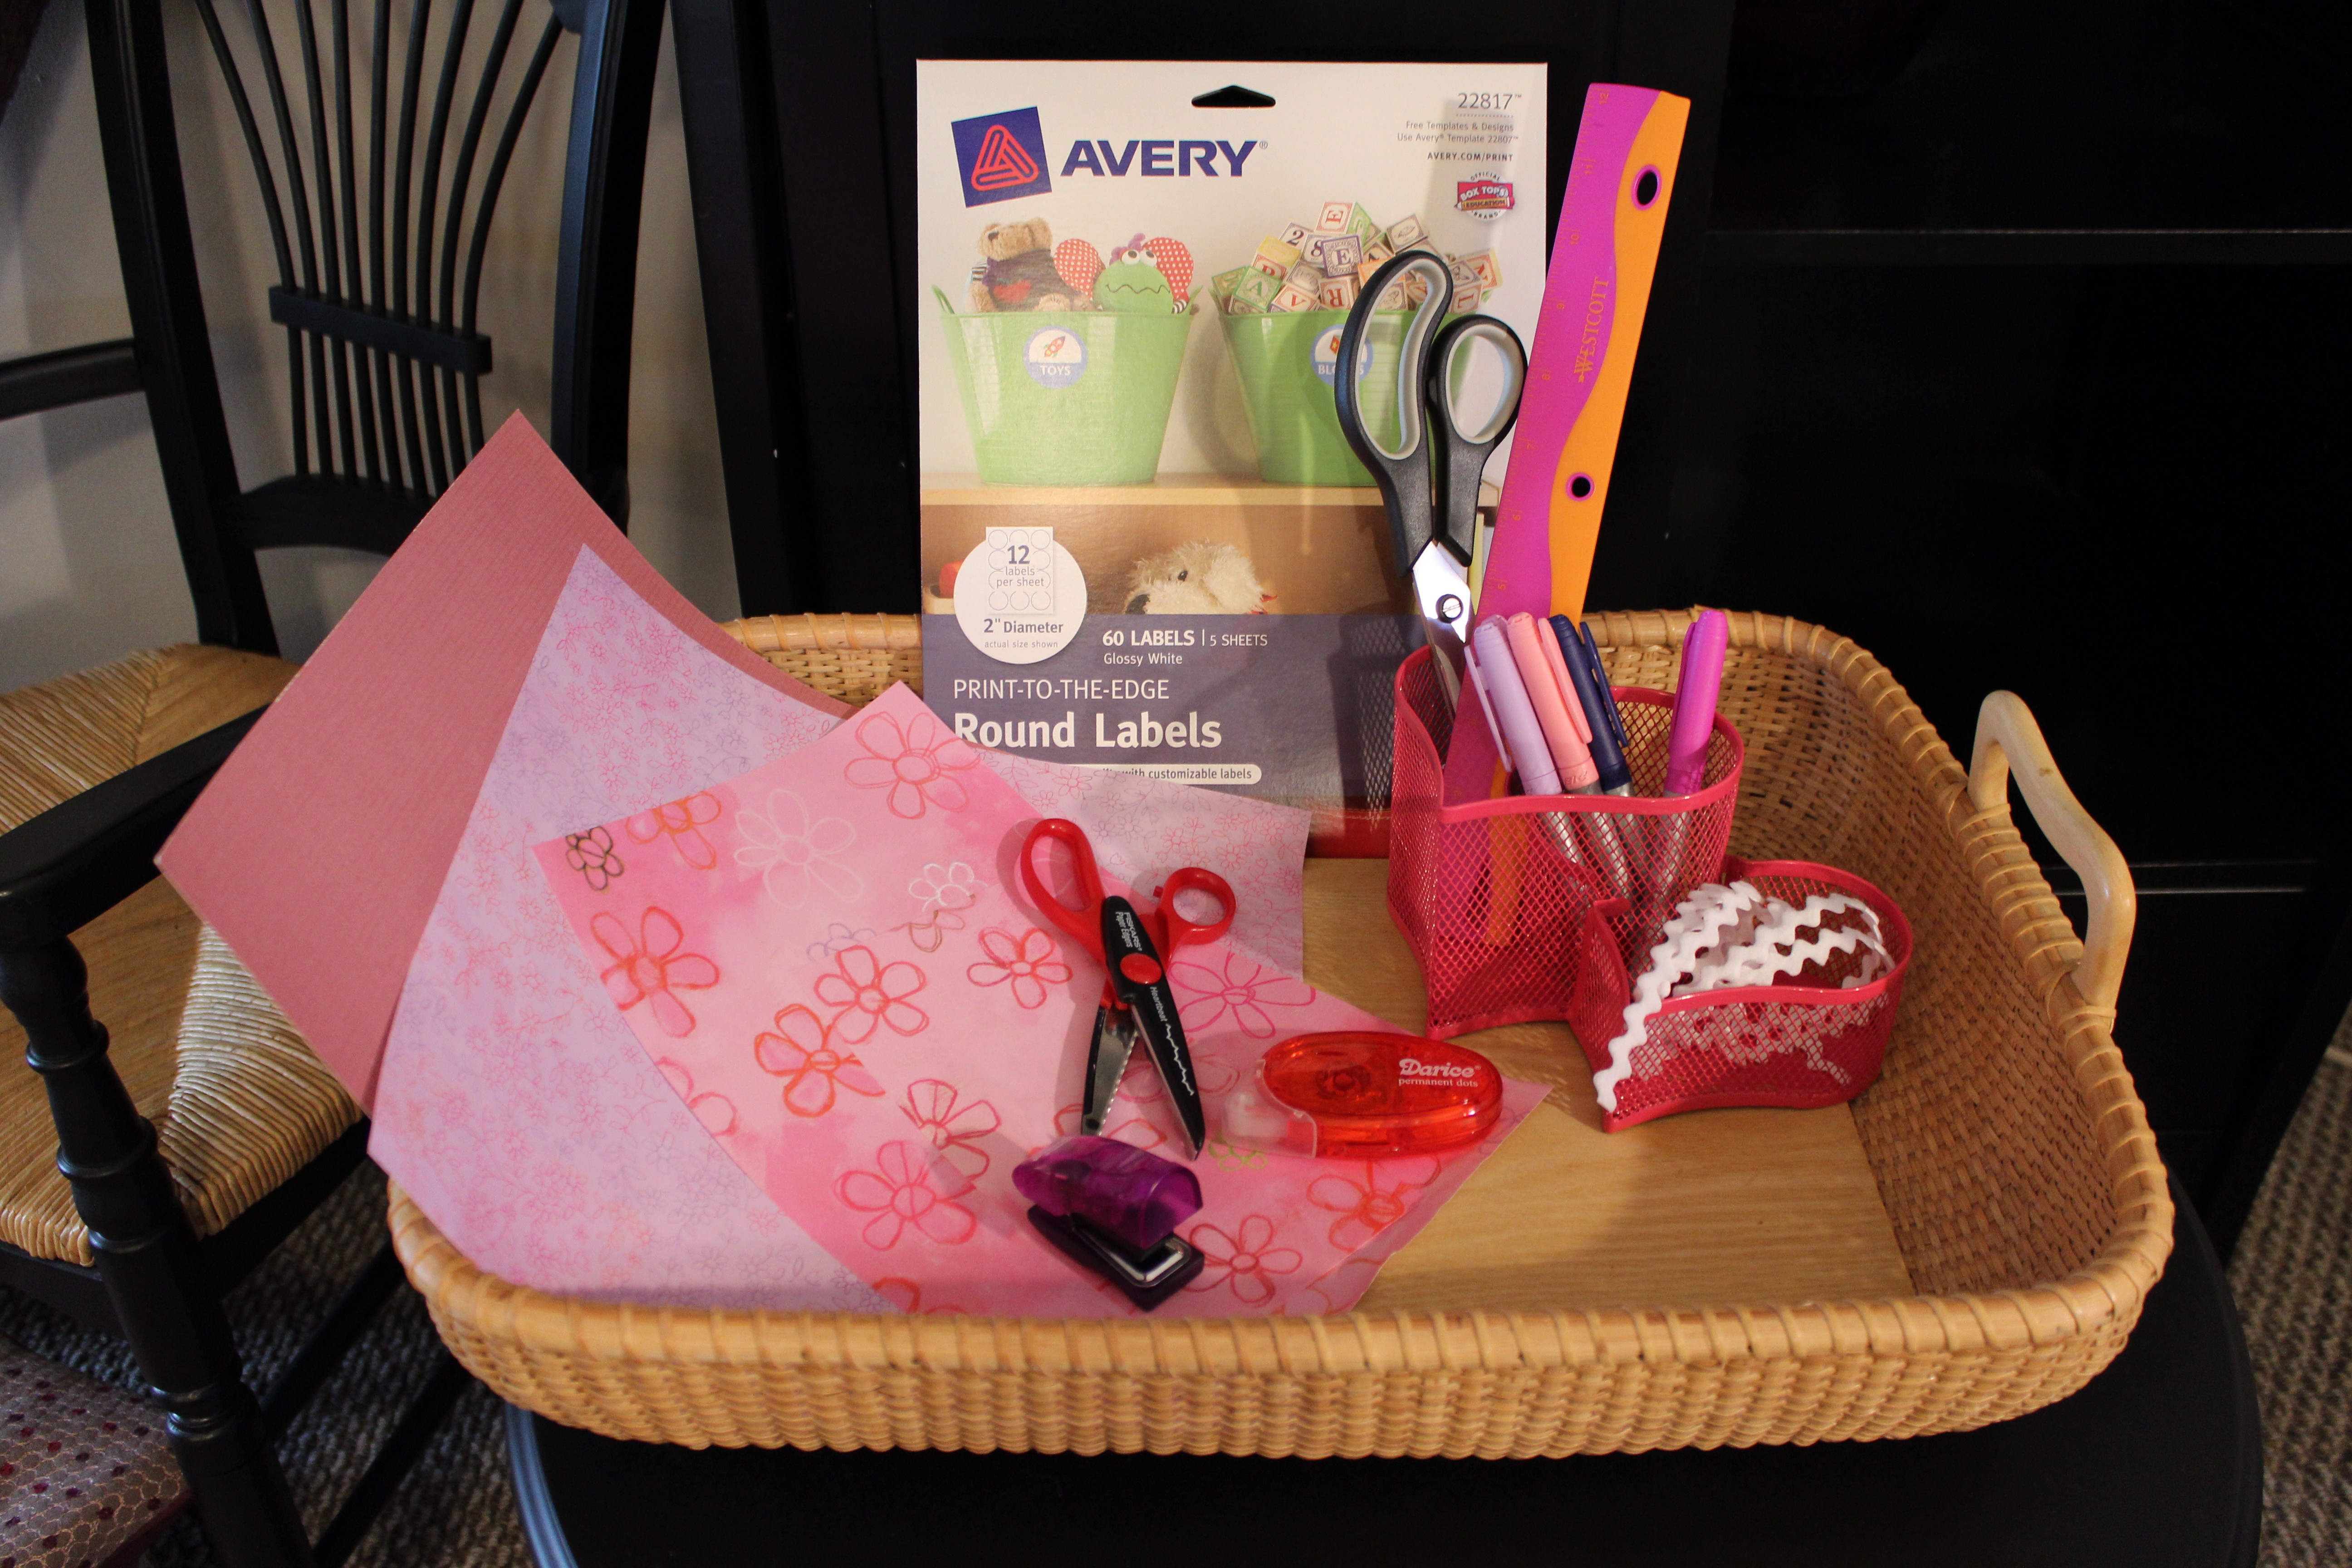
(4) sheets 12″x12″ patterned scrapbook paper (coordinating colors)
(1) piece of 8-1/2×11 copy/printer paper
4 yards 1/4″ ribbon
printer labels (I used 2″round; you could use 2×4″)
colored permanent markers (brands like Sharpie or Bic Mark It)
hole punch
scissors
decorative edge scissors (like this)
adhesive tape runner (like this)
Instructions
1. Cut the piece of copy paper down into a 6″x6″ square. Fold in ½ (3″x6″) and then draw the outline of one side of a heart using most of the piece of paper. Cut out along your line. Unfold the paper; voila! a heart! This will be your template.
2. Cut all 8 sheets of scrapbook paper into 6″x6″ squares (cut in half, and then, in half again).
3. Using the paper template and a pencil, trace onto each of the heavier-weight squares…16 in all. Cut out along traced line. Set aside.
4. Now take the paper template, fold along the original crease mark, and cut off about ½” all around. This will reduce the overall size of your template.
5. Then, using the slightly smaller template and a pencil, trace onto each of the remaining 16 pieces of lighter-weight scrapbook papers. Use the decorative edge scissors to cut out these hearts.
Almost ready to assemble!
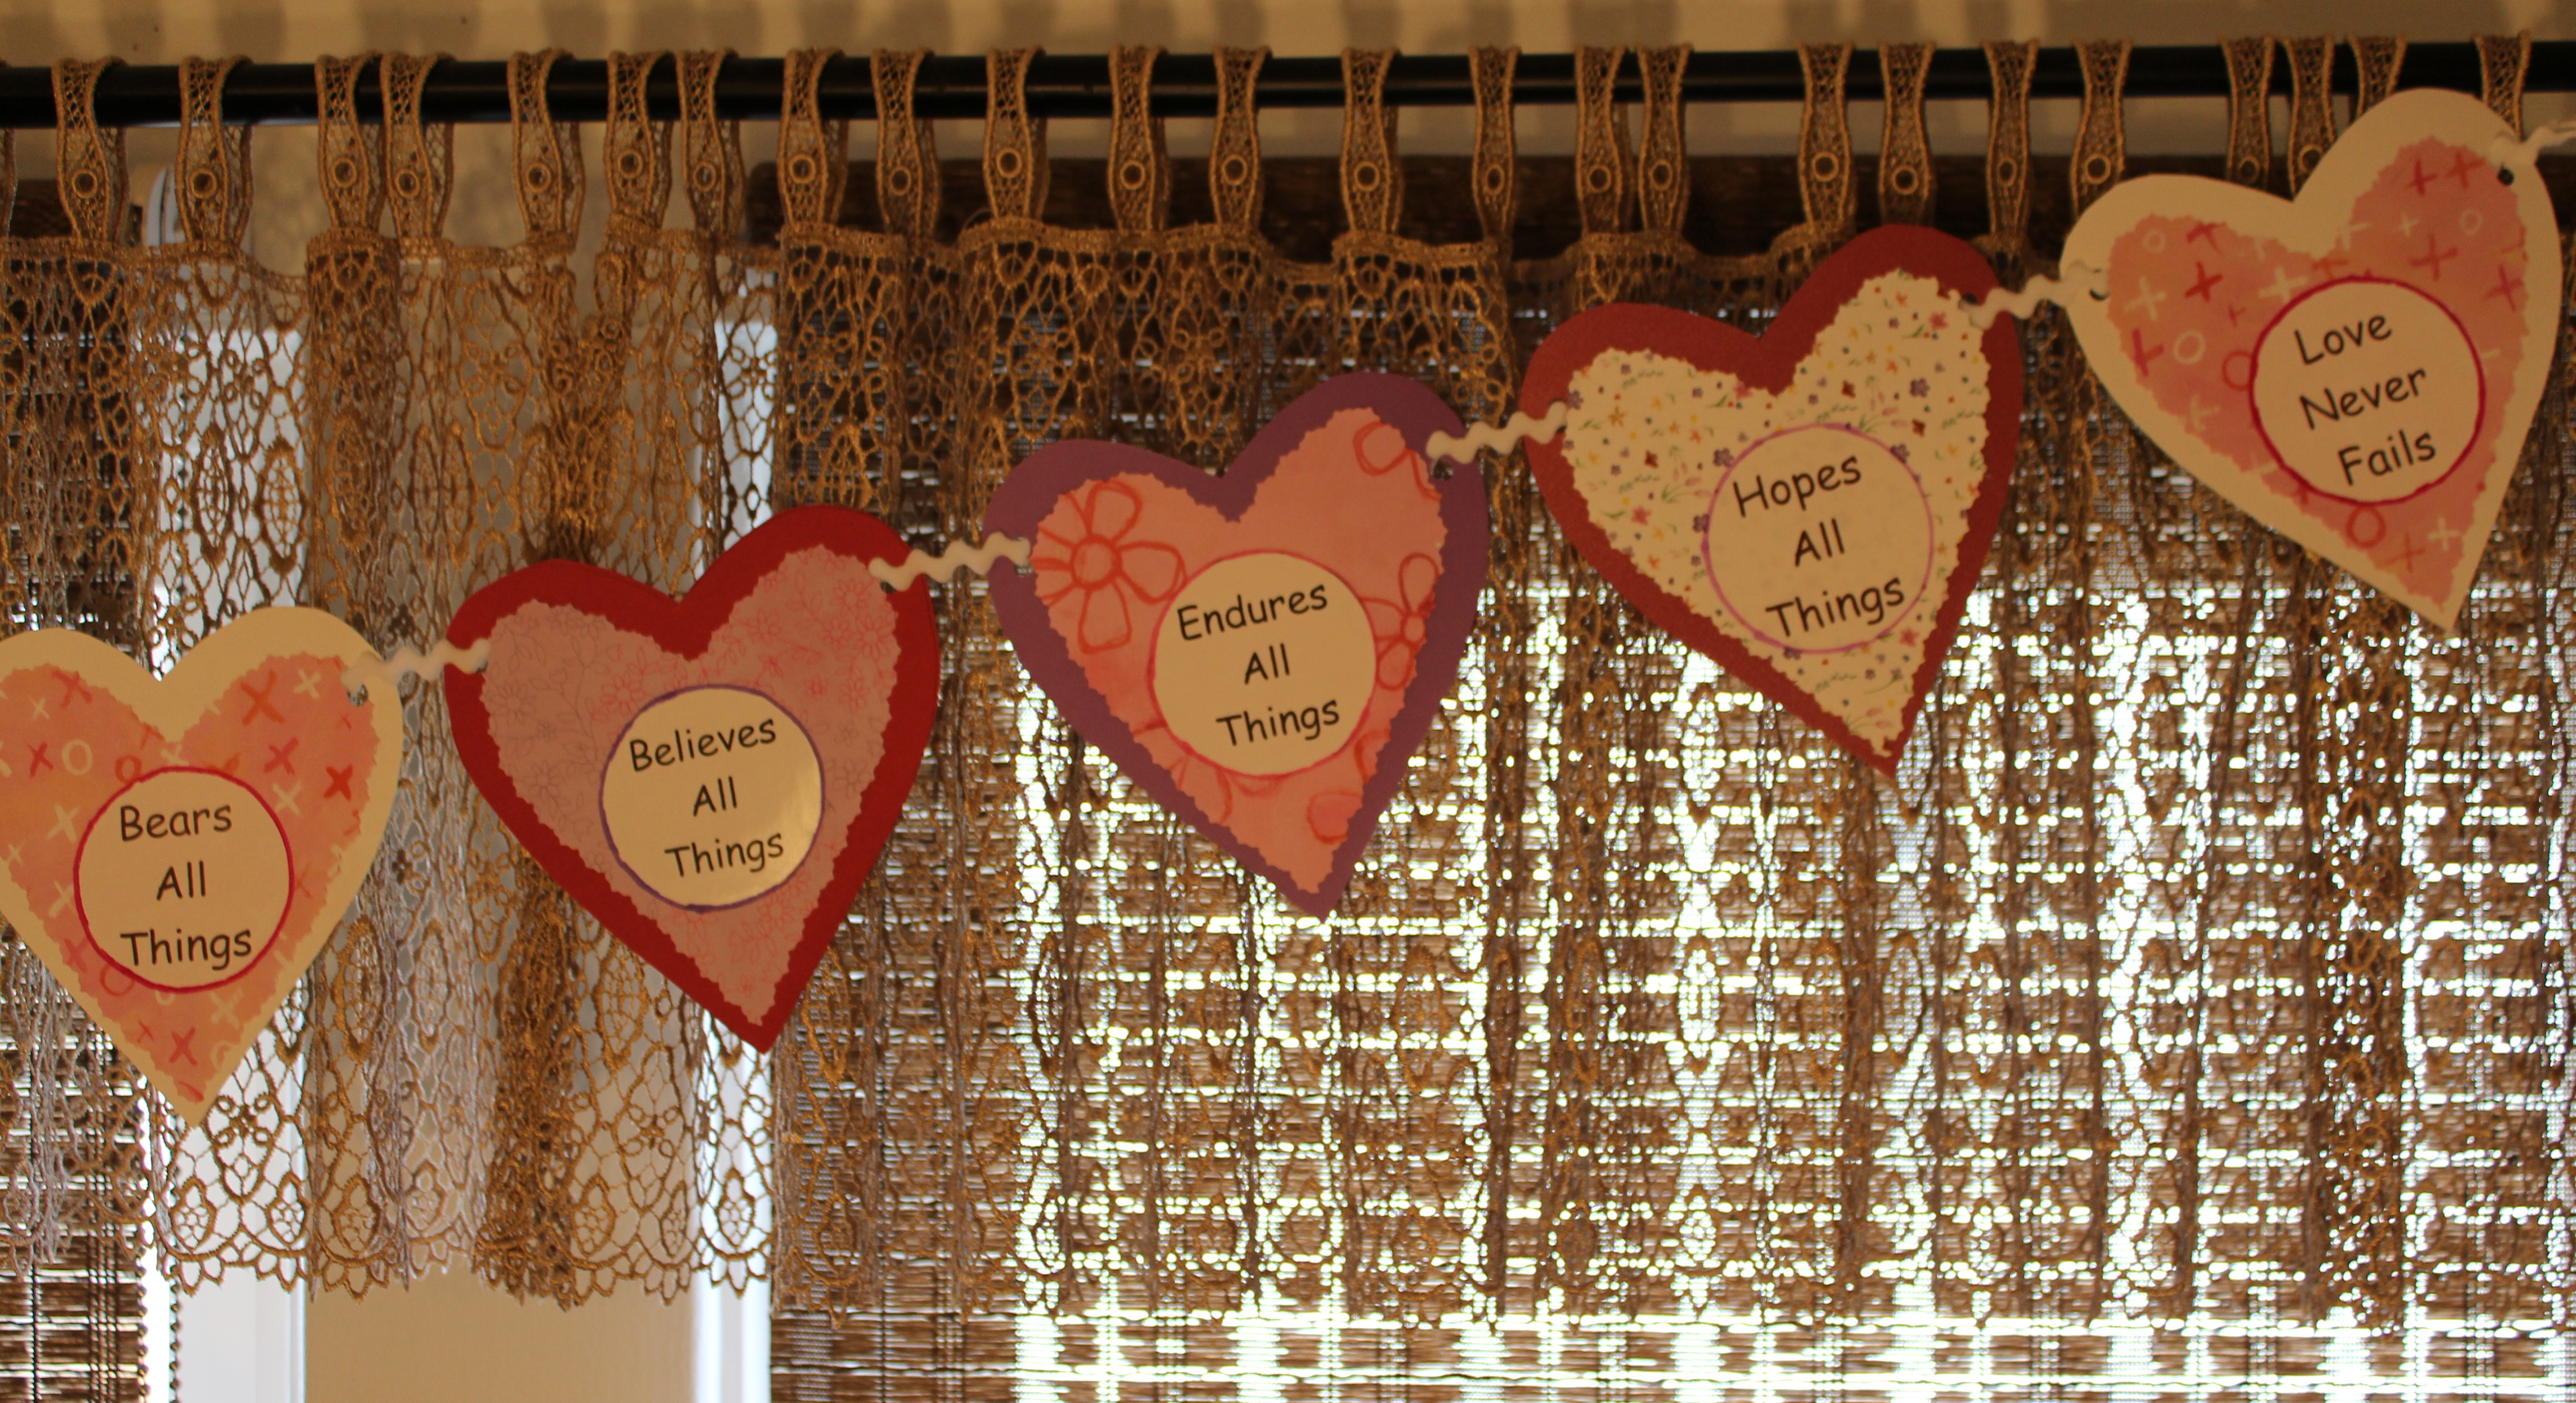
6. For the labels… Choose what you would like to write on your bunting. As you can see, I am featuring the words of a section of 1st Corinthians 13. You could simply put ‘I LOVE YOU!’ You can either write on them by hand (with the permanent markers) OR employ the use of your favorite wordprocessing program. (That’s what I did! You can achieve a very finished look with not much effort! And lots of fun!) Use the directions included with the printer labels.
Almost done!
7. Now to assemble: fiddle around with your cardstock hearts and paper hearts pairing them up to your satisfaction.
8. Then, using the adhesive tape runner, slide 3 or 4 lines of ‘tape’ onto the back of the lighter-weight paper hearts and affix to the front of the heavier-weight hearts. Pretty, hmmm? Continue until all are put into pairs.
9. Then attach the labels to the very front of your beautiful hearts.
10. Now take the hole punch, and punch a hole or two onto each ‘shoulder’ or bump of the hearts.
11. Lay out the hearts in the proper order to complete your chosen phrase. Take one end of the ribbon, and using about 6″ tie off a loop. This is how you will hang your finished bunting. Beginning with your FINAL word or letter, hold the non-looped end of the ribbon, and thread the ribbon through the holes punched on each heart, keeping the ribbon along the backside of the heart. (Try it…as you manipulate the ribbon, you will see how easy this goes.) When you get all of your hearts threaded onto the ribbon, lay your bunting out on a flat surface and space out the hearts so there is just 1″, or so, of ribbon between each heart. Finally, tie off a loop at the end using about 6″ of ribbon.
Done!
Now it is up to you to find the perfect spot to hang your HAPPY HEARTS DAY bunting…and enjoy!
God loves you! ♥ (Don’t ever forget that!)
♥ coleen
_________________________________
If you would like to send a personal message to Coleen concerning this series, you may email her at: Coleen@girlfriendscoffeehour.com


