November 24, 2024

Leftover Link-aPalooza

My girls, admiring the turkey!

My girls, admiring the turkey!

Esteemed Ladies of Girlfriends Coffee Hour, I come to you with my apron in hand.  I ask for your mercy.  I don’t have a new recipe for you on this Black Friday…this day after Thanksgiving.  Let me explain.

We moved to Austin, Texas two week ago, from sunny Los Angeles.  This was our first Thanksgiving apart from family, friends, and “home”.  I didn’t make any new recipes, and I didn’t even make anything that challenging:  mashed potatoes, roasted vegetables, and pumpkin pie.  My husband made the turkey and gravy, and we bought rolls from the grocery store.  And you know what?  I was pretty happy with it!  Sometimes it’s nice to not stress over big events.  So instead of jumping through hoops to make a new recipe specifically for a blog post today, I’m just going to post links to stuff I MIGHT make.

That’s right.  I’ve got the turkey carcass on the stove already, making a delicious-smelling stock.  I’m not sure what I’ll do with the rest of the meat, mashed potatoes, cranberry sauce, and gravy.  But here are some recipes I’ll probably be checking out tomorrow, Saturday, and Sunday.  And instead of worrying about it, I’m going to focus more on my kids, my husband, my health, and my sleep.  🙂

Ready for Link-aPalooza?  Let’s go!

This is for breakfast, minus the corn, and plus a little cranberry sauce:

http://www.foodnetwork.com/recipes/danny-boome/bubble-and-squeak-with-corn-puree-recipe.html

Still more mashed potatoes?  Maybe some Colcannon!

http://frugalgirlmet.blogspot.com/2012/03/colcannon.html

Lots of leftover cranberry sauce?  Go Ikea-style!

http://www.epicurious.com/articlesguides/holidays/thanksgiving/leftovers-cranberry-sauce/recipes/food/views/Swedish-Meatballs-350172

Stuffing from last week’s Thanksgiving Burger?

http://www.kraftrecipes.com/recipes/stuffing-topped-vegetable-bake-138240.aspx

And if you have extra pie?  EAT IT UP!!!

God Bless you all.  — Dana

Pumpkin Pie with GF Nut Crust—and Spiced Whipped Cream

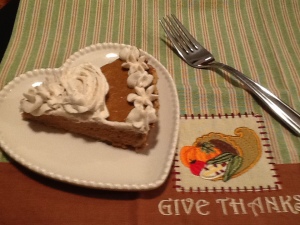
2014-11-23 21.57.44I think that the Thanksgiving meal is one where the most traditional fare is prepared, served, and enjoyed.  Whether they are the ubiquitous offerings…turkey (goes with saying, right?), gravy, cranberry sauce; or favorites that are traditional for your own family…there are just some dishes we expect to prepare and share.  One of these is Pumpkin Pie!

Ok, asking for a show of hands, please…how many of you are baking pumpkin pie(s) to serve to your loved ones at your Thanksgiving dinner?  Me, too!  Actually, have already made this one.  The recipe included below features a Gluten-Free crust (made with almond and hazelnut flours) filled with a very traditional Pumpkin Custard and served with Spiced Whipped Cream to top it all off.  If you are looking for something traditional but with an updated twist, this might just fit the bill!

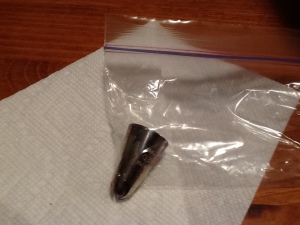
Here’s a tip (oh, punny!) for decoratively adding the whipped cream topping:  place a large-sized cake decorating tip (I used a #2D) into a small zip-top disposable bag…snip off JUST a bit from one corner.  Push the tip firmly into the snipped corner and add a good amount of the Spiced Whipped Cream into the bag; zip closed being SURE the baggie is sealed.

2014-11-23 19.59.46


Carefully manipulate the whipped cream down towards the corner holding the tip…making sure the tip remains lodged in the opening.  Gently squeeze allowing the whipped cream to come out through the tip.  Decorate to your heart’s content!  Make designs…write ‘Thank You, God, for all Your blessings!’ on the pie top.  Have fun!


Pumpkin Pie in a GF Nut Crust
with Spiced Whipped Cream

2014-11-23 22.07.23

Nut Crust
ingredients:
1+1/2 cups almond flour
1/2 cup hazelnut flour
1/4 teaspoon salt
1/8 teaspoon almond extract
1 egg
1+1/2 tablespoons ice cold butter

directions:

  • cut butter into small cubes; place in fridge ‘til ready to use
  • preheat oven to 350
  • place ingredients in food processor (in order listed)
  • immediately pulse ingredients ‘til they come together into a ball
  • dump gathered ingredients into a 9″ tart pan
  • press out from the center evenly spreading across the bottom of pan and up the sides
  • bake for 15 minutes ‘til just beginning to lightly brown around the edges (don’t be alarmed if center puffs up; just lightly tap pan onto counter…crust will settle)
  • allow to cool completely before adding pumpkin custard filling

Pumpkin Custard
ingredients:
1+3/4 cups pumpkin puree (15 oz. can)
1/2 cup almond milk
1/2 cup half and half
2 large eggs, room temperature
1 teaspoon almond extract
1 teaspoon ground cinnamon
1/2 teaspoon ground nutmeg (freshly ground if possible)
1/2 teaspoon ground allspice
1/4 teaspoon salt
1/4 teaspoon liquid stevia (I used vanilla stevia)*

directions:

  • Increase oven temp to 375
  • in a large bowl, whisk eggs and salt
  • add in liquids and pumpkin puree, continuing to whisk
  • add spices and sweetener whisking ‘til spices are fully blended in
  • pour into the cooled nut crust (it will fill the pan)
  • place filled pan on a baking sheet’
  • bake at 350 for 50-60 minutes
  • custard is done when center is set and slightly puffed
  • allow to cool before slicing
  • store any leftovers in the ‘fridge

Spiced Whipped Cream
ingredients:
1/2 cup heavy or whipping cream
2 teaspoons 10X powdered sugar
1/4 teaspoon vanilla extract
1/8 teaspoon EACH ground cinnamon, nutmeg, allspice, ginger

directions:

  • in mixer bowl, at medium-high speed, beat cream ‘til peaks start to form
  • add sugar and spices into a fine sieve or sifter and dust over whipped cream
  • start mixer up again, pour in extract
  • continue to whip just ‘til stiff peaks form
  • (follow directions above if piping using decorative tip) otherwise, serve with Spiced Whipped Cream

 ♥   ♥   ♥   ♥   ♥

God loves you!  ♥  (Don’t ever forget that!)

♥  coleen

Thanksgiving Burger

thanksgiving burger

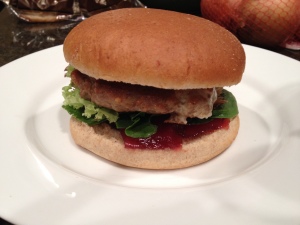
If you’re anything like me, Thanksgiving is one of your favorite times of the year.  The best food, the best company (family, friends, fortuitous strangers), and the best traditions.  If you can’t wait for that one day a year, make this Thanksgiving Burger!

The secret ingredient is a box of bread stuffing mixed in with the turkey.  It adds moisture and the unmistakeable seasonings that really make this burger special.  Your toppings can vary—add gravy, sweet potatoes, whatever you like!  I made mine easy, with a quick smear of mayo, cranberry sauce, and lettuce.

Ready to taste the season before the day gets here?  Let’s give thanks!

Thanksgiving Burger

Ingredients:

  • 1 box bread stuffing mix (I used Stove Top)
  • 20 ounces ground turkey
  • 1/8 teaspoon granulated garlic
  • 1/4 teaspoon celery salt
  • 1 can cranberry sauce
  • for each serving:  1 hamburger bun, mayonnaise, a few leaves of lettuce

Directions:

  1. Prepare the stuffing mix according to the directions on the box.  Let cool a little.
  2. Combine 1 cup of prepared stuffing with the turkey.  (Refrigerate the rest of the stuffing and eat it later, or use it on top of casseroles!)  Form four 5-ounce burgers, and refrigerate for at least an hour so they firm up a little.
  3. Fry the burgers in a non-stick pan.  Use a little oil of your choice, and cover the pan with aluminum foil.  Cook on medium heat for about 6-8 minutes, until done on one side with a little crust.  Flip, cover, and cook again.
  4. To serve:  give a light coating of mayo to both top and bottom hamburger buns.  Add a couple teaspoons of cranberry sauce to the bottom bun, then the lettuce.  Top with the burger and the top bun.  Serve hot!

Explore, experiment, enjoy! — Dana


To view even more of Dana’s unique recipe, you can visit her at Frugal Girlmet!

Spiced Pumpkin Smoothie

2014-11-16 22.22.56 HDR

‘Tis the season for all things PUMPKIN!  Pumpkin pie, pumpkin chili, pumpkin muffins, beef stew IN a pumpkin, pumpkin in your oatmeal, pumpkin ice cream…what are some of your favorites?  Over the weekend, Robert and I took a roadtrip down to celebrate my brother’s birthday and treated ourselves to some nice large coffees to go along.  Mine was a pumpkin spice latte…deeeeee-licious!  And it got me thinking about other pumpkin-y&spicy beverages. Why not pumpkin&spicy smoothies!  So when we got back home that is exactly what I made!  The quantities below made up two big mugs-full…and about 8 ounces for me tomorrow morning  😉   (I think I am going to make these again as a healthy, hearty breakfast prior to Thanksgiving Dinner.)

This is SO in line with our healthy but oh-so-yummy POV!  Here’s a link to some of the healthy benefits and nutrition facts about pumpkin.  This smoothie is loaded with protein, fiber, low in fat, and full of flavor.  Of course, you can substitute any milk or milk alternative and your choice of yogurt.

2014-11-16 22.19.30
Also, I added a couple of smashed up graham crackers into the blender, too (and tossed a few crumbs onto the top of Robert’s smoothie.)  Hope you enjoy it, too!

Pumpkin Pie Smoothie

ingredients:
1 cup canned pumpkin puree, FROZEN
1 cup vanilla Greek yogurt
2 cups almond milk
1 cup ice
1 really ripe banana (frozen, too)
2-3 tablespoons pure maple syrup (or honey or agave)
1 teaspoon cinnamon
1/2 teaspoon nutmeg (freshly grated is superb!)
1/2 teaspoon ginger
1/4 teaspoon ground cloves (optional)
1 graham cracker (smashed up in a baggie) optional!

directions:

  • place all ingredients into your blender container
  • blend on high ‘til ice is thoroughly pulverized (this will depend on the strength of your blender)
  • pour into big mugs, add straw (or not!)

♥    ♥    ♥    ♥    ♥

God loves you!  ♥  (Don’t ever forget that!)

♥  coleen

CrockPot Black Bean Soup

I love my Crockpot. I have found, however, that almost all the recipes in my Crockpot cookbooks are for meat-based entrees. That’s all well and good, but there are some times you want something lighter, or vegetarian (or that isn’t made with a can of cream of chicken soup!) I ordered a book on Amazon.com, hoping to find something new and different, and I did: “Fresh From the Vegetarian Slow Cooker” by Robin Robertson.

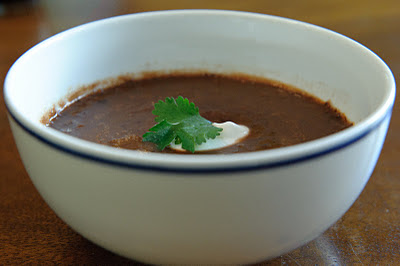
The recipe for Black Bean Soup was easy to follow, and I had everything I needed for it already in my pantry and fridge – and I’m betting you do, too. This came out better than I expected!  The texture was both chunky and smooth after I used my immersion blender (you can put your soup in the blender or food processor and pulse lightly, or even use a potato masher to get your desired consistency.)
Serve this with chopped green onions, cilantro, sour cream, shredded cheese, salsa, tortilla chips—any or all of the above.  Terrific!
 
(Sorry about the photo. It’s bean soup, and it’s delicious and nutritious, but there’s just no way to make it look glamorous in a photo!)
gchdanablackbeansoup
 
Black Bean Soup
(recipe courtesy “Fresh From the Vegetarian Slow Cooker” by Robin Robertson)
 
Ingredients:
  • 1 tablespoon olive oil
  • 1 medium onion, chopped
  • 1 carrot, chopped
  • 1/2 green (I used red) bell pepper, seeded and minced
  • 2 garlic cloves, minced
  • 2 cans (15.5-ounces each) black beans, drained and rinsed
  • 1 can diced tomatoes, left undrained
  • 4 cups stock (I used less, probably closer to 3 cups)
  • 2 bay leaves
  • 1 teaspoon ground cumin
  • 1 teaspoon dried thyme
  • 1/4 teaspoon cayenne pepper
  • salt and pepper
  • 2 teaspoons fresh lemon juice (optional)
Directions:
  1. Heat oil in a large skillet over medium heat. Add the onion, carrot, bell pepper, and garlic; cover and cook until softened, about 5 minutes.
  2. Transfer the cooked vegetables to a slow cooker, add the beans, tomatoes and their juice, stock, bay leaves, cumin, thyme, and cayenne, and season with salt and black pepper. Stir to combine. Cover and cook on LOW for 8 hours.
  3. Remove and discard the bay leaves and taste to adjust the seaosonings.  Just before serving, stir in the lemon juice, if using. To thicken, puree at least 2 cups or up to one half of the soup solids with an immersion blender used right in the CrockPot, or ladled into a regular blender or food processor and returned to the CrockPot.  Serve hot.

Explore, experiment, enjoy! — Dana


To view even more of Dana’s unique recipe, you can visit her at Frugal Girlmet!

Veggie Fried Rice


2014-11-07 20.47.12

Veggie Fried Rice

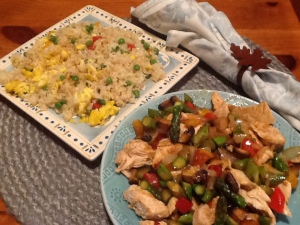
OK, I admit it…I do really, really, really love fried rice!  So yummy!  And totally limitless in variety…. You can prepare it with or without chicken or shrimp or ham or tofu! And so many choices of veggies to add: onions, mushrooms, peppers, broccoli, asparagus, green beans,…some folks even toss in a bag of frozen mixed veggies!  You can even vary the type of rice or grain that you choose: plain white, or a scented rice (like jasmine or basmati); brown rice, wild rice…or even quinoa!  The point is you make it to your own liking!  But there is one thing you MUST have—cold rice (preferably a day old).

Really!  Reason being if the rice you use is still warm and ‘fresh’ it will stick together and be clumpy.  Not pretty!  I always try to remember when preparing rice or quinoa to make an extra 1+1/2 cups so that it is sitting in the ‘fridge just waiting to be turned into Fried Rice.

This dish is also an excellent way to use up bits and pieces of fresh veggies, like half of an onion or a piece of red or yellow bell pepper.  Even some leftover cooked veggies from last night’s supper can be added in at the last minute!

Trying a new recipe that includes an ingredient or two not usually found in your pantry or ‘fridge is a great way to add those ingredients!  Our Dana Kim has been an inspiration to me as she has introduced me, through her wonderful recipes, to some items I didn’t have on hand.  (Use the ‘Search’ bar on our home page for Dana’s recipes!)  One item I always keep in my ‘fridge is sesame oil.  It has such a distinctive flavor and a teaspoon or two added to a stir fry dish or a marinade or Fried Rice is just delicious!  You can find it at any grocery store, I would imagine, right in the ethnic foods aisle.  It almost always comes packaged in a glass bottle and the oil itself is very dark.  Try it!

Here is my basic recipe…I would love to hear how you made it your own!  Enjoy!

2014-11-07 20.47.23

ingredients:
1 large egg, beaten lightly
2-3 tablespoons olive oil
2 teaspoons sesame oil
1 small onion, chopped fine
2 tablespoons finely chopped garlic (I used jarred)
1 cup (or more) finely sliced cabbage (napa is especially nice)
1 small red bell pepper, finely chopped
1/2 cup frozen tiny peas, defrosted
2-3 cups COLD cooked rice
1/2 cup finely chopped pineapple, drained WELL (I use crushed from a can)
2 tablespoons soy sauce
1-2 tablespoons your favorite stirfry sauce (optional)

salt and pepper (optional)
1 tablespoon sesame seeds, for garnish (optional)
½ cup green onion slices, for garnish (optional)

directions:

  • add a few drops of olive oil to a large nonstick skillet and warm over medium heat
  • pour the beaten egg into the middle of the pan. allow to cook, undisturbed just ‘til cooked through (will only take 1 minute or so). remove the egg ‘pancake,’ set aside and chop into bits
  • pour in an additional 1 tablespoon of olive oil; when the oil is hot, add the onion, saute for about 5 minutes
  • stir in the bell pepper along with any other raw veggies; continue to cook for 5-6 minutes ’til the peppers start to soften
  • add the chopped garlic and any leftover (cooked) veggies; stir constantly for about 1 minute ‘til garlic is fragrant
  • add in the rice and peas; mix with a wooden spoon to break up any lumps. (if necessary, add a bit more olive oil.)  saute the rice veggie mixture, stirring just once or twice, allowing the rice to just begin to lightly brown (about 5-6 minutes)
  • add in the crushed pineapple; stir to incorporate
  • pour the sesame oil and the soy sauce (and stirfry sauce) into the mixture
  • reduce heat to medium-low and cook ‘til everything is heated through
  • toss the chopped cooked egg over top

♥    ♥    ♥    ♥    ♥

God loves you!  ♥  (Don’t ever forget that!)

  coleen

Baked Ziti…Greek Style

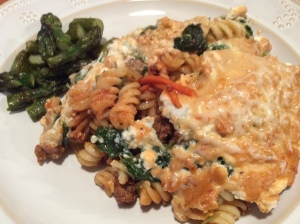
This recipe came about because I needed to use up some ground lamb. In our efforts to eat more healthy, quality foods, we have been trying to use better quality meats…especially ground meat.  But sometimes these items come along with a price tag that is steep!  (Y’know?)  Last week, I came across some organic, grass-fed ground lamb at a really good price…oh, happy me!  But even happier hubby—he just loves lamb!  And, maybe because it was cold and rainy, I thought it would be good basis for a real comfort food meal!  Thus…Baked Ziti, Greek Style!

Now, this dish is a little decadent as it has a bechamel (or white) sauce and uses a couple of cups of ricotta. However, the other cheeses included only add up to four (4) ounces. Just be sure to use really flavorful cheese, and grating it yourself will give you a nice melting product. So this dish fit well into our ‘healthy but oh-so-yummy’ POV since it has lots of veggies (onions, mushrooms, carrots, tomatoes, spinach) and uses a meat that is of a really good quality.

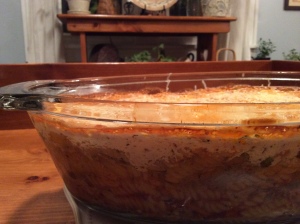
Let me tell you, this recipe fills a huge casserole! I used a 4quart casserole which holds more than a 9X13 baking dish. And we got 8 generous servings (maybe 6 if you are feeding manly men!) out of it.  Enjoy!

2014-10-28 20.50.23

Baked Ziti…Greek Style

ingredients:
2 tablespoons extra-virgin olive oil
1 pound ground lamb
a couple sprigs rosemary (or 1+1/2 teaspoons dried chopped rosemary)
1 teaspoon dried marjoram (or oregano)
sea salt and freshly ground black pepper (I always use a lemon-pepper-salt combo)
1 large onion, finely chopped
6-8 ounces Baby Bella mushroom, chopped small
1 carrot, peeled and finely grated
3 (or more!) tablespoons chopped garlic (I use jarred)
1/2 cup tomato paste
2 cups chicken stock
1 cup dry red win

1 pound macaroni (I used GF rotini)
16 ounce bag of frozen chopped spinach, defrosted
bechamel sauce
2 tablespoons butter
2 rounded tablespoons all-purpose flour (I used GF all-purpose)
1 cup milk (I used coconut milk)
1 cup chicken broth
Freshly ground black pepper
Freshly grated nutmeg (just a bit!)

2 cups ricotta cheese
dried oregano
4 ounces freshly shredded cheese (I used smoked gouda and a really sharp white cheddar)
directions

for the meat sauce:

  • heat 1 tablespoon olive oil in a Dutch oven over medium-high heat
  • when hot, crumble the ground lamb into the pot, and saute ‘til lightly browned
  • strip the leaves from the rosemary stems (if using fresh herbs) and finely chop
  • season with rosemary, orgegano, s&p
  • once the meat has browned, remove from pan, draining away juices
  • add 1 tablespoon olive oil along with the onion and carrot; saute for 6-7 minutes
  • add the chopped garlic and cook, stirring constantly, for an additional minute or so
  • stir in tomato paste, and cook for another minute or ‘til fragrant
  • stir in broth and wine, bring up to a boil; reduce heat to low and gently simmer ‘til pasta is ready

pasta:

  • prepare pasta according to package directions but UNDERcook by 2 minutes (then it won’t be overcooked after baking)
  • add the defrosted spinach into the pasta water for the last couple of minutes
  • drain the pasta/spinach and add back to the pasta pot
  • toss the pasta with the meat sauce
  • pour the pasta into a large (4 quart) casserole

bechamel/white sauce:

  • melt the butter in a medium saucepan, adding the diced onion
  • cook ‘til the onion is soft and translucent, approximately 5 minutes
  • sprinkle the flour over the cooked onion and, using a whisk, stir constantly for 1 minute; adjust the heat to VERY low and continue to cook for 2-3 minutes to get the starchy taste out of the mixture. do not let the mixture brown
  • increase the heat back to medium and immediately start slowly pouring in 1/4 cup or so of milk while whisking briskly; (just keep whisking!)   as this is absorbed, continue to slowly and steadily add the balance of the milk followed by the broth whisking constantly as the liquid becomes absorbed…this will take about 3 minutes
  • adjust the heat lower again and let this mixture simmer gently for another 5 minutes, stirring occasionally.  season with salt, pepper, and nutmeg, to taste

2014-10-28 20.48.42

to finish:

  • combine the ricotta and dried oregano
  • spoon the ricotta evenly around the top of the casserole, spreading to cover the pasta/meat mixture
  • pour the bechamel sauce in an even layer over top the ricotta; top with shredded cheese
  • place casserole into a preheated 425 degree oven; bake for about 20 minutes or ‘til middle is hot and edges are bubbly

♥  ♥  ♥  ♥  ♥

God loves you!  ♥  (Don’t ever forget that!)

♥  coleen

Beef Stroganoff

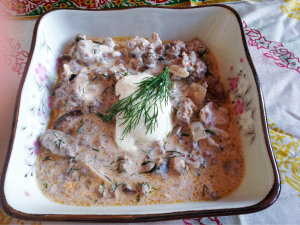
Beef Stroganoff GCH resizeThis recipe is one of my favorites in the “Comfort Food” category.  Beef Stroganoff is easy and filling, especially if you serve it over rice or noodles.  We just eat it straight from the bowl, paired with a salad or roasted vegetables.

Now before you think I’m crazy for using so much wine in a stew, remember that all the alcohol cooks off. You will not get tipsy from your entree, I promise!  Make sure you use a wine that you will want to drink, because this recipe leaves you enough for a glass or two with dinner.  You can use red – like cabernet sauvignon, merlot, or pinot noir – or white – like pinot grigio or chardonnay.  Don’t use anything sweet, though.  Nice and dry is the secret.  And if you are really, really opposed to wine…you can use beef broth instead.

This recipe also calls for dried mushrooms.  I get big bags of dried, sliced shiitake mushrooms at the Korean supermarket.  Any Asian grocery store should carry dried mushrooms for cheap.  If you can’t find them, you can use fresh button or cremini mushrooms.  The difference will be the cooking time – you’ll need to sauté them for longer so that you can cook most of the water out of them.  Just experiment until it looks right – it’s not rocket science.

Ready for a fall stew that will warm your belly and delight your tastebuds?  Let’s go!

Beef Stroganoff

Ingredients:

  • 1 1/2 to 2 pounds ground beef
  • 1 large onion, sliced
  • 1 cup dried, sliced mushrooms (or use one pound fresh mushrooms, sliced)
  • 2 cups dry red or white wine
  • 1 tablespoon fresh snipped dill (or use 1/2 teaspoon dried dill)
  • 1/4 teaspoon smoked paprika (optional, but nice)
  • 1 teaspoon Dijon mustard
  • 1 cup whole milk yogurt (or use sour cream or creme fraiche)

Directions:

  1. If using dried mushrooms:  In a bowl, pour in one cup of the wine.  Microwave for about a minute so it’s hot, or at least very warm.  Add the dried mushrooms to the hot wine to rehydrate them.  Place another bowl on top so the mushrooms stay submerged in the wine.  Let steep until Step 3.
  2. In a large pot, brown the ground beef.  You don’t need to add any extra fat, since the fat will melt out of the meat.  When brown, remove beef with a slotted spoon to a bowl.  Leave the fat and juices in the pot.
  3. Add the sliced onion to the pot and sauté over medium.  If using fresh mushrooms, add them together with the onion.  If using dried mushrooms, add the mushrooms AND the wine they were soaking in when the onion starts to turn golden, about 8 minutes.
  4. When the mushrooms and onion are soft and golden, add the beef back to the pot, along with the other cup of wine, the dill, paprika, and mustard.  Cover with a lid and turn the heat to low.  Simmer for 5 minutes to combine.
  5. Turn off the heat, stir in the yogurt, and serve hot.

Explore, experiment, enjoy! — Dana


To view even more of Dana’s unique recipe, you can visit her at Frugal Girlmet!

Broccoli Cheese Soup


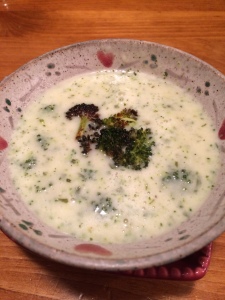
Here in New York, we have had quite the cool fall season so far!  (How about where you live?) Here in our home that means it’s soup season!  I’ve already made and frozen a batch of veggie broth and also chicken broth. Having those containers stacked up in the freezer means that basically any day I can throw together a pot of soup. All of the ingredients for today’s recipe are things that are generally on hand in my ‘fridge and pantry…well, maybe not the ham steak. 🙂

There are plenty of bright green broccoli florets floating around in this hearty soup, but it’s broccoli stems that make up the base of the soup. This is a ‘healthified’ version of many Broccoli-Cheese soup recipes available. Rather than making a roux—a soup base consisting of onions, butter, and flour—we prefer to thicken this creamy soup by pureeing the potatoes and broccoli stems. Also, I use a larger proportion of broth, and less of milk and cream. And, I have found that using just 4 ounces or so of shredded cheese is quite enough. Each of these changes makes this soup ‘healthy but oh-so-yummy!’ Enjoy!

Broccoli Potato Cheese Soup

2014-10-26 19.57.50

ingredients:
2 large heads broccoli (approximately 2 pounds)
1/2 large onion
5 medium Yukon Gold potatoes (approximately 1+1/2 pounds)
1/2 pound ham steak, cut into small cubes (optional)
1 tablespoon butter
1 tablespoon olive oil + 1 teaspoon
2 heaping teaspoons chopped garlic
4 cups chicken (or vegetable) broth
2 cups milk (I used coconut milk)
1/2 cup half & half
4 ounces shredded cheese (use something very flavorful
sea salt and freshly ground pepper (I used a lemon-pepper-salt combo)
directions:

  • preheat oven to 375
  • separate florets from stems of broccoli
  • take 1 cup of tiny florets, toss with 1 teaspoon olive oil; season w/salt&pepper
  • place on baking sheet and roast for 10 minutes…just ‘til beginning to brown;
  • remove from oven when done and set aside for garnishing
  • when you set aside the roasted broccoli, use the same pan to heat the ham cubes for about 6-7 minutes; remove from oven and set aside ‘til plating
  • rough chop stems of broccoli into 1-1+1/2″ pieces
  • peel and cube potatoes into 1″ pieces
  • chop onion into small dice
  • heat butter and 1 tablespoon olive oil in a 4 quart (or larger) stockpot
  • add cut veggies and stir to coat; saute for 5-6 minutes; do not allow to brown
  • stir in broth; raise heat to bring to a boil
  • cover pot; reduce heat and simmer for 15-20 minutes or so…’til broccoli stems are tender
  • remove pot from heat and, using immersion blender, puree ‘til smooth
  • place back on stove and add broccoli florets and the milk; stir
  • cover and simmer for 10 minutes or ‘til florets are still bright green but cooked through
  • remove pot from heat and, again using immersion blender, puree for just a minute or so, breaking up the broccoli
  • place pot back on stove; and over low heat add half & half, and shredded cheese; stir ‘til combined and cheese is melted
  • carefully taste for seasoning, adding more s&p as needed
  • scoop into bowls adding the ham and roasted broccoli florets

NOTE: if not using an immersion blender, you can puree the soup like this (from Food Network.com):

“When blending hot liquids, first let cool for 5 minutes or so, then transfer to a blender, filling only halfway. Put the lid on, leaving one corner open; this will prevent the vacuum effect that creates heat explosions. Cover the lid with a kitchen towel to catch splatters and pulse until smooth.”

♥  ♥  ♥  ♥  ♥

God loves you!  ♥  (Don’t ever forget that!)

♥  coleen

Pumpkin Chia Pudding

Pumpkin Chia Pudding resize

It seems like when we turn the calendar page to October, we all mysteriously start craving PUMPKIN!   I am not immune.   However, I didn’t want to make a big sugar bomb, so I searched around for something to satisfy the pumpkin craving and not spike my insulin.  Bingo:  Pumpkin Chia Pudding!

If you’ve never made chia pudding, now’s your chance.  I love it – the texture is a crazy blend of creamy and crunchy—like tapioca with attitude!  I make it with coconut milk, but you can try another nut milk or soy milk if that’s your thing.  This was ready to eat in an hour, and tastes just like pumpkin pie.  What more can you ask for?!

Pumpkin Chia Pudding

Ingredients:

  • 1 can full-fat coconut milk (about 2 cups)
  • 1/2 can pumpkin puree (about 1 cup, or use one cup of roasted and mashed pumpkin)
  • 1/2 teaspoon pumpkin pie spice (or combine cinnamon, nutmeg, allspice and cloves)
  • 1/2 teaspoon vanilla extract
  • 2 tablespoons honey or maple syrup
  • 1/4 cup chia seeds

Directions:

  1. In a blender or food processor, blend the coconut milk, pumpkin puree, pumpkin pie spice, vanilla, and honey together.
  2. Pour into a Tupperware container with a tight-fitting lid, or a very large jar with a lid.  Add the chia seeds and Shake!  Shake!  Shake!
  3. Refrigerate.  After another hour, shake again!  If it’s cold, go ahead and eat it!  Garnish with a little whipped cream if you like.

Explore, experiment, enjoy! — Dana


To view even more of Dana’s unique recipe, you can visit her at Frugal Girlmet!